

Building a Personal Finance App with Arcjet

These days, we live in a more security-focused environment where applications and platforms need to have security measures in place to protect against attacks from 3rd parties. There are quite a few platforms out there that offer such capabilities. Arcjet contacted me to ask if I would like to try their beta and then write about the experience. They paid me for my time but didn't influence this write-up.
This article will serve as a guide on how to create a simple finance management app using Arcjet, Next.js, Auth.js, Prisma, SQLite, and Tailwind CSS. Building a personal finance management app with modern web development skills, practical functionality, and robust security helps drive home the point of how effective it can be to incorporate these features. Our application will be proof of concept, so there will be no live working payment gateway.
What is Arcjet?
Arcjet is a platform equipped with essential features needed to safeguard applications. The platform has many features, such as Arcjet Shield, which can prevent attacks such as SQL injections, XSS attacks, and CSRF. Arcjet Shield is capable of preventing unauthorized access to the private information found in financial systems. It also has rate Limits that control how often operations like transactions happen on your database, consequently preventing unnecessary exploitations from taking place.
Bot Protection ensures your app stays away from bad bots that steal information or carry out scams using automated systems. Email validation helps keep real users since it ensures all provided email addresses are valid. Also, it provides tools that protect signup forms, accordingly averting fraudulent registration attempts and unauthorized logins.
At the end of this tutorial, you will have created a simple working personal finance app, so let's get started!
Setting up our project structure
Before we begin working on our codebase, we first need to set up the architecture for our project. This is what the homepage for our application will look like:

Our application will be built using TypeScript and the technical stack will be:
- Arcjet
- Next.js
- Auth.js
- Prisma
- SQLite
- Tailwind CSS
You must create a free account on Arcjet and note your Arcjet API key, which you should be able to find in the SDK CONFIGURATION section. We need the API key so that our app can use the Arcjet platform, giving us access to all of the security features.
You can find the codebase online here https://github.com/andrewbaisden/personal-finance-app
Let's start with our project files and folders. Navigate to a directory on your computer where you want to create your project, like the desktop. Now run this command in your command line to scaffold a boilerplate Next.js project that uses TypeScript:
1 |
|
This command will create a project folder called personal-finance-app. Ensure that you select yes for Tailwind CSS, as we will be using that CSS library for styling. Select yes for the App Router, as we will be using it for page routing.
All right, let's install all of the packages we require for this project, and then we will work on our project structure. First, cd into the personal-finance-app folder and run these commands to install all of the packages and dependencies for the project:
1 |
|
Next, run these commands to set up all of the files and folders. It's much faster to set up your project this way using a script because you won't need to manually create all of the files and folders yourself, which can be tedious:
1 2 3 4 5 6 7 8 9 10 |
|
Great, that's the bulk of the work done. If you haven't already, open the codebase in your code editor now. In the next section, we will set up our database, and then we can start creating the codebase.
Configuring our backend
Our personal finance application will have an SQLite database for storing users. Users will create an account by using a sign-up form, and then they will be able to log into their accounts, which will show their user information, such as name, email address, and bank balance.
We will use Prisma to connect our application to the database. Prisma is an Object Relational Mapper (ORM) and is specifically designed to translate data representations between databases and object-oriented programming.
Run these commands to setup Prisma in our project:
1 |
|
This command basically initializes Prisma in our project. We should now have a file located at prisma/schema.prisma. Replace the code inside of that file with this database schema, which is going to define how the data will look:
1 2 3 4 5 6 7 8 9 10 11 12 13 14 15 16 17 |
|
Now run these commands to generate a Prisma client and apply the database migrations so that everything gets in sync:
1 2 |
|
We should now have a database schema and an empty database file called dev.db. It's time to work on our codebase, which we shall do in the next section.
Creating our codebase
This section will be split into three parts. First, we will create some configuration files. Then, we will work on the backend API, and finally, we will complete our application by adding the code for our frontend architecture.
Setting up our configuration files
In this section, we have three files to work on. Our .env.local, layout.tsx and globals.css files.
We are starting with our .env.local file, which will hold the variables for our Arcject API key and our JWT_SECRET. The JWT_SECRET is a key that we will use to sign and verify the JSON Web Tokens (JWT) in our application. This is an essential step for securing authentication because it ensures that tokens can't be manipulated by people who don't have access.
In our example application, we will use the same JWT_SECRET for all users, as this is just a test application. It is not built for production.
We can generate a secret key using the built-in Node.js crypto module by running this code in the command line:
1 |
|
Now copy your Arcjet key, which you will find in the SDK CONFIGURATION section on your account, and the JWT_SECRET into the .env.local file. Take a look at the example below:
1 2 |
|
Ok, good, let's work on our layout.tsx file now. All you have to do is replace all of the code inside the existing file with this code here. We just added the Kulim_Park font for our application:
1 2 3 4 5 6 7 8 9 10 11 12 13 14 15 16 17 18 19 20 21 22 23 24 25 |
|
Lastly, go to the globals.css file and replace all of the code inside with this new one. We did some code cleanup and made the default font size 18px:
1 2 3 4 5 6 7 |
|
That takes care of our configuration files. In the next section, we can start working on the backend rest API.
Building our backend
In this section, we have seven files to work on, so let's start.
Six of the seven files will be POST routes, and the other one will be a GET route. First, let's add the code for our route.ts file inside of apt/auth/[...nextauth]:
1 2 3 4 5 6 7 8 9 10 11 12 13 14 15 16 17 18 19 20 21 22 23 24 25 26 27 28 29 30 31 32 33 34 35 36 37 38 39 40 41 42 43 44 45 46 47 48 49 50 51 52 53 54 55 56 57 58 |
|
This file holds the Arcjet security protection for our login route. Rate limiting is also in place for users who try to sign in too many times in quick succession.
Next, let's add the code for generating JWT tokens in the route inside of api/generatejwt/route.ts:
1 2 3 4 5 6 7 8 9 10 11 12 13 14 15 16 17 18 19 20 21 22 |
|
This route generates JWT tokens for different users and is dependent on their user ID. It is done automatically when we create a user and sign in. Its purpose in this file is to use Curl commands to add money to a user's bank account.
Right lets now add the code for our sign in route at api/signin/route.ts:
1 2 3 4 5 6 7 8 9 10 11 12 13 14 15 16 17 18 19 20 21 22 23 24 25 26 27 28 29 30 31 32 33 34 35 36 37 38 39 40 41 42 43 44 45 46 47 48 |
|
The logic in this route is used to sign users into their bank accounts. The route has some Arcjet security protection set up to block automated clients.
The next route to work on will be api/signup/route.ts so add this code to the file:
1 2 3 4 5 6 7 8 9 10 11 12 13 14 15 16 17 18 19 20 21 22 23 24 25 26 27 28 29 30 31 32 33 34 35 36 37 38 39 40 41 42 43 44 45 46 47 48 49 50 51 52 53 54 55 56 57 58 59 60 61 62 63 64 65 66 67 68 69 70 71 72 73 74 75 76 77 78 79 80 81 82 83 84 85 86 87 88 89 90 91 92 93 94 95 96 97 98 99 100 101 102 103 104 105 106 107 108 109 110 111 112 |
|
This route has the logic for letting users sign up for an account on the platform. It also has Arcjet protection for blocking bots and invalid emails. Like before, there is rate limiting, too, as well as various error handling to cater to different use cases.
We are going to add the code for our transaction route now, which you can find in api/transaction/route.ts so add this code to the file:
1 2 3 4 5 6 7 8 9 10 11 12 13 14 15 16 17 18 19 20 21 22 23 24 25 26 27 28 29 30 31 32 33 34 35 36 37 38 39 40 41 42 43 44 45 46 47 48 49 50 51 52 53 54 55 56 57 58 59 60 61 |
|
This is another one of the POST request routes used for sending money from one user account to another. It can check to see whether an account exists and is valid and tell if a user has enough balance in their account to send. Error handling is set up to check for different scenarios.
Now, we have our user route, which is the only GET route we have for our API. This code will go inside of api/user/route.ts:
1 2 3 4 5 6 7 8 9 10 11 12 13 14 15 16 17 18 19 20 21 22 23 24 25 26 27 28 29 30 31 32 33 34 35 36 37 38 39 40 |
|
The code in this file is used to find users inside our database. It also lets us know if a user is authorized and has a valid or invalid token for signing in.
Lastly, we need to add the code for our middleware.ts file which is inside our src/app folder:
1 2 3 4 5 6 7 8 9 10 11 12 13 14 15 16 17 18 19 20 21 22 23 24 25 26 27 28 29 30 31 32 33 34 35 36 37 38 39 40 |
|
The middleware file applies more Arcjet protection to our routes and enforces live protection for the Arcjet shield. We even have sign-in redirection logic for routes which ensures that you can only access pages that you have authentication for.
Our backend is now complete. The only thing left is the front end, and then we can test our application.
Building our frontend
The front end is all that remains, and we have five files to add code to. Let's begin.
Our first file will be the Header.tsx file inside of components/Header.tsx and this is the code needed:
1 2 3 4 5 6 7 8 9 10 11 12 13 14 15 16 17 18 19 20 21 22 23 24 |
|
This file creates our main navigation component, which will be on every page. It also has the links for our home, sign-in, and register pages.
Now we will add the code for our sign-in page inside of signin/page.tsx:
1 2 3 4 5 6 7 8 9 10 11 12 13 14 15 16 17 18 19 20 21 22 23 24 25 26 27 28 29 30 31 32 33 34 35 36 37 38 39 40 41 42 43 44 45 46 47 48 49 50 51 52 53 54 55 56 57 58 59 60 61 62 63 64 65 66 67 68 69 70 71 72 73 74 75 76 77 78 79 80 81 82 83 84 85 86 87 88 89 90 91 92 93 94 95 96 97 98 99 100 101 102 103 104 |
|
This is our sign-in page, which is pretty straightforward. It has one form for signing users into their accounts after retrieving them from the database. The form also has an error-handling setup.
Ok, we have our sign-in form, so now we should do our sign-up form, which you can find on the signup/page.tsx and this is the code to add to it:
1 2 3 4 5 6 7 8 9 10 11 12 13 14 15 16 17 18 19 20 21 22 23 24 25 26 27 28 29 30 31 32 33 34 35 36 37 38 39 40 41 42 43 44 45 46 47 48 49 50 51 52 53 54 55 56 57 58 59 60 61 62 63 64 65 66 67 68 69 70 71 72 73 74 75 76 77 78 79 80 81 82 83 84 85 86 87 88 89 90 91 92 93 94 95 96 97 98 99 100 101 102 103 104 |
|
Our signup form is very similar to our sign-in form. In this case, it creates user accounts, which are then saved in our database. Like our previous form, it also has error handling.
Just two more files left and our application is completed. The file we will work on now is for transactions, and you can find it inside of transaction/page.tsx. Make sure you add this code to the file:
1 2 3 4 5 6 7 8 9 10 11 12 13 14 15 16 17 18 19 20 21 22 23 24 25 26 27 28 29 30 31 32 33 34 35 36 37 38 39 40 41 42 43 44 45 46 47 48 49 50 51 52 53 54 55 56 57 58 59 60 61 62 63 64 65 66 67 68 69 70 71 72 73 74 75 76 77 78 79 80 81 82 83 84 85 86 87 88 89 90 91 92 93 94 95 96 97 98 99 100 101 102 103 104 105 106 107 108 109 110 111 112 113 114 115 116 117 118 119 120 121 122 123 124 125 126 127 128 129 130 131 132 133 134 135 |
|
This is our transaction page which all users will use to view their account details and do transactions between accounts.
Lastly, let's complete our application by adding this code to our main page.tsx file inside of the src/app folder:
1 2 3 4 5 6 7 8 9 10 11 12 13 14 15 16 17 18 19 20 21 22 23 24 25 26 27 28 29 30 31 32 33 34 35 36 37 38 39 40 41 42 43 44 45 46 47 48 49 50 51 52 53 54 55 56 57 58 59 60 61 62 63 64 65 66 67 68 69 70 71 72 73 74 75 76 77 78 79 80 81 82 83 84 85 86 87 88 89 90 91 92 93 94 95 96 97 98 99 100 101 102 103 104 105 106 107 108 109 110 111 112 113 114 115 116 117 118 119 120 121 122 123 124 125 126 127 128 129 130 131 132 133 134 135 136 137 138 139 140 141 142 143 144 145 146 147 148 149 150 151 152 153 154 155 156 157 158 159 160 161 162 163 164 165 166 167 168 169 170 171 172 173 174 175 176 177 178 179 180 181 182 183 184 185 186 187 188 189 190 191 192 193 194 195 196 |
|
This is our main homepage, and it is essential because it also has instructions for adding money to users' accounts. All users start with a balance of zero, so we have to simulate a bank transfer and add money to their accounts before we can test out the different transactions.
We can do this by using an SQL query like in this example:
1 |
|
Essentially, we find a user inside our database and set a number of our choice for their bank account balance. This balance will go up and down when a user sends and receives money from other users, just like it would in a real bank account. In this example, it's just numbers, not real money, because there is no payment gateway in our application.
Using our personal finance application
We should now have a working Minimum Viable Product (MVP). To start the application, run the usual Next.js run command in your terminal:
1 |
|
Let's learn how to use the application. First, you need to create some new users, which can be done by going to the register page. After you have created a user, you should be able to log in with the email and password that you chose.
You should now see the transaction page. You can sign out of your account or send money to another user. Obviously, you will need to create multiple users so that you have accounts to send to. All users start with a balance of zero, so follow the instructions on the home page to add money to a user's account.
If you want to view the data inside your SQLite database, you can use a VS Code extension like SQLite Viewer, although you won't be able to run any SQL queries. Alternatively, you can use the command line by referring to the SQLite Documentation or a database management tool like TablePlus.
Testing Arcjet Protection in our app
Okay, our application is up and running, so now we can test the Arcjet protection we have implemented and see it working in real-time. Our app should have:
- Signup form protection
- Bot protection
- Rate limiting
If you sign in to your Arcjet account and go to the dashboard, you should be able to see the requests and analytics for your Arcjet protection layer, as seen in this example:

Signup form protection
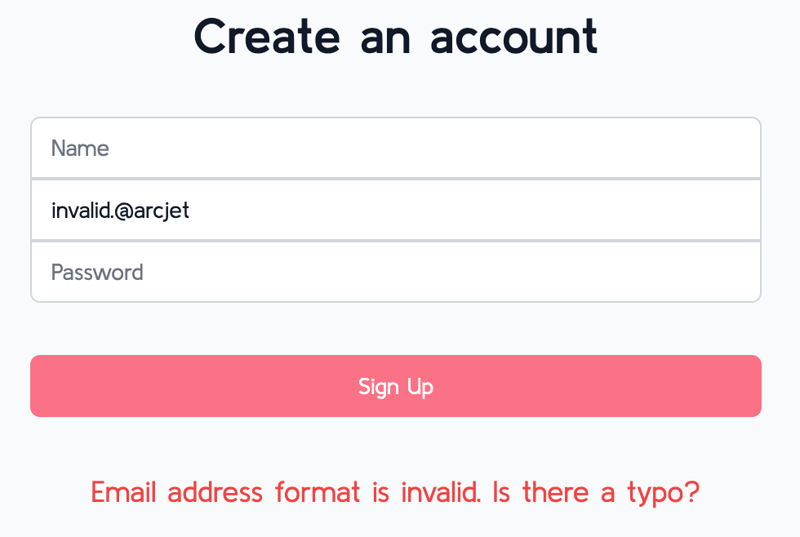
To see the signup form protection in action, go to the Register page and then try these emails to see what happens:
- invalid.@arcjet – is an invalid email address.
- test@0zc7eznv3rsiswlohu.tk – is from a disposable email provider.
- nonexistent@arcjet.ai – is a valid email address & domain, but has no MX records.
The form should show different errors depending on the type of email address that you use and even if you forget to enter an email address altogether as shown in the examples below:
Invalid email and address and no email address error
Disposable email address error

No MX record error

Bot Protection
Send a post request to the sign-in route using the command line with this code here:
1 |
|
You should get an error, like this which confirms that the Arcjet bot protection is working:
1 2 3 4 5 6 7 8 9 10 11 12 13 14 15 16 17 18 19 20 21 22 23 24 25 26 |
|
Rate limiting
One example of rate limiting can be seen on the Sign-in page. If you try to sign into user accounts more than twice in quick succession, then you will get a Too Many Requests error as shown here:

This is because users can only sign in two times quickly, and then they have to wait 30 seconds before they can try again.
This number can be adjusted inside of the src/api/auth/[...nextauth] route inside of this code block:
1 2 3 4 5 6 7 8 9 10 11 12 13 |
|
Conclusion
Well, we are done, our app is complete! You have created a simple personal finance app. In this tutorial, we went through how to set up a simple and user-friendly application that can perform transactions between accounts. In order for your app to not only run smoothly but also maintain some sense of security and reliability, we incorporated Arcjet's powerful tools, such as Arcjet Shield, Rate Limiting, Bot Protection, Email Validation, and Signup Form Protection.
Now that you have a good understanding of these technologies and how they work together, you can leverage their essential construction elements to add more features to your app or scale it up with additional security features. This newfound knowledge gives you the power to take your app to the next level.
If you want more information on this topic, take a look at Arcjet's official documentation.
The above is the detailed content of Building a Personal Finance App with Arcjet. For more information, please follow other related articles on the PHP Chinese website!

Hot AI Tools

Undresser.AI Undress
AI-powered app for creating realistic nude photos

AI Clothes Remover
Online AI tool for removing clothes from photos.

Undress AI Tool
Undress images for free

Clothoff.io
AI clothes remover

Video Face Swap
Swap faces in any video effortlessly with our completely free AI face swap tool!
Hot Article
Hot Tools

Notepad++7.3.1
Easy-to-use and free code editor

SublimeText3 Chinese version
Chinese version, very easy to use

Zend Studio 13.0.1
Powerful PHP integrated development environment

Dreamweaver CS6
Visual web development tools

SublimeText3 Mac version
God-level code editing software (SublimeText3)
Hot Topics
 1662
1662
 14
1419
52
1311
25
1262
29
1235
24
14
1419
52
1311
25
1262
29
1235
24

 Demystifying JavaScript: What It Does and Why It Matters
Apr 09, 2025 am 12:07 AM
Demystifying JavaScript: What It Does and Why It Matters
Apr 09, 2025 am 12:07 AM
JavaScript is the cornerstone of modern web development, and its main functions include event-driven programming, dynamic content generation and asynchronous programming. 1) Event-driven programming allows web pages to change dynamically according to user operations. 2) Dynamic content generation allows page content to be adjusted according to conditions. 3) Asynchronous programming ensures that the user interface is not blocked. JavaScript is widely used in web interaction, single-page application and server-side development, greatly improving the flexibility of user experience and cross-platform development.
 The Evolution of JavaScript: Current Trends and Future Prospects
Apr 10, 2025 am 09:33 AM
The Evolution of JavaScript: Current Trends and Future Prospects
Apr 10, 2025 am 09:33 AM
The latest trends in JavaScript include the rise of TypeScript, the popularity of modern frameworks and libraries, and the application of WebAssembly. Future prospects cover more powerful type systems, the development of server-side JavaScript, the expansion of artificial intelligence and machine learning, and the potential of IoT and edge computing.
 JavaScript Engines: Comparing Implementations
Apr 13, 2025 am 12:05 AM
JavaScript Engines: Comparing Implementations
Apr 13, 2025 am 12:05 AM
Different JavaScript engines have different effects when parsing and executing JavaScript code, because the implementation principles and optimization strategies of each engine differ. 1. Lexical analysis: convert source code into lexical unit. 2. Grammar analysis: Generate an abstract syntax tree. 3. Optimization and compilation: Generate machine code through the JIT compiler. 4. Execute: Run the machine code. V8 engine optimizes through instant compilation and hidden class, SpiderMonkey uses a type inference system, resulting in different performance performance on the same code.
 JavaScript: Exploring the Versatility of a Web Language
Apr 11, 2025 am 12:01 AM
JavaScript: Exploring the Versatility of a Web Language
Apr 11, 2025 am 12:01 AM
JavaScript is the core language of modern web development and is widely used for its diversity and flexibility. 1) Front-end development: build dynamic web pages and single-page applications through DOM operations and modern frameworks (such as React, Vue.js, Angular). 2) Server-side development: Node.js uses a non-blocking I/O model to handle high concurrency and real-time applications. 3) Mobile and desktop application development: cross-platform development is realized through ReactNative and Electron to improve development efficiency.
 Python vs. JavaScript: The Learning Curve and Ease of Use
Apr 16, 2025 am 12:12 AM
Python vs. JavaScript: The Learning Curve and Ease of Use
Apr 16, 2025 am 12:12 AM
Python is more suitable for beginners, with a smooth learning curve and concise syntax; JavaScript is suitable for front-end development, with a steep learning curve and flexible syntax. 1. Python syntax is intuitive and suitable for data science and back-end development. 2. JavaScript is flexible and widely used in front-end and server-side programming.
 How to Build a Multi-Tenant SaaS Application with Next.js (Frontend Integration)
Apr 11, 2025 am 08:22 AM
How to Build a Multi-Tenant SaaS Application with Next.js (Frontend Integration)
Apr 11, 2025 am 08:22 AM
This article demonstrates frontend integration with a backend secured by Permit, building a functional EdTech SaaS application using Next.js. The frontend fetches user permissions to control UI visibility and ensures API requests adhere to role-base
 From C/C to JavaScript: How It All Works
Apr 14, 2025 am 12:05 AM
From C/C to JavaScript: How It All Works
Apr 14, 2025 am 12:05 AM
The shift from C/C to JavaScript requires adapting to dynamic typing, garbage collection and asynchronous programming. 1) C/C is a statically typed language that requires manual memory management, while JavaScript is dynamically typed and garbage collection is automatically processed. 2) C/C needs to be compiled into machine code, while JavaScript is an interpreted language. 3) JavaScript introduces concepts such as closures, prototype chains and Promise, which enhances flexibility and asynchronous programming capabilities.
 Building a Multi-Tenant SaaS Application with Next.js (Backend Integration)
Apr 11, 2025 am 08:23 AM
Building a Multi-Tenant SaaS Application with Next.js (Backend Integration)
Apr 11, 2025 am 08:23 AM
I built a functional multi-tenant SaaS application (an EdTech app) with your everyday tech tool and you can do the same. First, what’s a multi-tenant SaaS application? Multi-tenant SaaS applications let you serve multiple customers from a sing
