

Investing in top-tier hardware for your Windows gaming rig is a great start, but it's not the whole story. Even the most powerful components can underperform if not optimized correctly. Here are the key Windows 11 settings I adjusted to maximize gaming performance.
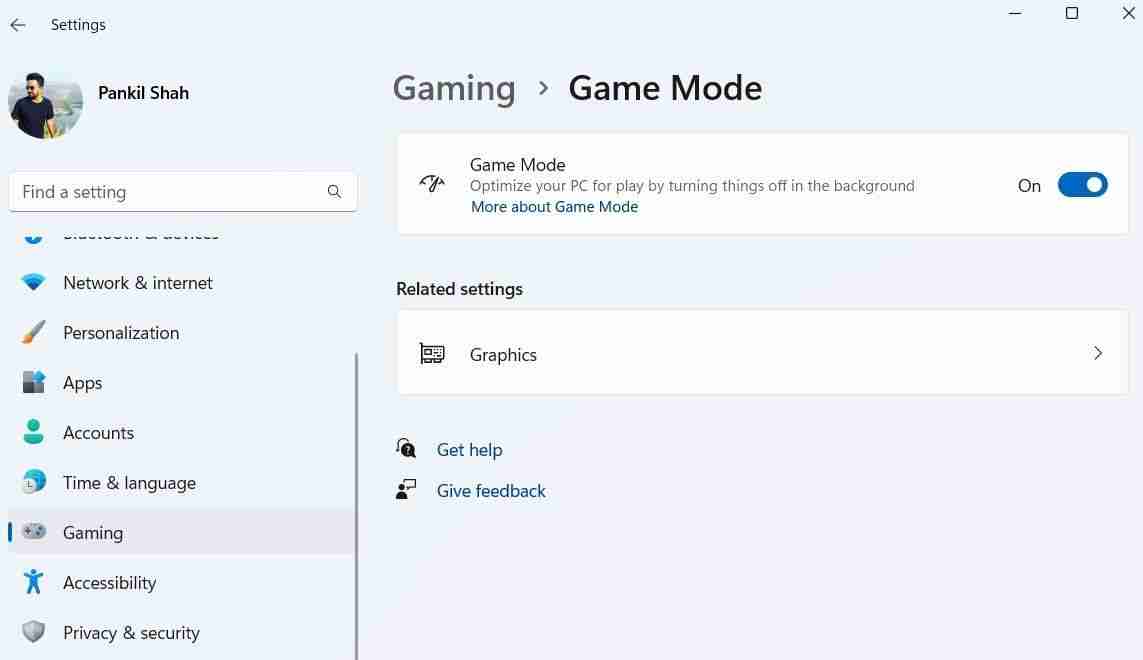
Enabling Game Mode in Windows 11 is a must for anyone looking to maximize their hardware's performance. Game Mode prioritizes system resources for the game by reducing unnecessary background processes, including automatic Windows updates, which helps maintain stable gaming performance.
This feature ensures that my gaming experience remains the top priority, preventing potential slowdowns or frame drops caused by background processes. You can enable Game Mode in Windows 11 by heading to Settings > Gaming > Game Mode.
Another step I take to boost gaming performance on Windows 11 is enabling the high-performance graphics setting for my visually demanding games. This is especially important on PCs with both integrated and dedicated graphics cards, as games might otherwise default to the power-saving option. Here's how to do it:

Game overlays are excellent for monitoring system performance, chatting with friends, and accessing specific game features quickly. However, they come at a cost. Since these overlays run additional processes in the background, it can affect overall performance, leading to lower frame rates, increased latency, or stuttering in games.
Overlays can also be distracting in specific titles or sometimes conflict with the game itself. Hence, I avoid using them whenever possible.
To get rid of the default Xbox Game Bar overlay in Windows 11, follow these steps:
<code class="hljs ">Ge-AppxPackage Microsoft.XboxGamingOverlay | Remove-AppxPackage</code>
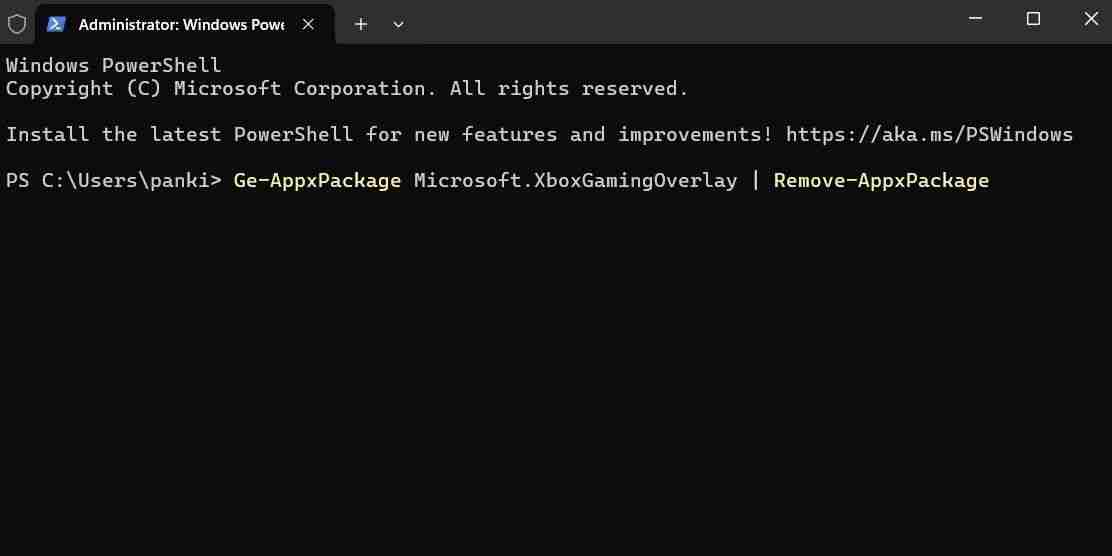
Similarly, you can disable overlays in NVIDIA GeForce Experience, Discord, and other apps.
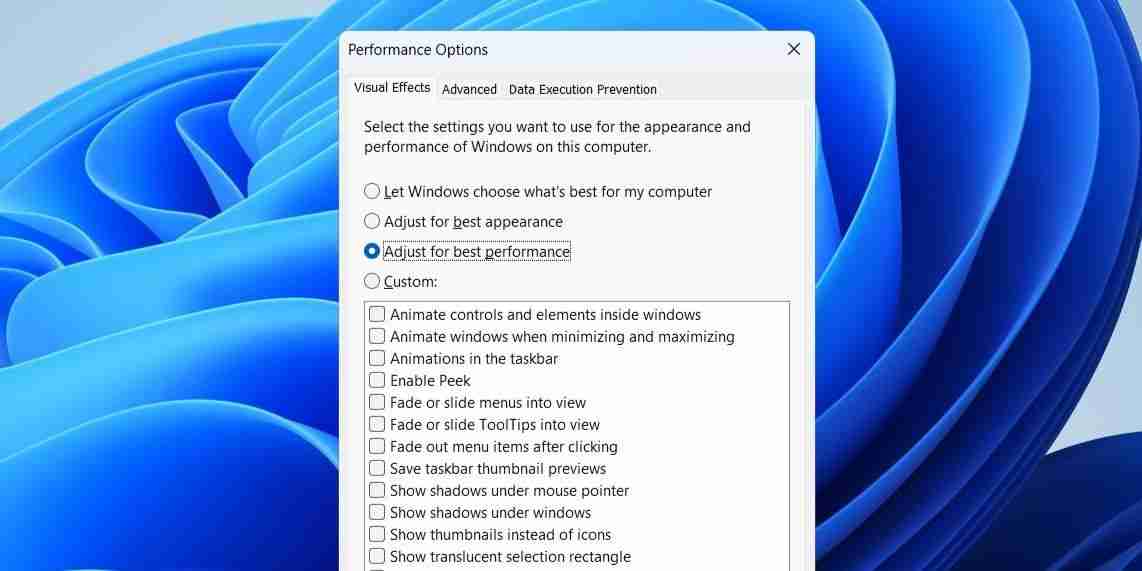
Windows 11 includes various visual effects to enhance its aesthetic appeal. However, these effects can consume valuable system resources that could otherwise be allocated to improving gaming performance.
To optimize the gaming experience, I have configured my Windows 11 PC to prioritize performance over appearance. Here's how to do it:
Windows 11's default "Balanced" power plan is ideal for everyday computing tasks. However, before starting a gaming session, I always switch to the "High performance" power plan. This maximizes hardware performance by allowing Windows to run at higher power levels, ensuring that all components operate at their full potential.
To enable this power plan on Windows, open the Control Panel via the Windows Search menu. Then, go to Power Options and select the High performance option
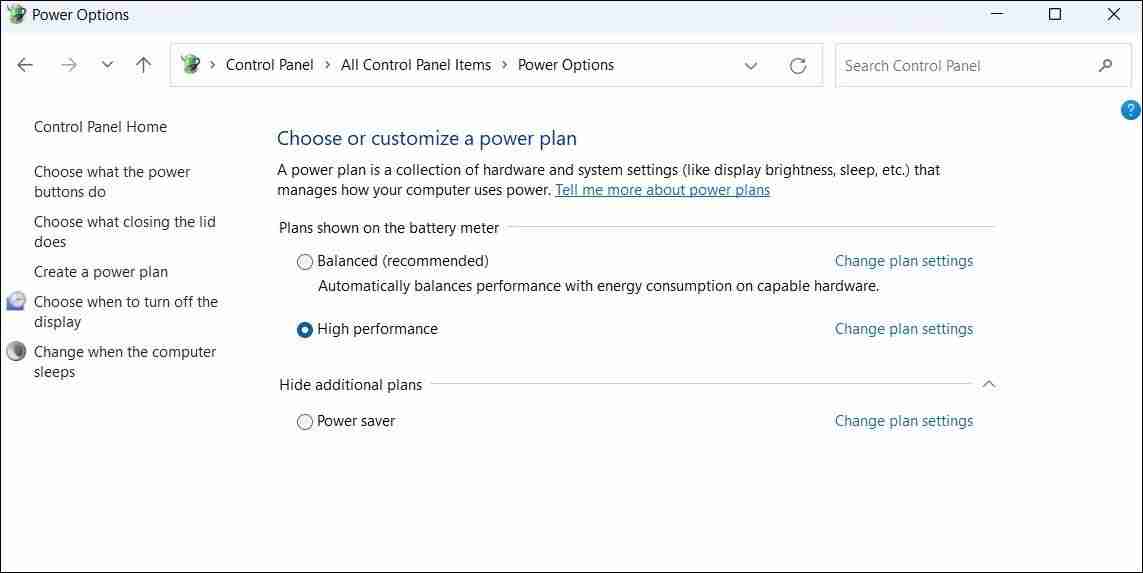
If the high performance plan is missing on your Windows PC, you can create it manually.

While Wi-Fi has come a long way in terms of speed and reliability, nothing beats the performance and stability of a wired LAN connection for gaming. Unlike Wi-Fi, which can experience fluctuations due to network congestion or physical obstructions, a wired LAN connection offers consistent and faster internet speeds.
This stability helps minimize packet loss and prevent disconnects, ensuring a smoother gaming experience. Also, I make sure to disable background downloads and automatic updates for apps while gaming. This makes a significant difference, especially when playing online games like Call of Duty, Fortnite, or Apex Legends, where every millisecond counts.
I also make sure to keep my graphics drivers updated, as these updates optimize performance for new games and fix bugs. Depending on which graphics card your PC has—NVIDIA, AMD, or Intel—the process of updating the graphics drivers in Windows may be different.
Games themselves also receive updates to fix bugs, improve performance, and add new features, so I always keep them updated to benefit from these improvements.
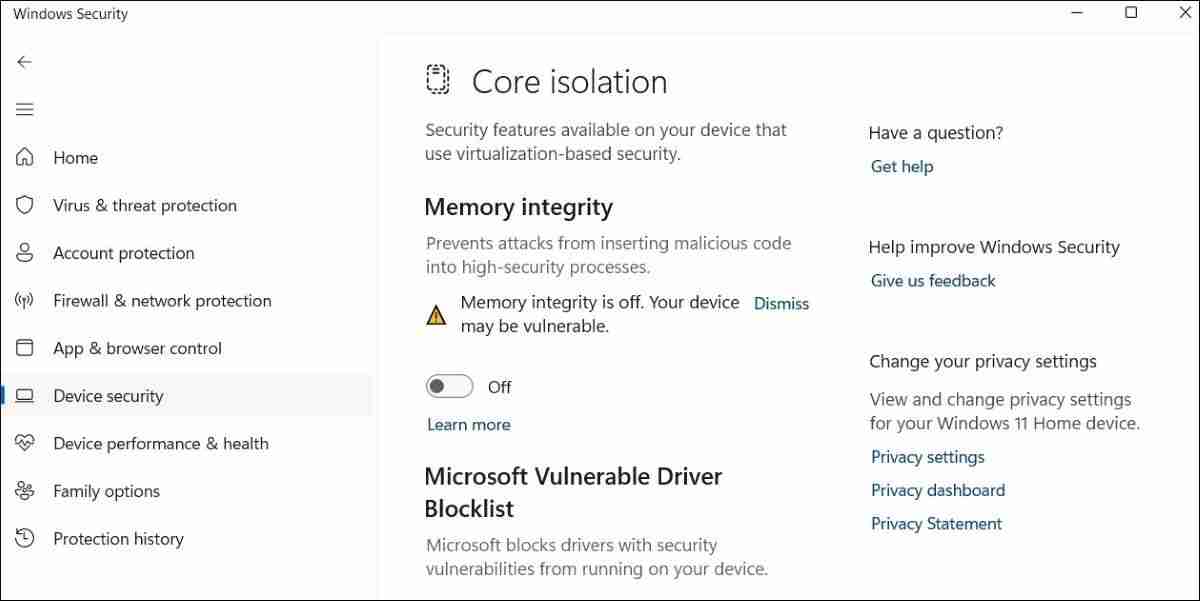
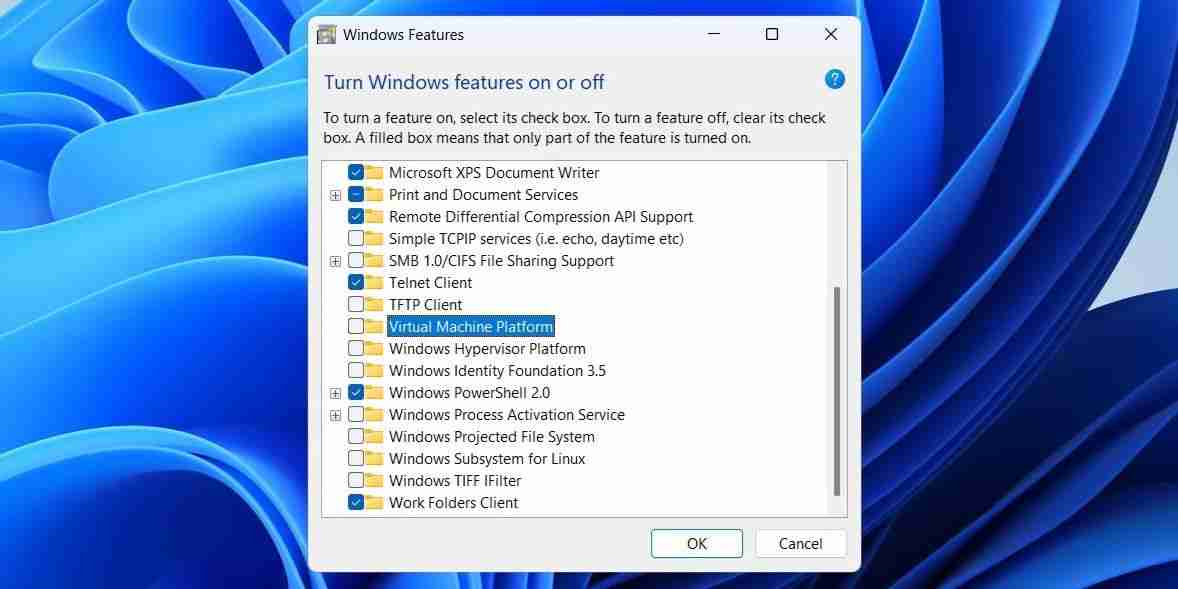
Lastly, I keep security features like Memory Integrity and Virtual Machine Platform (VMP) turned off during my gaming sessions. These two features are enabled by default in Windows 11 to enhance system security and provide a more robust environment against potential threats. However, they can also introduce some performance overhead that may impact the gaming experience.
To disable memory integrity in Windows 11, follow these steps:
To disable Virtual Machine Platform on Windows, open the search menu again. Type Windows features and select the first result that appears. In the Windows Features window, find and unselect Virtual Machine Platform. Then, select OK.
Disabling these two options makes a significant difference in your Windows gaming experience. However, I always re-enable these features once I'm done gaming to ensure my PC remains secure.
Adjusting these key settings helped me get the best possible gaming experience on my Windows 11 PC and steer clear of annoying issues like lag and stuttering. While each tweak might offer only a modest improvement on its own, together, they can make a significant difference in your PC's gaming performance.
The above is the detailed content of I Tweaked These 7 Windows 11 Settings to Maximize Gaming Performance. For more information, please follow other related articles on the PHP Chinese website!


![[Web front-end] Node.js quick start](https://img.php.cn/upload/course/000/000/067/662b5d34ba7c0227.png)


