Getting started with RabbitMq using NodeJs
Introduction to RabbitMq
RabbitMq is a message broker that allows sending and receiving messages between different services. It is a message broker that implements the Advanced Message Queuing Protocol (AMQP). Written with Erlang Programming Language.
Installing RabbitMq
RabbitMq can be installed on different operating systems Using there respective package managers. RabbitMQ requires Erlang/OTP to be installed beforehand, please refer to the official documentation for more information.
- Linux
1 |
|
- Mac
1 |
|
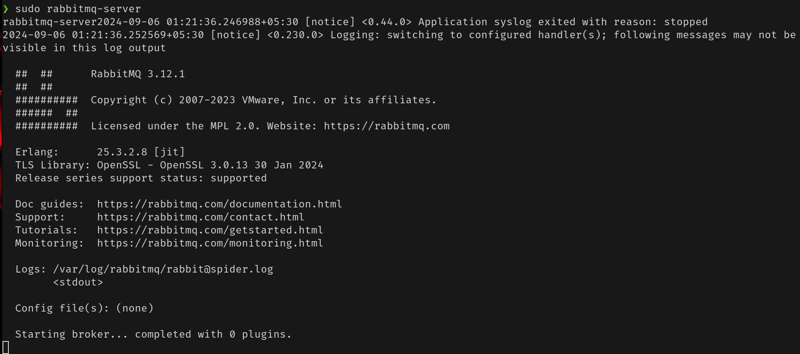
Once installed, we can start the RabbitMq server using the following command:
1 |
|

Once the server is started, we can access rabbitmq from our application using the default port 5672.
To enable the RabbitMq management console, we can run the following command:
1 |
|
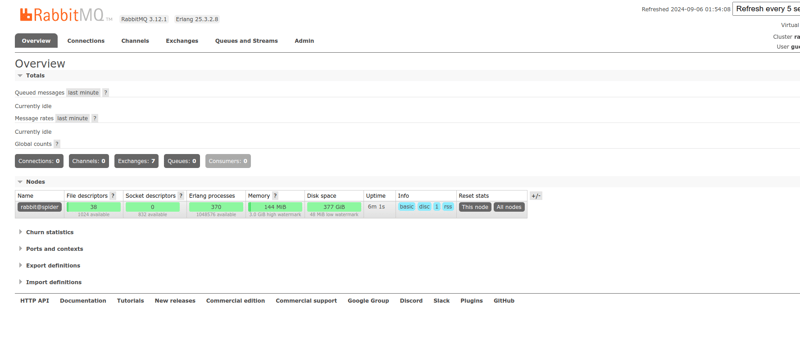
we can access the RabbitMq management console by visiting http://localhost:15672/ in your browser. The default username and password are guest.

Setting up RabbitMq with NodeJs
To interact with RabbitMq from NodeJs, we can use the amqplib library. We can install the library using the following command:
1 |
|
To connect to RabbitMq from NodeJs and create a channel to interact with RabbitMq, we can use the following code:
1 2 3 4 5 6 7 8 9 10 11 12 13 14 |
|
Now, we have a channel to interact with RabbitMq. We can use this channel to send and receive messages from RabbitMq. let name our queue mq-test-queue and send a message to the queue.
1 2 3 4 5 6 7 |
|
We have created a queue mq-test-queue and sent a message Hello World! to the queue. To create a Queue, we have used the assertQueue method and to send a message to the queue, we have used the sendToQueue method.
To receive a message from the queue, we can use the consume method.
1 2 3 4 5 6 7 8 9 10 |
|
The consume method takes a callback function and passes the message object to the callback function to access the message content using msg.content.toString().
After consuming the message, we need to ack or nack the message to remove the message from the queue. We can use the ack method to acknowledge the message and the nack method to reject the message.
For this example, we will ack the message after consuming the message.
1 2 3 4 5 6 7 8 9 10 11 12 13 14 15 16 17 18 19 20 |
|

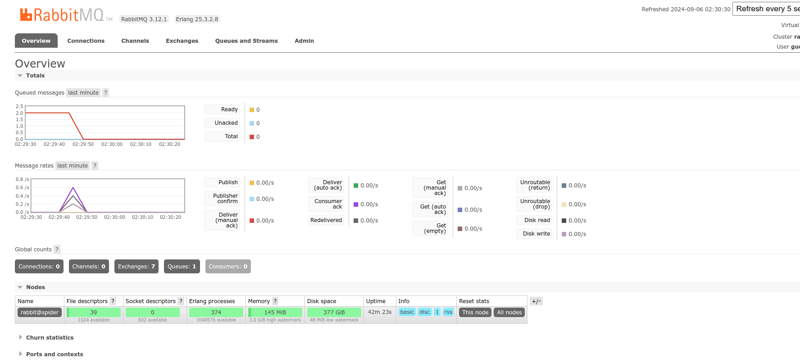
We can see messages sent and received successfully from the queue. using rabbitmq management console.
Conclusion
In this article, we have learned how to set up RabbitMq and interact with RabbitMq from NodeJs using the amqplib library. We have created a queue, sent a message to the queue, and received a message from the queue.
The above is the detailed content of Getting started with RabbitMq using NodeJs. For more information, please follow other related articles on the PHP Chinese website!

Hot AI Tools

Undresser.AI Undress
AI-powered app for creating realistic nude photos

AI Clothes Remover
Online AI tool for removing clothes from photos.

Undress AI Tool
Undress images for free

Clothoff.io
AI clothes remover

Video Face Swap
Swap faces in any video effortlessly with our completely free AI face swap tool!

Hot Article

Hot Tools

Notepad++7.3.1
Easy-to-use and free code editor

SublimeText3 Chinese version
Chinese version, very easy to use

Zend Studio 13.0.1
Powerful PHP integrated development environment

Dreamweaver CS6
Visual web development tools

SublimeText3 Mac version
God-level code editing software (SublimeText3)

Hot Topics
 1660
1660
 14
14
 1416
1416
 52
52
 1310
1310
 25
25
 1260
1260
 29
29
 1233
1233
 24
24
 Demystifying JavaScript: What It Does and Why It Matters
Apr 09, 2025 am 12:07 AM
JavaScript is the cornerstone of modern web development, and its main functions include event-driven programming, dynamic content generation and asynchronous programming. 1) Event-driven programming allows web pages to change dynamically according to user operations. 2) Dynamic content generation allows page content to be adjusted according to conditions. 3) Asynchronous programming ensures that the user interface is not blocked. JavaScript is widely used in web interaction, single-page application and server-side development, greatly improving the flexibility of user experience and cross-platform development.
 The Evolution of JavaScript: Current Trends and Future Prospects
Apr 10, 2025 am 09:33 AM
The latest trends in JavaScript include the rise of TypeScript, the popularity of modern frameworks and libraries, and the application of WebAssembly. Future prospects cover more powerful type systems, the development of server-side JavaScript, the expansion of artificial intelligence and machine learning, and the potential of IoT and edge computing.
 JavaScript Engines: Comparing Implementations
Apr 13, 2025 am 12:05 AM
Different JavaScript engines have different effects when parsing and executing JavaScript code, because the implementation principles and optimization strategies of each engine differ. 1. Lexical analysis: convert source code into lexical unit. 2. Grammar analysis: Generate an abstract syntax tree. 3. Optimization and compilation: Generate machine code through the JIT compiler. 4. Execute: Run the machine code. V8 engine optimizes through instant compilation and hidden class, SpiderMonkey uses a type inference system, resulting in different performance performance on the same code.
 JavaScript: Exploring the Versatility of a Web Language
Apr 11, 2025 am 12:01 AM
JavaScript is the core language of modern web development and is widely used for its diversity and flexibility. 1) Front-end development: build dynamic web pages and single-page applications through DOM operations and modern frameworks (such as React, Vue.js, Angular). 2) Server-side development: Node.js uses a non-blocking I/O model to handle high concurrency and real-time applications. 3) Mobile and desktop application development: cross-platform development is realized through ReactNative and Electron to improve development efficiency.
 How to Build a Multi-Tenant SaaS Application with Next.js (Frontend Integration)
Apr 11, 2025 am 08:22 AM
This article demonstrates frontend integration with a backend secured by Permit, building a functional EdTech SaaS application using Next.js. The frontend fetches user permissions to control UI visibility and ensures API requests adhere to role-base
 Python vs. JavaScript: The Learning Curve and Ease of Use
Apr 16, 2025 am 12:12 AM
Python is more suitable for beginners, with a smooth learning curve and concise syntax; JavaScript is suitable for front-end development, with a steep learning curve and flexible syntax. 1. Python syntax is intuitive and suitable for data science and back-end development. 2. JavaScript is flexible and widely used in front-end and server-side programming.
 From C/C to JavaScript: How It All Works
Apr 14, 2025 am 12:05 AM
The shift from C/C to JavaScript requires adapting to dynamic typing, garbage collection and asynchronous programming. 1) C/C is a statically typed language that requires manual memory management, while JavaScript is dynamically typed and garbage collection is automatically processed. 2) C/C needs to be compiled into machine code, while JavaScript is an interpreted language. 3) JavaScript introduces concepts such as closures, prototype chains and Promise, which enhances flexibility and asynchronous programming capabilities.
 Building a Multi-Tenant SaaS Application with Next.js (Backend Integration)
Apr 11, 2025 am 08:23 AM
I built a functional multi-tenant SaaS application (an EdTech app) with your everyday tech tool and you can do the same. First, what’s a multi-tenant SaaS application? Multi-tenant SaaS applications let you serve multiple customers from a sing


