

How to beat the Lictor in Space Marine 2

The Lictor in Warhammer 40K: Space Marine 2 is the first boss you face, and it’s an ambush predator. It will turn invisible and leap on you with scarcely a warning. Here’s everything you need to know to take it down.
Best weapons for the Lictor fight in Space Marine 2
You could fight the Lictor with any weapon in Space Marine 2, technically, but it pays to be properly equipped with the best stuff. Considering that the Lictor will switch from prowling around the arena to close-quarters combat, you’ll need to be equipped to punish it no matter how far or close it is.
For this reason, I’d recommend you bring the following gear into the fight:
- Primary: Melta Rifle.
- Secondary: Plasma Pistol.
- Melee: Chainsword.
- Equipment: Krak Grenades.
It would be ideal to pick up these weapons from the Armory Hall before the mission, as only a couple Plasma Pistols will be available in the Operation.

If you don’t wish to restart the mission to equip the Melta Rifle, then the Bolt Carbine found outside the arena will still do.
Along the way toward the Lictor in the mission, you can pick up a Guardian Relic that allows for one self-revival and there are many Krak Grenades littered around that’ll aid in the fight. I only found 1 Medicae Stimm in the arena where the two Ravagers show up to fight next to some wreckage.
The checkpoint before the Lictor fight can access previous regions to find the spare Medicae Stimm if needed, so it may be worth backtracking upon a future defeat if needed.
Now you have everything sorted, let’s slay that damned Lictor.
Best strategy for fighting the Lictor in Space Marine 2
Keep the following strategies and tips in mind to make the Lictor fight a breeze in Space Marine 2. Happy hunting.
Keep an eye on the Lictor
When the Lictor goes invisible, keep an eye on your surroundings to locate it. It will briefly appear visible on the surfaces and trees surrounding the arena, opening it up for gunfire. Before long it will leap to its left or right, and that’s the general direction you can expect to find it again.

By following its leaps around the arena, you can punish it whilst it can’t attack you. Also, when it does decide to pounce, you’ll be prepared.
Make sure to not be too caught up in attacking as it could delay your dodge when it strikes, leading to significant damage.
If your fire is concentrated enough, you can knock the Lictor off its vantage point, allowing you to get more shots in and stopping it from launching.
Parry and dodge to perform Gun Strikes
Perfect parries and dodges in Space Marine 2 are what open your enemies up to Gun Strikes, which allow you to deal extra damage without expending ammo. These replenish Armor Segments and make you invulnerable whilst the animation plays out. Also, on occasion, it’ll allow for a follow-up Gun Strike.

This is especially useful when other Tyranids pile in to the fight. You can parry attacks without the blue light, so may extra attention whilst you’re fighting the swarm. During these invasions, I’d suggest you focus on parrying the tougher enemies to keep a defensive stance, with you only attacking when it’s safe to do so. This will take the enemies out and keep your health preserved for when the Lictor next attacks.
Pay attention for the blue and red warning signs, as it could be the Lictor attacking you whilst you’re tied up with other enemies. By not constantly swinging your Chainsword, you can respond to these threats and potentially save your skin.
Pick up the Medicae Stimms
Around the Lictor arena in Space Marine 2 are four Medicae Stimms around the edges. Make sure that you’ve got two on your at all times.

Be careful when rushing to get to these, as the Lictor is prone to launching at you when you’re unprepared. I’d suggest to find them ahead of time so you’re not lacking them when you need them. And ensure you’re keeping an eye out on the Lictor for no nasty surprises.
Use the Krak Grenades
This is mostly a reminder that you have Krak Grenades that do great damage, so use them!
For best accuracy, wait until the Lictor is engaging with you on the ground and lock-in to it before throwing the grenade. It’s possible to miss with these, which would be a sorry waste.
There are Krak Grenades in the arena, however, so try to make the most of them and use one every time you get the chance.
Use Chairon’s Auspex Scan
If you’re playing in multiplayer, one of you can use Chairon’s Auspex Scan to keep the Lictor highlighted when it turns invisible.

This is a great advantage when it flitters in and out of invisibility on the ground to confuse and pounce. It’ll also help you keep an eye on it when it reverts back to stalking. The additional damage you’ll deal to it is also welcome.
So, if possible, the idea strategy would be for Chairon to use his Auspex Scan and then litter the Lictor with Krak Grenades. It’ll go down in no time.
With all of these tips, you’ll be able to utterly vanquish the Lictor in Warhammer 40K: Space Marine 2. Also, if you’re still struggling with graphical issues this far into the game, then you may need to double-check your graphics settings.
The above is the detailed content of How to beat the Lictor in Space Marine 2. For more information, please follow other related articles on the PHP Chinese website!

Hot AI Tools

Undresser.AI Undress
AI-powered app for creating realistic nude photos

AI Clothes Remover
Online AI tool for removing clothes from photos.

Undress AI Tool
Undress images for free

Clothoff.io
AI clothes remover

Video Face Swap
Swap faces in any video effortlessly with our completely free AI face swap tool!

Hot Article
Hot Tools

Notepad++7.3.1
Easy-to-use and free code editor

SublimeText3 Chinese version
Chinese version, very easy to use

Zend Studio 13.0.1
Powerful PHP integrated development environment

Dreamweaver CS6
Visual web development tools

SublimeText3 Mac version
God-level code editing software (SublimeText3)
Hot Topics
 1393
1393
 52
37
110
52
37
110

 Assassin's Creed Shadows: Seashell Riddle Solution
Mar 28, 2025 am 01:58 AM
Assassin's Creed Shadows: Seashell Riddle Solution
Mar 28, 2025 am 01:58 AM
Assassin's Creed: Shadows boasts a vast world brimming with activities beyond the main storyline. Side missions and various encounters significantly enrich the immersive experience of in-game Japan. One particularly memorable encounter is the Seashe
 Where to find the Crane Control Keycard in Atomfall
Mar 28, 2025 am 02:17 AM
Where to find the Crane Control Keycard in Atomfall
Mar 28, 2025 am 02:17 AM
In Atomfall, discover hidden keys and passages, including multiple ways to access key locations. This guide focuses on using the Crane Control Keycard for easy, unguarded Entry to Skethermoor Prison, bypassing the need to cooperate with Captain Sims
 Roblox: Dead Rails - How To Complete Every Challenge
Mar 26, 2025 am 02:14 AM
Roblox: Dead Rails - How To Complete Every Challenge
Mar 26, 2025 am 02:14 AM
If you've already taken on the Monumental task of beating Dead Rails on Roblox and are looking for an even greater challenge — or simply need some extra Bonds — look no further than the Challenge Board. Here, you'll find challenges of varying difficu
 Atomfall guide: item locations, quest guides, and tips
Mar 25, 2025 am 02:25 AM
Atomfall guide: item locations, quest guides, and tips
Mar 25, 2025 am 02:25 AM
It’s your first foray into Rebellion’s Atomfall, a post-apocalyptic survival-action game set in England. As a result, you can expect plenty of dodgy accents, tea, cornish pasties, and Britishisms such as the need to call people ‘boffins&
 Mudborne: FAQ Guide
Mar 23, 2025 am 02:36 AM
Mudborne: FAQ Guide
Mar 23, 2025 am 02:36 AM
Mudborne: A Guide to Frog Breeding and Mystery Solving Mudborne is an adorable pixel art game where you breed cute frogs and restore a desolate ecosystem. But beneath the charming exterior lies a compelling mystery surrounding the Pondmother and a m
 InZoi: How To Apply To School And University
Apr 02, 2025 am 12:08 AM
InZoi: How To Apply To School And University
Apr 02, 2025 am 12:08 AM
In the vibrant world of InZoi, you're free to shape your character's life, from exploring its diverse environments to mastering various skills. Whether it's culinary adventures, household chores, or relaxing on the beach, the choices are yours. But
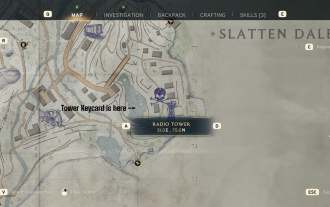 How to activate all Radio Towers for Joyce Tanner in Atomfall
Mar 28, 2025 am 12:04 AM
How to activate all Radio Towers for Joyce Tanner in Atomfall
Mar 28, 2025 am 12:04 AM
At this point in Atomfall, you’ve no doubt wandered into the Interchange, restored power to your first Data Store, and met the enigmatic Joyce Tanner inside. Tanner is more than happy to see someone who hasn’t immediately tried to kill her, an
 Mudborne: How To Open The Northern Pool
Mar 23, 2025 am 02:57 AM
Mudborne: How To Open The Northern Pool
Mar 23, 2025 am 02:57 AM
In Mudborne, accessing the Central Junction requires navigating the North Spawning Pool. To do this, you must meet Dendro and create a specific frog variant within a single generation. Dendro explains that the path to the Central Junction, blocked
