Home > Software Tutorial > Computer Software > How to adjust the printing area in Excel How to adjust the printing area in Excel

How to adjust the printing area in Excel How to adjust the printing area in Excel

WBOY
Release: 2024-09-13 12:51:32
Original
644 people have browsed it

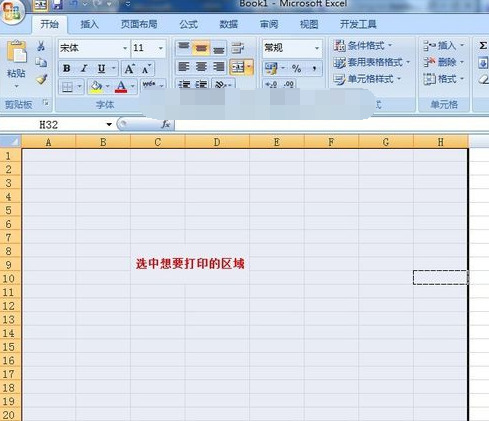
Many of our friends will print out the content after editing it in Excel. Sometimes some unnecessary content will be printed out without setting the print area. Many people don’t know how to set the print area. For this In this situation, today’s software tutorial will share with you how to adjust the print area. Let’s take a look at the detailed setting method. How to adjust the excel printing area 1. Open the edited Excel document and select the area you want to print, as shown in the figure (the shaded layer is the area you want to print).
excel打印区域怎么调整 excel调整打印区域设置方法

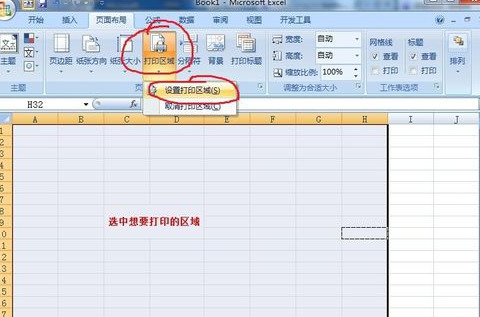
2. Click the Page Layout tab, select the print area option, and click the Set Print Area sub-option. At this time, we have successfully set the print area.

excel打印区域怎么调整 excel调整打印区域设置方法

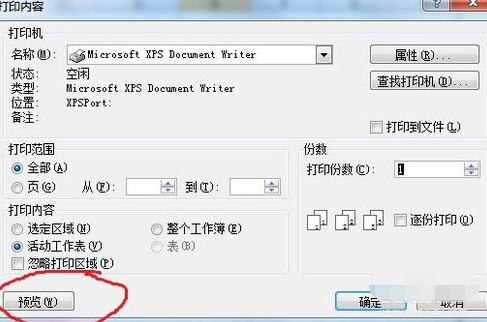
3. After setting the print area, we need to slightly adjust the output effect of the selected print area to meet our output needs. First press CTRL P and click on the preview option (marked with a red pen).

excel打印区域怎么调整 excel调整打印区域设置方法

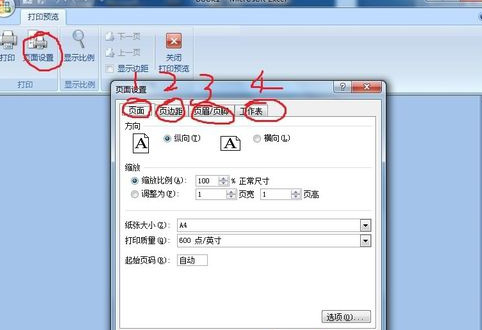
4. Click Page Settings in the pop-up window, you can see (as shown below):
1-Page
2-Page Margins
3-Header /Footer
4-Worksheet

The four tabs are responsible for adjusting page layout, page margins, adding headers and footers, and some advanced options for worksheet printout (worksheet options Rarely used by novices). After becoming familiar with the entire simple page setup, readers can try each option on their own.
excel打印区域怎么调整 excel调整打印区域设置方法

5. After the above adjustments are completed, click OK to output to the printer.

The above is the detailed content of How to adjust the printing area in Excel How to adjust the printing area in Excel. For more information, please follow other related articles on the PHP Chinese website!

source:xpwin7.com
Statement of this Website
The content of this article is voluntarily contributed by netizens, and the copyright belongs to the original author. This site does not assume corresponding legal responsibility. If you find any content suspected of plagiarism or infringement, please contact admin@php.cn
Popular Tutorials
More>
Latest Downloads
More>
Web Effects
Website Source Code
Website Materials
Front End Template