
 Software Tutorial
Computer Software
How to delete Baidu network disk synchronization space. How to delete Baidu network disk synchronization space.
Software Tutorial
Computer Software
How to delete Baidu network disk synchronization space. How to delete Baidu network disk synchronization space.
How to delete Baidu network disk synchronization space. How to delete Baidu network disk synchronization space.

Worried about the annoying synchronization space in Baidu Netdisk? PHP editor Xiaoxin will show you his own experience and help you solve this problem easily! This article will explain in detail how to delete Baidu network disk synchronization space, and teach you how to completely remove this unnecessary function. Follow the guidance of this article to free up your network disk space and get a refreshing and efficient usage experience!
Method 1:
1. Right-click the start menu in the lower left corner of the desktop, find Run and click to enter, enter regedit in the window, and then click OK. If User Account Control is turned on, click Yes.

2. Next, copy the following address into the address bar and press Enter:
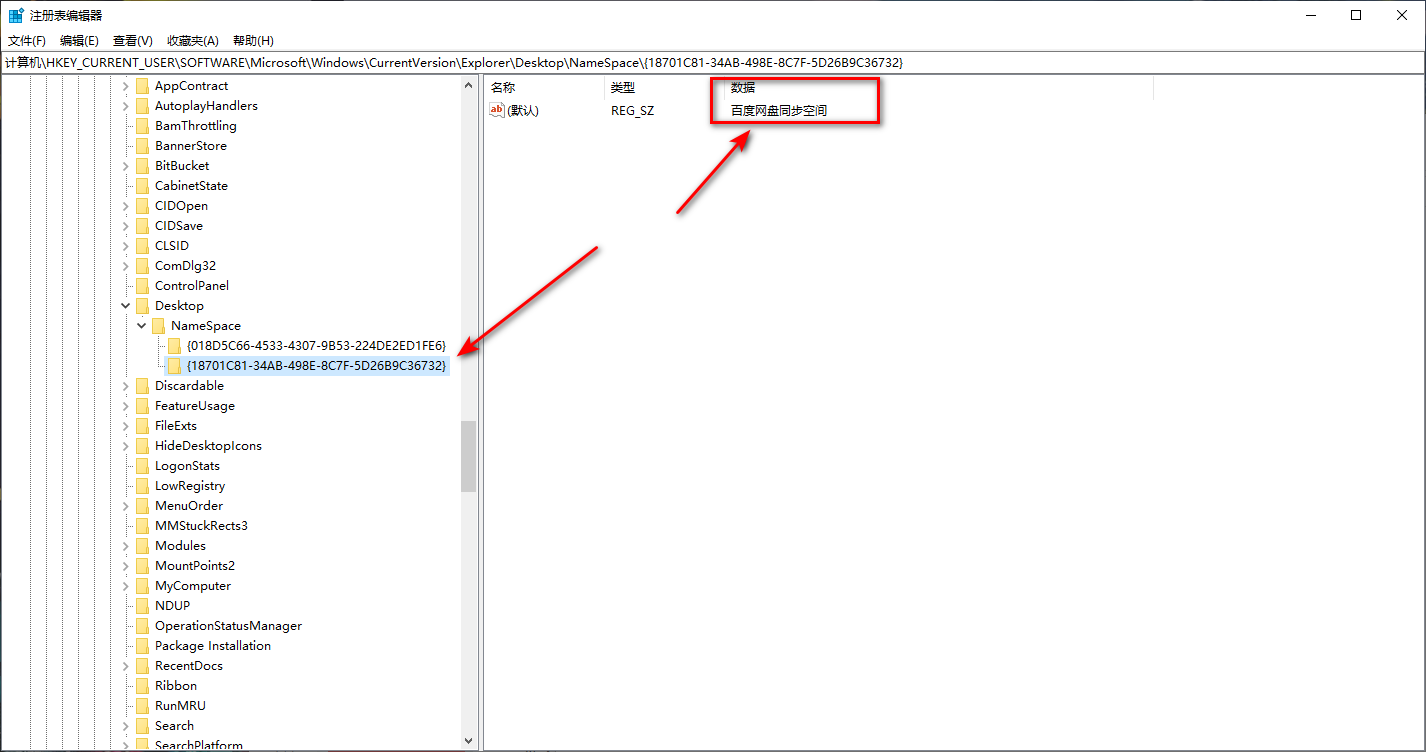
ComputerHKEY_CURRENT_USERSOFTWAREMicrosoftWindowsCurrentVersionExplorerDesktopNameSpace
3. The icons under NameSpace are the icons on the desktop that cannot be deleted. If you don’t know which one, click and you can see it on the right, select it, right-click to delete it.
Baidu network disk synchronization space map:
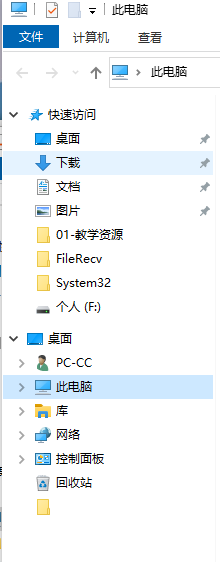
Success map:
Method 2:
1. Enter Run, right-click the Windows menu, and then click Run.

2. Enter the registry, enter regedit in the run window in the lower left corner of the desktop, and then click OK. If User Account Control is turned on, click Yes.

Enter regedit in the run window in the lower left corner of the desktop and click OK.

Click Yes.
3. Search in the registry, enter the synchronization space in the search text box, then click Find Next and wait for the search process. After finding it, right-click the directory on the left and click Delete. Then keep repeating the search-delete process until the desktop icon disappears. (Of course, if you are a user who needs to use the Baidu Cloud Disk synchronization space function, please do not delete the registry at will!)

Search in the registry.

Enter synchronization space in the search text box, and then click Find Next.

Waiting for the search process.

The interface after finding it.
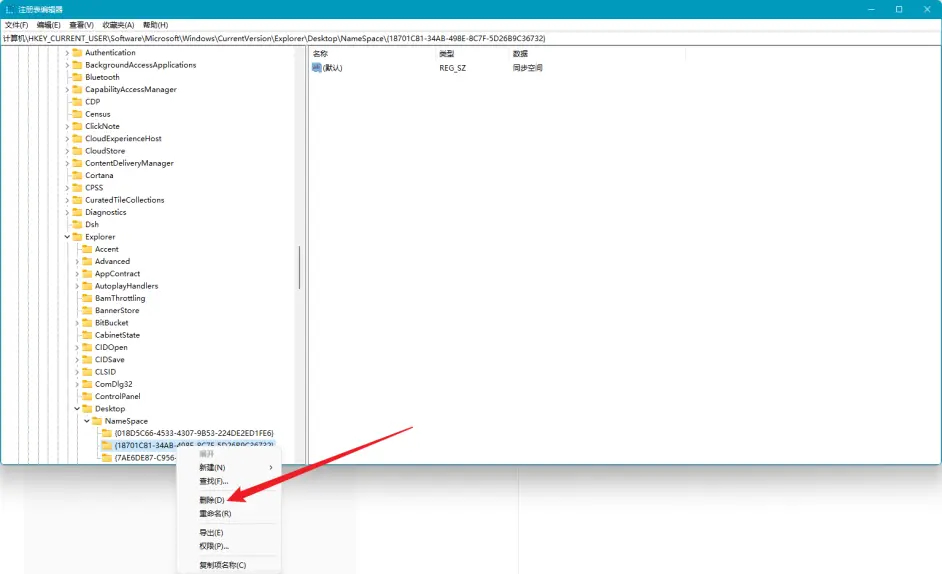
Right-click the directory on the left and click Delete.
The above is the detailed content of How to delete Baidu network disk synchronization space. How to delete Baidu network disk synchronization space.. For more information, please follow other related articles on the PHP Chinese website!

Hot AI Tools

Undresser.AI Undress
AI-powered app for creating realistic nude photos

AI Clothes Remover
Online AI tool for removing clothes from photos.

Undress AI Tool
Undress images for free

Clothoff.io
AI clothes remover

Video Face Swap
Swap faces in any video effortlessly with our completely free AI face swap tool!

Hot Article
Hot Tools

Notepad++7.3.1
Easy-to-use and free code editor

SublimeText3 Chinese version
Chinese version, very easy to use

Zend Studio 13.0.1
Powerful PHP integrated development environment

Dreamweaver CS6
Visual web development tools

SublimeText3 Mac version
God-level code editing software (SublimeText3)
Hot Topics
 1664
1664
 14
1423
52
1317
25
1268
29
1246
24
14
1423
52
1317
25
1268
29
1246
24