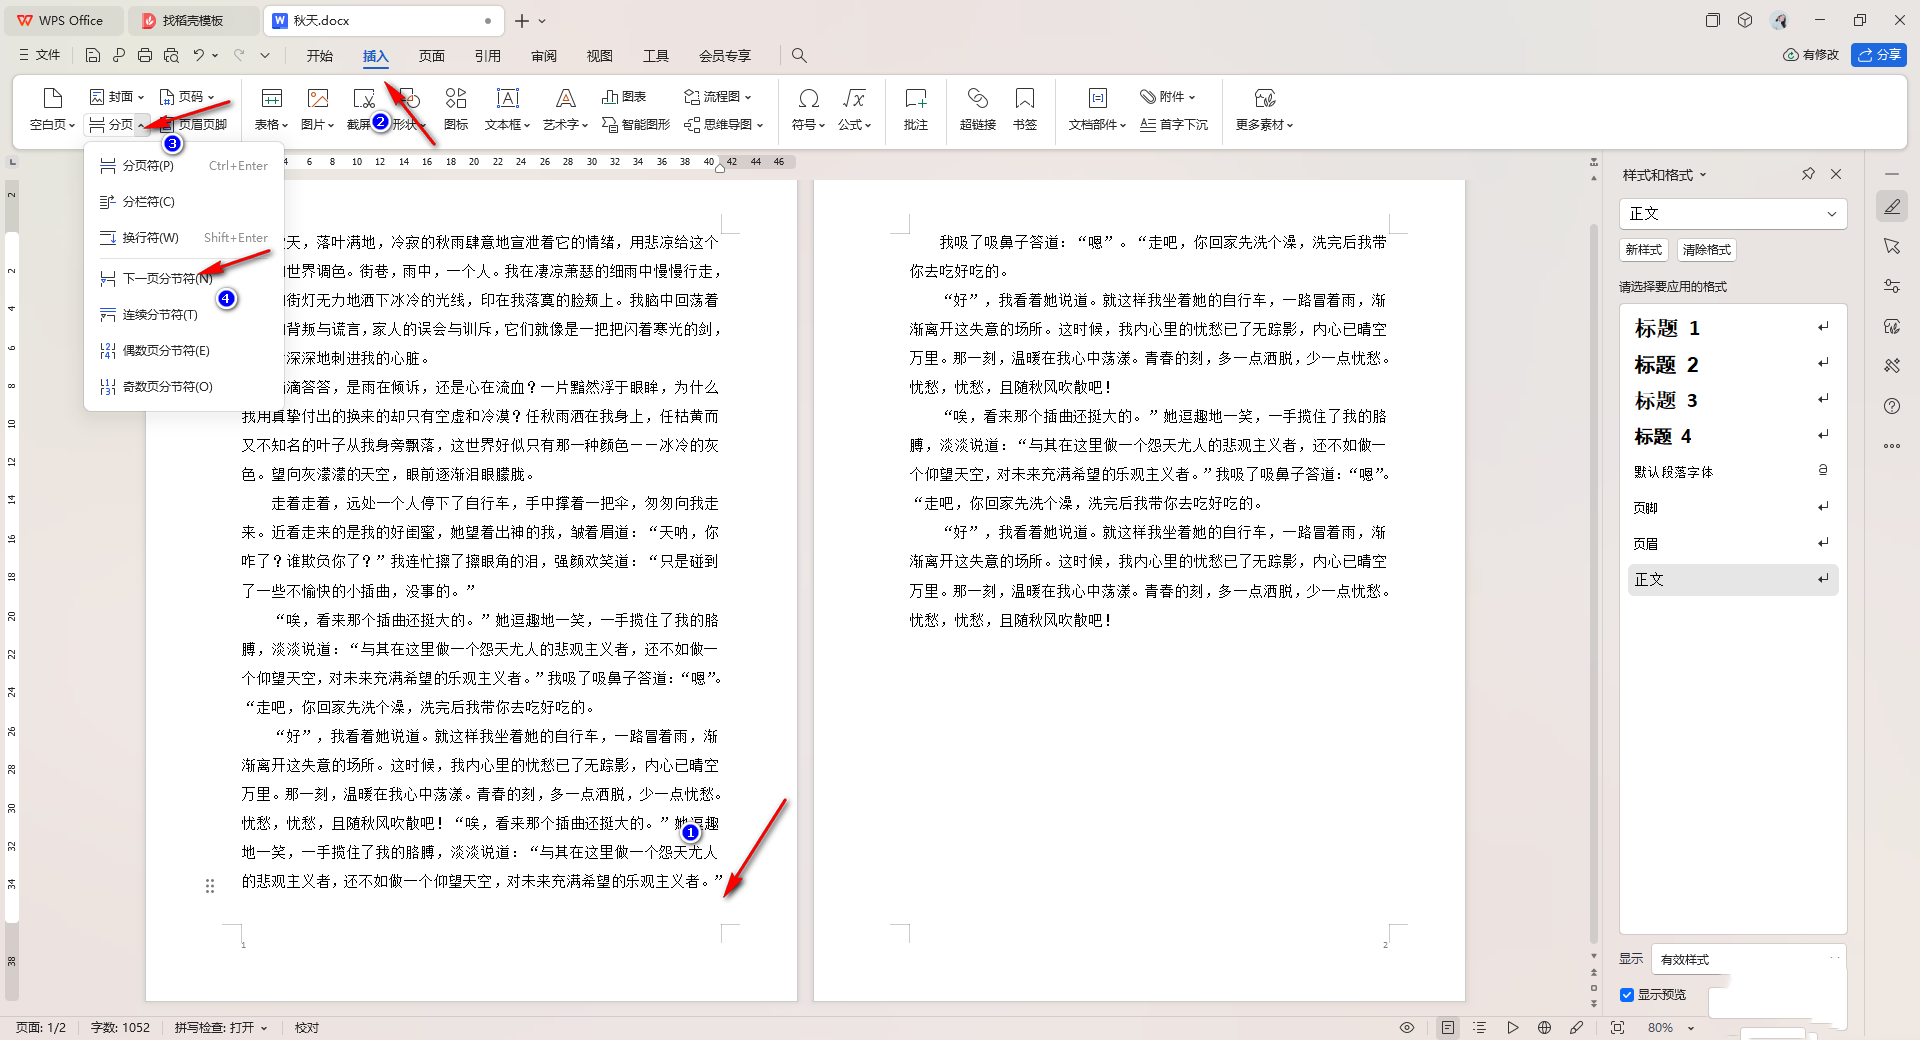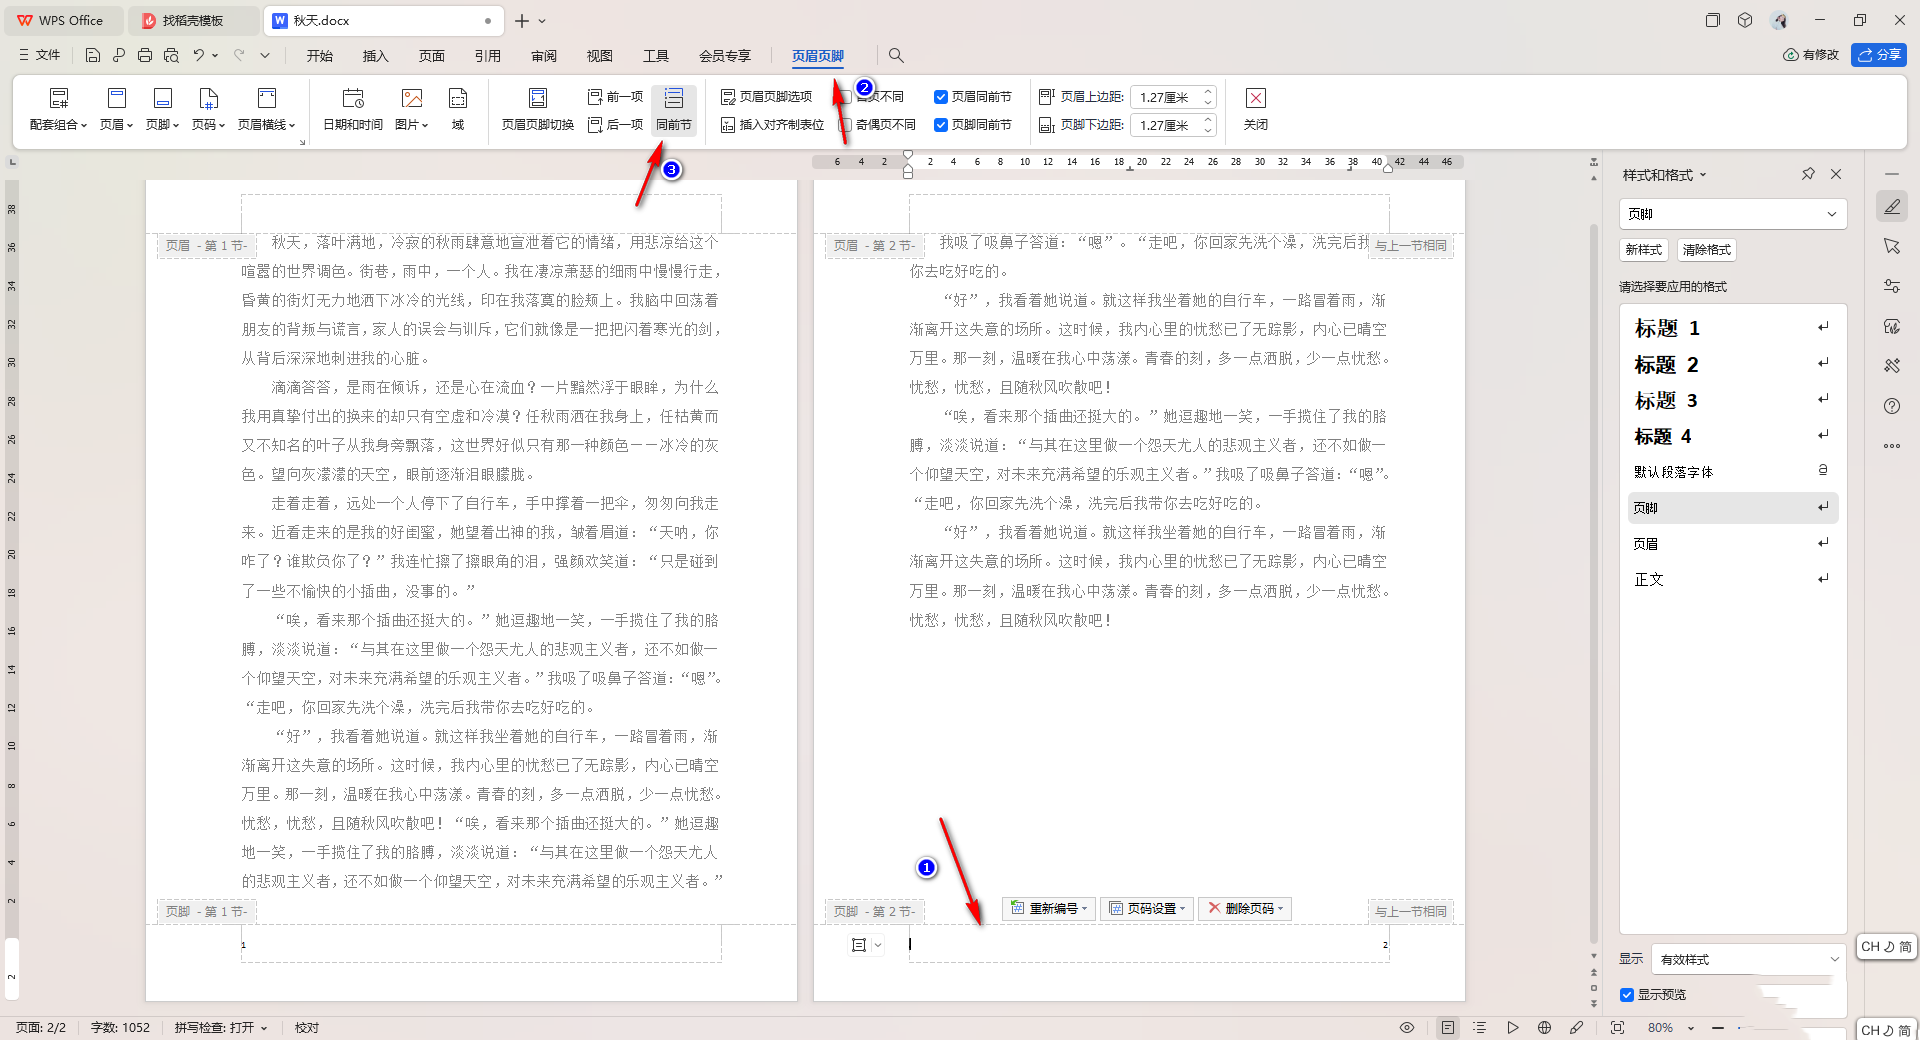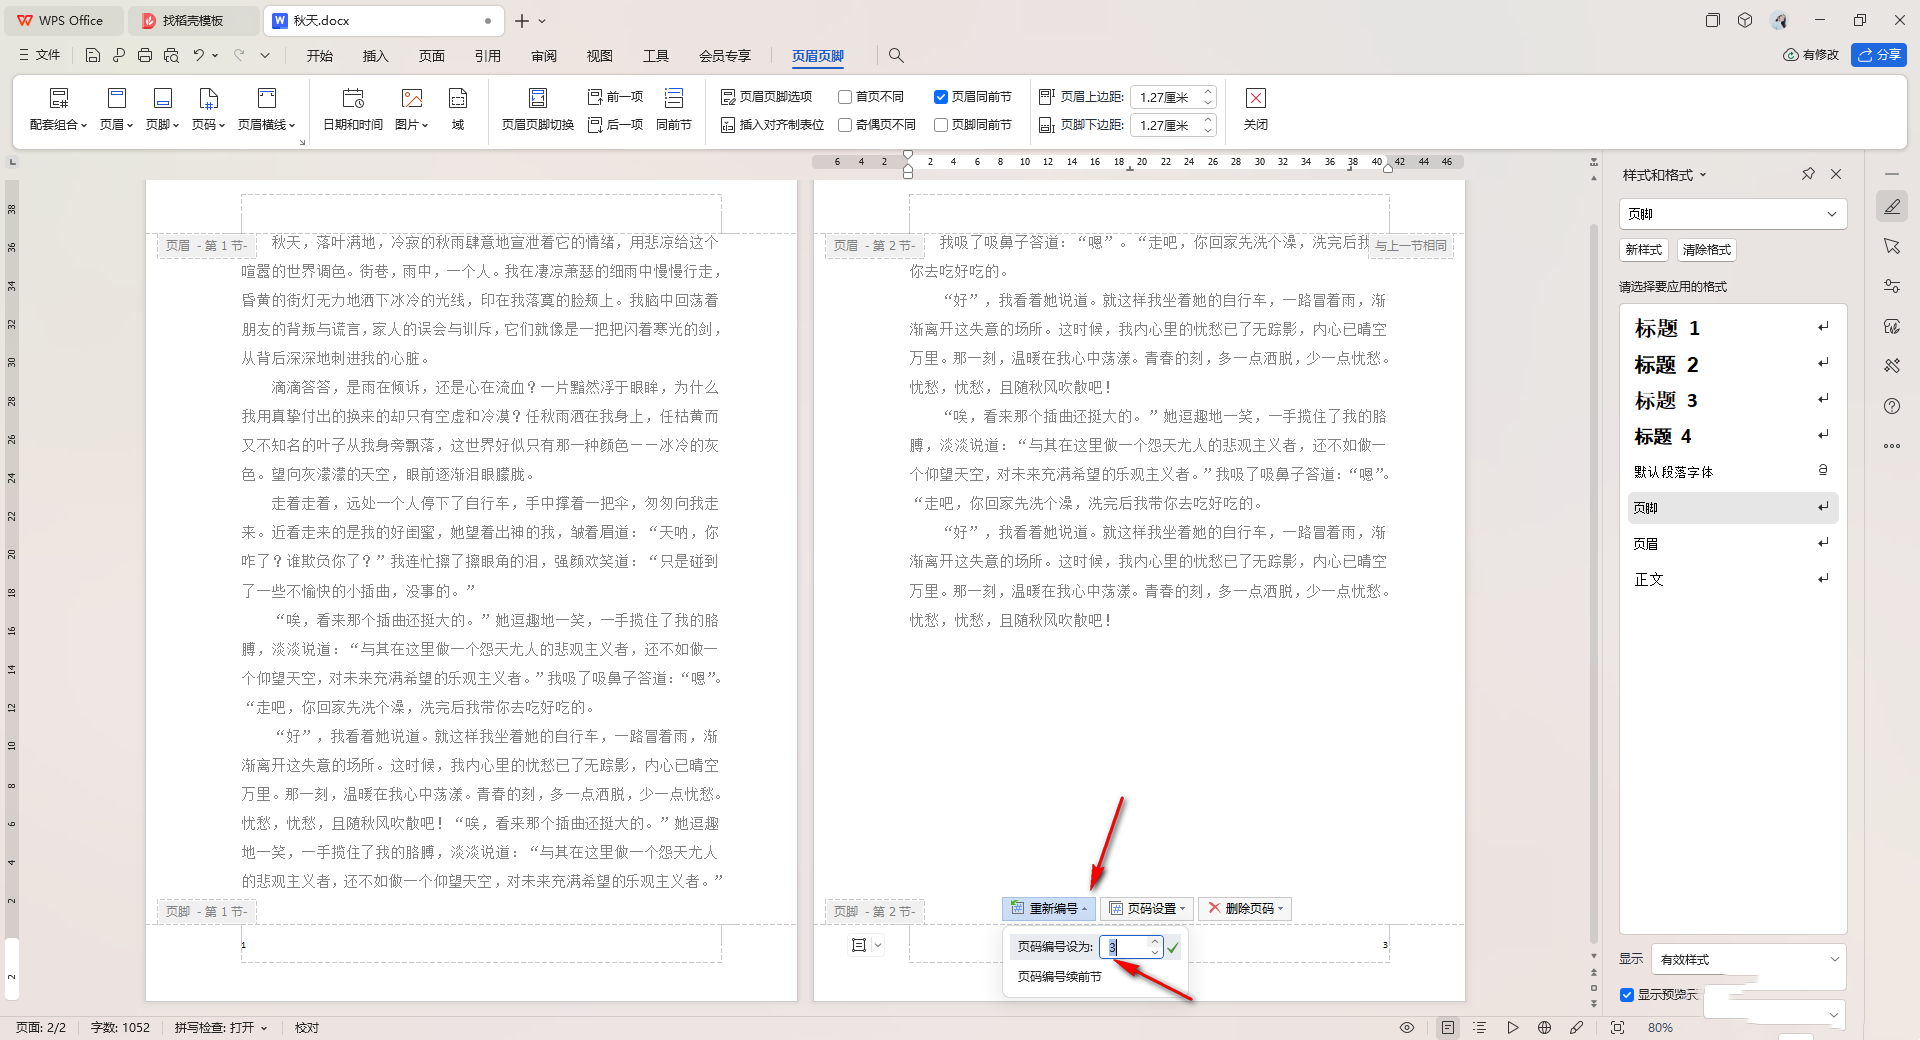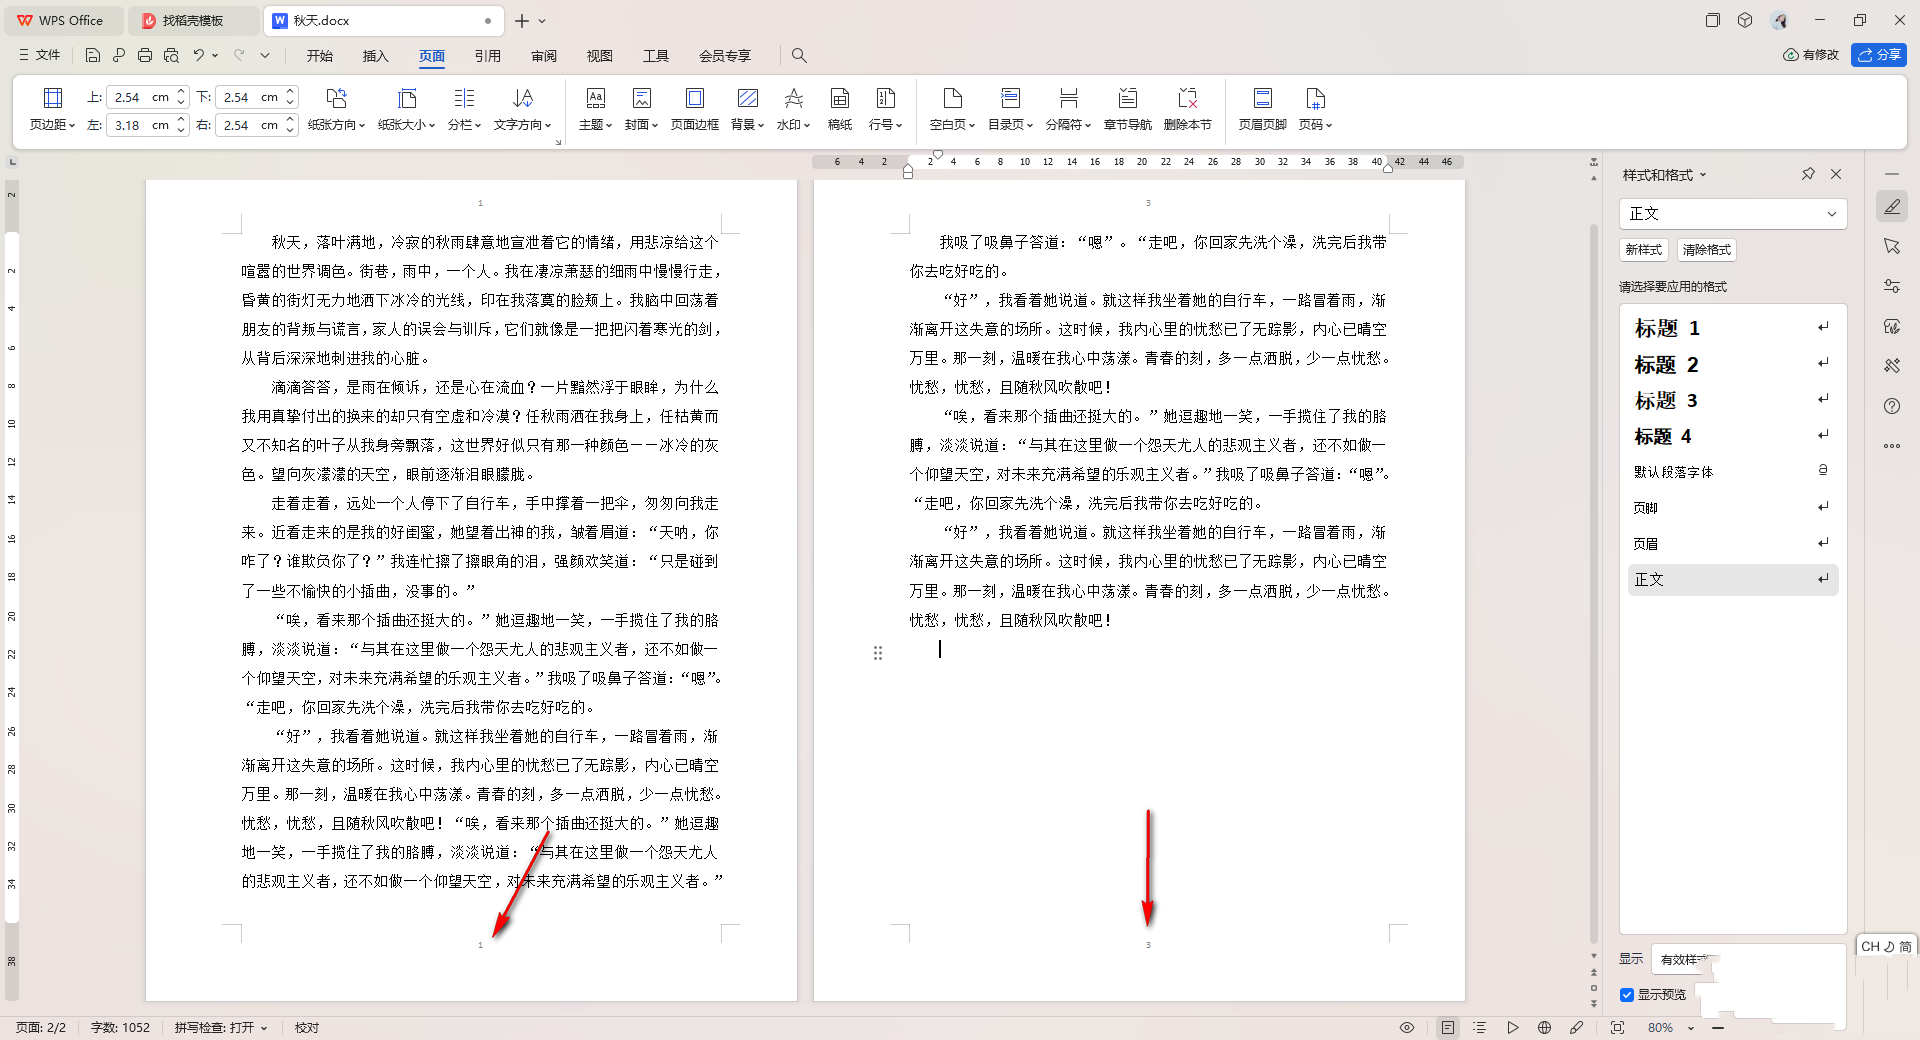
When we use word documents, we will encounter situations where we need to set page numbers. However, generally after we insert the page numbers, they are continuous. If we want the page numbers to be discontinuous, we need to set it up separately. Then the word page number will not be continuous with the previous page. How to set it up? Let this site carefully introduce to users the method of setting page numbers and disconnecting from the previous page in WPS Word. How to set the page number to disconnect from the previous page in WPS Word 1. First, we need to position the mouse cursor to the end of the first page, and then click [Insert]-[Page Break]-[Next Page Section Break].


The above is the detailed content of How to set the word page number to be disconnected from the previous page WPS How to set the page number to be disconnected from the previous page in Word. For more information, please follow other related articles on the PHP Chinese website!
 How to light up Douyin close friends moment
 microsoft project
 What is phased array radar
 How to use fusioncharts.js
 Yiou trading software download
 The latest ranking of the top ten exchanges in the currency circle
 What to do if win8wifi connection is not available
 How to recover files emptied from Recycle Bin


