

Java for Mobile Apps: Your First Steps in Android Development

Clear answer: Java is the basic language for Android application development. Through the Java development environment and SDK, you can write and run Android applications. Detailed description: Setting up the development environment: installing Android Studio, JDK, and creating AVD. Create your first Android app: Use Android Studio to create a project and write Java code to interact with it. Define the user interface: Use XML files to create activity layouts and display components. Run your app: Use an emulator or a physical device to run your app. Practical example: Add interactive elements, such as buttons, for a richer user experience.
Java and mobile applications: the first step into Android development
Introduction
Java is a powerful language that is widely used for Android application development. If you aspire to create engaging mobile apps, understanding the basics of Java is crucial. This article will take you on an exciting journey of Android development, from installing the necessary toolkits to writing your first Android app.
Set up the development environment
To start Android development, you need to perform the following steps:
- Install Android Studio: This is provided by Google The official Android integrated development environment (IDE).
- Install the Java Development Kit (JDK): Provides the tools needed to compile and run Java code.
- Create an Android Virtual Device (AVD): This is the virtual Android device you use to test your app.
Create your first Android app
After completing the setup, let’s create our first Android app. Open Android Studio, create a new project and select the "Empty Activity" template.
Activity.java
Here is the sample code for the Activity.java file (your app’s main activity):
package com.example.myapp;

import android.app.Activity;
import android.os.Bundle;

public class MainActivity extends Activity {
    @Override
    protected void onCreate(Bundle savedInstanceState) {
        super.onCreate(savedInstanceState);
        setContentView(R.layout.activity_main);
    }
}- The first line contains the application's package name.
- The MainActivity class extends from the Activity class, which is the basic building block of every screen in an Android app.
- onCreate() method is called when the activity is first created.
- The setContentView() method associates R.layout.activity_main with the activity. The activity_main.xml file is the user interface (UI) layout of our application.
activity_main.xml
Now, let’s create the activity_main.xml file (layout file), which defines the user interface:
<?xml version="1.0" encoding="utf-8"?>
<LinearLayout xmlns:android="http://schemas.android.com/apk/res/android"
    android:orientation="vertical"
    android:layout_width="match_parent"
    android:layout_height="match_parent">

    <TextView
        android:text="Hello, World!"
        android:layout_width="wrap_content"
        android:layout_height="wrap_content" />
</LinearLayout>- The first line specifies the XML file version.
- LinearLayout contains our UI elements.
- TextView is used as our text control, it displays the "Hello, World!" message.
Run your app
After completing the setup, click the "Run" button to run the app in the AVD. After a few seconds, you should see the app interface displaying a "Hello, World!" message.
Practical Case: User Interface Interaction
To further understand Android development, let’s add some interactivity.
- In MainActivity.java, add a button control.
- In activity_main.xml, define the button layout.
- In MainActivity.java, implement the ボタン click listener.
@Override
protected void onCreate(Bundle savedInstanceState) {
    super.onCreate(savedInstanceState);
    setContentView(R.layout.activity_main);

    // 获取按钮
    Button button = findViewById(R.id.button);

    // 设置按钮点击侦听器
    button.setOnClickListener(new View.OnClickListener() {
        @Override
        public void onClick(View view) {
            // 在单击按钮时执行的操作
        }
    });
}Now when you click the button, you can display a message to the user or perform other actions.
Conclusion
You have taken the first step in Android development by writing and running your first Android application in Java. Through continued practice, you'll develop a deeper understanding of the capabilities of Java and the Android SDK and create more complex mobile applications.
The above is the detailed content of Java for Mobile Apps: Your First Steps in Android Development. For more information, please follow other related articles on the PHP Chinese website!

Hot AI Tools

Undresser.AI Undress
AI-powered app for creating realistic nude photos

AI Clothes Remover
Online AI tool for removing clothes from photos.

Undress AI Tool
Undress images for free

Clothoff.io
AI clothes remover

AI Hentai Generator
Generate AI Hentai for free.

Hot Article
Hot Tools

Notepad++7.3.1
Easy-to-use and free code editor

SublimeText3 Chinese version
Chinese version, very easy to use

Zend Studio 13.0.1
Powerful PHP integrated development environment

Dreamweaver CS6
Visual web development tools

SublimeText3 Mac version
God-level code editing software (SublimeText3)
Hot Topics
 1384
1384
 52
52

 Xiaomi Redmi Note 14 Pro Plus arrives as first Qualcomm Snapdragon 7s Gen 3 smartphone with Light Hunter 800 camera
Sep 27, 2024 am 06:23 AM
Xiaomi Redmi Note 14 Pro Plus arrives as first Qualcomm Snapdragon 7s Gen 3 smartphone with Light Hunter 800 camera
Sep 27, 2024 am 06:23 AM
The Redmi Note 14 Pro Plus is now official as a direct successor to last year'sRedmi Note 13 Pro Plus(curr. $375 on Amazon). As expected, the Redmi Note 14 Pro Plus heads up the Redmi Note 14 series alongside theRedmi Note 14and Redmi Note 14 Pro. Li
 Oppo Find X8 design looks like a cross between Apple iPhone 16 Pro and OnePlus Open in early images
Sep 28, 2024 am 06:04 AM
Oppo Find X8 design looks like a cross between Apple iPhone 16 Pro and OnePlus Open in early images
Sep 28, 2024 am 06:04 AM
Historically, Oppo has refreshed its flagship 'Find X' series in late winter or early spring, save for the original Find X that it announced in June 2018. To that end, the Find X7 and Find X7 Ultra are barely more than six months old at this point. H
 Break or return from Java 8 stream forEach?
Feb 07, 2025 pm 12:09 PM
Break or return from Java 8 stream forEach?
Feb 07, 2025 pm 12:09 PM
Java 8 introduces the Stream API, providing a powerful and expressive way to process data collections. However, a common question when using Stream is: How to break or return from a forEach operation? Traditional loops allow for early interruption or return, but Stream's forEach method does not directly support this method. This article will explain the reasons and explore alternative methods for implementing premature termination in Stream processing systems. Further reading: Java Stream API improvements Understand Stream forEach The forEach method is a terminal operation that performs one operation on each element in the Stream. Its design intention is
 Lenovo reveals new color option for the 2024 Legion Y700 gaming tablet
Sep 29, 2024 am 06:05 AM
Lenovo reveals new color option for the 2024 Legion Y700 gaming tablet
Sep 29, 2024 am 06:05 AM
Lenovo is gearing up to launch the 2024 Legion Y700 on September 29 in China. This new Android gaming tablet will be going against the RedMagic Nova, and the company has already confirmed almost all the specs of the device. Now, hours before the full
 Java Program to Find the Volume of Capsule
Feb 07, 2025 am 11:37 AM
Java Program to Find the Volume of Capsule
Feb 07, 2025 am 11:37 AM
Capsules are three-dimensional geometric figures, composed of a cylinder and a hemisphere at both ends. The volume of the capsule can be calculated by adding the volume of the cylinder and the volume of the hemisphere at both ends. This tutorial will discuss how to calculate the volume of a given capsule in Java using different methods. Capsule volume formula The formula for capsule volume is as follows: Capsule volume = Cylindrical volume Volume Two hemisphere volume in, r: The radius of the hemisphere. h: The height of the cylinder (excluding the hemisphere). Example 1 enter Radius = 5 units Height = 10 units Output Volume = 1570.8 cubic units explain Calculate volume using formula: Volume = π × r2 × h (4
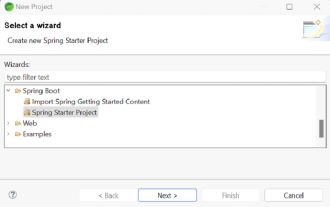 How to Run Your First Spring Boot Application in Spring Tool Suite?
Feb 07, 2025 pm 12:11 PM
How to Run Your First Spring Boot Application in Spring Tool Suite?
Feb 07, 2025 pm 12:11 PM
Spring Boot simplifies the creation of robust, scalable, and production-ready Java applications, revolutionizing Java development. Its "convention over configuration" approach, inherent to the Spring ecosystem, minimizes manual setup, allo
 Samsung Galaxy Z Fold Special Edition revealed to land in late October as conflicting name emerges
Oct 01, 2024 am 06:21 AM
Samsung Galaxy Z Fold Special Edition revealed to land in late October as conflicting name emerges
Oct 01, 2024 am 06:21 AM
The launch of Samsung's long-awaited 'Special Edition' foldable has taken another twist. In recent weeks, rumours about the so-called Galaxy Z Fold Special Edition went rather quiet. Instead, the focus has shifted to the Galaxy S25 series, including
 Create the Future: Java Programming for Absolute Beginners
Oct 13, 2024 pm 01:32 PM
Create the Future: Java Programming for Absolute Beginners
Oct 13, 2024 pm 01:32 PM
Java is a popular programming language that can be learned by both beginners and experienced developers. This tutorial starts with basic concepts and progresses through advanced topics. After installing the Java Development Kit, you can practice programming by creating a simple "Hello, World!" program. After you understand the code, use the command prompt to compile and run the program, and "Hello, World!" will be output on the console. Learning Java starts your programming journey, and as your mastery deepens, you can create more complex applications.
