 Mobile Game Tutorial
 Mobile Game Guide
 Dragon Age: The Veilguard - For Gold And Glory Walkthrough
Dragon Age: The Veilguard - For Gold And Glory Walkthrough
For Gold And Glory is a quest you'll find on the beautiful, exotic Rivain Coast of Dragon Age: The Veilguard. It's where the Lords of Fortune, including Taash set up their base, though Taash is not mandatory for this mission. It sees you recovering supplies for the Antivan Crows on behalf of the Lords of Fortune.
However, it's less about finding the supplies and more about defeating the Antaam who are guarding them at various locations. For this reason, we suggest taking Taash and Lucanis. Both have a narrative link to the quest, but also their Fire and Necrotic damage is highly effective against the foes you fight, and they can trigger Detonations via combos too. It's like Rook might as well not even be there...
Taash is mostly there as it's their home, but they are useful in a fight. As long as its not Bellara, whose Electric Abilities are Resisted by Antaam, you're fine.
Defeat The Antaam

The first set of Antaam you face are a trio. There are two Valotaar, which are just brutes, and God-Touched Valotarr, who is the same but with harder hitting strikes. Deflect their attacks and use Necrotic Abilities to make short work of them. A bigger issue is the Taaralok, who makes the trio into a quartet, and is a ranged Antaam with Armor.
Taaralok is mostly a nuisance. He can disrupt your fight against the three thugs going face to face while keeping his distance. Using Taash's Fire Abilities, any Rook Abilities that destroy Armor, and Charged Heavy attacks, you should rush the Taaralok first. If you're too far away, ranged headshots will also work.
Defeat The Reaver

Once you have dealt enough damage to the God-Touched Valotaar, a Reaver appears. This becomes the biggest threat and it is imperative you get rid of the Taaralok so you can focus on the Reaver. It charges around the arena with unstoppable, devastating attacks and you will need to dodge quickly.
When the Reaver appears, you need to focus on thinning out the herd. Taking down a Reaver takes a while, so you don't want other enemies getting in the way. Since the Reaver is predictable (it follows you and charges), keep moving and doge inwards or outward to avoid it, and take out the other Antaam.
When you have the Reaver alone, using Taash's Abilities to apply Burning will help you whittle it down while attacking when it takes rare breaks - just get ready to dodge again afterwards. Search the Crow bodies in the corner when the fight is over to discover the second location, where the supply cache (and more Antaam) are waiting.
Find The Supply Cache

Head through the ruins and follow the marker as they lead you across the ledge and outside to the the shore, then dip back in and vault over the wall. Follow the passage outside and to slide down the hill to the next combat arena.
If you have unlocked the Dragon Beach Fast Travel Beacon, you can also just use this.
You'll interrupt the Antaam performing some pest control on the local wildlife, which clues you into the new form of Antaam you'll be fighting: Anadar. These have flamethrowers, though they remain resistant to Electric damage, not Fire, so Taash can still eviscerate them.
How To Defeat The Anadar

Rush the closest Anadar to you as you enter with a Charged Heavy attack. Keep hitting it with regular Heavy attacks until the Armor goes down - these enemies take a while to get their flamethrower ready, so you can drop this one before it starts. Once the Armor is down, it will soon be Staggered, where you can perform a Takedown.
That then leaves you with two Anadar and one Valotaar, but the Anadar's flamethrowers give them such large coverage that they should be the priority. Taash can take down their Armor (ideally with a combo with Lucanis), just be aware that if you rush them, you need to dodge quickly if the other one arrives.
The arena here is large enough that you should keep your distance where you can, especially as the Anadar have a much greater reach. Abilities and ranged attacks will help, although Armor are best dealt with by Charged Heavy attacks, so you may need to risk it when an opening appears.
Recover The Supplies

After all of the enemies have been cleared out, head to the back of the arena and climb up the rocks. Continue along the river until the steps, then jump to the podium with the log on it. Go along the branch and continue around left until you reach the Clifftops.
Drop down, then head around to the waterfall and find a note in the pool at the bottom. This sends you to your final location, where you'll need to go away from the waterfall and around the cliff you just jumped off, back to the river and the podium with the branch. This time, go up and go right.
This takes you to some castle ruins, so make your way through and head out the exit on the right at back, up the stairs to the zipline. Take the zipline across to the Warden Castle, and inside you will fight your penultimate wave of Antaam.

You will face four Valotaar, including some with hammers that charge. However, they should be dealt with in the same away as before, with Necrotic Abilities and Burning condition, as well as Heavy attacks and Takedowns when Staggered.
Defeat Penshanek The Blood Eater

Head through the Castle Ruins, out into the rocky walls and around the corner at the back (it can be tough to see in the dark, but run to the back wall then turn left). Outside, you will face the final boss of the quest: Penshanek the Blood Eater.
At first glance, Penshanek is not too difficult. It has no Armor or Barrier, just a very chunky health bar, so powerful Necrotic Abilities and any high-damage or status inflicting Abilities work well too. The issue is how crowded things are.
The Castle Bailey area is more cramped than Rivain's other spaces, and Penshanek has two Anadar, a Valotaar, and a Taaralok helping him. Take out the Taaralok first with Charged ranged attacks and Abilities, then focus on eroding the Anadar Armors with Detonation, and rush the Valotaar with Heavy attacks.
Any Abilities with a large Area of Effect will be very useful here.
When that's done, think of Penshanek as a big Valotar. Dodge away when he glows red, and drive in with Heavy attacks to Stagger quickly. When that's done, free the Antivan Crow locked up in the corner and the quest will be complete.
The above is the detailed content of Dragon Age: The Veilguard - For Gold And Glory Walkthrough. For more information, please follow other related articles on the PHP Chinese website!

Hot AI Tools

Undresser.AI Undress
AI-powered app for creating realistic nude photos

AI Clothes Remover
Online AI tool for removing clothes from photos.

Undress AI Tool
Undress images for free

Clothoff.io
AI clothes remover

AI Hentai Generator
Generate AI Hentai for free.

Hot Article

Hot Tools

Notepad++7.3.1
Easy-to-use and free code editor

SublimeText3 Chinese version
Chinese version, very easy to use

Zend Studio 13.0.1
Powerful PHP integrated development environment

Dreamweaver CS6
Visual web development tools

SublimeText3 Mac version
God-level code editing software (SublimeText3)

Hot Topics
 1379
1379
 52
52
 R.E.P.O. Energy Crystals Explained and What They Do (Yellow Crystal)
Mar 18, 2025 am 12:07 AM
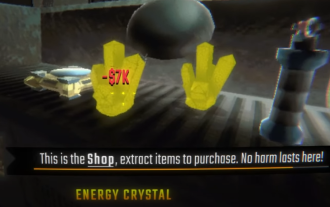
I bought expensive weapons or drones in R.E.P.O. but found that the energy was exhausted and became useless? Don't worry, you don't have to spend $50,000 on replacements, just charge your gear! That strange machine at the back of your truck is not a decoration. Here are how to get energy crystals and use them to keep your gear running continuously to avoid bankruptcy. More Reads: All R.E.P.O. Items How to get energy crystal You can buy energy crystals from the service store between levels. They usually cost between $7,000 and $9,000 — while expensive, they are far cheaper than repurchasing gear. In the first few levels, no purchase is required. You don't need them for the time being, so
 R.E.P.O. Best Graphic Settings
Mar 18, 2025 am 01:33 AM
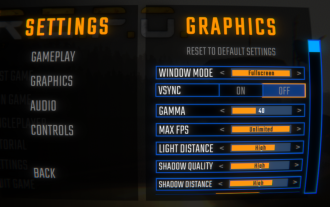
R.E.P.O. Game Screen Setting Guide: How to improve frame rate while ensuring picture quality? This article will guide you to optimize game settings and find the best balance point. Step 1: Full Screen Mode and Frame Rate Adjustment Before adjusting other settings, make sure the game is running in the best mode: Display Mode: Full Screen - Always use Full Screen Mode for optimal performance. Window mode will reduce the frame rate. Vertical Sync (V-Sync): Off - Unless a screen tear occurs, turn off vertical synchronization for a smoother gaming experience. Maximum FPS: Unlimited - If your computer is configured strongly, you can set it to Unlimited. Otherwise, it is recommended to limit it to 60 frames or match your monitor refresh rate. second
 Assassin's Creed Shadows: Seashell Riddle Solution
Mar 28, 2025 am 01:58 AM
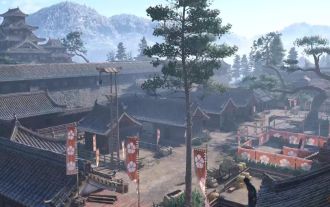
Assassin's Creed: Shadows boasts a vast world brimming with activities beyond the main storyline. Side missions and various encounters significantly enrich the immersive experience of in-game Japan. One particularly memorable encounter is the Seashe
 R.E.P.O. How to Fix Audio if You Can't Hear Anyone
Mar 17, 2025 pm 06:10 PM
Can't hear other players' voices in the R.E.P.O. game? Even if your microphone is working properly, it can be a problem caused by audio settings or device conflicts. Here are some effective solutions to help you restore your voice chat functionality. 1. Check the output device Open the audio settings of R.E.P.O. and check the output device settings. If set to "Default", manually select your headset or speaker. Restart the game and test voice chat again. 2. Adjust Windows sound settings If R.E.P.O. does not output the sound to the correct device, check the Windows Sound Settings: Right-click the speaker icon in the taskbar and select Sound Settings. Under "Output",
 R.E.P.O. Chat Commands and How to Use Them
Mar 17, 2025 pm 06:13 PM
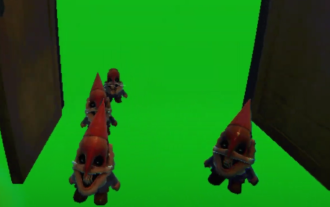
R.E.P.O. provides some convenient chat instructions in the game to help you optimize the gaming experience. These instructions do not affect game balance, but are useful for taking clear screenshots or setting up visuals for content creation. How to use chat commands in R.E.P.O. To activate the command, please follow the steps below: Press the “T” key to open the chat window. Enter the “/” symbol, and then enter the command you want to use. Press Enter and the effect will take effect. To cancel the effect, enter the same command again or restart the game. Please note that these commands are only valid in multiplayer games and are not available in single player mode. Available chat commands /cinematic commands remove the game world
 Will R.E.P.O. Have Crossplay?
Mar 18, 2025 am 01:07 AM
At present, "R.E.P.O." does not support cross-platform games, and the official has not confirmed whether it will support it in the future. The game is currently only available on PC platforms (early experience through Steam), so console players are temporarily unable to play. Why does R.E.P.O. not support cross-platform games? Released on PC platforms only – The console version of the game has not been announced yet. Early Access Phase – Developers are still refining the game, and cross-platform gaming is not a current priority. Host porting is not confirmed – without a host version, cross-platform gaming is simply impossible. Will cross-platform games be supported in the future? There is no official news on whether R.E.P.O. will launch a console version and whether it will support cross-platform games. However,
 Where to find the Crane Control Keycard in Atomfall
Mar 28, 2025 am 02:17 AM
In Atomfall, discover hidden keys and passages, including multiple ways to access key locations. This guide focuses on using the Crane Control Keycard for easy, unguarded Entry to Skethermoor Prison, bypassing the need to cooperate with Captain Sims
 Saving in R.E.P.O. Explained (And Save Files)
Mar 19, 2025 am 12:22 AM
Want to save progress in R.E.P.O.? Good news: You can! Bad news: Only under very specific conditions…but this will change soon. Read more about the upcoming update that involves a new save menu and multiple save slots. Save mechanism Complete the game run once, then exit from the menu and do not start another game immediately. If you do it correctly, your progress will be saved to continue from where you last left. If everyone dies, your save will be deleted – no second chance. The game will simply erase your existence as if you never existed. Basically, if you complete a level and want to keep your progress, make sure to stop and exit before jumping into another task. This means


