

Deploying a MongoDB Collection Generator on Kubernetes

Creating a utility to generate 100 MongoDB collections, each populated with 1 million random documents, and deploying it on Kubernetes involves several steps. This guide walks through the process, from setting up a Kubernetes environment to generating the collections and deploying the job in a dedicated namespace.
1. Setting Up Your Kubernetes Environment
Ensure you have a Kubernetes cluster (such as GKE, EKS, AKS, or Minikube) and configure kubectl to connect to it.
2. Create a Dedicated Namespace
To keep this deployment isolated, create a namespace called my-lab:
kubectl create namespace my-lab
kubectl get ns my-lab
3. Deploy MongoDB on Kubernetes
Create a Persistent Volume (PV)
Create a mongo-pv.yaml file to define a persistent volume for MongoDB data:
apiVersion: v1
kind: PersistentVolume
metadata:
  name: mongo-pv
  namespace: my-lab
spec:
  capacity:
    storage: 10Gi
  accessModes:
    - ReadWriteOnce
  hostPath:
    path: /data/mongo
Apply the PV:
kubectl apply -f mongo-pv.yaml
Create a Persistent Volume Claim (PVC)
Define a persistent volume claim in mongo-pvc.yaml:
apiVersion: v1
kind: PersistentVolumeClaim
metadata:
  name: mongo-pvc
  namespace: my-lab
spec:
  accessModes:
    - ReadWriteOnce
  resources:
    requests:
      storage: 10Gi
Apply the PVC:
kubectl apply -f mongo-pvc.yaml
Create a MongoDB Deployment
Define the MongoDB deployment and service in mongo-deployment.yaml:
apiVersion: apps/v1
kind: Deployment
metadata:
  name: mongo
  namespace: my-lab
spec:
  replicas: 1
  selector:
    matchLabels:
      app: mongo
  template:
    metadata:
      labels:
        app: mongo
    spec:
      containers:
        - name: mongo
          image: mongo:latest
          ports:
            - containerPort: 27017
          env:
            - name: MONGO_INITDB_ROOT_USERNAME
              value: "root"
            - name: MONGO_INITDB_ROOT_PASSWORD
              value: "password"
          volumeMounts:
            - name: mongo-storage
              mountPath: /data/db
      volumes:
        - name: mongo-storage
          persistentVolumeClaim:
            claimName: mongo-pvc
---
apiVersion: v1
kind: Service
metadata:
  name: mongo
  namespace: my-lab
spec:
  type: ClusterIP
  ports:
    - port: 27017
      targetPort: 27017
  selector:
    app: mongo
Apply the deployment:
kubectl apply -f mongo-deployment.yaml
4. Connect to MongoDB
Verify the MongoDB deployment by connecting to it:
kubectl exec -it <mongo-pod-name> -n my-lab -- mongosh -u root -p password
5. Verify Persistence
Scale down and then back up the MongoDB deployment to ensure data persists:
kubectl scale deployment mongo --replicas=0 -n my-lab
kubectl scale deployment mongo --replicas=1 -n my-lab
6. Create a Python Utility for Collection Generation
Using Python, define a script to create collections and populate them with random documents:
import random
import string
import pymongo
from pymongo import MongoClient

def random_string(length=10):
    return ''.join(random.choices(string.ascii_letters + string.digits, k=length))

def create_collections_and_populate(db_name='mydatabase', collections_count=100, documents_per_collection=1_000_000):
    client = MongoClient('mongodb://root:password@mongo:27017/')
    db = client[db_name]

    for i in range(collections_count):
        collection_name = f'collection_{i+1}'
        collection = db[collection_name]
        print(f'Creating collection: {collection_name}')

        bulk_data = [{'name': random_string(), 'value': random.randint(1, 100)} for _ in range(documents_per_collection)]
        collection.insert_many(bulk_data)
        print(f'Inserted {documents_per_collection} documents into {collection_name}')

if __name__ == "__main__":
    create_collections_and_populate()
7. Dockerize the Python Utility
Create a Dockerfile to containerize the Python script:
FROM python:3.9-slim

WORKDIR /app
COPY mongo_populator.py .
RUN pip install pymongo

CMD ["python", "mongo_populator.py"]
Build and push the image to a container registry:
docker build -t <your-docker-repo>/mongo-populator:latest .
docker push <your-docker-repo>/mongo-populator:latest
8. Create a Kubernetes Job
Define a job in mongo-populator-job.yaml to run the collection generation script:
apiVersion: batch/v1
kind: Job
metadata:
  name: mongo-populator
  namespace: my-lab
spec:
  template:
    spec:
      containers:
        - name: mongo-populator
          image: <your-docker-repo>/mongo-populator:latest
          env:
            - name: MONGO_URI
              value: "mongodb://root:password@mongo:27017/"
      restartPolicy: Never
  backoffLimit: 4
Apply the job:
kubectl apply -f mongo-populator-job.yaml
9. Verify Collection Generation
After the job completes, connect to MongoDB to examine the data:
kubectl exec -it <mongo-pod-name> -n my-lab -- mongosh -u root -p password
In MongoDB:
use mydatabase
show collections
db.collection_9.find().limit(5).pretty()

db.getCollectionNames().forEach(function(collection) {
     var count = db[collection].countDocuments();
     print(collection + ": " + count + " documents");
 });
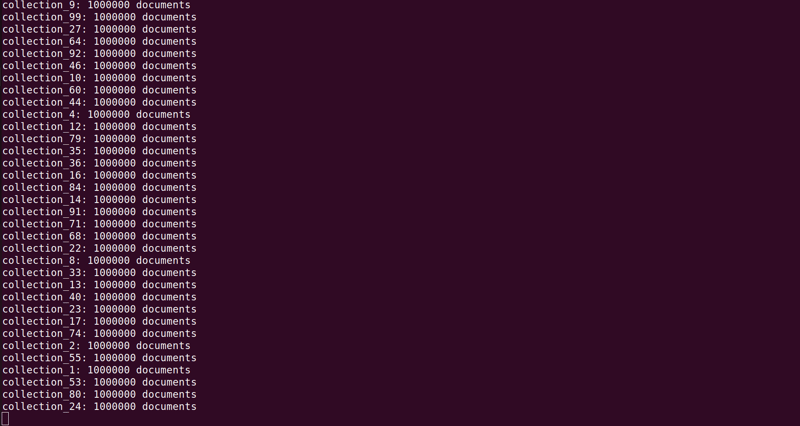
Each collection should contain 1 million documents, confirming that the data generation job was successful.
The above is the detailed content of Deploying a MongoDB Collection Generator on Kubernetes. For more information, please follow other related articles on the PHP Chinese website!

Hot AI Tools

Undresser.AI Undress
AI-powered app for creating realistic nude photos

AI Clothes Remover
Online AI tool for removing clothes from photos.

Undress AI Tool
Undress images for free

Clothoff.io
AI clothes remover

Video Face Swap
Swap faces in any video effortlessly with our completely free AI face swap tool!

Hot Article
Hot Tools

Notepad++7.3.1
Easy-to-use and free code editor

SublimeText3 Chinese version
Chinese version, very easy to use

Zend Studio 13.0.1
Powerful PHP integrated development environment

Dreamweaver CS6
Visual web development tools

SublimeText3 Mac version
God-level code editing software (SublimeText3)
Hot Topics


 How to solve the permissions problem encountered when viewing Python version in Linux terminal?
Apr 01, 2025 pm 05:09 PM
How to solve the permissions problem encountered when viewing Python version in Linux terminal?
Apr 01, 2025 pm 05:09 PM
Solution to permission issues when viewing Python version in Linux terminal When you try to view Python version in Linux terminal, enter python...
 How to avoid being detected by the browser when using Fiddler Everywhere for man-in-the-middle reading?
Apr 02, 2025 am 07:15 AM
How to avoid being detected by the browser when using Fiddler Everywhere for man-in-the-middle reading?
Apr 02, 2025 am 07:15 AM
How to avoid being detected when using FiddlerEverywhere for man-in-the-middle readings When you use FiddlerEverywhere...
 How to efficiently copy the entire column of one DataFrame into another DataFrame with different structures in Python?
Apr 01, 2025 pm 11:15 PM
How to efficiently copy the entire column of one DataFrame into another DataFrame with different structures in Python?
Apr 01, 2025 pm 11:15 PM
When using Python's pandas library, how to copy whole columns between two DataFrames with different structures is a common problem. Suppose we have two Dats...
 How to teach computer novice programming basics in project and problem-driven methods within 10 hours?
Apr 02, 2025 am 07:18 AM
How to teach computer novice programming basics in project and problem-driven methods within 10 hours?
Apr 02, 2025 am 07:18 AM
How to teach computer novice programming basics within 10 hours? If you only have 10 hours to teach computer novice some programming knowledge, what would you choose to teach...
 How does Uvicorn continuously listen for HTTP requests without serving_forever()?
Apr 01, 2025 pm 10:51 PM
How does Uvicorn continuously listen for HTTP requests without serving_forever()?
Apr 01, 2025 pm 10:51 PM
How does Uvicorn continuously listen for HTTP requests? Uvicorn is a lightweight web server based on ASGI. One of its core functions is to listen for HTTP requests and proceed...
 How to solve permission issues when using python --version command in Linux terminal?
Apr 02, 2025 am 06:36 AM
How to solve permission issues when using python --version command in Linux terminal?
Apr 02, 2025 am 06:36 AM
Using python in Linux terminal...
 How to handle comma-separated list query parameters in FastAPI?
Apr 02, 2025 am 06:51 AM
How to handle comma-separated list query parameters in FastAPI?
Apr 02, 2025 am 06:51 AM
Fastapi ...
 How to get news data bypassing Investing.com's anti-crawler mechanism?
Apr 02, 2025 am 07:03 AM
How to get news data bypassing Investing.com's anti-crawler mechanism?
Apr 02, 2025 am 07:03 AM
Understanding the anti-crawling strategy of Investing.com Many people often try to crawl news data from Investing.com (https://cn.investing.com/news/latest-news)...
