

Brighter Shores: The Lost Shipment Quest Walkthrough

'The Lost Shipment' is an early side quest in Brighter Shores, but don't let that fool you - as with most Brighter Shores quests, it's fairly involved. Several steps must be taken, a couple of professions must be suitably leveled, and your character's eyebrows must suffer a certain indignity along the way.

Our guide to 'The Lost Shipment' will tell you where you need to go, what you need to do, and how to progress through each piece of the overarching puzzle. From Captain Shirker to the Furtive Stranger, you'll get to know a handful of memorable fellows here in Hopetown before it's over.
How To Start 'The Lost Shipment'

You'll gain 'The Lost Shipment' as one of your earliest quests in Brighter Shores. To begin in earnest, travel to Brannof Hall. Here's how to get there: start at the Town Square, then go west twice. Easy enough!
Enter Brannof's Dining Room. Speak with Cohen, who will ask you to locate the lost shipment. He'll send you to meet Captain Shirker, but he'll also mention a possible clue at The Hooked Hand, a tavern here in Hopeport.
It doesn't really matter which route you take first, as you'll need to complete both objectives. We started with Shirker, so that's how the guide will be ordered.
Speak With Captain Shirker

Captain Shirker is aboard his ship, the Vincible. The ship is located at the farthest-southeast part of Hopeport. For simplicity's sake, we'll guide you there from the Town Square: go south as far as you can, then east as far as you can, then south one tile.
Shirker won't trust you if you come equipped as a guard. Remove all your weapons and armor in order to gain the necessary dialogue options with him.
Inquire about the lost shipment with him. One thing leads to another, and you will have to invite Captain Shirker for a meal to progress the quest. He'll run off to the Delectable Dab, so head there, yourself - it's just west of the Town Square.
Find Captain Shirker at one of the tables. Order a chicken pie, and keep the conversation flowing with small talk a couple of times before asking him about the shipment. He will tell you about a man in a blue waistcoat.

Obtain A Monobrow

Return to the Town Square. In the southwest part of the area, you'll find our blue-coated man. He'll mention a man known as The Illusion, and suggests you disguise yourself with a monobrow disguise.
Travel to the Hairdresser now, where you ought to be able to request a monobrow. It will set you back Eight silver and 280 copper, but at least getting rid of it later will come free of charge.
If you request the monobrow while wearing a helmet, you'll be told to remove it first. Just a neat little detail.
Head To The Hooked Hand

Before you continue down the monobrow-related side of this quest, go to The Hooked Hand. If you start out at Town Square again, head south until you can't, then go west one tile, and the tavern we're looking for is to the north here.
Wellington and Nelson are presently seated at one of the tables. Once again, remove your weapons and armor. Speak with either of them, and when the dialogue option comes up for it, tell them: "I wish I could find a seller of Carthian plumbatae."
Neither Wellington nor Nelson are of any real help here, but a man named Harris Slant will tell you to find The Illusion. (There's that name again.)
You need to catch a Fetid Flounder at this point. Check out our guide on how to do so!
Write The Message In The Fetid Flounder

With the Fetid Flounder in your inventory, fetch a Quill and Ink as well as a Paper. Both can be found in either Jal Degreene's office back near the Training Ground, or in Lord Brannof's house.
Combine the Quill and Ink with the Paper, and write "Order 2 Carthian plumbatae." Then, open up your inventory. Here, you must combine the Paper with the Fetid Flounder.
Bring your message to the Fishmonger who runs The Frequently Fresh Fish Stall on Eel Street. Sell your Fetid Flounder, and then hide behind the nearby bush. Watch as the Furtive Stranger purchases the Fetid Flounder.
Hiding behind the bush is always an option, by the way; it's simply irrelevant until this point in the game.
Go To Monob Row

From Eel Street, go east to Wilhope Crossing, then east again to Wilhope Passage. To the northeast here is Monob Row. Locate the locked door; now that you have your monobrow, claim that you're Monobrow Sam to be granted Entry.
You will soon be forced to battle a level 30 Thief followed by the Furtive Stranger, who is also level 30. Defeat them, then take the plumbatae from the chest. Wrap up 'The Lost Shipment' for your sweet reward!

The above is the detailed content of Brighter Shores: The Lost Shipment Quest Walkthrough. For more information, please follow other related articles on the PHP Chinese website!

Hot AI Tools

Undresser.AI Undress
AI-powered app for creating realistic nude photos

AI Clothes Remover
Online AI tool for removing clothes from photos.

Undress AI Tool
Undress images for free

Clothoff.io
AI clothes remover

Video Face Swap
Swap faces in any video effortlessly with our completely free AI face swap tool!

Hot Article
Hot Tools

Notepad++7.3.1
Easy-to-use and free code editor

SublimeText3 Chinese version
Chinese version, very easy to use

Zend Studio 13.0.1
Powerful PHP integrated development environment

Dreamweaver CS6
Visual web development tools

SublimeText3 Mac version
God-level code editing software (SublimeText3)
Hot Topics
 1664
1664
 14
1423
52
1317
25
1268
29
1243
24
14
1423
52
1317
25
1268
29
1243
24

 Roblox: Grow A Garden - Complete Mutation Guide
Apr 18, 2025 am 01:10 AM
Roblox: Grow A Garden - Complete Mutation Guide
Apr 18, 2025 am 01:10 AM
Maximize your profits in Roblox's Grow A Garden by understanding the lucrative world of crop mutations! These rare variations significantly boost your harvest's value. While you can't directly control mutations, knowing how they work provides a signi
 Roblox: Bubble Gum Simulator Infinity - How To Get And Use Royal Keys
Apr 16, 2025 am 11:05 AM
Roblox: Bubble Gum Simulator Infinity - How To Get And Use Royal Keys
Apr 16, 2025 am 11:05 AM
Royal Keys are some of the most valuable items you can find in Roblox's Bubble Gum Simulator Infinity. These rare tools allow you to open Royal Chests — limited-time loot containers packed with high-tier items, boosts, and even ultra-rare rewards. If
 Blue Prince: How To Get To The Basement
Apr 11, 2025 am 04:04 AM
Blue Prince: How To Get To The Basement
Apr 11, 2025 am 04:04 AM
Unlocking the Basement in Blue Prince: A Comprehensive Guide Finding the basement in Blue Prince is crucial for progressing to Room 46, but its location and access method aren't immediately obvious. This guide will walk you through accessing the base
 Nordhold: Fusion System, Explained
Apr 16, 2025 am 04:07 AM
Nordhold: Fusion System, Explained
Apr 16, 2025 am 04:07 AM
Nordhold Tower Fusion Guide: Synergistic Tower Combinations for Enhanced Defense Mastering tower combinations in Nordhold is key to effective base defense. Certain towers synergize exceptionally well, creating powerful defensive strategies. This gui
 Mandragora: Whispers Of The Witch Tree - How To Unlock The Grappling Hook
Apr 18, 2025 am 12:53 AM
Mandragora: Whispers Of The Witch Tree - How To Unlock The Grappling Hook
Apr 18, 2025 am 12:53 AM
Mandragora's dungeons offer Metroidvania-style challenges, requiring players to revisit earlier areas with newly acquired tools. The grappling hook is a prime example, enabling rapid traversal of long distances. While this crucial tool is obtained r
 Sephiria: 8 Beginner Tips
Apr 10, 2025 pm 10:08 PM
Sephiria: 8 Beginner Tips
Apr 10, 2025 pm 10:08 PM
Sephiria: Adventures in the Pixel World Sephiria attracts players with its cute pixel style and smooth operation, but the difficulty of its dungeon adventures gradually increases as they go deeper. From unpredictable bosses to a wide variety of enemies, the game is full of challenges. However, the game's extensive equipment and weapon systems allow players to choose unique combat styles to cope with these challenges. In addition, mastering some tips and strategies will help to better explore this mysterious world. Master sprint and blocking skills Sephiria's core combat mechanics are similar to many roguelike hacking and slashing games. This means that sprint (or dodge) and blocking will be the most effective combat skills in the game. Always pay attention to enemies when sprinting
 Rusty Rabbit: Where To Find Every Keycube
Apr 17, 2025 pm 10:02 PM
Rusty Rabbit: Where To Find Every Keycube
Apr 17, 2025 pm 10:02 PM
Many 2D platformers, including Rusty Rabbit, feature inaccessible areas requiring specific abilities or items. Rusty Rabbit is no exception, with multiple such areas in each region. Besides visually obvious blocked pathways, you'll encounter robots
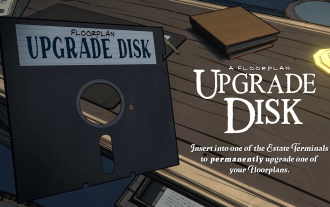 Blue Prince: Upgrade Disk Guide
Apr 12, 2025 am 11:34 AM
Blue Prince: Upgrade Disk Guide
Apr 12, 2025 am 11:34 AM
Upgrade Disks are some of the most powerful and valuable items you’ll find in Blue Prince. While they’re not needed to reach Room 46, they make your runs smoother, your puzzles easier, and your odds of survival higher. If you’re lucky enough to find
