Dragon Quest 3 Remake: Zoma's Citadel Walkthrough
While Baramos' Lair might have seemed like the grand finale to Dragon Quest 3 Remake before, this is it for real this time. Zoma's Citadel is the final stop before you come against the man himself and his legions of powerful minions. It won't be easy.

Zoma's Citadel isn't the longest dungeon in the game, though it's packed with powerful enemies, and even more powerful treasures. While your Hero should already be well-kitted at this stage, the items in here are a great help against the hordes you have to fight to reach Zoma.
How To Reach Zoma's Citadel

Reaching Zoma's Citadel is the main puzzle of Alefgard. As soon as you reach Tantegel, you will see Zoma's Citadel looming in the distance, covered in a purple haze. And while the island is right there, just beyond the shore, it is encased in tall mountains and hills that you can't reach by sea.
So you must acquire the Rainbow Drop. This, in turn, require you to collect the Sunstone from Tantegel, the Staff of Rain from the Shrine of Spirits, and the Sacred Amulet from the Tower of Rubiss. With all of these in hand, you can bring them to the Sanctum on an island to the south-east to be given the Rainbow Drop.
All you have to do now is head to the location shared with you by the priest, the peninsula north of Cantlin, and the Rainbow Drop will form a bridge for you.
Navigating Zoma's Citadel

Once you get into Zoma's Citadel, you'll be facing lots of long corridors and false passageways designed to make you run into as many enemies as much as possible. From the entrance, you must take either the left or right corridor, and then follow the inner corridor all the way south until you reach the central room. The two side passages only lead to a looping staircase on the lower floor.
Once you enter the central room, you will be forced into battle with a series of Living Statues. They're not all that different from other Living Statues you've fought so use the same tactics as usual. Keep in mind that they will spawn in waves rather than ending as soon as you defeat the initial set.
After defeating the Living Statues and heading into the northern room, cast Safe Passage if you have the Spell so you can safely walk on the electrified flooring and interact with the throne to make it move. Head down the really revealed stairs to floor B1, a winding staircase.
At the end of these stairs, you will arrive in floor B2. Ignore the stairs to the right and head into the north room instead. This room will be filled with the same coloured tiles as in the Tower of Rubiss that twist your controls. This rotates them 90 degrees clockwise or counter-clockwise, so walk with the D-pad for safety.
The two side passages contain treasure, while the north is where we're aiming for. Take the stairs down to floor B3. This room is quite simple, with only one exit all the way on the top-right, though you'll encounter plenty of enemies, so make sure to heal up.
After taking the stairs down to floor B4, you'll finally come face-to-face with Ortega, the Hero's missing father. After your sorrowful farewell, continuing northwards. While this area looks somewhat complex, you just need to circle it clockwise to reach the next staircase.
Which will bring you to the Altar of Sacrifice. There will be a Teleportal here as you move forward, so make sure to use this to heal up at an inn before heading any further. This is the final showdown awaiting you. You'll want to be as prepared as possible.
Every Optional Item

Reaching Zoma isn't the hardest part of this dungeon. The actual most difficult part is staying alive while you gather up all the amazing treasures. There's some real good ones here, including a unique item that is very helpful during the final battle, so make sure not to miss them.
Here's where to find all of them:
|
Item |
Floor |
Directions |
|---|---|---|
| Hapless Helm | B1 | Take one of the side passages in 1F down, and find this in a chest to the north. |
| Mini Medal | 1F | Interact with the seat of the throne. |
| 4.989 Gold Coins | B2 | In the right passage past the coloured tiles. |
| Scourge Whip | B2 | In the left passage past the coloured tiles. |
| Bastard Sword | B3 | After falling from B2 or taking the right stairs down, find this in the lower left corner in the north section of the floor. |
| Liquid Metal Slime (Monster) | B3 | In the top left corner. |
| Dragon Dojo Duds | B3 | In the small room just north of the staircase you entered this room from B2 into. |
| Flayer (Monster) | B3 | In the small room in the lower left corner. |
| Double-edged Sword | B3 | In the same room as the monster. |
| Mini Medal | B4 | In the leftmost chest in the large room with a red carpet. |
| Dieamend | B4 | In the second to the left chest in the large room with a red carpet. |
| Yggdrasil Leaf | B4 | In the left central chest in the large room with a red carpet. |
| Sage's Stone | B4 | In the right central chest in the large room with a red carpet. |
| Prayer Ring | B4 | In the second to the right chest in the large room with a red carpet. |
| Shimmering Dress | B4 | In the rightmost chest in the large room with a red carpet. |
The above is the detailed content of Dragon Quest 3 Remake: Zoma's Citadel Walkthrough. For more information, please follow other related articles on the PHP Chinese website!

Hot AI Tools

Undresser.AI Undress
AI-powered app for creating realistic nude photos

AI Clothes Remover
Online AI tool for removing clothes from photos.

Undress AI Tool
Undress images for free

Clothoff.io
AI clothes remover

AI Hentai Generator
Generate AI Hentai for free.

Hot Article

Hot Tools

Notepad++7.3.1
Easy-to-use and free code editor

SublimeText3 Chinese version
Chinese version, very easy to use

Zend Studio 13.0.1
Powerful PHP integrated development environment

Dreamweaver CS6
Visual web development tools

SublimeText3 Mac version
God-level code editing software (SublimeText3)

Hot Topics
 1359
1359
 52
52
 R.E.P.O. Energy Crystals Explained and What They Do (Yellow Crystal)
Mar 18, 2025 am 12:07 AM
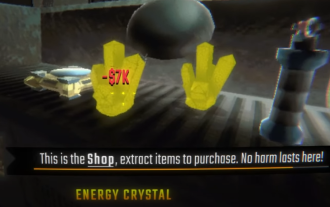
I bought expensive weapons or drones in R.E.P.O. but found that the energy was exhausted and became useless? Don't worry, you don't have to spend $50,000 on replacements, just charge your gear! That strange machine at the back of your truck is not a decoration. Here are how to get energy crystals and use them to keep your gear running continuously to avoid bankruptcy. More Reads: All R.E.P.O. Items How to get energy crystal You can buy energy crystals from the service store between levels. They usually cost between $7,000 and $9,000 — while expensive, they are far cheaper than repurchasing gear. In the first few levels, no purchase is required. You don't need them for the time being, so
 R.E.P.O. Best Graphic Settings
Mar 18, 2025 am 01:33 AM
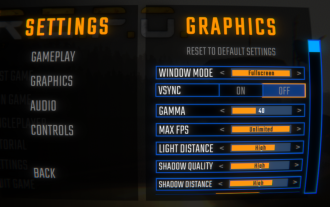
R.E.P.O. Game Screen Setting Guide: How to improve frame rate while ensuring picture quality? This article will guide you to optimize game settings and find the best balance point. Step 1: Full Screen Mode and Frame Rate Adjustment Before adjusting other settings, make sure the game is running in the best mode: Display Mode: Full Screen - Always use Full Screen Mode for optimal performance. Window mode will reduce the frame rate. Vertical Sync (V-Sync): Off - Unless a screen tear occurs, turn off vertical synchronization for a smoother gaming experience. Maximum FPS: Unlimited - If your computer is configured strongly, you can set it to Unlimited. Otherwise, it is recommended to limit it to 60 frames or match your monitor refresh rate. second
 Assassin's Creed Shadows: Seashell Riddle Solution
Mar 28, 2025 am 01:58 AM
Assassin's Creed: Shadows boasts a vast world brimming with activities beyond the main storyline. Side missions and various encounters significantly enrich the immersive experience of in-game Japan. One particularly memorable encounter is the Seashe
 R.E.P.O. How to Fix Audio if You Can't Hear Anyone
Mar 17, 2025 pm 06:10 PM
Can't hear other players' voices in the R.E.P.O. game? Even if your microphone is working properly, it can be a problem caused by audio settings or device conflicts. Here are some effective solutions to help you restore your voice chat functionality. 1. Check the output device Open the audio settings of R.E.P.O. and check the output device settings. If set to "Default", manually select your headset or speaker. Restart the game and test voice chat again. 2. Adjust Windows sound settings If R.E.P.O. does not output the sound to the correct device, check the Windows Sound Settings: Right-click the speaker icon in the taskbar and select Sound Settings. Under "Output",
 Where to find the Crane Control Keycard in Atomfall
Mar 28, 2025 am 02:17 AM
In Atomfall, discover hidden keys and passages, including multiple ways to access key locations. This guide focuses on using the Crane Control Keycard for easy, unguarded Entry to Skethermoor Prison, bypassing the need to cooperate with Captain Sims
 WWE 2K25: How To Unlock Everything In MyRise
Mar 15, 2025 pm 12:03 PM
WWE 2K25's MyRise mode is one of the best career modes in WWE games in recent years, telling an exciting story: a group of disgruntled NXT superstars take over WWE. However, enjoying the plot is not the only reason to play this mode. By playing MyRise, you can also unlock many content such as new superstars, new arenas, extra costumes, special weapons, and more. However, you can't get everything in a round of games, so you may want to prioritize certain items. Before you do this, you need to know what unlockable content is and how to get them. All this information is included here. Unlocked content through plot promotion By advancing the main plot and completing the chapters, you can solve
 R.E.P.O. Chat Commands and How to Use Them
Mar 17, 2025 pm 06:13 PM
R.E.P.O. provides some convenient chat instructions in the game to help you optimize the gaming experience. These instructions do not affect game balance, but are useful for taking clear screenshots or setting up visuals for content creation. How to use chat commands in R.E.P.O. To activate the command, please follow the steps below: Press the “T” key to open the chat window. Enter the “/” symbol, and then enter the command you want to use. Press Enter and the effect will take effect. To cancel the effect, enter the same command again or restart the game. Please note that these commands are only valid in multiplayer games and are not available in single player mode. Available chat commands /cinematic commands remove the game world
 Assassin's Creed Shadows - How To Find The Blacksmith And Unlock Weapon And Armour Customisation
Mar 22, 2025 am 01:06 AM
In Assassin's Creed Mirage, early game progression is limited until you recruit allies and unlock key features. Weapon customization, for instance, requires finding the blacksmith, Heiji. This unlocks through a side quest, impacting gameplay signif


