You can finally select from multiple window layouts on macOS without having to use a third-party program. But Windows 11 still does it better.
MAKEUSEOF VIDEO OF THE DAYSCROLL TO CONTINUE WITH CONTENT
Window Tiling in macOS is a game-changer. There's no doubt about it. However, one thing Apple hasn't done is give you as many ways to snap your windows into different positions.
✕ Remove AdsmacOS lets you put windows side by side, stack them on top of each other, and place one in each corner—for a total of four. You can also set one vertical window next to two smaller windows, giving you three windows on the screen at the same time.
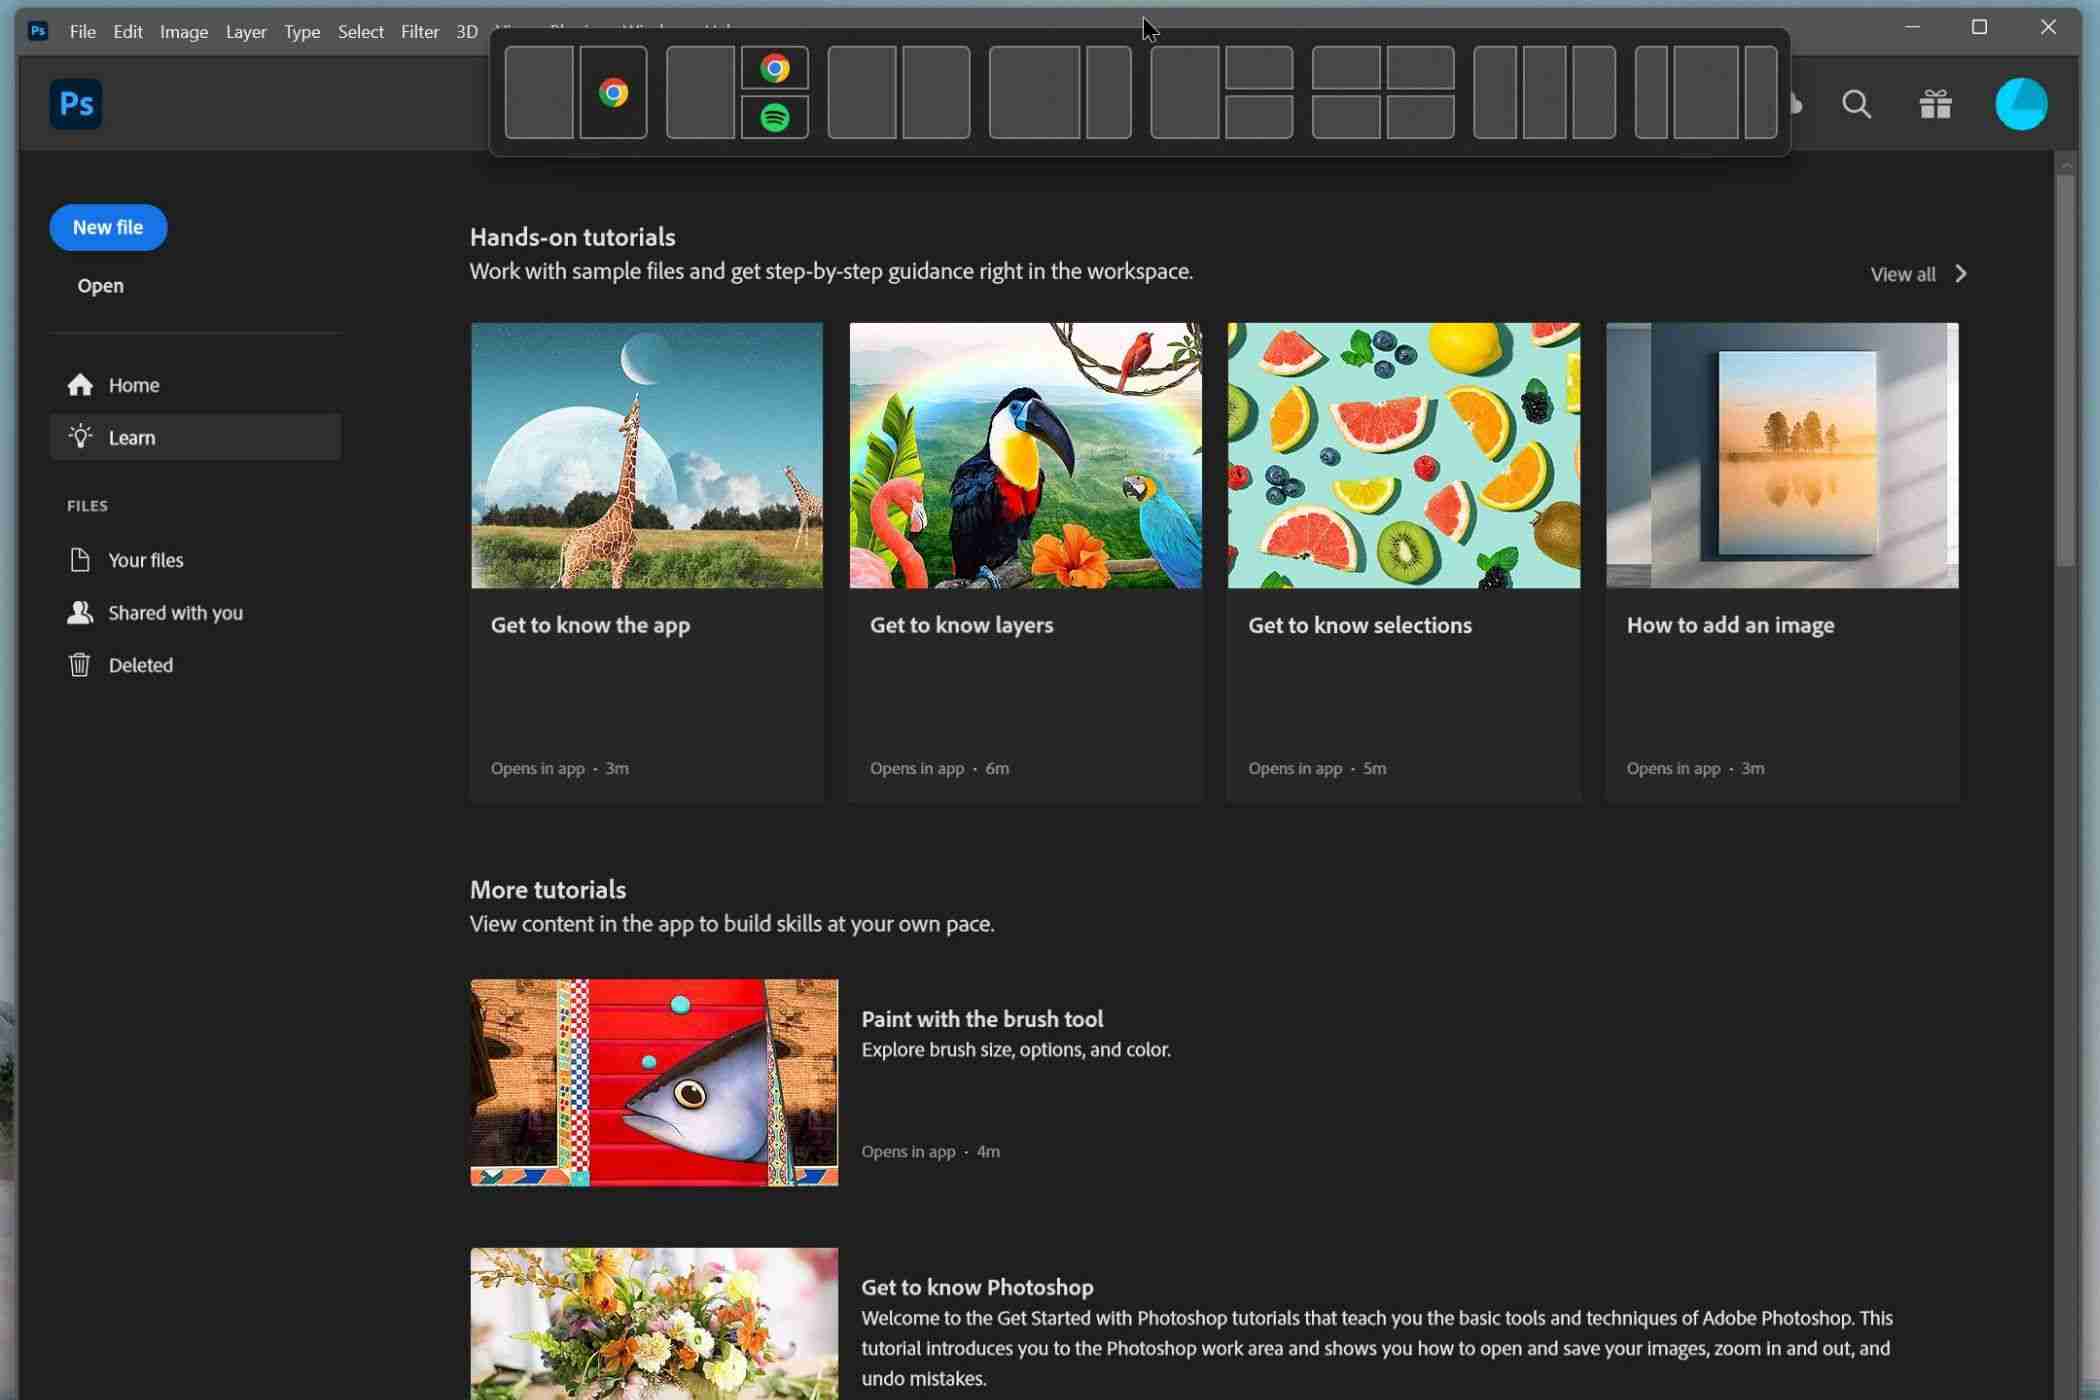
Windows gives you all those options, plus a few more. You can set up three windows side-by-side in equal columns or take two windows and make one take up 75% of the screen while the other only takes up 25%.
There’s also an option to place one smaller column on either side of a larger center window, which I’ve found helpful while working on research-heavy projects. However, the number of options you have can change based on your display size and resolution.
Where Windows really shines is in its ability to create custom Windows Snap layouts using Fancy Zones. This feature is found in PowerToys, a free suite of tools Microsoft offers all Windows users.
✕ Remove Ads
Another place Windows Snap Layouts excels over Window Tiling in macOS is in its popup selector. Both Windows and macOS offer a popup that appears when you hover over the maximize button for a window. While handy, the popup can also take a moment to appear.
However, Windows has a much faster popup you can take advantage of. This one appears anytime you drag a window to the top center of your screen. It allows you to drop the window into any of the configurations Windows Snap Layouts offers for quicker snapping, and it’s how I use Snap Layouts the most.
This should be turned on by default. If you’ve somehow disabled it, here’s how to turn it back on:
Open Settings > System > Multitasking to find the Snap windows options. Press the downward-facing arrow to see all the different options. Click the checkbox beside Show snap layouts when I drag a window to the top of my screen.
✕ Remove AdsAnother handy way to use Windows Snap Layouts and Window Tiling is through keyboard shortcuts. These are also easier to use on Windows, as you don’t have to press as many buttons to move your windows around.
On macOS you need to interact with three different keys to move windows into different snapping positions: Fn Control an arrow key. With Windows 11, you only have to press the Windows key and then an arrow key.
The keyboard shortcuts offer fewer snapping positions, but they are an excellent option if you’re trying to stack windows side-by-side quickly.
I'm happy Apple finally brought Window Tiling to macOS, and I no longer have to install a third-party app to take advantage of this great feature. However, Windows still offers more functionality, especially when you consider the customized layouts you can make with Fancy Zones. I hope Apple continues to expand Window Tiling in macOS with more layouts and customization. Until then, Windows gets my vote.
✕ Remove AdsThe above is the detailed content of Why Windows 11's Snap Layouts Is Better Than Window Tiling in macOS Sequoia. For more information, please follow other related articles on the PHP Chinese website!


