Fantasia's Neo Dimension: Omega Boss Guide
Every boss fight is something special in Fantasian Neo Dimension. You rarely encounter a boss that doesn't have some unique gimmick to it that makes it memorable. Even in Act 2, when you're fighting the same bosses again, they still feel fresh.

Omega though, they're one of the most special. They are massive, and feature permanent fixtures within the arena that make them an even tougher challenge. Except even reaching Omega is a challenge itself, so let's get you to them and claiming that treasure.
Starting The Omega Quest

Most quests in Fantasian unlock with story progression, or are unlocked as prerequisites of other quests. The Omega quest works a little differently as it requires you saving quite a few robots to unlock it.
After finding Eight of the ten total robots, they inform you of a secret treasure buried beneath the Thaumatech Factory. 'Omega' is the passcode, and it can be accessed from the factory rooftop. So let's go ahead and find this treasure.
Navigating The Thaumatech Factory Depths

Warp to the Thaumatech Rooftop, and then go right behind the elevator. This will trigger a small cutscene, and show you the door to the Depths, which is otherwise quite hard to make out. After this little scene, you head into the Depths, where a rather long and convoluted process begins.
There are no treasures in this section of the Depths, and no boss until the very end. Instead, you have to progress back and forth through three areas continually activating the arms to pick up crates so that you can finally reach the boss.
Prickle even tells you to warp back to the entrance if you get lost.
Here's the order in which you should go:
- From the Save Point, head straight ahead to activate the console at the end.
- Head back to the Save Point and go right, moving forward with the mechanical hand you just activated.
- From here, head to the central platform and then go south. This will bring you to another console.
- Head back to the centre platform and enter into the next area on the right.
This will bring you to the area Depths - 2nd Belt. Let's continue our console hunt:
- Starting from the north-east corner, head down the path and to the right until you reach the large platform. Activate the console.
- Next, head back to the entrance of this area and progress to the platform in the north-west, activating the console here.
- Head back to the east, and then go south to reach the arm you activated. Take it across to the large platform.
- Follow this path to the west to enter into the next area.
Now we're in the Top Secret Storage area. This is also where the boss is located, though we're not quite finished yet.
We're locked to a single platform here, so simply activate it and then return to the 2nd Belt.
- Back on the 2nd Belt, follow the path north-east and then turn left to take a box over to another platform.
- Follow this path around until you are near the large platform in the north-west, taking the small south turn before it.
- This arm will bring you to the isolated strip. Follow this path into the Top Secret Storage.
- Follow the path around, activating both consoles along the way.
We must now make our way back to the 1st Belt. There's not much of a puzzle to this, just trek backwards until you've come back through the entrance that originally brought you to the 2nd Belt.
- From the north-east corner, head to the central platform and proceed through the exit. This will bring you to the 2nd Belt. Follow this path around to return to the 1st Belt on the other side.
- At the end of this path will be a mechanical arm that will bring you across to the next platform. Activate the console here.
From here, the final mechanical arm to reach the boss is active. Head back to the 2nd Belt, and take the arm that brings you to the isolated strip to enter the Top Secret Storage area once again. Just walk ahead to be carried across, and make sure to save.
There is no new Warp point activated here. If you leave, you will have to walk through all of the Depths again.

There are a series of chests here, all locked with Machine Keys. These can be farmed in the Wormhole, if you are so inclined. Here's what's inside, in counter-clockwise formation:
- Onyx XL
- Pearl XL
- Diamond XL
- SP Capsule x2
- Opal XL
The Diamond XL will be especially helpful in the upcoming boss battle, followed by the Pearl XL, so prioritise getting these ones.
Battling Omega

Party Set-Up
There's no treasure, but there sure is a boss! Omega is one of the more challenging bosses in the game by merit of its extra mechanics. Prickle is mandatory for this battle, though they're quite helpful all the same for their healing and Lightning attacks. Leo also has Lightning abilities, making him essential for this battle.
For our third member, we'll mainly be making use of Ez. It can be helpful to set up Cheryl or Tan with buffs such as Charge, Concentrate, etc, to swap in when the boss is low on HP, though otherwise you want to focus on the former three almost exclusively.
Make sure you do the elemental trials before this so you can unlock skills like Plasma, and so you'll have an extra Diamond XL.
Here are the core skills you'll want for this fight:
- Leo - Samidare Lightning 2
- Prickle - Barrier All, Plasma, Heal All
- Ez - Quick All, All Potion L, All Potion
Omega hits hard, and primarily with Holy damage. As such, equip as many Diamonds as you can on your party. Put Diamond XLs on the two weakest members, and a Diamond L on the strongest to give everyone a high amount of defense. For the second Jewel, we would recommend a Ruby or Emerald.
How To Defeat Omega
Omega feels akin to a superboss in many ways, utilizing mechanics that no other boss in the game has had, and punishing every mistake with nigh on instant death. That said, they become much more manageable once you figure out their pattern.
<script> window.adsNinja = window.adsNinja || {}; window.adsNinja.queue = window.adsNinja.queue || []; window.adsNinja.queue.push(function(){ window.adsNinja.queue.push(function(){ var fallbackContent = ` <video> <source src='https://video.thegamerimages.com/2024/12/fantasian-neo-dimension-omega-boss-fight-made-with-clipchamp-1734016636.mp4' type='video/mp4'> Your browser does not support the video tag. `; try{ var result = window.adsNinja.monetizeVideo('.emaki-video-player-013b5837655e6939', JSON.parse(`{\"name\":\"Instream-InContent\",\"groupName\":\"content\"}`), JSON.parse(`{\"trackingId\":\"in-content\",\"playlist\":[{\"title\":\"Fantasian Neo Dimension Omega Boss Fight\",\"description\":\"\",\"length\":\"5:00\",\"mimeType\":\"video\/mp4\",\"url\":\"https:\/\/video.thegamerimages.com\/2024\/12\/fantasian-neo-dimension-omega-boss-fight-made-with-clipchamp-1734016636.mp4\",\"thumbnailLink\":\"https:\/\/static1.thegamerimages.com\/wordpress\/wordpress\/wp-content\/uploads\/wm\/2024\/12\/20241209235731_1.jpg?fit=crop&w=1024&h=576\",\"textTracks\":[{\"kind\":\"subtitles\",\"label\":\"English\",\"language\":\"en\",\"url\":\"https:\/\/video.thegamerimages.com\/2024\/12\/fantasian-neo-dimension-omega-boss-fight-made-with-clipchamp-1734016636-1734017115.vtt\",\"default\":false}]}]}`)); if(!result){ console.warn('Failed to load AdsNinja video player.'); document.getElementById('emaki-video-player-013b5837655e6939').innerHTML = fallbackContent; } } catch(error){ console.warn('Failed to load AdsNinja video player.'); document.getElementById('emaki-video-player-013b5837655e6939').innerHTML = fallbackContent; } }); }); </script>The boss itself is in the centre, while they have two devices to the left and right of them. These are weak to Lightning damage, and increase the strength of all of Omega's moves while they are active. They work in stages though, going from fully powered, to weakened, to depleted.
They also correspond to each hand. The device on the left empowers Omega's left-handed moves, and the one on the right for its right-handed moves. Omega always attacks with physical attacks with its left hand (from your perspective), and Holy with the right. None of the attacks are weak, but the Holy attacks deal obscene damage even with Diamonds, so focus on destroying this device first.
Omega also can't be debuffed at all, so you really do just have to focus on destroying the devices to mitigate damage.
This is Omega's structure for the most part, though they also count down after each attack. Once they hit zero, they activate Overboost. This fully restores both energy devices, and gives you a few turns to destroy them both. After it turns to Omega's turn once again, they will attack with both arms in a single turn, the attacks dependent on how damaged the energy devices are.
- With the right device at full or half strength, Omega will attack with Sacrament Omega or Sacrament Lambda respectively, attacking the whole party. Fully depleted, they cast Sacrament, dealing Holy Damage to a single party member.
- With the left device at full or half-strength, Omega will attack with Ultra Swing, attacking the whole party. Fully depleted, they will attack with just Ultra Punch on a single character.
During this phase, it is essential to have Quick All applied to the party so they can get as many turns as possible. If you have it, Bounce Field can be very helpful to cast around one of the Energy Devices, giving Prickle's Plasma attack much more damage-dealing potential. This Overboost phase is also where Tension skills are best used.
Omega will rest for a few turns after their Overboost phase, giving you time to recover and get in some free hits.
And that's the whole flow. Omega doesn't gain any new moves as the fight goes on, though they will start to use moves like Thaumatech Laser more frequently, which hits the whole party while lowering their defence. On top of healing, Ez's buffs like Quick All are essential for how often the party gets debuffed.
After Omega is finally defeated, you are rewarded with the Positron Blaster for Prickle.

The above is the detailed content of Fantasia's Neo Dimension: Omega Boss Guide. For more information, please follow other related articles on the PHP Chinese website!

Hot AI Tools

Undresser.AI Undress
AI-powered app for creating realistic nude photos

AI Clothes Remover
Online AI tool for removing clothes from photos.

Undress AI Tool
Undress images for free

Clothoff.io
AI clothes remover

AI Hentai Generator
Generate AI Hentai for free.

Hot Article

Hot Tools

Notepad++7.3.1
Easy-to-use and free code editor

SublimeText3 Chinese version
Chinese version, very easy to use

Zend Studio 13.0.1
Powerful PHP integrated development environment

Dreamweaver CS6
Visual web development tools

SublimeText3 Mac version
God-level code editing software (SublimeText3)

Hot Topics
 1381
1381
 52
52
 R.E.P.O. Energy Crystals Explained and What They Do (Yellow Crystal)
Mar 18, 2025 am 12:07 AM
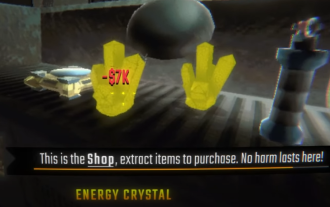
I bought expensive weapons or drones in R.E.P.O. but found that the energy was exhausted and became useless? Don't worry, you don't have to spend $50,000 on replacements, just charge your gear! That strange machine at the back of your truck is not a decoration. Here are how to get energy crystals and use them to keep your gear running continuously to avoid bankruptcy. More Reads: All R.E.P.O. Items How to get energy crystal You can buy energy crystals from the service store between levels. They usually cost between $7,000 and $9,000 — while expensive, they are far cheaper than repurchasing gear. In the first few levels, no purchase is required. You don't need them for the time being, so
 R.E.P.O. Best Graphic Settings
Mar 18, 2025 am 01:33 AM
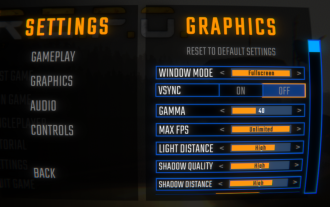
R.E.P.O. Game Screen Setting Guide: How to improve frame rate while ensuring picture quality? This article will guide you to optimize game settings and find the best balance point. Step 1: Full Screen Mode and Frame Rate Adjustment Before adjusting other settings, make sure the game is running in the best mode: Display Mode: Full Screen - Always use Full Screen Mode for optimal performance. Window mode will reduce the frame rate. Vertical Sync (V-Sync): Off - Unless a screen tear occurs, turn off vertical synchronization for a smoother gaming experience. Maximum FPS: Unlimited - If your computer is configured strongly, you can set it to Unlimited. Otherwise, it is recommended to limit it to 60 frames or match your monitor refresh rate. second
 Assassin's Creed Shadows: Seashell Riddle Solution
Mar 28, 2025 am 01:58 AM
Assassin's Creed: Shadows boasts a vast world brimming with activities beyond the main storyline. Side missions and various encounters significantly enrich the immersive experience of in-game Japan. One particularly memorable encounter is the Seashe
 R.E.P.O. How to Fix Audio if You Can't Hear Anyone
Mar 17, 2025 pm 06:10 PM
Can't hear other players' voices in the R.E.P.O. game? Even if your microphone is working properly, it can be a problem caused by audio settings or device conflicts. Here are some effective solutions to help you restore your voice chat functionality. 1. Check the output device Open the audio settings of R.E.P.O. and check the output device settings. If set to "Default", manually select your headset or speaker. Restart the game and test voice chat again. 2. Adjust Windows sound settings If R.E.P.O. does not output the sound to the correct device, check the Windows Sound Settings: Right-click the speaker icon in the taskbar and select Sound Settings. Under "Output",
 R.E.P.O. Chat Commands and How to Use Them
Mar 17, 2025 pm 06:13 PM
R.E.P.O. provides some convenient chat instructions in the game to help you optimize the gaming experience. These instructions do not affect game balance, but are useful for taking clear screenshots or setting up visuals for content creation. How to use chat commands in R.E.P.O. To activate the command, please follow the steps below: Press the “T” key to open the chat window. Enter the “/” symbol, and then enter the command you want to use. Press Enter and the effect will take effect. To cancel the effect, enter the same command again or restart the game. Please note that these commands are only valid in multiplayer games and are not available in single player mode. Available chat commands /cinematic commands remove the game world
 Will R.E.P.O. Have Crossplay?
Mar 18, 2025 am 01:07 AM
At present, "R.E.P.O." does not support cross-platform games, and the official has not confirmed whether it will support it in the future. The game is currently only available on PC platforms (early experience through Steam), so console players are temporarily unable to play. Why does R.E.P.O. not support cross-platform games? Released on PC platforms only – The console version of the game has not been announced yet. Early Access Phase – Developers are still refining the game, and cross-platform gaming is not a current priority. Host porting is not confirmed – without a host version, cross-platform gaming is simply impossible. Will cross-platform games be supported in the future? There is no official news on whether R.E.P.O. will launch a console version and whether it will support cross-platform games. However,
 Where to find the Crane Control Keycard in Atomfall
Mar 28, 2025 am 02:17 AM
In Atomfall, discover hidden keys and passages, including multiple ways to access key locations. This guide focuses on using the Crane Control Keycard for easy, unguarded Entry to Skethermoor Prison, bypassing the need to cooperate with Captain Sims
 Saving in R.E.P.O. Explained (And Save Files)
Mar 19, 2025 am 12:22 AM
Want to save progress in R.E.P.O.? Good news: You can! Bad news: Only under very specific conditions…but this will change soon. Read more about the upcoming update that involves a new save menu and multiple save slots. Save mechanism Complete the game run once, then exit from the menu and do not start another game immediately. If you do it correctly, your progress will be saved to continue from where you last left. If everyone dies, your save will be deleted – no second chance. The game will simply erase your existence as if you never existed. Basically, if you complete a level and want to keep your progress, make sure to stop and exit before jumping into another task. This means


