
 Backend Development
Python Tutorial
Building AI-Powered Real-Time Object Detection with OpenCV, Flask, Gemini Vision, and GitHub Actions CI/CD on AWS EC2
Backend Development
Python Tutorial
Building AI-Powered Real-Time Object Detection with OpenCV, Flask, Gemini Vision, and GitHub Actions CI/CD on AWS EC2
Building AI-Powered Real-Time Object Detection with OpenCV, Flask, Gemini Vision, and GitHub Actions CI/CD on AWS EC2

INTRODUCTION:
Imagine a system that can analyze live video feeds in real time, interpret scenes, and respond intelligently to questions about the environment—just like a virtual assistant with eyes. This is the potential of combining cutting-edge technologies like OpenCV for video processing and Google's Gemini vision model, leveraging its latest "gemini-1.5-flash-latest" model.
In this article, I will guide you through building a Real-Time Object Detection System that uses live video streaming and AI-powered scene analysis to deliver insightful, context-aware responses. We'll deploy the application on AWS EC2, setting the stage for scalability and real-world use while employing Github Actions for automated CI/CD, ensuring a seamless update pipeline.
By the end of this tutorial, you'll have a fully functional AI-powered system ready for deployment, with the confidence to expand and customize it for various use cases.
PROJECT STRUCTURE
project/
├── app.py              # Flask application code
├── requirements.txt    # Python dependencies
├── templates/
│   └── index.html     # Frontend UI
└── .env               # Environment variables (API keys, etc.)
Core Components
- Real-Time Video Capture (OpenCV) The WebcamCapture class in app.py handles video streaming:
self.stream = cv2.VideoCapture(0) # Open the default webcam
This ensures efficient, thread-safe frame capture and processing.
- AI-Powered Object Detection (Google Gemini) Using the Gemini model, we analyze frames for real-time scene understanding:
self.model = ChatGoogleGenerativeAI(model="gemini-1.5-flash-latest")
response = self.chain.invoke({"prompt": prompt, "image_base64": image_base64})
- Flask Backend The Flask application provides endpoints for video streaming, AI queries, and system status checks:
/video_feed: Streams live video.
/process_query: Handles AI-powered analysis based on user input and video frames.
-
Frontend UI
The index.html file provides a responsive web interface for interacting with the system. It captures user queries and displays real-time AI responses.
PREREQUISITES
An AWS account.
A registered domain name (e.g., example.com).
A Google Cloud Account or Open AI account
GitHub actions configured in your repository.
4. Basic knowledge of SSH and Linux command-line tools.
APPLICATION CLONING & DEPLOYMENT
Step 1: Clone the Repository, Generate the API & Push the application files to Github
A. Clone the repository
$ git clone https://github.com/Abunuman/Real-Time-ODS.git
$ cd Real-Time-ODS
B. Generate your API key and add to a .env file
i. Create a .env file either manually from the options available on the left-hand side of your text editor (I used VScode)
OR
On the terminal, run:
$ touch .env
Then add these in the .env
GOOGLE_API_KEY=your_google_api_key
OPENAI_API_KEY=your_openai_api_key
FLASK_DEBUG=True
ii. Log into Google Cloud and follow these steps to generate your API key.

a. Navigate to the API & Services Section

b. Click on Credentials then follow the other steps below
Create Credentials > API Key , then the API Key is generated. Remember to note the name of your API key. You can also give it a name during the process.


Copy the API Key generated, go back to your .env file and replace your_google_api_key with the key you just copied.
c. Enable Gemini API
Search for Gemini API and click on ENABLE

Confirm that your API Key is under the METRICS and Credentials section under the Enabled Gemini API.

iii. Create a .gitignore file and add .env to the file so that it is not pushed to github.
N.B.: Standard practice is to ensure that secrets and environment variables are not exposed to the public. Hence the need for a .gitignore to ignore files added therein while pushing to Github.
B. Push to Repository.
i. Create a Github repository with the application name and follow the commands below to push to github
project/
├── app.py              # Flask application code
├── requirements.txt    # Python dependencies
├── templates/
│   └── index.html     # Frontend UI
└── .env               # Environment variables (API keys, etc.)
N.B: change repository-name to your repository name
Step 2: Set up Github Actions Environment Secrets
Configure your AWS IAM user secrets and environment variables needed for the project.
Deploying the project through AWS requires that AWS secrets as well as the environment variables added locally to your .env are added to the Github Actions environment. This is to ensure access to the specific AWS account meant for deployment and also ensure the necessary environment variables are available within the deployment environment.
i. Navigate to Settings in your repository

ii. Click on Secrets and Variables > Actions

iii. Add your Secrets and Variables like below

.

- Select an instance type (e.g., t2.micro for free tier users).

- Create and download a key pair (.pem file) for SSH access.
Create a new key pair or use an existing one.
If you are creating a new key pair, click on create key pair and give it a name of your choice.

Select Key Pair type as RSA
File format as .pem
The key pair is automatically downloaded to your system.
- Configure Security Groups

Allow the following inbound rules:
i. HTTP (port 80): For serving your application.
ii. HTTPS (port 443): For secure access.
iii. SSH (port 22): For management access.

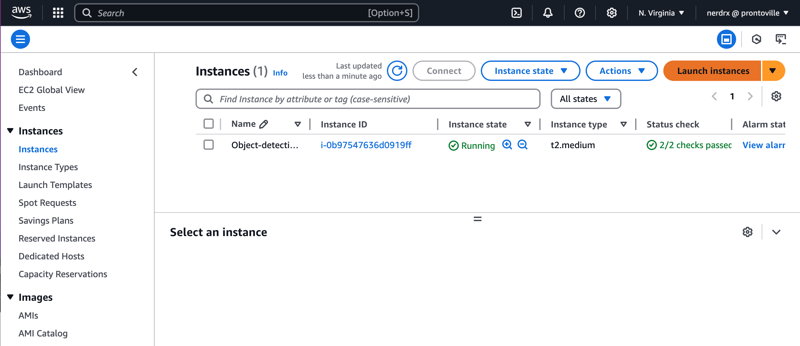
- Click on Launch instance and allow the instance to be fully launched.
Now your instance is ready to use once the status shows “Running”.
ii. Configure the key pair (.pem key) for SSH access
For Mac book users or Linux users with bash terminal, configure your key pair for SSH access thus:
a. Open the downloaded .pem key using VScode or Xcode
b. On your terminal, navigate to the .ssh directory from the root directory(~)
project/
├── app.py              # Flask application code
├── requirements.txt    # Python dependencies
├── templates/
│   └── index.html     # Frontend UI
└── .env               # Environment variables (API keys, etc.)
c. Create a .pem file in the .ssh directory using nano or vim text editors; I will be using nano in this tutorial.
Install nano if you don't have it installed.
For macbook users
self.stream = cv2.VideoCapture(0) # Open the default webcam
For linux users
self.model = ChatGoogleGenerativeAI(model="gemini-1.5-flash-latest")
response = self.chain.invoke({"prompt": prompt, "image_base64": image_base64})
Having installed it, create the .pem file in the .ssh directory using nano.
Ensure the file to be created bears the exact name of your .pem file.
$ git clone https://github.com/Abunuman/Real-Time-ODS.git
$ cd Real-Time-ODS
Then copy the already opened .pem file and paste in the .pem to be created in the .ssh directory.
Press Ctrl X, then Y , then Enter to save.
d. Change the .pem file permission
GOOGLE_API_KEY=your_google_api_key
OPENAI_API_KEY=your_openai_api_key
FLASK_DEBUG=True
iii. Access the Instance - SSH into your EC2 instance:
Click on the Instance ID . Once the instance is in running state, select on the connect option
Once you are at Connect page , Go to SSH Client

Then copy the last command on the page that looks like this:
$ git init
$ git add .
$ git commit -m "first commit"
$ git branch -M main
$ git remote add origin https://github.com/Abunuman/repository-name.git
git push -u origin main
Paste this on your terminal and press enter. You should connect seamlessly.
For Windows Users
- Windows Setup
Open CMD on your windows machine
Locate desired directory where .pim file is stored
Ideally from this directory , we can run the copied ssh command and we should be able to connect to EC2. However, sometimes we get a security permissions error when we run the ssh command.
We have to change the permissions to the .pem file.
For that follow the steps below.
Locate the .pem file folder , right click on the file and select properties
Go to Security tab
Go to Advanced tab
Click Disable inheritance
This Advance options also shows other user having all permissions to .pem file. Remove permission for all other users
Add the user with which you are trying to connect to EC2 if not already present in the user list.
Enable all permissions for this user.
Ideally with these steps, you should not encounter an error.
Run the SSH command from CMD prompt
Once the permissions are fixed , prompt will successfully connect to EC2
Now you are successfully completed the steps and you can run commands from windows CMD on EC2 instance.
iv.Install Dependencies - Update the package list and install necessary packages:
Having connected to your EC2 instance via SSH, install dependencies on EC2.
On your connected terminal, run the following commands:
project/
├── app.py              # Flask application code
├── requirements.txt    # Python dependencies
├── templates/
│   └── index.html     # Frontend UI
└── .env               # Environment variables (API keys, etc.)
Check the version of python3 installed, ensure its 3.12
self.stream = cv2.VideoCapture(0) # Open the default webcam
Step 2: Deploying the Application
Set Up the Application
Transfer app.py, index.html, and requirements.txt to the EC2 instance:
self.model = ChatGoogleGenerativeAI(model="gemini-1.5-flash-latest")
response = self.chain.invoke({"prompt": prompt, "image_base64": image_base64})
Step 3: Configuring GitHub Actions for CI/CD
Create a Workflow File in your repository, add a .github/workflows/main.yml file:
$ git clone https://github.com/Abunuman/Real-Time-ODS.git
$ cd Real-Time-ODS
CONCLUSION
In this tutorial, we embarked on a comprehensive journey to build and deploy a real-time object detection system that seamlessly integrates OpenCV for live video capture and Google's ChatGoogleGenerativeAI for intelligent scene analysis. From configuring the application locally to deploying it securely on AWS EC2 with a custom domain and SSL, we covered every essential step to transform your idea into a functional and scalable solution.
This project highlights the power of combining cutting-edge technologies like Flask, OpenCV, and AI to solve real-world problems while ensuring best practices for cloud deployment. By following these steps, you've not only deployed a robust AI-powered system but also ensured scalability, security, and efficient CI/CD pipelines.
The above is the detailed content of Building AI-Powered Real-Time Object Detection with OpenCV, Flask, Gemini Vision, and GitHub Actions CI/CD on AWS EC2. For more information, please follow other related articles on the PHP Chinese website!

Hot AI Tools

Undresser.AI Undress
AI-powered app for creating realistic nude photos

AI Clothes Remover
Online AI tool for removing clothes from photos.

Undress AI Tool
Undress images for free

Clothoff.io
AI clothes remover

Video Face Swap
Swap faces in any video effortlessly with our completely free AI face swap tool!

Hot Article
Hot Tools

Notepad++7.3.1
Easy-to-use and free code editor

SublimeText3 Chinese version
Chinese version, very easy to use

Zend Studio 13.0.1
Powerful PHP integrated development environment

Dreamweaver CS6
Visual web development tools

SublimeText3 Mac version
God-level code editing software (SublimeText3)
Hot Topics
 1663
1663
 14
1420
52
1315
25
1266
29
1239
24
14
1420
52
1315
25
1266
29
1239
24

 Python vs. C : Applications and Use Cases Compared
Apr 12, 2025 am 12:01 AM
Python vs. C : Applications and Use Cases Compared
Apr 12, 2025 am 12:01 AM
Python is suitable for data science, web development and automation tasks, while C is suitable for system programming, game development and embedded systems. Python is known for its simplicity and powerful ecosystem, while C is known for its high performance and underlying control capabilities.
 The 2-Hour Python Plan: A Realistic Approach
Apr 11, 2025 am 12:04 AM
The 2-Hour Python Plan: A Realistic Approach
Apr 11, 2025 am 12:04 AM
You can learn basic programming concepts and skills of Python within 2 hours. 1. Learn variables and data types, 2. Master control flow (conditional statements and loops), 3. Understand the definition and use of functions, 4. Quickly get started with Python programming through simple examples and code snippets.
 Python: Games, GUIs, and More
Apr 13, 2025 am 12:14 AM
Python: Games, GUIs, and More
Apr 13, 2025 am 12:14 AM
Python excels in gaming and GUI development. 1) Game development uses Pygame, providing drawing, audio and other functions, which are suitable for creating 2D games. 2) GUI development can choose Tkinter or PyQt. Tkinter is simple and easy to use, PyQt has rich functions and is suitable for professional development.
 How Much Python Can You Learn in 2 Hours?
Apr 09, 2025 pm 04:33 PM
How Much Python Can You Learn in 2 Hours?
Apr 09, 2025 pm 04:33 PM
You can learn the basics of Python within two hours. 1. Learn variables and data types, 2. Master control structures such as if statements and loops, 3. Understand the definition and use of functions. These will help you start writing simple Python programs.
 Python vs. C : Learning Curves and Ease of Use
Apr 19, 2025 am 12:20 AM
Python vs. C : Learning Curves and Ease of Use
Apr 19, 2025 am 12:20 AM
Python is easier to learn and use, while C is more powerful but complex. 1. Python syntax is concise and suitable for beginners. Dynamic typing and automatic memory management make it easy to use, but may cause runtime errors. 2.C provides low-level control and advanced features, suitable for high-performance applications, but has a high learning threshold and requires manual memory and type safety management.
 Python and Time: Making the Most of Your Study Time
Apr 14, 2025 am 12:02 AM
Python and Time: Making the Most of Your Study Time
Apr 14, 2025 am 12:02 AM
To maximize the efficiency of learning Python in a limited time, you can use Python's datetime, time, and schedule modules. 1. The datetime module is used to record and plan learning time. 2. The time module helps to set study and rest time. 3. The schedule module automatically arranges weekly learning tasks.
 Python: Exploring Its Primary Applications
Apr 10, 2025 am 09:41 AM
Python: Exploring Its Primary Applications
Apr 10, 2025 am 09:41 AM
Python is widely used in the fields of web development, data science, machine learning, automation and scripting. 1) In web development, Django and Flask frameworks simplify the development process. 2) In the fields of data science and machine learning, NumPy, Pandas, Scikit-learn and TensorFlow libraries provide strong support. 3) In terms of automation and scripting, Python is suitable for tasks such as automated testing and system management.
 Python: Automation, Scripting, and Task Management
Apr 16, 2025 am 12:14 AM
Python: Automation, Scripting, and Task Management
Apr 16, 2025 am 12:14 AM
Python excels in automation, scripting, and task management. 1) Automation: File backup is realized through standard libraries such as os and shutil. 2) Script writing: Use the psutil library to monitor system resources. 3) Task management: Use the schedule library to schedule tasks. Python's ease of use and rich library support makes it the preferred tool in these areas.
