Marvel Rivals: How To Customize Crosshair
In Marvel Rivals, your crosshair does more than point at things, it’s your not-so-secret weapon for getting headshots on competition. A generic reticle is fine, but if you want to dominate in style, customization is the way to go. Whether you’re tweaking colors to match your vibe or setting up a hero-specific design for your favorite Avenger, this guide has you covered.

Not feeling creative? We’ll even show you how to swipe some pre-made designs. We have all the tools you need to turn your crosshair into what you want it to be. Let’s dive in and give your reticle the glow-up it deserves.
How To Customize Crosshair

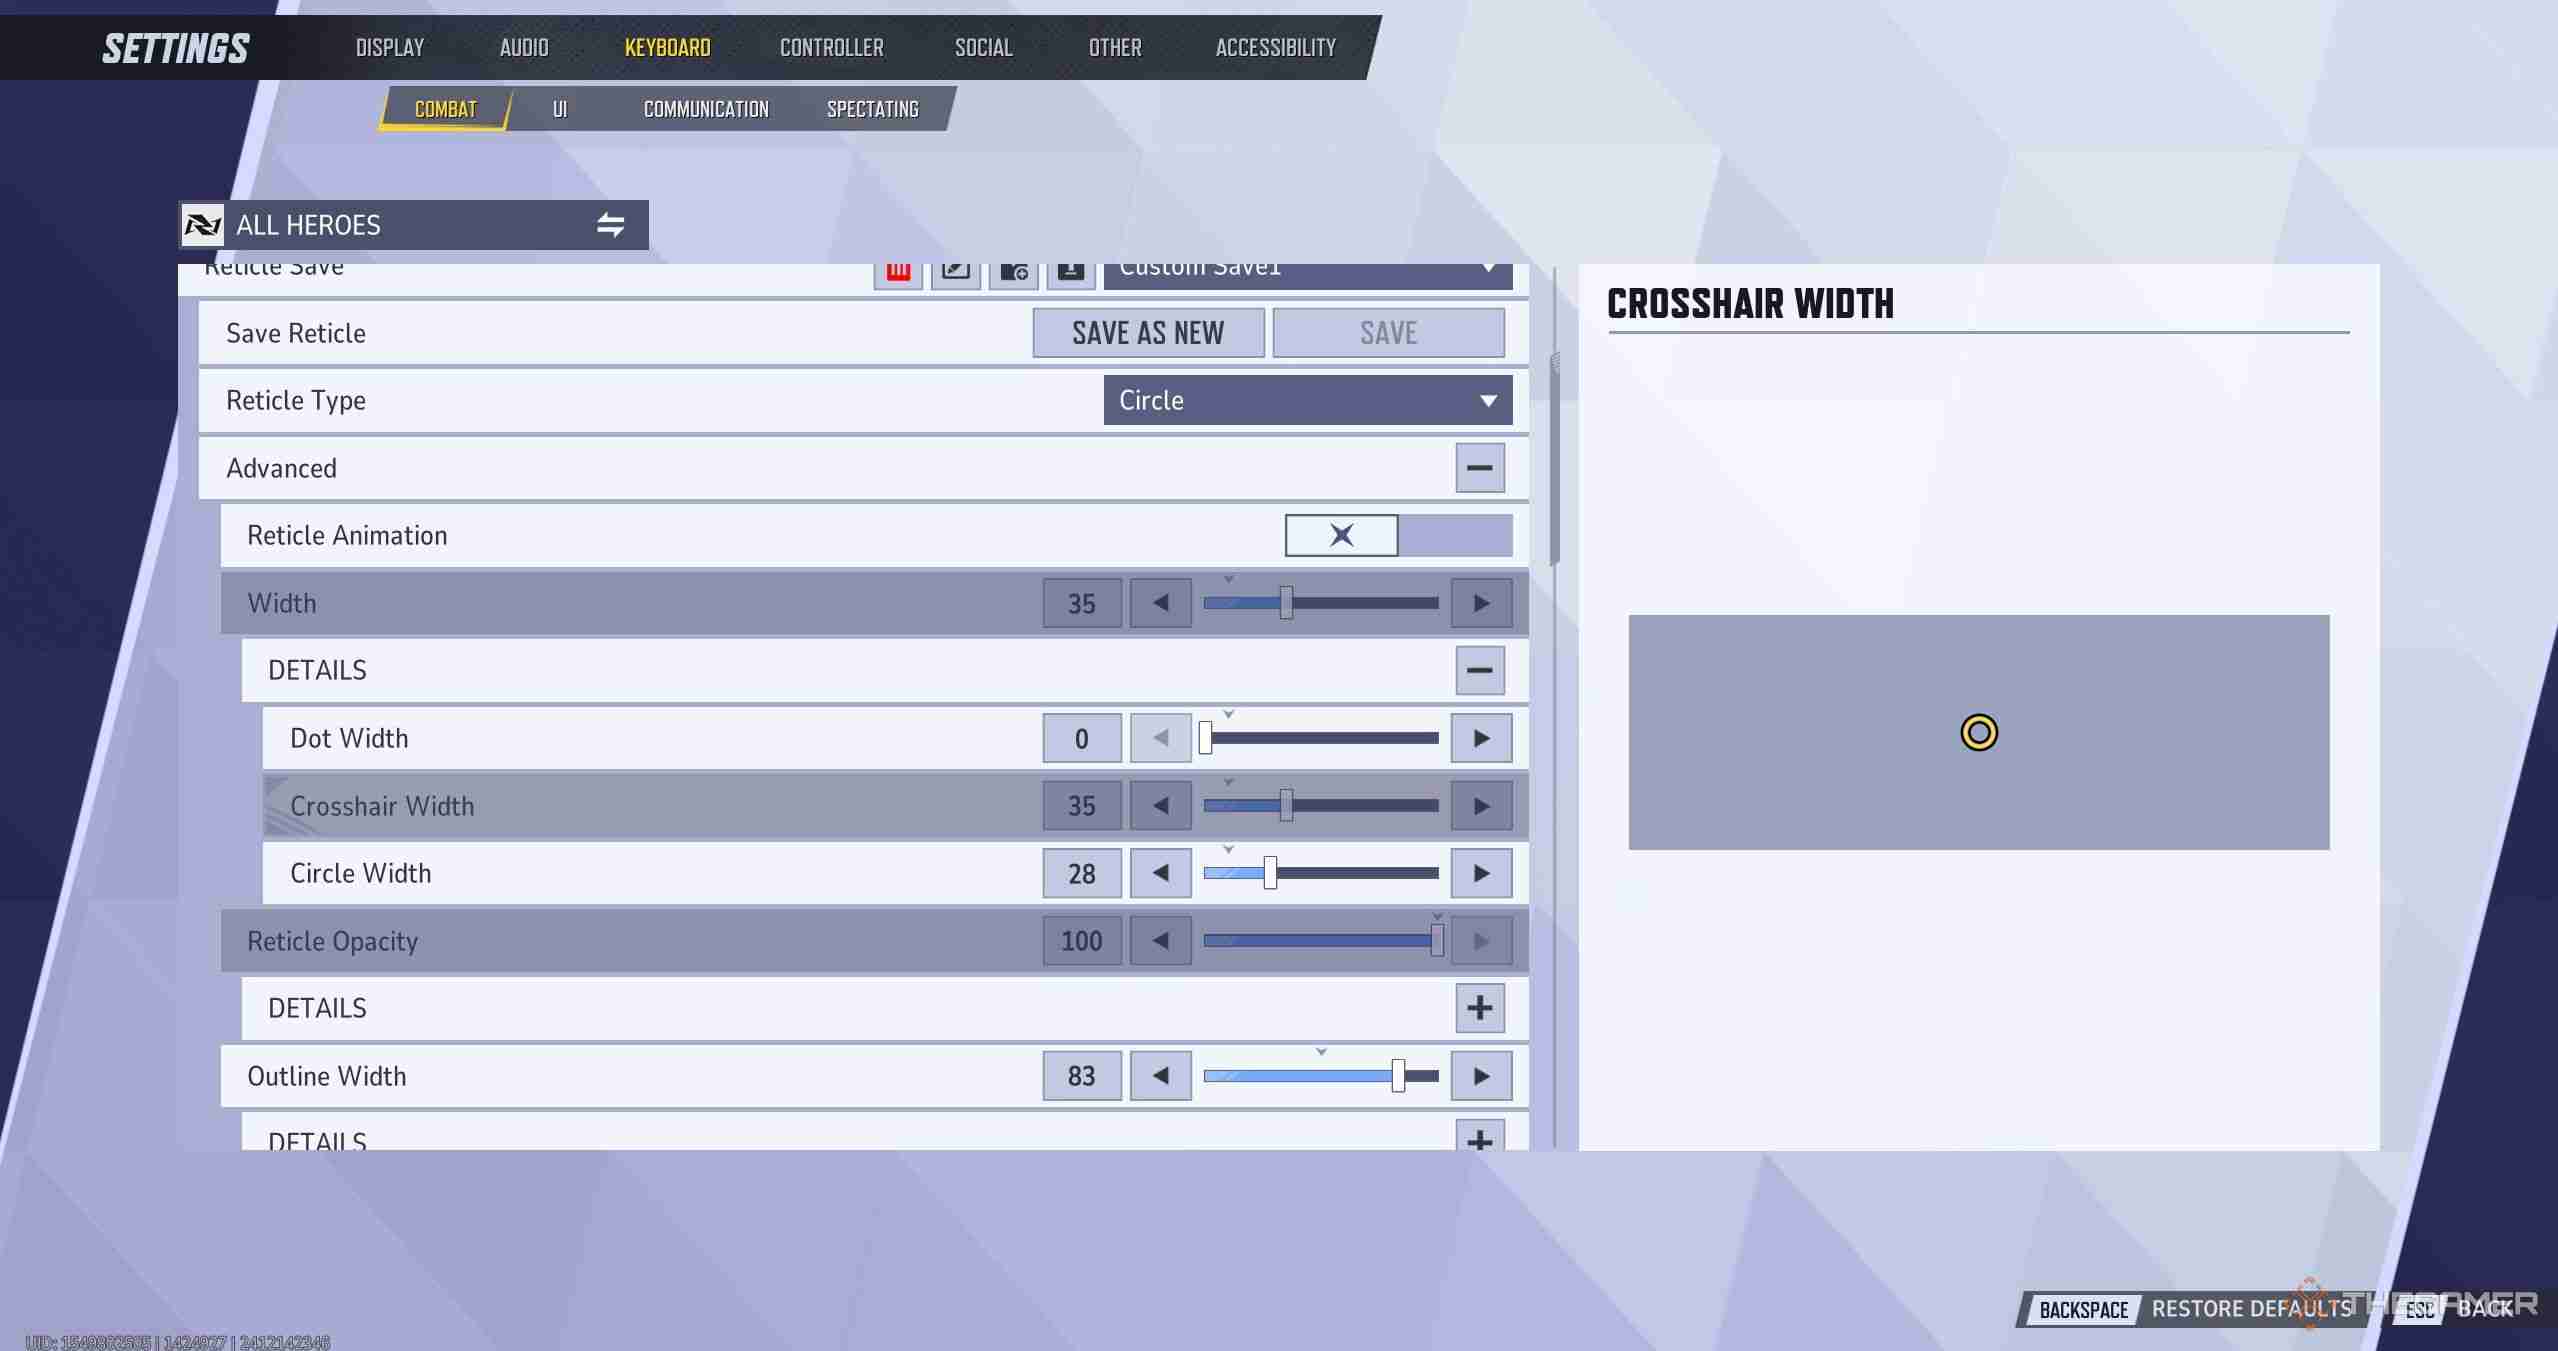
To adjust your reticle, head to the Settings menu and navigate to either the Keyboard or Controller options. Under the Combat section, scroll down to find HUD settings. Here, you’ll have access to various reticle settings.
To unlock advanced options, click the plus icon next to 'Advanced.' You can modify several parameters, including reticle animation, dot width, circle width, reticle opacity, outline width, outline opacity, center gap, and color. Here is a more specific breakdown of each setting:
|
Setting |
Description |
|---|---|
|
Reticle Animation |
Expands the reticle during actions like shooting, jumping, or using movement abilities when toggled on. |
|
Dot Width |
Modifies the size of the central dot within the reticle. |
|
Circle Width |
Changes the thickness of the circle surrounding the dot. |
|
Reticle Opacity |
Adjusts the transparency of the reticle, letting you see more of the environment. Transparency can be customized separately for the dot or circle. |
|
Outline Width |
Alters the thickness of the outline surrounding the reticle. This setting also allows for separate adjustments to the dot or circle. |
|
Outline Opacity |
Controls the transparency of the outline, enhancing visibility of the surroundings. You can apply this to the dot or circle individually. |
|
Center Gap |
Determines the overall size of the reticle by modifying the spacing between its elements. |
|
Color |
Lets you customize the reticle’s color, choosing from white, red, yellow, green, blue, or a custom color using hex or RGB codes. |
Once you're done, be sure to save the reticle.
How To Import Crosshair

If creating a custom crosshair feels daunting, you can import pre-made designs. At the top of the reticle settings screen, click the icon next to the 'Default' dropdown, labeled Import Save. Enter a code for the desired reticle design. Here are some of our favorite codes:
|
Crosshair |
Photo |
Code |
|---|---|---|
|
Blue and small |
 |
2;0.0;4.0,4.0,4.0,9.0;100.0,100.0,100.0,100.0;55.0,55.0,55.0,55.0;100.0,100.0,100.0,100.0;0.0,0.0,0.0,0.0;33.0,3.0,50.0,33.0;15.0;100.0,100.0,100.0,100.0;0.0;4,4,4,4;1.0,1.0,1.0; |
|
Pink and long |
 |
4;0.0;10.0,10.0,10.0,10.0;100.0,100.0,100.0,100.0;50.0,50.0,50.0,50.0;100.0,100.0,100.0,100.0;0.0,0.0,0.0,0.0;33.0,27.0,0.0,33.0;91.0;100.0,100.0,100.0,100.0;0.0;5,5,5,5;1.0,0.2,0.953; |
|
Small green dot |
 |
3;0.0;10.0,10.0,10.0,10.0;100.0,100.0,100.0,100.0;50.0,50.0,50.0,50.0;100.0,100.0,100.0,100.0;0.0,0.0,0.0,0.0;0.0,0.0,0.0,0.0;30.0;100.0,100.0,100.0,100.0;0.0;3,3,3,3;1.0,1.0,1.0; |
|
White circle with cross |
 |
4;0;47.0,9.0,40.0,44.0;77.0,100.0,100.0,23.0;29.0,29.0,29.0,29.0;100.0,16.0,0.0,0.0;0.0,0.0,0.0,100.0;32.0,32.0,32.0,32.0;8.0;77.0,100.0,100.0,23.0;0.0;5.0,0.0,0.0,5.0;0.329,0.498,1.0; |
|
Yellow circle |
 |
1;0;35.0,35.0,28.0,0.0;100.0,100.0,100.0,0.0;83.0,83.0,83.0,83.0;100.0,100.0,100.0,100.0;11.0,11.0,11.0,11.0;33.0,33.0,22.0,33.0;30.0;100.0,100.0,100.0,0.0;0.0;2.0,2.0,2.0,2.0;1.0,1.0,1.0; |
How To Adjust Crosshair For Individual Heroes

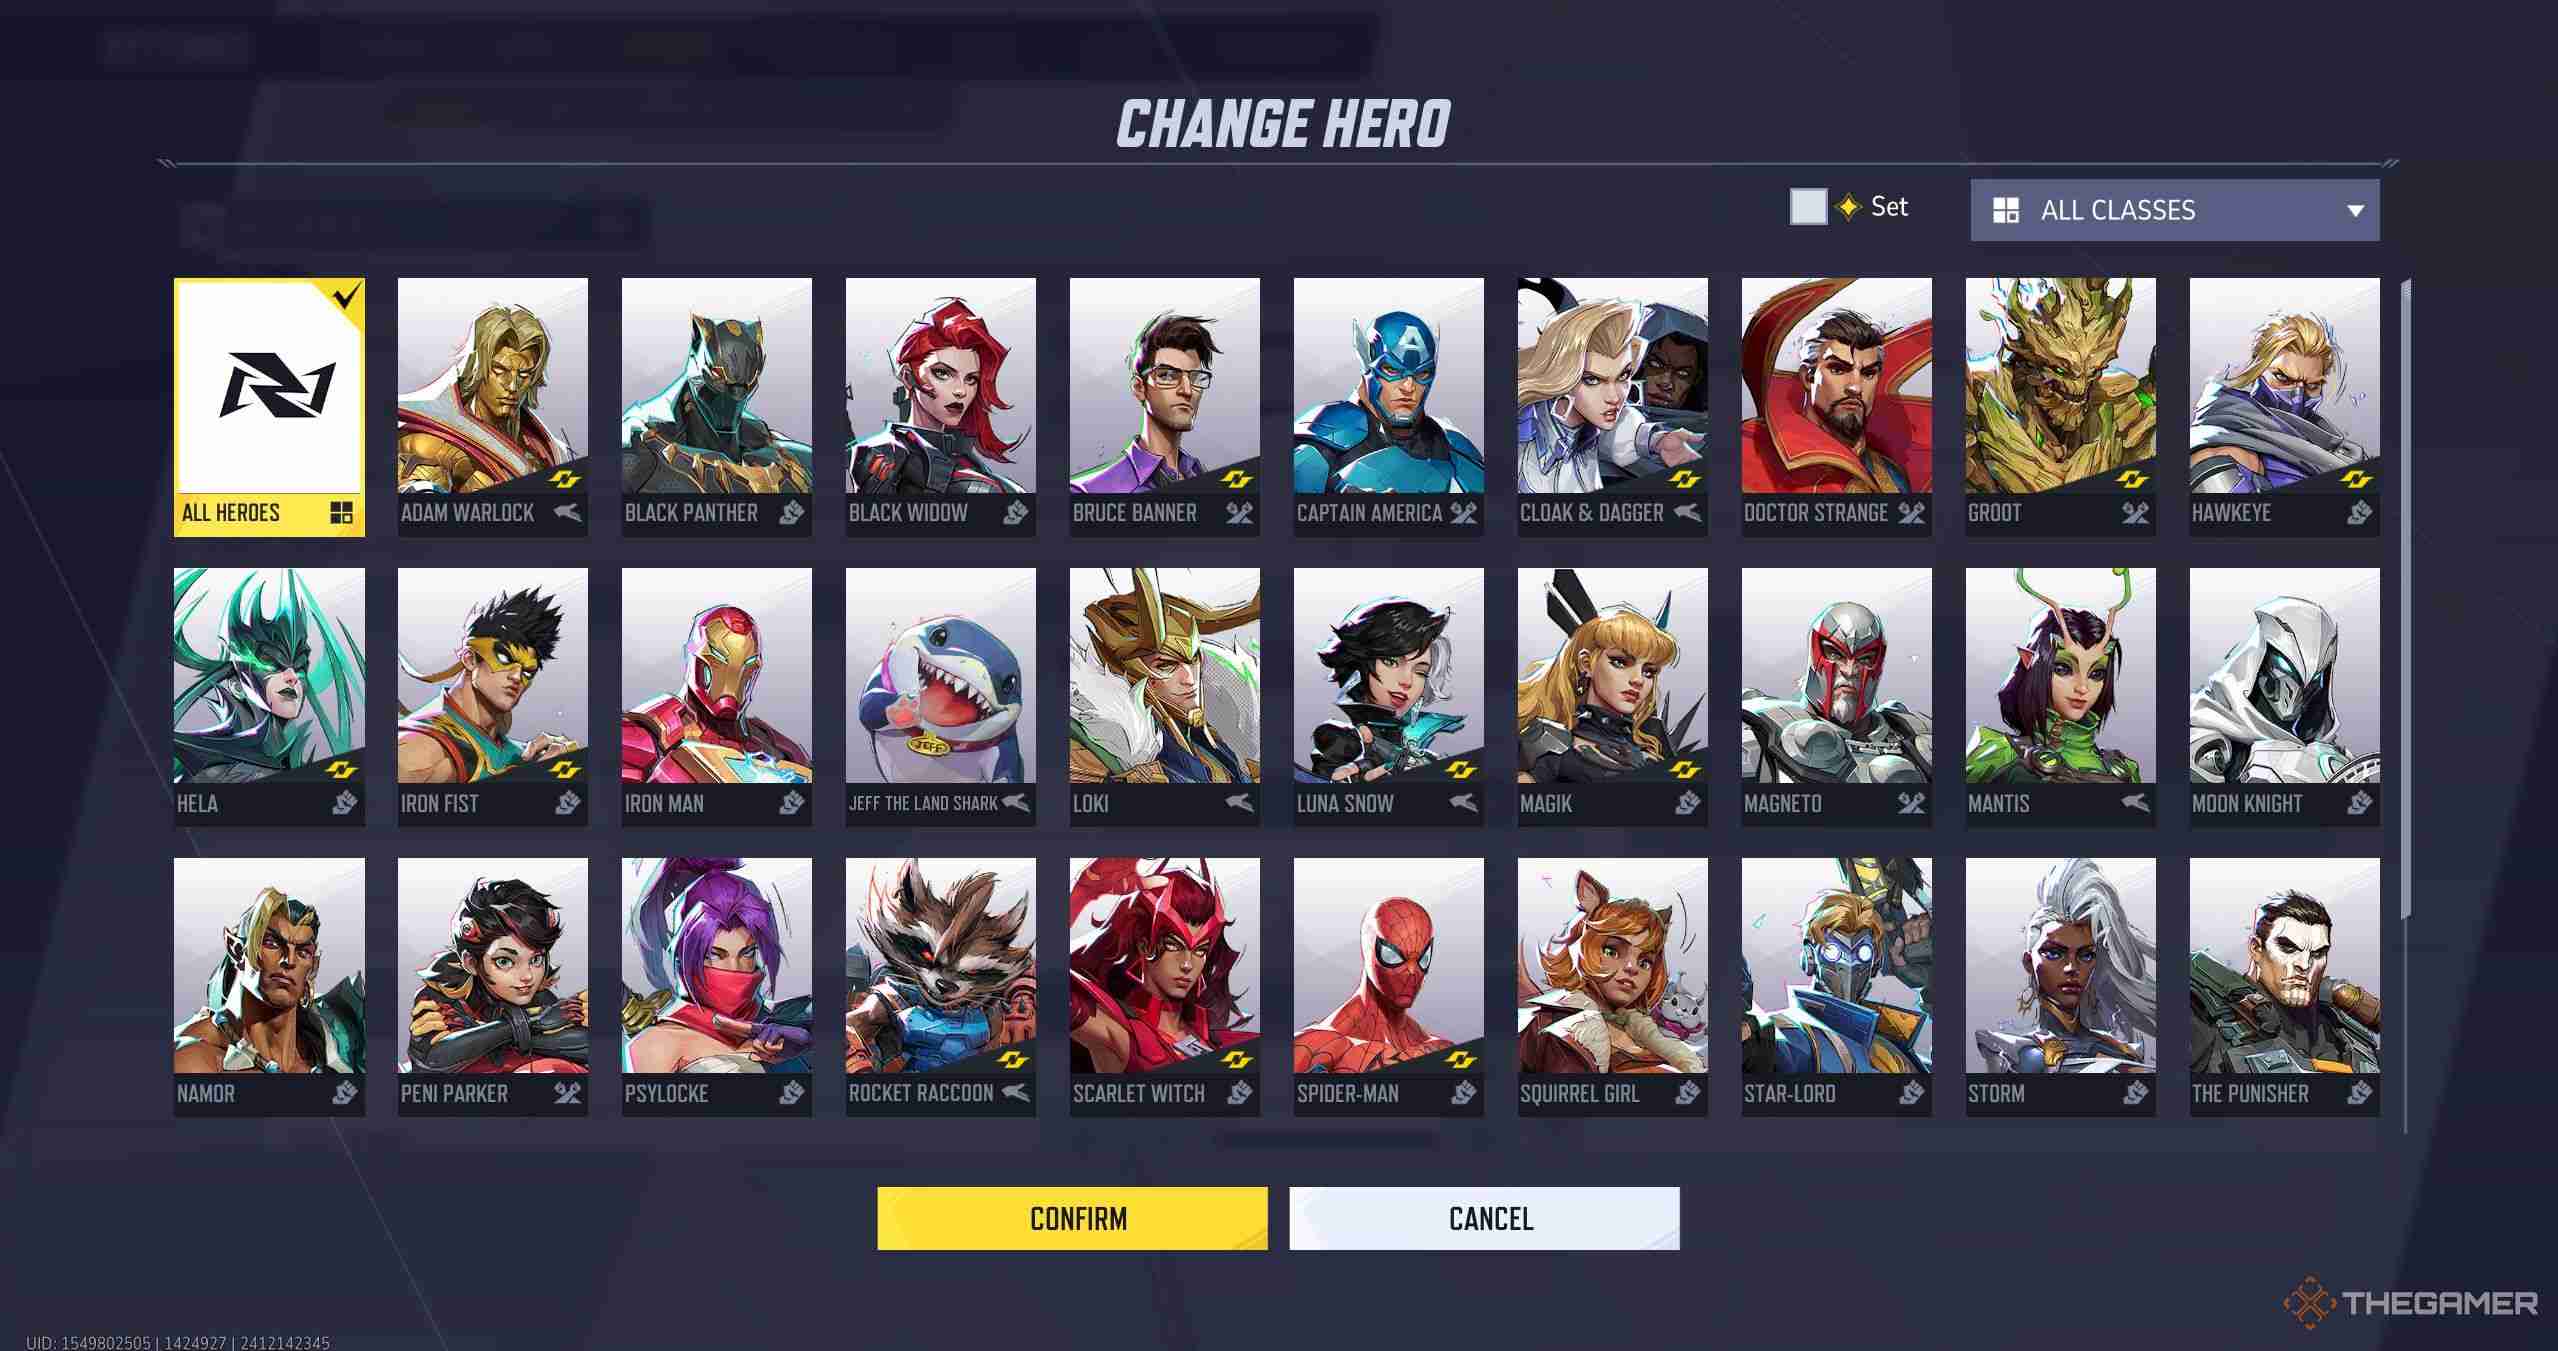
If you’d like to customize crosshairs for individual heroes, click the All Heroes button in the top left corner of the combat settings screen. Select and confirm a hero from the menu, and you’ll gain the ability to modify their crosshair independently. This feature is particularly useful if you want distinct reticles for heroes with varying abilities or roles.
To revert to the universal crosshair settings, simply return to the same menu and select All Heroes again.

The above is the detailed content of Marvel Rivals: How To Customize Crosshair. For more information, please follow other related articles on the PHP Chinese website!

Hot AI Tools

Undresser.AI Undress
AI-powered app for creating realistic nude photos

AI Clothes Remover
Online AI tool for removing clothes from photos.

Undress AI Tool
Undress images for free

Clothoff.io
AI clothes remover

Video Face Swap
Swap faces in any video effortlessly with our completely free AI face swap tool!

Hot Article

Hot Tools

Notepad++7.3.1
Easy-to-use and free code editor

SublimeText3 Chinese version
Chinese version, very easy to use

Zend Studio 13.0.1
Powerful PHP integrated development environment

Dreamweaver CS6
Visual web development tools

SublimeText3 Mac version
God-level code editing software (SublimeText3)

Hot Topics
 InZoi: How To Apply To School And University
Apr 02, 2025 am 12:08 AM
In the vibrant world of InZoi, you're free to shape your character's life, from exploring its diverse environments to mastering various skills. Whether it's culinary adventures, household chores, or relaxing on the beach, the choices are yours. But
 Where to find the Site Office Key in Atomfall
Apr 02, 2025 pm 06:03 PM
In Atomfall's Interchange, the locked Site Office presents an early challenge. The "Strange Noises From Below" note hints at the key's location: the Robotics lab. However, accessing Robotics requires completing several preliminary tasks.
 Blue Prince: How To Get To The Basement
Apr 11, 2025 am 04:04 AM
Unlocking the Basement in Blue Prince: A Comprehensive Guide Finding the basement in Blue Prince is crucial for progressing to Room 46, but its location and access method aren't immediately obvious. This guide will walk you through accessing the base
 Roblox: Dead Rails - How To Tame Wolves
Apr 07, 2025 am 06:05 AM
In the desolate landscapes of Roblox's Dead Rails, survival hinges on overcoming numerous threats. Undead hordes, vampires, and werewolves roam the wasteland, alongside the outlaws and wolves that predate the outbreak. However, a unique opportunity
 InZoi: How To Surf
Apr 03, 2025 am 03:43 AM
In InZoi, your Zois can enjoy a variety of activities, fulfilling their ever-changing Urges to keep them happy. Surfing is a popular choice, particularly for Zois with the "Life of Excitement" Desired Life. This guide explains how and whe
 Strength Levels for Every Enemy & Monster in R.E.P.O.
Apr 07, 2025 am 10:45 AM
In R.E.P.O., some monsters are small enough to throw out easily, while others are as hard to shake like tanks unless you have strong powers—or stacked with a lot of powerful upgrades (because your life may depend on that). If you're tired of pressing the grab button and being crushed, this list will tell you how much power you need to lift, throw or slam them against every monster in the game, from a small goblin to a giant Trucci. Requires 4 power upgrades: animal Mind manipulator Squirter 9 power upgrades are required: Men with bow chef hunter Shadow Children 13 power upgrades are required: Clown (beam transmitter) Leader Robe monster Truci No need for strength (or
 Where to find and use the Castle Key in Atomfall
Apr 04, 2025 am 01:02 AM
In Atomfall, numerous keys unlock the game's many locked doors and bunkers. One such key, the Castle Key, can be easily overlooked. This guide details its location and use. To view this content, please enable targeting cookies. Locating the Castle K
 Roblox: Bubble Gum Simulator Infinity - How To Get And Use Royal Keys
Apr 16, 2025 am 11:05 AM
Royal Keys are some of the most valuable items you can find in Roblox's Bubble Gum Simulator Infinity. These rare tools allow you to open Royal Chests — limited-time loot containers packed with high-tier items, boosts, and even ultra-rare rewards. If


