

Final Fantasy 14: Complete Guide To Playing Dancer


While rightfully daunting for newcomers, the Dancer Job in Final Fantasy 14 is a fun, exhilarating, and rewarding role to play and get the hang of in the game. This is why many players gravitate towards it, despite it being a bit rough to learn the ins and outs, especially compared to most other offerings.

The Dancer can be one of the most devastating Jobs in the game if you take the time to sync up with its beat and rhythm. This Job is also amongst the most stylish, which is an added bonus for sticking with it as your Warrior of Light can look phenomenal while you annihilate everything in your way. Still, the path of mastering the Dancer can be tricky, but overcoming the obstacles isn't nearly as bad as you might think.
Updated December 18, 2024, by Seth Parmer: Despite not getting a more flashy or complex Opening Move with the subsequent updates after Dawntrail's release, the Dancer Job in Final Fantasy 14 saw some adjustments to its Actions, allowing us to incorporate them into this update. Additionally, we have also touched up the Dance Partner Priority list, as we now have a much better understanding of which Jobs benefit more from it now than at the expansion's launch. Additionally, we also updated the Dancer's best gear, showcasing how to get the most out of the job!
Dancing In The Spotlight
Due to the Dancer Job being one of the classes introduced to the game with the Shadowbringers expansion, there is no prerequisite Class you have to level before evolving into the Job. However, since it was released alongside Shadowbringers, you must be at least Level 60 before diving into the role.
Requirements
- Be at least Level 60 with any Disciple of War or Magic
- Own the Shadowbringers expansion
If you meet the requirements posted above, you can dawn the high-fashion Dancer garb and Throwing Weapons by visiting the Eager Lominsan in Limsa Lominsa Lower Decks (X:9.8, Y:12.0) to pick up the quest "Shall We Dance." The Dancer Job will be yours once you complete this quest.
Next, you will have to work your way up to Level 100. This can take quite some time to accomplish, so please look at our Leveling Guide if you find yourself spinning tires trying to gain EXP. Furthermore, if you need more guidance on obtaining this Job or any of the other ones found in the game, we have that covered as well with our Job Unlocking Guide!
Dancer Rotations

With the Dancer being a Physical Ranged DPS Job, they have many tools at their disposal that allow them to thrive at range and frequently mix up their attacks.
Also, due to their role, they are free of having to worry about positional attacks, which is always a plus. However, the downside is the Dancer has many systems and mechanics they must pay attention to if they want to get the most out of their kit.
Below are the Dancer's basic rotations for single and multi-target acquisitions. The Dancer has a unique mechanic here that relies solely on the luck of the draw, having a fifty percent chance to weave more potent attacks into their rotation after casting specific actions.
Remember that the examples below only cover the basics of the Dancer's rotation, and the more fleshed-out attack string that includes the Job's Off-GCD Actions will be found in the "Opener" section.
Basic Single-Target Rotation
- Cascade > Fountain
- Cascade > Reverse Cascade > Fountainfall
- Cascade > Rising Windmill > Bloodshower
Casting Cascade offers a 50 percent chance you will gain Flourishing Symmetry, which allows you to flow directly into Reverse Cascade or Rising Windmill.
When performing Reverse Cascade or Rising Windmill, you will have another 50 percent chance to gain Flourishing Flow, which allows you to go straight into Fountainfall or Bloodshower. Always cast these abilities when they become available, as they will help you get the most out of the Dancer Job.
Basic AoE Rotation
- Windmill > Bladeshower
Picking A Dance Partner

While the Dancer has several gimmicks, their primary one is having the option to select a Dance Partner to grant buffs to throughout an encounter or Dungeon.
To choose your Dance Partner, you must cast Closed Position on the Party Member of your choice. Doing this allows you to share specific buffs with them that increase their overall damage output.
Though you are free to choose whoever you wish to be your Dance Partner, the general rule of thumb is to place it on whoever can deal the most damage in the encounter, which will almost always be the Melee DPS.
Below is the priority ranking of each Job, with "1" marking the highest priority:
- Pictomancer or Samurai
- Reaper, Viper, or Monk
- Ninja or Dragoon
- Black Mage or Red Mage
- Summoner
- Machinist
- Bard
- Dancer
- Every other Job (Not Recommended)
It's essential to note that your Dance Partner's equipment will directly impact your buff potency, so selecting whoever you think will make the most out of it is crucial. The order provided above is based on the assumption that everyone in the lobby has the same gear level as you. We understand that may not always be the case, but each lobby will be different, making it entirely situational.
Dancer Off-GCD Actions

Before getting into the Dancer's Opener, we need to go over the Job's Off-GCD Actions as they are what make you shine as a Ranged DPS/Light Support role.
Not only will you see some of these actions appear in the Opener, but you will also see other Off-GCD Actions that you will be using in situational moments when you are relying on them to buy time for your core cooldown timers to come back online.
You can find every Off-GCD Action belonging to the Dancer in the table below. This covers what they do, how to use them, their recast timers, and even what buffs they apply or need to become active. The Opener will have several of these actions mixed throughout it, so we strongly urge you to go through the table and learn what each ability does before moving on!
|
Action |
Recast Time |
Information |
|---|---|---|
| Fan Dance | 1s | Attack with a potency of 180. |
| Fan Dance II | 1s | Attack with an AoE that has the potency of 100. |
| Fan Dance III | 1s | Attack with an AoE that has the potency of 220 to the first target hit, with the remaining enemies in the area taking fifty percent less damage. |
| Fan Dance IV | 1s | Attack with a cone-shaped AoE with the potency of 300 to the first target hit, with the remaining enemies in the area taking fifty percent less damage. |
| Ev Avant | 30s | Swiftly dash forwards by ten yalms. |
| Curing Waltz | 60s | Heal yourself and nearby Party Members with a Cure Potency of 300. - You can now execute this action while Dancing per Patch 6.3. |
| Shield Samba | 90s | Incoming damage is reduced for you and nearby Party Members by 15 percent for 15s. |
| Closed Position | 30s | You cast Closed Position on yourself and highlighted Party Member, designating them as your Dance Partner. You share the effects of Curing Waltz, Devilment, Standard Finish, and Finishing Move with your chosen Dance Partner. |
| Ending | 1s | Allows you to end the effect of Closed Position. |
| Devilment | 120s | Your Critical and Direct Hit Rates are increased by twenty percent for 20s. |
| Flourish | 60s | You gain the effects of Flourishing Symmetry, Flourishing Flow, Threefold Fan Dance, Fourfold Fan Dance, and Finishing Move for 30s. |
| Improvisation | 120s | You cast Rising Rhythm on yourself and start dancing to the beat of your own drum. You will begin to earn stacks every three seconds, with four stacks being the maximum. |
| Improvised Finish | 1.5s | You create a barrier around yourself and nearby Party Members for 30s that absorbs incoming damage equal to the stacks you gained during Improvisation. |
Best Dancer Opener In FFXIV Dawntrail

In Final Fantasy 14, the Opener is the most optimal string of actions you can perform at the start of a boss encounter, typically in Raids or Dungeons.
Having a solid Opener to propel off of at the beginning of a battle will sync your cooldown timers up to flow perfectly into your rotation while being able to maintain the Off-GCD Actions you will periodically be mixing in to maximize your potential.
If you are lost on the Opener we provided below regarding why we used one action over another or have concerns about their placement, we likely went over them in the Rotations or Off-GCD Actions sections above. Furthermore, to keep things a bit organized, all Off-GCD Action in the Opener is bolded and put into parentheses to keep them distinct from your standard actions.
Basic Opener
- Pre-Pull: (Closed Position) Standard Step > Step > Step (Peloton Grade 1 Gemdraught of Dexterity)
- Standard Step > Technical Step > Step > Step > Step > Step > Technical Finish (Devilment) > Tillana (Flourish) > Dance of the Dawn (Fan Dance IV) > Last Dance (Fan Dance III) > Finishing Move > Saber Dance/Starfall Dance > Priority Dance GCD > Priority Dance GCD > Priority Dance GCD > Priority Dance GCD
Best Gear For Dancer In FFXIV Dawntrail

As outlined above, the Dancer has tons of potential with their many systems and mechanics, making them an offensive powerhouse and decent support player. However, there's still some room for improvement, and that's where properly managing your equipment comes into play.
While having the best gear doesn't matter all that much unless you plan on tackling the game's more demanding activities, it's still nice to know what you should be looking for in terms of which Stats to focus on, how to Meld Materia properly, and what is considered "Best In Slot."
|
Equipment |
Materia |
Stats |
How To Obtain |
|
|---|---|---|---|---|
|
Weapon |
Dark Horse Champion's Tathlums |
|
|
Can drop during AAC Light-heavyweight M4 (Savage) or purchased from Hhihwi in Solution Nine (X:8.7, Y:13.7) for x8 AAC Illustrated: LHW Edition IV. |
|
Head |
Dark Horse Champion's Mask of Aiming |
|
|
Can drop during AAC Light-heavyweight M3 (Savage) or purchased from Hhihwi in Solution Nine (X:8.7, Y:13.7) for x4 AAC Illustrated: LHW Edition II. |
|
Body |
Augmented Quetzalli Jacket of Aiming |
|
|
Upgraded by giving x1 Surgelight Twine and the corresponding Quetzalli Armor to Theone in Solution Nine (X:8.5, Y:13.6). |
|
Hands |
Augmented Quetzalli Vambraces of Aiming |
|
|
Upgraded by giving x1 Surgelight Twine and the corresponding Quetzalli Armor to Theone in Solution Nine (X:8.5, Y:13.6). |
|
Legs |
Dark Horse Champion's Brais of Aiming |
|
|
Can drop during AAC Light-heavyweight M3 (Savage) or purchased from Hhihwi in Solution Nine (X:8.7, Y:13.7) for x4 AAC Illustrated: LHW Edition II. |
|
Feet |
Dark Horse Champion's Boots of Aiming |
|
|
Can drop during AAC Light-heavyweight M3 (Savage) or purchased from Hhihwi in Solution Nine (X:8.7, Y:13.7) for x4 AAC Illustrated: LHW Edition II. |
|
Earrings |
Augmented Quetzalli Ear Cuffs of Aiming |
|
|
Upgraded by giving x1 Surgelight Glaze and the corresponding Quetzalli Accessory to Theone in Solution Nine (X:8.5, Y:13.6). |
|
Necklace |
Dark Horse Champion's Choker of Aiming |
|
|
Can drop during AAC Light-heavyweight M1 (Savage) or purchased from Hhihwi in Solution Nine (X:8.7, Y:13.7) for x3 AAC Illustrated: LHW Edition I. |
|
Bracelets |
Augmented Quetzalli Bracelets of Aiming |
|
|
Upgraded by giving x1 Surgelight Glaze and the corresponding Quetzalli Accessory to Theone in Solution Nine (X:8.5, Y:13.6). |
|
Left Ring |
Augmented Quetzalli Ring of Aiming |
|
|
Upgraded by giving x1 Surgelight Glaze and the corresponding Quetzalli Accessory to Theone in Solution Nine (X:8.5, Y:13.6). |
|
Right Ring |
Dark Horse Champion's Ring of Aiming |
|
|
Can drop during AAC Light-heavyweight M1 (Savage) or purchased from Hhihwi in Solution Nine (X:8.7, Y:13.7) for x3 AAC Illustrated: LHW Edition I. |
Finally, you can get a smidge more performance out of your Dancer by using a couple of things to your advantage. The first method was actually slyly covered in the Opener section above, which is consuming the Grade 1 Gemdraught of Dexterity during the pre-pull phase of an encounter to get a free buff that lasts for the remainder of the Opener.
The other way is by downing a meal before diving into battle, and the Dancer's food of choice should always be the Moqueca as it provides buffs for everything they need that makes them shine!

The above is the detailed content of Final Fantasy 14: Complete Guide To Playing Dancer. For more information, please follow other related articles on the PHP Chinese website!

Hot AI Tools

Undresser.AI Undress
AI-powered app for creating realistic nude photos

AI Clothes Remover
Online AI tool for removing clothes from photos.

Undress AI Tool
Undress images for free

Clothoff.io
AI clothes remover

Video Face Swap
Swap faces in any video effortlessly with our completely free AI face swap tool!

Hot Article
Hot Tools

Notepad++7.3.1
Easy-to-use and free code editor

SublimeText3 Chinese version
Chinese version, very easy to use

Zend Studio 13.0.1
Powerful PHP integrated development environment

Dreamweaver CS6
Visual web development tools

SublimeText3 Mac version
God-level code editing software (SublimeText3)
Hot Topics
 1664
1664
 14
1422
52
1316
25
1266
29
1239
24
14
1422
52
1316
25
1266
29
1239
24

 Roblox: Grow A Garden - Complete Mutation Guide
Apr 18, 2025 am 01:10 AM
Roblox: Grow A Garden - Complete Mutation Guide
Apr 18, 2025 am 01:10 AM
Maximize your profits in Roblox's Grow A Garden by understanding the lucrative world of crop mutations! These rare variations significantly boost your harvest's value. While you can't directly control mutations, knowing how they work provides a signi
 Roblox: Bubble Gum Simulator Infinity - How To Get And Use Royal Keys
Apr 16, 2025 am 11:05 AM
Roblox: Bubble Gum Simulator Infinity - How To Get And Use Royal Keys
Apr 16, 2025 am 11:05 AM
Royal Keys are some of the most valuable items you can find in Roblox's Bubble Gum Simulator Infinity. These rare tools allow you to open Royal Chests — limited-time loot containers packed with high-tier items, boosts, and even ultra-rare rewards. If
 Blue Prince: How To Get To The Basement
Apr 11, 2025 am 04:04 AM
Blue Prince: How To Get To The Basement
Apr 11, 2025 am 04:04 AM
Unlocking the Basement in Blue Prince: A Comprehensive Guide Finding the basement in Blue Prince is crucial for progressing to Room 46, but its location and access method aren't immediately obvious. This guide will walk you through accessing the base
 Mandragora: Whispers Of The Witch Tree - How To Unlock The Grappling Hook
Apr 18, 2025 am 12:53 AM
Mandragora: Whispers Of The Witch Tree - How To Unlock The Grappling Hook
Apr 18, 2025 am 12:53 AM
Mandragora's dungeons offer Metroidvania-style challenges, requiring players to revisit earlier areas with newly acquired tools. The grappling hook is a prime example, enabling rapid traversal of long distances. While this crucial tool is obtained r
 Nordhold: Fusion System, Explained
Apr 16, 2025 am 04:07 AM
Nordhold: Fusion System, Explained
Apr 16, 2025 am 04:07 AM
Nordhold Tower Fusion Guide: Synergistic Tower Combinations for Enhanced Defense Mastering tower combinations in Nordhold is key to effective base defense. Certain towers synergize exceptionally well, creating powerful defensive strategies. This gui
 Rusty Rabbit: Where To Find Every Keycube
Apr 17, 2025 pm 10:02 PM
Rusty Rabbit: Where To Find Every Keycube
Apr 17, 2025 pm 10:02 PM
Many 2D platformers, including Rusty Rabbit, feature inaccessible areas requiring specific abilities or items. Rusty Rabbit is no exception, with multiple such areas in each region. Besides visually obvious blocked pathways, you'll encounter robots
 Sephiria: 8 Beginner Tips
Apr 10, 2025 pm 10:08 PM
Sephiria: 8 Beginner Tips
Apr 10, 2025 pm 10:08 PM
Sephiria: Adventures in the Pixel World Sephiria attracts players with its cute pixel style and smooth operation, but the difficulty of its dungeon adventures gradually increases as they go deeper. From unpredictable bosses to a wide variety of enemies, the game is full of challenges. However, the game's extensive equipment and weapon systems allow players to choose unique combat styles to cope with these challenges. In addition, mastering some tips and strategies will help to better explore this mysterious world. Master sprint and blocking skills Sephiria's core combat mechanics are similar to many roguelike hacking and slashing games. This means that sprint (or dodge) and blocking will be the most effective combat skills in the game. Always pay attention to enemies when sprinting
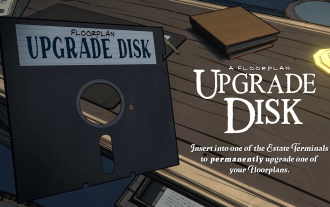 Blue Prince: Upgrade Disk Guide
Apr 12, 2025 am 11:34 AM
Blue Prince: Upgrade Disk Guide
Apr 12, 2025 am 11:34 AM
Upgrade Disks are some of the most powerful and valuable items you’ll find in Blue Prince. While they’re not needed to reach Room 46, they make your runs smoother, your puzzles easier, and your odds of survival higher. If you’re lucky enough to find
