

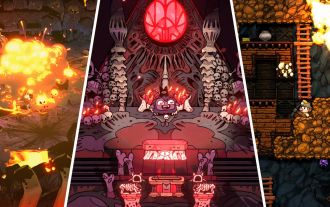
Wuthering Waves: Lorelei Boss Guide

The Rinacita region that came with the Wuthering Waves 2.0 update brought with it four new bosses: three Overlord class and one Calamity class. The first of these you'll face is Lorelei, a watery, mermaid-like spirit corrupted by the Lycoris flower. Like all the bosses, she has a lot more going on than anything from the 1.0 content.

Fighting Lorelei takes place across two distinct phases, with her second phase ramping up the difficulty with new attacks and buffs the boss can summon. We'll go over everything you need to know about the fight here.
All Lorelei: Queen Of The Night Attacks

Lorelei's primary defensive buff is against Havoc damage, which technically rules out the likes of Camellya, Havoc Rover, or Danjin, but if you've built them enough, you can likely brute force your way through.
Despite being an aquatic creature, Lorelei is Havoc element, explaining her resistance.
Like all the Overlord-class bosses in Rinacita, Lorelei transitions to her second phase at 50 percent health, gaining new attacks and periodically summoning a green bubble that can heal her — or you, if you pop it.
Phase One Attacks
|
Attack |
Parryable |
Description |
How to Avoid/Counter |
|---|---|---|---|
|
Star Field |
No | Lorelei summons a field of blue stars and sends them at you. | You can avoid this attack by dodging or running in either direction perpendicular to her. |
|
Big Bubble |
No | Lorelei creates and then tosses a large bubble at you, which pops when it makes contact with you or the watery arena floor. | Run perpendicular to Lorelei and dodge just as the bubble is about to hit. |
|
Kick Blade |
No | Lorelei throws a heavy kick that sends out an energy wave. | Either dodge the kick or get out gifts range. Lorelei will stop to recover after the attack, giving you an opening. |
|
Localized Explosion |
No | Lorelei collects energy in her hands and then creates an explosion centered on your current position. | Watch her hands and start running to either side as soon as the circle appears around your feet. |
|
Triple Bubble |
No | Loreli creates a line of three smaller bubbles centered on her body, then sends them your way. They lightly track and explode on contact with you or the ground. | Either run side to side or dodge just as each bubble is about to hit. You'll need three dodge sto fully avoid the attack. |
|
X-Energy Blade and Explosion |
No | Lorelei quickly summons energy into her hands above her head, then throws two x-shaped energy beams at you, followed by a large explosion. | These attacks are too fast to easily run from, so you'll need to dodge them. Each has a slight delay before coming out, so timing is key. |
|
Stellar Explosion Field |
No | Lorelei conjures a field of stars above the arena that generates several explosions but does not move from where it appears. | As soon as Lorelei summons the field, get out from beneath it and keep it in your peripheral so you don't run back in. |
Phase Two Attacks
|
Attack |
Parrayble |
Description |
How to Counter/Avoid |
|---|---|---|---|
|
Bubble and Stars |
No | Lorelei dives underwater, creating several bubbles that fly toward you. When she surfaces, you'll need to avoid a small field of stars she summons as well. | Run side to side and dodge each attack is it would land. You'll likely need at least two dodges, as the stars and bubbles tend to hit around the same time. |
|
Triple Tail Slap |
No | After a brief windup, Lorelei attempts to whap you with her tail. If it hits, she'll launch your active character into the air and combo them three times. You need to avoid each successive hit or be juggled for the remaining ones. | There's a misleading delay before the first tail slap, and the attack continues whether the first hit connects or not. |
|
Shield and Small Bubbles |
No | Lorelei summons a shield and shoots three fast-moving bubbles, which she then detonates all at once where they landed. She loses the shield once the attack ends. | Run either left or right and keep an eye on where the bubble land. Getting behind Lorelei will help and give you a brief opening when the shield drops. |
|
Explosion and Bubble |
No | Lorelei creates an explosion centered on you, then dives under the water, summons a bubble, and waits for it to explode before surfacing. | Like her other bubble attacks, avoiding this one is all about running side to side and dodging as the bubble is about to hit. |
|
Siren Song |
No | Lorelei surfaces when bubbles are floating in from the edge of the arena, calling out, particularly to the green ones that will heal her over time. | As soon as this attack starts, swing your camera around to find the green bubble and pop it on yourself for free extra healing. |

Tips For Beating Lorelei

The biggest tip for beating Lorelei is frighteningly simple: walk left or right. While many of her attacks can track you, the projects are either too slow, or that tracking isn't strong enough to defeat the mighty 'move leisurely in one direction or the other' strategy.
You will, of course, need to dodge some things, like the big bubbles, if they get too close. Their hitbox is fairly accurate to the model, so if you think the bubble will pop on your head, it probably will.
Outspacing Lorelei's attacks is also an option, even her phase two tail swipe. Her AoE and melee attacks all have a limited range, and if you know their windup animations, you can simply run away to avoid taking damage.
Lorelei doesn't get much forward momentum during her attacks, so don't worry about chasedown.
Lastly, many of Lorelei's bigger attacks have a long recovery where she'll lie down for a moment to catch her breath. If you've been doing a lot of dodging, those are the times to recover your stamina or build up some Forte gauge. Save your Resonance Liberation for the more active moments of the fight.
Best Characters To Fight Lorelei

Lorelei has high Havoc damage resistance, but many fantastic main DPS and support options come from other elements.
|
Character |
Role |
Reason to Use |
|---|---|---|
|
Carlotta |
Main DPS | Carlotta was the opening limited five-star character with the 2.0 update and is a fantastic choice for any of the content in Rinacita, thanks to her mobility, output, and ease of use. |
|
Jinhsi |
Main DPS | The DPS during the 1.0 period, Jinhsi remains a top-tier choice thanks to her fantastic DPS output, coordination potential, and relative mobility. |
|
Changli |
Main DPS | Though she's a bit more technical to play, Changli can delete bosses like Lorelei in a few Resonance Liberations, which is the core of her damage. |
|
Zhezhi |
Sub-DPS | Zhezhi came into her own with the 2.0 update, becoming by far the best pairing for Carlotta, but she can also elevate almost any DPS in the game with her buffs. |
|
Sanhua |
Sub-DPS | If you want a much easier-to-come-by top-tier sub-dps, Sanhua provides tons of Glacio damage, some buffs, and general usability. |
|
Mortefi |
Sub-DPS | Do you like heavy attacks or Fusion damage? Mortefi is here to make both better and supply some extra DPS of his own. |
|
Shorekeeper |
Support | As of the launch of the 2.0 update, Shorekeeper is the go-to support for literally any team, with massive Crit bonuses, healing, and a bit of supplemental damage of her own. |
|
Verina |
Support | The standard banner support de jour, Verina was only barely dethroned by Shorekeeper as the best support, showing how powerful her damage buffs and healing were out the gate. |
In truth, any team can take down Lorelei with the right investment and foreknowledge of her attack patterns. You will need to be properly leveled, as she can hit like a truck if you're too beneath her, but if you have a team like Carlotta, Zhezhi/Sanhua, and Shorekeeper, there's essentially no boss in the game that poses a real threat.
Rewards For Beating Lorelei

Lorelei shares the same kinds of rewards as every other boss in the game, including her own special ascension material. She also has a Havoc-element Echo you can farm that provides Havoc and Basic Attack damage bonuses when equipped.
- 450 Union EXP
- 180 Intimacy
- 9600 Shell Credits at Union Level seven
- 2-3 Advanced Sealed Tube at Union Level seven
- 3-5 Cleansing Conch
- 3-4 Advanced Resonance Potion at Union Level seven
- 3-4 Advanced Energy Core at Union Level seven

The above is the detailed content of Wuthering Waves: Lorelei Boss Guide. For more information, please follow other related articles on the PHP Chinese website!

Hot AI Tools

Undresser.AI Undress
AI-powered app for creating realistic nude photos

AI Clothes Remover
Online AI tool for removing clothes from photos.

Undress AI Tool
Undress images for free

Clothoff.io
AI clothes remover

Video Face Swap
Swap faces in any video effortlessly with our completely free AI face swap tool!

Hot Article
Hot Tools

Notepad++7.3.1
Easy-to-use and free code editor

SublimeText3 Chinese version
Chinese version, very easy to use

Zend Studio 13.0.1
Powerful PHP integrated development environment

Dreamweaver CS6
Visual web development tools

SublimeText3 Mac version
God-level code editing software (SublimeText3)
Hot Topics
 1664
1664
 14
1423
52
1317
25
1268
29
1246
24
14
1423
52
1317
25
1268
29
1246
24

 Roblox: Grow A Garden - Complete Mutation Guide
Apr 18, 2025 am 01:10 AM
Roblox: Grow A Garden - Complete Mutation Guide
Apr 18, 2025 am 01:10 AM
Maximize your profits in Roblox's Grow A Garden by understanding the lucrative world of crop mutations! These rare variations significantly boost your harvest's value. While you can't directly control mutations, knowing how they work provides a signi
 Roblox: Bubble Gum Simulator Infinity - How To Get And Use Royal Keys
Apr 16, 2025 am 11:05 AM
Roblox: Bubble Gum Simulator Infinity - How To Get And Use Royal Keys
Apr 16, 2025 am 11:05 AM
Royal Keys are some of the most valuable items you can find in Roblox's Bubble Gum Simulator Infinity. These rare tools allow you to open Royal Chests — limited-time loot containers packed with high-tier items, boosts, and even ultra-rare rewards. If
 Nordhold: Fusion System, Explained
Apr 16, 2025 am 04:07 AM
Nordhold: Fusion System, Explained
Apr 16, 2025 am 04:07 AM
Nordhold Tower Fusion Guide: Synergistic Tower Combinations for Enhanced Defense Mastering tower combinations in Nordhold is key to effective base defense. Certain towers synergize exceptionally well, creating powerful defensive strategies. This gui
 Blue Prince: How To Get To The Basement
Apr 11, 2025 am 04:04 AM
Blue Prince: How To Get To The Basement
Apr 11, 2025 am 04:04 AM
Unlocking the Basement in Blue Prince: A Comprehensive Guide Finding the basement in Blue Prince is crucial for progressing to Room 46, but its location and access method aren't immediately obvious. This guide will walk you through accessing the base
 Mandragora: Whispers Of The Witch Tree - How To Unlock The Grappling Hook
Apr 18, 2025 am 12:53 AM
Mandragora: Whispers Of The Witch Tree - How To Unlock The Grappling Hook
Apr 18, 2025 am 12:53 AM
Mandragora's dungeons offer Metroidvania-style challenges, requiring players to revisit earlier areas with newly acquired tools. The grappling hook is a prime example, enabling rapid traversal of long distances. While this crucial tool is obtained r
 Sephiria: 8 Beginner Tips
Apr 10, 2025 pm 10:08 PM
Sephiria: 8 Beginner Tips
Apr 10, 2025 pm 10:08 PM
Sephiria: Adventures in the Pixel World Sephiria attracts players with its cute pixel style and smooth operation, but the difficulty of its dungeon adventures gradually increases as they go deeper. From unpredictable bosses to a wide variety of enemies, the game is full of challenges. However, the game's extensive equipment and weapon systems allow players to choose unique combat styles to cope with these challenges. In addition, mastering some tips and strategies will help to better explore this mysterious world. Master sprint and blocking skills Sephiria's core combat mechanics are similar to many roguelike hacking and slashing games. This means that sprint (or dodge) and blocking will be the most effective combat skills in the game. Always pay attention to enemies when sprinting
 Rusty Rabbit: Where To Find Every Keycube
Apr 17, 2025 pm 10:02 PM
Rusty Rabbit: Where To Find Every Keycube
Apr 17, 2025 pm 10:02 PM
Many 2D platformers, including Rusty Rabbit, feature inaccessible areas requiring specific abilities or items. Rusty Rabbit is no exception, with multiple such areas in each region. Besides visually obvious blocked pathways, you'll encounter robots
 Blue Prince: Upgrade Disk Guide
Apr 12, 2025 am 11:34 AM
Blue Prince: Upgrade Disk Guide
Apr 12, 2025 am 11:34 AM
Upgrade Disks are some of the most powerful and valuable items you’ll find in Blue Prince. While they’re not needed to reach Room 46, they make your runs smoother, your puzzles easier, and your odds of survival higher. If you’re lucky enough to find
