

Creating a Basic Calculator Using HTML, CSS and JavaScript

Creating a functional calculator in JavaScript is fun and there are a lots of concept used such as DOM Manipulation, Event Handling, Conditional Logic, String Manipulation, Arithmetic Operations, Keyboard Input Integration and CSS Styling for user interface. In this blog post, we'll dive deep into the code, breaking down each line to understand its properties and functionality. By the end of this blog, we will have a solid grasp of how the calculator works.
Lets get started.
Setting Up the HTML Structure
The HTML is straight forward, starting with a standard boilerplate. below is the code snippet for index.html

The
The tag links to an external JavaScript file, script.js, where the logic and functionality of the calculator are defined. This external file handles the user interactions and calculations, enabling the calculator to perform operations as intended.
Here, The display-box shows the input and displays the result while the button-box holds all the calculator buttons.
Adding CSS for Styling
Now, let's style our calculator to make it visually appealing and user-friendly.

Lets breakdown the css code.
- Wrapper Styling

The min-height: 100vh; ensures the wrapper occupies at least the full height of the viewport. The display: flex; enables a flexible layout, allowing alignment of its children. The justify-content: center; centers the content horizontally, while align-items: center; centers the content vertically. Lastly, the border: 2px solid black; adds a border around the wrapper.
- Calculator Container Styling:
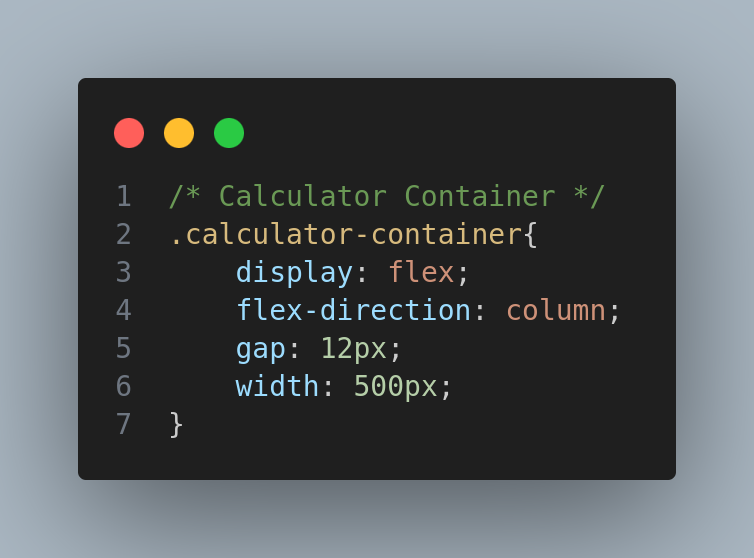
The display: flex; makes the calculator container flexible, allowing child elements to be laid out in a row or column. The flex-direction: column; arranges the child elements vertically. The gap: 12px; adds spacing between each section or element. Finally, width: 500px; sets the width of the calculator to 500px.
- Display Box Styling

The border: 1px solid black; adds a border to the display box. The padding: 16px; provides space inside the box for better readability. The text-align: right; ensures the text is aligned to the right. The font-size: 24px; increases the font size for improved visibility, while border-radius: 5px; rounds the corners of the box.
- Buttons Container and Buttons Styling

Here, the buttons container is styled with .flex-container, where display: flex; creates a flexible layout for its child elements. The justify-content: space-between; property evenly distributes the buttons with space between them, while gap: 8px; ensures proper spacing between each button for better alignment.
Each button is styled with flex: 1;, which makes them take up equal space within a row. Padding: 16px; adds space inside each button for comfort, and font-size: 20px; ensures the text is readable. The font-weight: bold; makes the text stand out, whileborder: 1px solid black; adds a border around each button. Additionally, border-radius: 8px; slightly rounds the corners of the buttons, and cursor: pointer; changes the cursor to a pointer when hovered over. The background color of the buttons is set to white with background-color: rgb(255, 255, 255);.
For the "=" button, the .equal class uses flex: 2.5; to give it more space, making it 2.5 times the width of the other buttons. When the button is hovered over, the button:hover style changes the background color to grey, background color:rgb(127, 131, 131); and the text color to white. This transition effect is smoothed by transition: background-color 0.3s ease, color 0.3s ease;, which allows for a 0.3-second fade between the colors.
With above HTML and CSS, our Calculator looks like this:

Now lets dive into the main part, giving life to our calculator.
JavaScript Code Snippet

Lets break down the code for better understanding.
- Selecting DOM Elements

The displayBox variable holds a reference to the display box (
- Variables for Display and Operators

The displayValue variable holds the current value to be shown on the screen, ensuring accurate updates during calculations. The lastOperator variable keeps track of the last operator used, preventing errors such as consecutive operator inputs. Additionally, console.log is utilized for debugging purposes, specifically to log the calculatorBtns node list for review.
- Button Click Event Listener/Looping Over Each Buttons

The forEach method is used to loop through each button in the calculatorBtns collection. For each button, the innerText property is assigned to the buttonValue variable, which holds the text displayed on the button, such as "AC", "C", "9", " ", etc.
An onclick event listener is then added to each button. When a button is clicked, the assigned function is executed. This function, handleButtonAction(buttonValue), takes the button's text (buttonValue) as an argument. By passing the button's value, the function allows the calculator to perform the correct action, such as clearing the display, inputting a number, or performing a mathematical operation.
- Handling Key-press for Keyboard Input

This allows the calculator to also work with the keyboard. When a key is pressed, the corresponding button's action is triggered. For example, pressing "1" on the keyboard will trigger the handleButtonAction() function with the value "1".
- Display Function

The display() function updates the content of the display box (displayBox) with the current displayValue. If displayValue is empty, it shows "0.0" by default.
- Button Action Handler(Main Logic):

The code performs several steps to update the calculator's display and handle the calculation. First, eval(displayValue) evaluates the mathematical expression stored in the displayValue. For example, if the display shows "3 5", eval calculates and returns the result, which in this case would be 8.
Next, displayValue = String(result) converts the result into a string and updates the displayValue to show the result on the screen. Once the calculation is complete, lastOperator = "" resets the lastOperator to an empty string, ensuring that any previous operator is cleared. Finally, the display() function updates the display to show the result of the calculation.
- AC(All Clear) and C (Clear) Button Logic

When the "AC" button is clicked, the code checks if buttonValue is equal to "AC". If true, it resets the displayValue to an empty string, effectively clearing the entire display and resetting the calculator. The display() function is then called to update the display with the empty value.
For the "C" button, if buttonValue is "C", the code removes the last character from displayValue using slice(0, -1). This allows the user to delete the last input or character, and the display() function is called again to update the display accordingly.
- Validating Operators

This condition is used to validate if an operator can be pressed based on the current value displayed.
The condition ["%", "/", "*", " "].includes(buttonValue) checks if the button clicked is one of the operators (%, /, *, ). If the button is an operator, the next check if (!displayValue || displayValue === "-") ensures that the operator cannot be pressed if the display is empty or only contains a minus sign (-). This prevents errors such as having two consecutive operators or starting with an operator. If the condition is true, the function simply returns and no operator is added to the display.
- Prevent Consecutive Operators

This block of code handles the scenario where consecutive operators are pressed, preventing invalid input such as " " or " -."
First, if (["%", "/", "*", " ", "-"].includes(buttonValue)) checks if the button clicked is an operator. Then, const lastCharacter = displayValue.slice(-1) retrieves the last character of the current expression in displayValue.
Next, the lastOperator = buttonValue updates the lastOperator variable to store the current operator. If the last character is also an operator, as checked by if (["%", "/", "*", " ", "-"].includes(lastCharacter)), the code removes it using displayValue.slice(0, -1). This ensures that only one operator appears at the end of the expression and prevents consecutive operators from being added.
- Validating Decimal Points

This block of code ensures that a decimal point (.) can only appear once within a number, preventing invalid inputs like "3..5."
First, the condition if (buttonValue === ".") checks if the button clicked is a decimal point. If so, it proceeds with the validation.
Next, const lastOperatorIndex = displayValue.lastIndexOf(lastOperator) finds the position of the last operator in the displayValue. Then, const currentNumberSet = displayValue.slice(lastOperatorIndex) || displayValue extracts the portion of displayValue after the last operator, which represents the current number being entered. If there is no operator, the entire displayValue is considered.
Finally, if (currentNumberSet.includes(".")) checks if the extracted number portion already contains a decimal point. If it does, the function returns early, preventing the user from entering a second decimal point. This ensures that numbers like "3.5" are valid, but inputs like "3..5" are not.
- Update the Display with New Value:

The code displayValue = displayValue buttonValue; appends the value of the pressed button (such as a number or operator) to the existing displayValue string. This builds the current expression or number as the user interacts with the calculator.
After appending the button value, the display() function is called to update the display, ensuring it reflects the updated displayValue. This ensures that the user sees the most current value or expression as they enter it.
Conclusion
This JavaScript code handles the logic for displaying values, performing calculations, clearing inputs, and validating expressions in a calculator. It works with both button clicks and keyboard input. The key features include performing calculations when the "=" or "Enter" keys are pressed, handling the AC (all-clear) and C (clear last character) buttons, and preventing invalid operations such as consecutive operators or multiple decimal points. Additionally, the display is updated after each action, ensuring that the user sees the most current value or expression. Together, these features provide the foundation for a functional and interactive calculator.
Below are my demo links so feel free to check out the full code, clone the repository, or interact with the live demo. Happy coding!
GITHUB - [https://github.com/bigyan1997/calculator]
VERCEL - [https://calculator-delta-sepia-91.vercel.app/]
The above is the detailed content of Creating a Basic Calculator Using HTML, CSS and JavaScript. For more information, please follow other related articles on the PHP Chinese website!

Hot AI Tools

Undresser.AI Undress
AI-powered app for creating realistic nude photos

AI Clothes Remover
Online AI tool for removing clothes from photos.

Undress AI Tool
Undress images for free

Clothoff.io
AI clothes remover

Video Face Swap
Swap faces in any video effortlessly with our completely free AI face swap tool!

Hot Article
Hot Tools

Notepad++7.3.1
Easy-to-use and free code editor

SublimeText3 Chinese version
Chinese version, very easy to use

Zend Studio 13.0.1
Powerful PHP integrated development environment

Dreamweaver CS6
Visual web development tools

SublimeText3 Mac version
God-level code editing software (SublimeText3)
Hot Topics
 1664
1664
 14
1421
52
1315
25
1266
29
1239
24
14
1421
52
1315
25
1266
29
1239
24

 Demystifying JavaScript: What It Does and Why It Matters
Apr 09, 2025 am 12:07 AM
Demystifying JavaScript: What It Does and Why It Matters
Apr 09, 2025 am 12:07 AM
JavaScript is the cornerstone of modern web development, and its main functions include event-driven programming, dynamic content generation and asynchronous programming. 1) Event-driven programming allows web pages to change dynamically according to user operations. 2) Dynamic content generation allows page content to be adjusted according to conditions. 3) Asynchronous programming ensures that the user interface is not blocked. JavaScript is widely used in web interaction, single-page application and server-side development, greatly improving the flexibility of user experience and cross-platform development.
 The Evolution of JavaScript: Current Trends and Future Prospects
Apr 10, 2025 am 09:33 AM
The Evolution of JavaScript: Current Trends and Future Prospects
Apr 10, 2025 am 09:33 AM
The latest trends in JavaScript include the rise of TypeScript, the popularity of modern frameworks and libraries, and the application of WebAssembly. Future prospects cover more powerful type systems, the development of server-side JavaScript, the expansion of artificial intelligence and machine learning, and the potential of IoT and edge computing.
 JavaScript Engines: Comparing Implementations
Apr 13, 2025 am 12:05 AM
JavaScript Engines: Comparing Implementations
Apr 13, 2025 am 12:05 AM
Different JavaScript engines have different effects when parsing and executing JavaScript code, because the implementation principles and optimization strategies of each engine differ. 1. Lexical analysis: convert source code into lexical unit. 2. Grammar analysis: Generate an abstract syntax tree. 3. Optimization and compilation: Generate machine code through the JIT compiler. 4. Execute: Run the machine code. V8 engine optimizes through instant compilation and hidden class, SpiderMonkey uses a type inference system, resulting in different performance performance on the same code.
 Python vs. JavaScript: The Learning Curve and Ease of Use
Apr 16, 2025 am 12:12 AM
Python vs. JavaScript: The Learning Curve and Ease of Use
Apr 16, 2025 am 12:12 AM
Python is more suitable for beginners, with a smooth learning curve and concise syntax; JavaScript is suitable for front-end development, with a steep learning curve and flexible syntax. 1. Python syntax is intuitive and suitable for data science and back-end development. 2. JavaScript is flexible and widely used in front-end and server-side programming.
 JavaScript: Exploring the Versatility of a Web Language
Apr 11, 2025 am 12:01 AM
JavaScript: Exploring the Versatility of a Web Language
Apr 11, 2025 am 12:01 AM
JavaScript is the core language of modern web development and is widely used for its diversity and flexibility. 1) Front-end development: build dynamic web pages and single-page applications through DOM operations and modern frameworks (such as React, Vue.js, Angular). 2) Server-side development: Node.js uses a non-blocking I/O model to handle high concurrency and real-time applications. 3) Mobile and desktop application development: cross-platform development is realized through ReactNative and Electron to improve development efficiency.
 How to Build a Multi-Tenant SaaS Application with Next.js (Frontend Integration)
Apr 11, 2025 am 08:22 AM
How to Build a Multi-Tenant SaaS Application with Next.js (Frontend Integration)
Apr 11, 2025 am 08:22 AM
This article demonstrates frontend integration with a backend secured by Permit, building a functional EdTech SaaS application using Next.js. The frontend fetches user permissions to control UI visibility and ensures API requests adhere to role-base
 From C/C to JavaScript: How It All Works
Apr 14, 2025 am 12:05 AM
From C/C to JavaScript: How It All Works
Apr 14, 2025 am 12:05 AM
The shift from C/C to JavaScript requires adapting to dynamic typing, garbage collection and asynchronous programming. 1) C/C is a statically typed language that requires manual memory management, while JavaScript is dynamically typed and garbage collection is automatically processed. 2) C/C needs to be compiled into machine code, while JavaScript is an interpreted language. 3) JavaScript introduces concepts such as closures, prototype chains and Promise, which enhances flexibility and asynchronous programming capabilities.
 Building a Multi-Tenant SaaS Application with Next.js (Backend Integration)
Apr 11, 2025 am 08:23 AM
Building a Multi-Tenant SaaS Application with Next.js (Backend Integration)
Apr 11, 2025 am 08:23 AM
I built a functional multi-tenant SaaS application (an EdTech app) with your everyday tech tool and you can do the same. First, what’s a multi-tenant SaaS application? Multi-tenant SaaS applications let you serve multiple customers from a sing
