

This guide shows you how to add live subtitles to your PowerPoint presentations for improved accessibility and multilingual audiences. Note that this feature requires Microsoft Office 365 version 16.0.11601.20178 or later; it's unavailable in standalone Microsoft Office versions.
Prerequisites: Microsoft Office 365 (version 16.0.11601.20178 or higher).
Adding Live Subtitles:
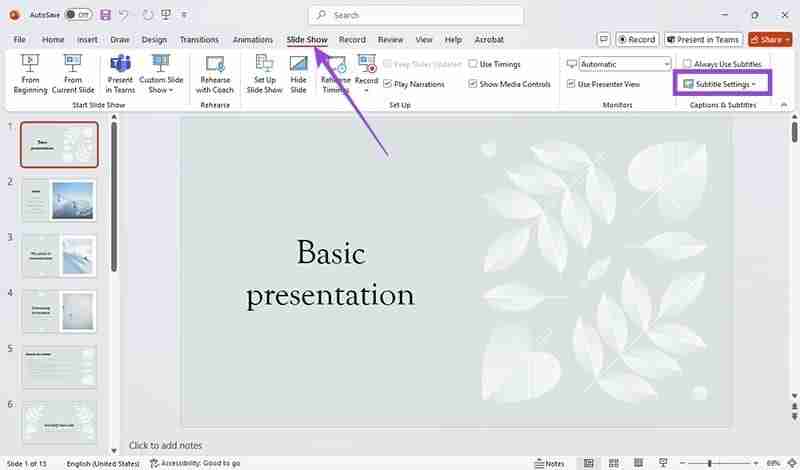
Step 1: Access Subtitle Settings. Go to the "Slide Show" tab in the PowerPoint ribbon and select "Subtitle Settings." Alternatively, in Presenter View, choose "Subtitle Settings," then "More Settings."
Step 2: Choose Spoken Language. Select the language you'll be speaking in from the "Spoken Language" dropdown. This determines the language PowerPoint "listens" to for transcription.

Step 3: Select Subtitle Language. In the "Subtitle Language" dropdown, choose the language you want the subtitles displayed in. This can be the same as the spoken language or a different language for translation.

Step 4: Position Subtitles. Choose the subtitle position: "Overlaid" (above or below the slide) or "Docked" (within the slide). The default is "Below Slide" (overlaid).

Step 5: Customize Subtitle Appearance. Access "More Settings" under "Subtitle Settings" to adjust the background, contrast, color, size, font, and transparency of your subtitles. Experiment to find the best visual match for your presentation.


Toggling Subtitles:
To always have subtitles enabled, check "Always Use Subtitles" in the "Slide Show" tab. Otherwise, use the subtitle toggle button (a screen icon with text lines at the bottom) in Slide Show View or Presenter View to turn captions on or off during your presentation.

Now you're ready to present with live, customizable subtitles!
The above is the detailed content of How to Add Live Subtitles to Your PowerPoint Presentation. For more information, please follow other related articles on the PHP Chinese website!
 What does Taobao b2c mean?
 internal server error
 What are the core technologies necessary for Java development?
 Excel diagonal header is divided into two
 What are the data conversion methods in golang?
 mysql engine introduction
 Detailed explanation of netsh command usage
 How to close the window opened by window.open


![[Web front-end] Node.js quick start](https://img.php.cn/upload/course/000/000/067/662b5d34ba7c0227.png)


