

Beginner of Astro Content Collection: Building a Powerful Content Model
This article is excerpted from the now-released book "Unlocking the Power of Astro" on SitePoint Premium. We will learn how to build flexible and scalable content models using Astro's content collection capabilities.

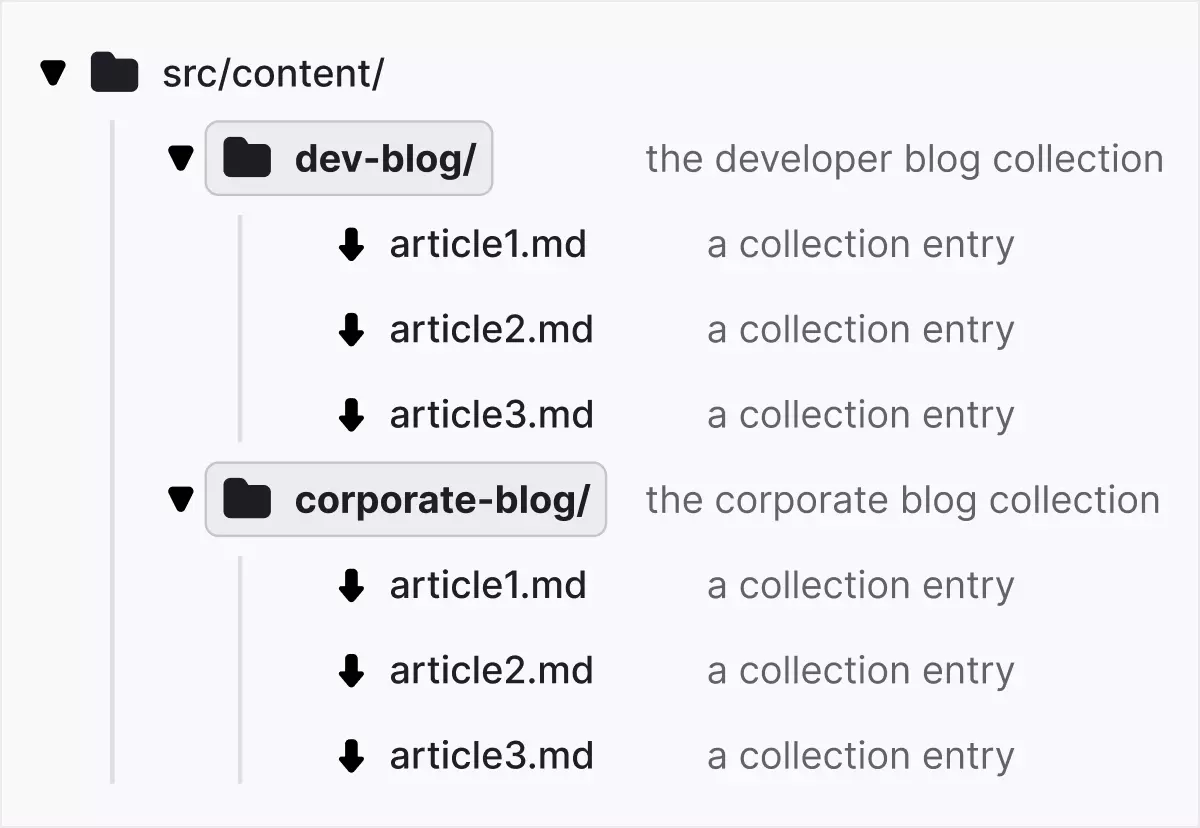
Astro uses special src/content folders to manage content collections. You can create subfolders to organize different collections of content, such as src/content/dev-blog and src/content/corporate-blog.
Each content collection can be configured in a configuration file (for example, /src/content/config.js or .ts) and uses Zod to define the collection pattern. Zod is a "TypeScript-based schema verification tool with static type inference" that has been integrated into Astro.
The following is a configuration example:
// src/content/config.js
import { z, defineCollection } from 'astro:content';

const devBlogCollection = defineCollection({
  schema: z.object({
    title: z.string(),
    author: z.string().default('The Dev Team'),
    tags: z.array(z.string()),
    date: z.date(),
    draft: z.boolean().default(true),
    description: z.string(),
  }),
});

const corporateBlogCollection = defineCollection({
  schema: z.object({
    title: z.string(),
    author: z.string(),
    date: z.date(),
    featured: z.boolean(),
    language: z.enum(['en', 'es']),
  }),
});

export const collections = {
  devblog: devBlogCollection,
  corporateblog: corporateBlogCollection,
};The code defines two content collections: "Developer Blog" and "Enterprise Blog". The defineCollection method allows you to create patterns for each collection.
Markdown files and front-end content
The example content collection in this tutorial assumes that the .md file contains front-end content that matches the pattern specified in the configuration file. For example, a "Company Blog" article might look like this:
---
title: 'Buy!!'
author: 'Jack from Marketing'
date: 2023-07-19
featured: true
language: 'en'
---

# Some Marketing Promo

This is the best product!
Slug Generation
Astro will automatically generate slugs for articles based on file name. For example, the slug of first-post.md is first-post. If the slug field is provided in the front-end content, Astro will use a custom slug.
Note that the properties specified in the export const collections object must match (and be case sensitive) the folder name where the content is located.
Data query
When you prepare the Markdown file (located in src/content/devblog and src/content/corporateblog) and config.js files, you can start querying the data in the collection:
---
import { getCollection } from 'astro:content';
const allDevPosts = await getCollection('devblog');
const allCorporatePosts = await getCollection('corporateblog');
---
{JSON.stringify(allDevPosts)}
{JSON.stringify(allCorporatePosts)}getCollection method can be used to retrieve all entries in a given set. All articles in "Developer Blog" (devblog) and "Company Blog" (corporateblog) are retrieved in the example. Use JSON.stringify() in the template to return the original data.
In addition to front-end content data, the returned data also includes id, slug and body attributes (the body attributes contain article content).
You can also filter drafts or language-specific articles by iterating over all articles:
import { getCollection } from 'astro:content';

const spanishEntries = await getCollection('corporateblog', ({ data }) => {
  return data.language === 'es';
});getCollection Returns all posts, but you can also use getEntry to return a single entry in the collection:
import { getEntry } from 'astro:content';

const singleEntry = await getEntry('corporateblog', 'pr-article-1');getCollection vs getEntries
While there are two ways to return multiple articles from a collection, there are slight differences between the two. getCollection() Retrieves a list of content collection entries based on the collection name, while getEntries() retrieves multiple collection entries from the same collection.
Examples of getEntries() for retrieving content are given in the
Content display
render()Now we know how to query data, let's discuss how to display data in a formatted way. Astro provides a convenient method called <content></content> for rendering the entire content of Markdown into the built-in Astro component
getStaticPaths()For pre-rendering, you can use
// src/content/config.js
import { z, defineCollection } from 'astro:content';

const devBlogCollection = defineCollection({
  schema: z.object({
    title: z.string(),
    author: z.string().default('The Dev Team'),
    tags: z.array(z.string()),
    date: z.date(),
    draft: z.boolean().default(true),
    description: z.string(),
  }),
});

const corporateBlogCollection = defineCollection({
  schema: z.object({
    title: z.string(),
    author: z.string(),
    date: z.date(),
    featured: z.boolean(),
    language: z.enum(['en', 'es']),
  }),
});

export const collections = {
  devblog: devBlogCollection,
  corporateblog: corporateBlogCollection,
};
getStaticPaths() is used in the Astro.props code. Then rely on id to capture the entry, which will be an object containing the metadata, slug, render(), and <content></content> methods about the entry. This method is responsible for rendering the Markdown entry to HTML in the Astro template, which is implemented by creating a <content></content> component. Amazingly, now you just need to add the
The above is the detailed content of Getting Started with Content Collections in Astro. For more information, please follow other related articles on the PHP Chinese website!
 The difference between PD fast charging and general fast charging
 How to share printer in win10
 WAN access settings
 java export excel
 Virtual mobile phone number to receive verification code
 The difference between lightweight application servers and cloud servers
 Complete collection of HTML tags
 The role of index


![[Web front-end] Node.js quick start](https://img.php.cn/upload/course/000/000/067/662b5d34ba7c0227.png)


