


In this tutorial, we’re going to see how we can deploy serverless functions alongside our front-end application and create an API that generates images and grabs metadata from links.
With serverless functions, developers can create and implement modern features and functionalities in their applications without going through the pain of setting up and managing back-end servers. The functions are hosted and deployed by cloud computing companies.
Netlify functions make creating and deploying serverless functions easy for applications hosted on Netlify.
To follow along with this tutorial, you’ll need to be familiar with JavaScript, Vue.js, Git, GitHub, and Netlify. You should also have a text editor — such as VS Code) with Vetur installed (for IntelliSense) — and a recent version of Node installed on your machine. You can install Node here. You can check your version of Node by running the command node -vin your terminal.
You should also have an account on Netlify. You can create one if you haven’t already.
To show how we can easily set up serverless functions with our front-end application, we’ll be building an app with a custom link previewer component.
This component sends a request with a URL to our serverless function. The function then uses Puppeteer to get metadata from the target site using the URL and to generate a screenshot of the site.
The function sends the metadata and screenshots back to the component on our front-end to display it as a link preview in the application.
Here’s the link to the example project deployed on Netlify. And here’s the GitHub Repo to follow along.
We’re going to create a Vue 3 application using Vue CLI. We’ll also install and set up Tailwind CSS, a utility-first CSS framework that provides classes we can use for our app without having to write a lot of custom CSS.
To quickly scaffold a Vue application, we’ll use Vue CLI. To install Vue CLI, run:
<span>npm install -g @vue/cli
</span>
Once the CLI has been installed, we can create a project by running:
vue create link-previewer
This will prompt us to pick a preset for our installation. We’ll select “Manually select features” so that we can pick the features we need. Here are the options I selected:
Please pick a preset: Manually <span>select features
</span>? Check the features needed <span>for your project: Choose Vue version, Babel, PWA, Router, Vuex, Linter
</span>? Choose a version of Vue.js that you want to start the project with: <span>3.x
</span>? Use <span>history mode for router? (Requires proper server setup for index fallback in production) Yes
</span>? Pick a linter / formatter config: Basic
? Pick additional lint features: Lint on save
? Where <span>do you prefer placing config for Babel, ESLint, etc.? In dedicated config files
</span>
After selecting these options, we’ll be asked if we want to save the options as a preset for later use. Select Y (yes) or N (no) and continue with the installation.

Run cd link-previewer to enter the newly created project.
To install Tailwind, we’ll use the PostCSS 7 compatibility build, since Tailwind depends on PostCSS 8 — which at the time of writing is not yet supported by Vue 3. Uninstall any previous Tailwind installation and re-install the compatibility build:
<span>npm uninstall tailwindcss postcss autoprefixer
</span><span>npm install -D tailwindcss@npm:@tailwindcss/postcss7-compat postcss@^7 autoprefixer@^9
</span>
Next, generate tailwind.config.js and postcss.config.js files:
npx tailwindcss init <span>-p
</span>
This will create a minimal tailwind.config.js file at the root of the project.
In the tailwind.config.js file, configure the purge option with the paths to all of the pages and components so Tailwind can tree-shake unused styles in production builds:
<span>// ./tailwind.config.js
</span>module<span>.exports = {
</span>  <span>purge: ['./index.html', './src/**/*.{vue,js,ts,jsx,tsx}'],
</span>  <span>...
</span><span>}
</span>Create the ./src/assets/css/main.css file and use the @tailwind directive to include Tailwind’s base, components, and utilities styles:
<span>/* ./src/assets/css/main.css */
</span><span><span>@tailwind base;</span>
</span><span><span>@tailwind components;</span>
</span><span><span>@tailwind utilities;</span>
</span>
<span>body{
</span>  <span><span>@apply bg-gray-50;</span>
</span><span>}
</span>Tailwind will swap these directives out at build time with all of the styles it generates based on the configured design system.
Finally, ensure the CSS file is being imported in the ./src/main.js file:
<span>// ./src/main.js
</span><span>import <span>{ createApp }</span> from 'vue'
</span><span>import <span>App</span> from './App.vue'
</span><span>import './registerServiceWorker'
</span><span>import router from './router'
</span><span>import store from './store'
</span><span>import './assets/css/main.css'
</span>
<span>createApp(App).use(store).use(router).mount('#app')
</span>And that’s it, we can run our server:
<span>npm run serve
</span>

Now that the app is running, if we go to the URL provided, we should see the default demo app for Vue and see that Tailwind’s preflight base styles have been applied.

For a smoother development experience, install the Tailwind CSS Intellisense extension for VS Code.

Here’s an overview of what our project folder should look like:
<span>npm install -g @vue/cli
</span>
Netlify Functions is a Netlify product that simplifies the process of creating and deploying serverless functions. According to the product’s home page, it’s used to:
Deploy server-side code that works as API endpoints, runs automatically in response to events, or processes more complex jobs in the background.
A basic Netlify Function file exports a handler method with the following syntax:
vue create link-previewer
Netlify provides the event and context parameters when the function is called/invoked. When a function’s endpoint is called, the handler receives an event object like this:
Please pick a preset: Manually <span>select features
</span>? Check the features needed <span>for your project: Choose Vue version, Babel, PWA, Router, Vuex, Linter
</span>? Choose a version of Vue.js that you want to start the project with: <span>3.x
</span>? Use <span>history mode for router? (Requires proper server setup for index fallback in production) Yes
</span>? Pick a linter / formatter config: Basic
? Pick additional lint features: Lint on save
? Where <span>do you prefer placing config for Babel, ESLint, etc.? In dedicated config files
</span>
The context parameter, on the other hand, includes information about the context in which the function was called.
Within the function, we’re returning an object with two important properties:
The function will be called from our site at /.netlify/functions/hello and on success, it would return the 200 status code and the message, “Hello, World!”.
Now that we have an idea of how Netlify functions work, let’s see them in practice.
To create our first Netlify function, we’ll create a new file functions/hello.js in the project directory and enter the following:
<span>npm uninstall tailwindcss postcss autoprefixer
</span><span>npm install -D tailwindcss@npm:@tailwindcss/postcss7-compat postcss@^7 autoprefixer@^9
</span>
Once we’ve created the function file, we have to make some necessary configurations in order for us to run our function locally.
We’ll create a netlify.toml file at the root of our project folder that will tell Netlify where to find our functions:
npx tailwindcss init <span>-p
</span>
Netlify will now locate and deploy the functions in the functions folder at build time.
To run our functions locally without having to deploy to Netlify, we need to install Netlify CLI. The CLI allows us to deploy our projects with some great Netlify features locally.
To install the CLI, make sure you have Node.js version 10 or later, then run:
<span>// ./tailwind.config.js
</span>module<span>.exports = {
</span>  <span>purge: ['./index.html', './src/**/*.{vue,js,ts,jsx,tsx}'],
</span>  <span>...
</span><span>}
</span>This installs Netlify CLI globally, so we can run netlify commands from any directory. To get the version, usage, and so on, we can run:
<span>/* ./src/assets/css/main.css */
</span><span><span>@tailwind base;</span>
</span><span><span>@tailwind components;</span>
</span><span><span>@tailwind utilities;</span>
</span>
<span>body{
</span>  <span><span>@apply bg-gray-50;</span>
</span><span>}
</span>To run our project locally with Netlify CLI, stop the dev server (if it’s active), then run:
<span>// ./src/main.js
</span><span>import <span>{ createApp }</span> from 'vue'
</span><span>import <span>App</span> from './App.vue'
</span><span>import './registerServiceWorker'
</span><span>import router from './router'
</span><span>import store from './store'
</span><span>import './assets/css/main.css'
</span>
<span>createApp(App).use(store).use(router).mount('#app')
</span>And here’s what we should see:

If you look closely, you’ll see a few things going on there:
Netlify tries to inject environment variables from our .env files into the build process, which can then be accessed by our Netlify Functions. In this case, we have no .env file, so it loads the defaults defined in process.
Secondly, it loads or deploys our functions located in the functions directory. The Functions server is deployed on a different and random port — 36647.
Lastly, it automatically detects what framework the application is built with and runs the necessary build processes to deploy the application. In this case, you can see “Starting Netlify Dev with Vue.js”. It also supports React and other popular frameworks.
Netlify then starts our development server on http://localhost:8888.

Now that our server has started and our functions arevloaded, we can call/invoke it. By default, we can access our functions using this route: /.netlify/functions/
One important thing to note is that we don’t need to specify the port where our Functions server is running. We can use the default route above to communicate with our Functions server. Netlify automatically resolves the URL and port behind the scenes.
if we send a GET request to http://localhost:8888/.netlify/functions/hello, we should get a response of {"message":"Hello, World!"}.

Great! Our first serverless function works!
Now that our Netlify function works, we can begin building the preview API. Here’s a quick rundown of what our Functions API is going to do:
Now that we have a basic idea of what our Functions API is going to do, we can start creating Functions. Let’s start by installing and setting up Puppeteer for Netlify Functions.
Puppeteer is a Node library that provides a high-level API to control headless Chrome or Chromium browsers. It can also be configured to use the full (non-headless) chrome or Chromium. You can do most things that you can do manually in the browser using Puppeteer. More about Puppeteer can be found in the Puppeteer documentation.
To get started with Puppeteer, we’ll install it in our project.
Puppeteer downloads a recent version of Chromium (~170MB macOS, ~282MB Linux, ~280MB Windows) that’s guaranteed to work with the API.
We can’t use the full puppeteer package for production. This is because Netlify Functions has a maximum size of 50MB, and the Chromium package is too large.
Thanks to this very useful article by Ire Aderinokun, we can still work with Puppeteer both locally and in production. Here’s what we have to do:
Install puppeteer as a development dependency* for local deployment:
<span>npm install -g @vue/cli
</span>
For Puppeteer to work both locally and in production, we have to install puppeteer-core and chrome-aws-lambda as production dependencies.
You can check out the difference between puppeteer and puppeteer-core here. The main difference, though, is that puppeteer-core doesn’t automatically download Chromium when installed.
Since puppeteer-core doesn’t download a browser, we’ll install chrome-aws-lambda, a “Chromium Binary for AWS Lambda and Google Cloud Functions” which we can use in our Netlify Functions. These are the packages that will work in production:
vue create link-previewer
Now that we’ve installed our packages, let’s create our function.
If Puppeteer installing a full browser to work with locally is going to be an issue, that may be due to slow network or bandwidth concerns. There’s a workaround, which is to use our already installed Chrome or Chromium browser for Puppeteer.
What we need is the path to the browser in our local machine. We’ll use this as our executablePath, which we’ll pass to the puppeteer.launch() method. This tells Puppeteer where to find the browser executable file.
If you don’t know exactly where to find the executable path, open up your browser and go to chrome://version/ to display the version of chrome.

Copy the path and create a .env file in the root of the project.
Please pick a preset: Manually <span>select features
</span>? Check the features needed <span>for your project: Choose Vue version, Babel, PWA, Router, Vuex, Linter
</span>? Choose a version of Vue.js that you want to start the project with: <span>3.x
</span>? Use <span>history mode for router? (Requires proper server setup for index fallback in production) Yes
</span>? Pick a linter / formatter config: Basic
? Pick additional lint features: Lint on save
? Where <span>do you prefer placing config for Babel, ESLint, etc.? In dedicated config files
</span>
To get the content of the .env file, we’ll install another package — dotenv:
<span>npm uninstall tailwindcss postcss autoprefixer
</span><span>npm install -D tailwindcss@npm:@tailwindcss/postcss7-compat postcss@^7 autoprefixer@^9
</span>
Now that we’ve successfully installed the package, let’s create the Netlify function.
Create a new file, ./functions/generate-preview.js:
npx tailwindcss init <span>-p
</span>
In the code above, we’re doing a number of things. First, we obtain the targetURL from the request payload in event.body. This would be sent with a POST request.
Next, we launch the browser using the chrome-aws-lambda package. We do this using the puppeteer.launch() method. This method takes in an object as an argument with a few optional properties. An important property we pass to this method is the executablePath.
We assign the executablePath to process.env.EXCECUTABLE_PATH || await chromium.executablePath enabling the package to locate the available headless browser to launch.
Once the browser is launched, we open a new page in the browser using the browser.newPage() method. We also set our desired browser viewport for the page using the page.setViewport() method.
Notice that we’re using the await keyword when running any function. This is because Puppeteer works asynchronously and some functions might take some time before they execute.
We can also do things like define the media features of the page with Puppeteer using the page.emulateMediaFeatures() method, which takes an array of media feature objects. That’s how we set the prefers-color-scheme to dark.
Next, we’ll navigate to the target URL and get our title, description and screenshot:
<span>npm install -g @vue/cli
</span>
In the code above, we’re using a trycatch block to wrap our code so that, if anything goes wrong, starting from await page.goto(targetURL), which navigates to the target URL, we can catch the error and send it to our front end. An error might occur through providing an invalid URL.
If the URL was valid, we get the title using the page.$eval() method, which is similar to the usual document.querySelector method in JavaScript. We pass in the CSS selector — head > title — of the title tag as the first argument. We also pass a function el => el.textContent as the second argument, where el is a parameter we pass to the function and is the title element. We can now get the value using title.textContent.
Notice that all this is wrapped in a parentheses (()) and we have a || null after page.$eval. This is so that title is assigned null if page.$eval() fails to get the title of the page.
To get the descriptions of the page, we’ll use the page.evaluate() method, which allows us to run some client-side JavaScript and return a value to the assigned variable — descriptions.
We pass a function as and argument to the page.evaluate() method. Within the function we use document.querySelector to get the various meta descriptions, such as for the default description, and for the OpenGraph description.
After getting the elements, we use ternary operators to get the content and add it to the descriptions object if the elements exist, or null if the element doesn’t exist.
Once we’ve gotten the descriptions, we take a screenshot of the page using the page.screenshot() method and close the browser with browser.close().
Finally, we’re sending the page details in the body property a JSON object with a statusCode of 200. If an error occurs in any of the previous steps, it’s caught in the catch block and we send a statusCode of 400 and the error message instead.
Let’s test our function using an API tester. You can install Postman or Talend API tester in your browser or use the Thunder Client extension, an API tester for VS Code.
You can also use cURL:
<span>npm install -g @vue/cli
</span>
Run the function using the netlify dev command.

We can send a request using the port for the functions server or the default :8888 port for the Netlify dev server to send a request to our functions. I’ll be using http://localhost:8888/.netlify/functions/generate-preview to send a POST request with an object containing the targetURL in the body:
vue create link-previewer
When we send the request, here’s the response we get.

We get a JSON object containing our preview data:
Please pick a preset: Manually <span>select features
</span>? Check the features needed <span>for your project: Choose Vue version, Babel, PWA, Router, Vuex, Linter
</span>? Choose a version of Vue.js that you want to start the project with: <span>3.x
</span>? Use <span>history mode for router? (Requires proper server setup for index fallback in production) Yes
</span>? Pick a linter / formatter config: Basic
? Pick additional lint features: Lint on save
? Where <span>do you prefer placing config for Babel, ESLint, etc.? In dedicated config files
</span>
Now that our serverless function works, let’s see how we can use it in our front end.
In order to interact with our generate-preview function, we’ll need to send POST requests containing our targetURL.
We’ll create LinkPreview components that will display normal links. These components will be passed their target URLs as props. Before the component is mounted in the application, it’ll send a POST request with the targetURL to our serverless function, get the preview data, and display it once we hover on the link.
First, let’s create our link preview component src/components/LinkPreviewer.vue.
In our <script>, we’ll get the link preview data by sending a request to our serverless function and save the data in previewData object. We’ll use this later in our template to display the data:</script>
<span>npm uninstall tailwindcss postcss autoprefixer
</span><span>npm install -D tailwindcss@npm:@tailwindcss/postcss7-compat postcss@^7 autoprefixer@^9
</span>
In the code above, we get the targetURL as a prop that will be passed into our component.
In the setup(), we pass props as an argument in order for us to access component props like targetURL.
Then, we create a reactive peviewData object using ref: const previewData = ref({}). In a new generatePreview() function, we’re using fetch to send a POST request containing the targetURL to our serverless function. This function returns the response or null if an error occurs.
Next, to run the function before the component is mounted, we use the onBeforeMount() hook. We pass an async function as an argument. Within the function, we assign previewData.value to the generatePreview() function. The descriptions (desc, og, twitter) are then gotten from the descriptions property.
To get the description that will be displayed in the preview, we’ll assign previewData.value.description to (desc || og || twitter || ""). This way, the first property with a value gets assigned to the description.
Do this to display the preview data in our template:
<span>npm install -g @vue/cli
</span>
In the above code, in order to display our image — which is essentially a base64 string — we have to pass the string along with data like the image type and encoding into the src-"" attribute.
That’s about it for our LinkPreviewer.vue component. Let’s see it in action. In ./src/views/Home.vue:
vue create link-previewer
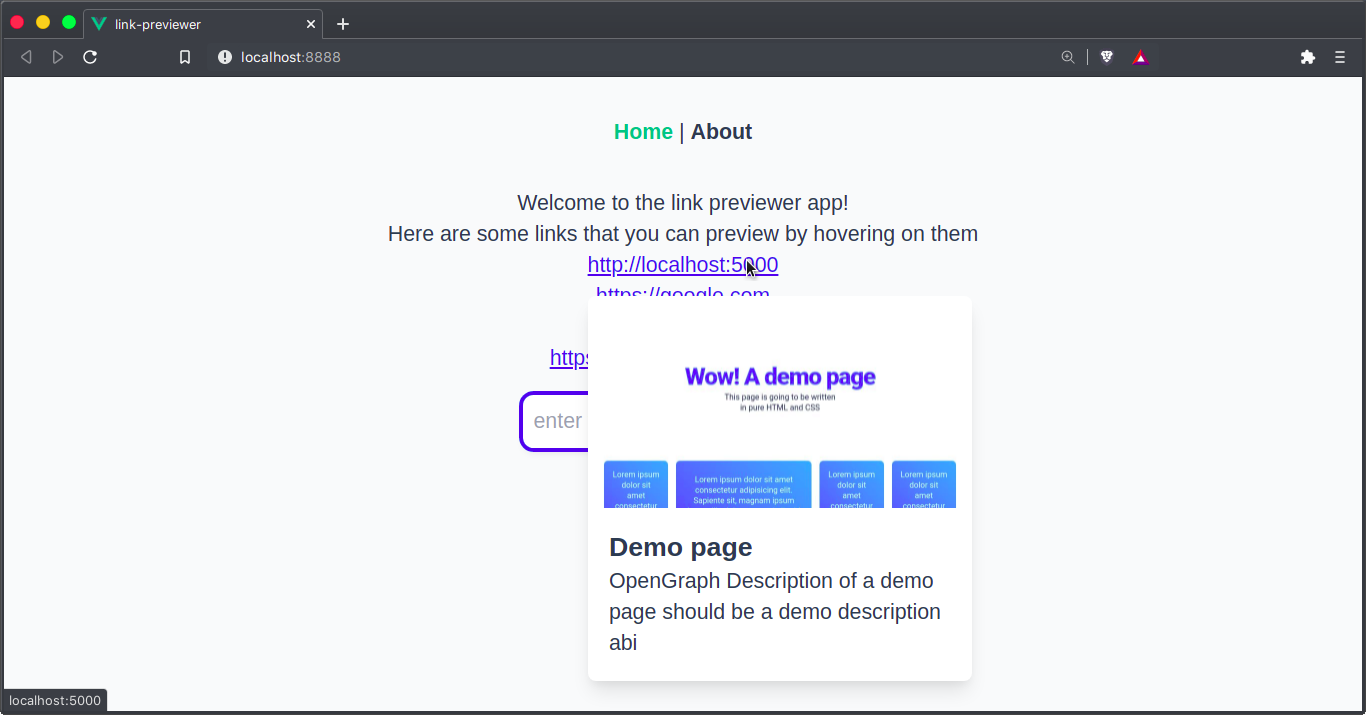
In our Home.vue file, we’re basically using a demoLinks array of links to render a list of LinkPreviewer components, which we pass to the targetURL props of the component.
We also have an element, which we use to dynamically add more LinkPreviewer components to the list.
Here’s what our simple app looks like now.
Sweet! Our app works. Since we’ve been running locally using Netlify CLI, let’s see how we can deploy to Netlify using the CLI.
Before we deploy our app to Netlify, we have to build our app for production:
Please pick a preset: Manually <span>select features
</span>? Check the features needed <span>for your project: Choose Vue version, Babel, PWA, Router, Vuex, Linter
</span>? Choose a version of Vue.js that you want to start the project with: <span>3.x
</span>? Use <span>history mode for router? (Requires proper server setup for index fallback in production) Yes
</span>? Pick a linter / formatter config: Basic
? Pick additional lint features: Lint on save
? Where <span>do you prefer placing config for Babel, ESLint, etc.? In dedicated config files
</span>
This will build our app and create a dist/ folder we can deploy to production.
Next, we need to log in to our Netlify account:
<span>npm uninstall tailwindcss postcss autoprefixer
</span><span>npm install -D tailwindcss@npm:@tailwindcss/postcss7-compat postcss@^7 autoprefixer@^9
</span>
This will log you into your Netlify account in your browser.

After authorizing the application, we can link our project to a new site. Netlify will ask us a bunch of questions:
After this, Netlify will upload our files and deploy them to our new site.
Alternatively, we can decide to deploy our site from GitHub. All you have to do is to log in to GitHub, create a new repository, and copy the URL to our newly created repo.

We then run the following command in our project folder:
<span>npm install -g @vue/cli
</span>
Note: you may not be able to push to your repo from your terminal because of authentication issues, and you might get a message from Git like this: “Support for password authentication was removed on August 13, 2021. Please use a personal access token instead.” This means that you have to create a personal access token (PAT) and use it to log in. To do that, go to GitHub token settings and generate a new token. Select all the permissions you want. Make sure you’re able to access repos. After generating your PAT, copy it and save it somewhere. Then try the git push -u origin main command again and paste in your PAT when asked for your password.
Once we’ve pushed the project to GitHub, head over to Netlify to create a new site from GitHub.
Follow the steps to choose a repository and enter the build settings for your project. For our Vue project, the build command is npm run build, and the deploy directory is dist.

After that, click on Deploy site.
Netlify will deploy the site, and we can preview our site by clicking on the deploy link provided. We can see our functions by going over to Functions from the top menu.

You can select a function to view more details and logs.

Sweet!
Here’s the link to the demo deployed on Netlify: https://lnkpreviewr.netlify.app
We’ve been able to create and deploy serverless functions with Netlify using Netlify functions. We’ve also seen how we can interact with the functions from our Vue front end. This time, we used to it screenshot and get data from other sites and built a link previewer component with it, but we can do so much more. With serverless functions, we can do more on the front end without having to bother on setting up a back-end server.
Here are some resources and content that I found useful and I think you will too:
Debugging Puppeteer code in a serverless function can be a bit tricky due to the nature of serverless architecture. However, you can use the “console.log” function to print out the values and track the execution of your code. You can also use the “page.on(‘console’, msg => console.log(msg.text()))” function to log all console output from the browser. Remember to check the logs in your serverless function provider’s dashboard.
Error handling in Puppeteer within serverless functions is crucial to ensure your application runs smoothly. You can use try-catch blocks to handle errors. In the catch block, you can log the error message and optionally send a response with the error message. This way, you can track and fix any issues that may arise.
Yes, you can use Puppeteer with other serverless providers such as AWS Lambda, Google Cloud Functions, and Azure Functions. However, the setup process may vary depending on the provider. You may need to use a custom build of Puppeteer like chrome-aws-lambda for AWS Lambda.
To optimize the performance of Puppeteer in serverless functions, you can use a few strategies. First, reuse the browser instance across multiple invocations. Second, use the ‘networkidle0’ waitUntil option to ensure all network requests have finished. Third, disable unnecessary features in Puppeteer like images, CSS, and fonts to speed up page loading.
Taking screenshots with Puppeteer in serverless functions is straightforward. You can use the “page.screenshot()” function to take a screenshot of the current page. You can specify options such as the screenshot type (JPEG or PNG), quality, and whether to include the full page or just the viewport.
Yes, you can use Puppeteer to automate form submission in serverless functions. You can use the “page.type()” function to fill in input fields and the “page.click()” function to click on buttons or links. After the form submission, you can use Puppeteer to navigate the resulting page and extract the data you need.
Puppeteer is excellent for scraping dynamic websites in serverless functions because it can render JavaScript-generated content. You can use the “page.evaluate()” function to run JavaScript code in the context of the page and extract the data you need.
Handling navigation and page redirects with Puppeteer in serverless functions can be done using the “page.waitForNavigation()” function. This function waits for the page to navigate to a new URL or reload. You can use it in conjunction with the “page.click()” function to wait for the page to navigate after clicking a link or button.
Yes, you can use Puppeteer to test your web application in serverless functions. Puppeteer provides a high-level API for browser automation, which is perfect for end-to-end testing. You can simulate user interactions, check the resulting page state, and even take screenshots to visually verify your application’s behavior.
Handling cookies and sessions with Puppeteer in serverless functions can be done using the “page.cookies()” and “page.setCookie()” functions. You can use these functions to get and set cookies, respectively. This is useful for maintaining a session or testing the behavior of your application with different cookies.
The above is the detailed content of Build a Link Previewer with Puppeteer & Serverless Functions. For more information, please follow other related articles on the PHP Chinese website!


![[Web front-end] Node.js quick start](https://img.php.cn/upload/course/000/000/067/662b5d34ba7c0227.png)


