Windows update error 0x80246018 is among the tricky errors that disturbs the normal process of update in many Windows systems. This is pretty frequent during the installation of cumulative or feature updates, thus leaving users unable to implement vital system improvements.
The majority of times, error 0x80246018 happens as a result of corrupted update files, misconfigured update components, or network interruptions that impede the connection between your system and Microsoft's update servers. When error 0x80246018 occurs, it not only prevents necessary patches from being installed but can also expose your system to security vulnerabilities and performance degradation.
Error code 0x80246018 is being reported by users who noticed that despite multiple attempts, the update process was continuously failing, which could have hinted at a problem with one of the fundamental services of Windows.
Community forums point out that sometimes the error can be related to issues with the SoftwareDistribution folder, outdated drivers, or interference from third-party antivirus software that may affect the normal operation of Windows Update. Sometimes, previous failed update attempts can worsen the error 0x80246018 and make it hard for the system to install updates successfully.
The error 0x80246018 takes place in several users when their system is overloaded, or volume usage of a network or simply an overload state occurs, thus making the search for the origin more complex. Because many contributing factors define this error code, diagnosing and resolving Error Code 0x80246018 involves thoroughly scrutinizing the settings and update logs.
In the case of frequent appearance of errors, automatic repair tool of Windows like FortectMac Washing Machine X9 will be of great effectiveness, because it will identify and correct the problems of your system; thus, your process of updating Windows should work in a proper and secure way.
Fix 1. Check relevant services
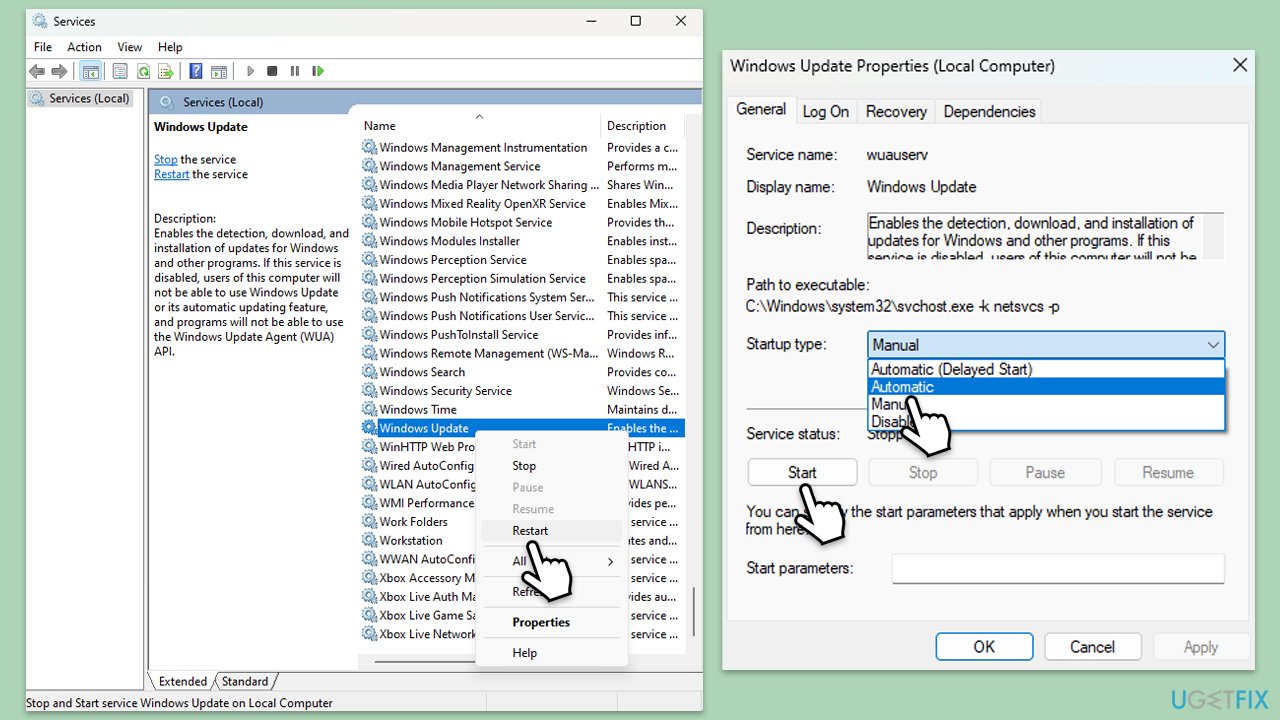
- Type in Services in Windows search and hit Enter.
- Find Windows Update Service.
- If it is already running, right-click and pick Restart.
- If the service is not running, double-click it, and select Automatic under the Startup type from the drop-down menu.
- Click Start, Apply, and OK.
- Repeat this process for Background Intelligent Transfer Service (BITS) and Cryptographic services.
Fix 2. Run the troubleshooters
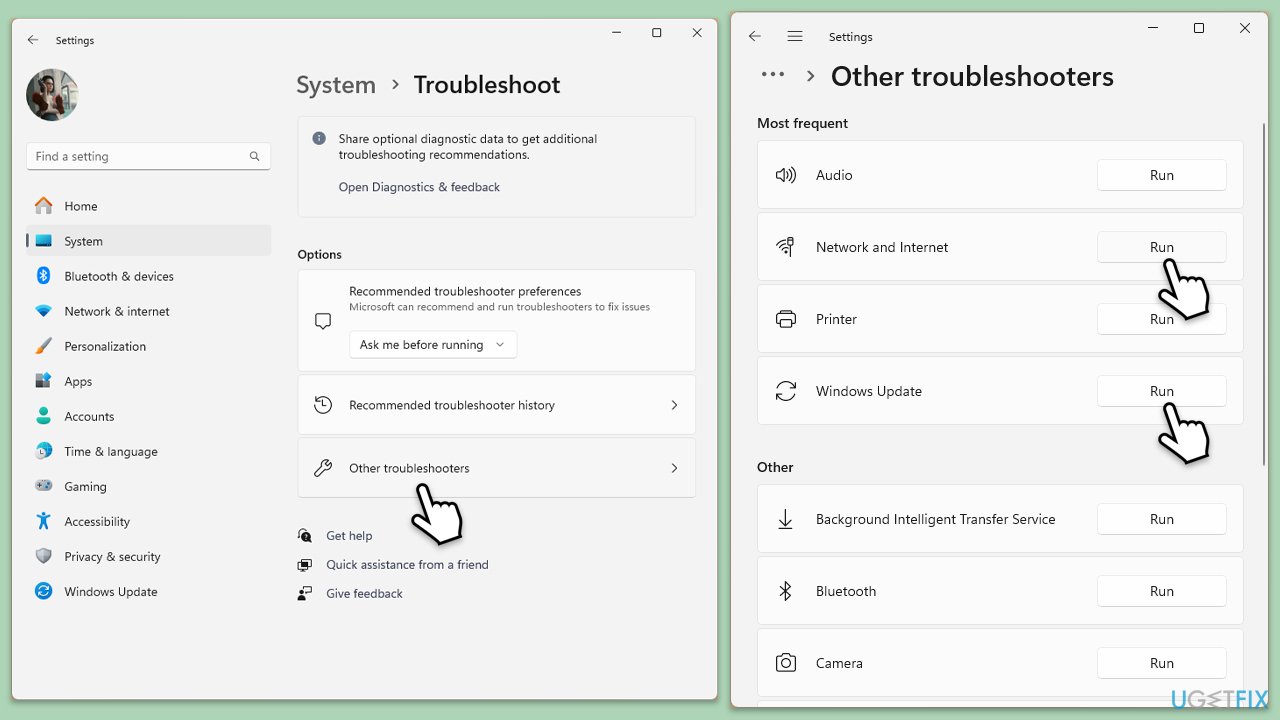
- Type Troubleshoot in Windows search and press Enter.
- Select Additional troubleshooters/Other troubleshooters.
- Find Windows Update from the list.
- Click it and select Run the troubleshooter/Run.
- The troubleshooter will automatically scan your system for potential problems and display any issues it finds.
- Repeat the process with Network and Internet troubleshooter.
In Windows 10, follow these steps:
- Right-click on Start and pick Settings.
- Go to the Network & Internet section.
- On the right side, find the Advanced network settings section.
- Click Network troubleshooter, specify the problem, and wait till the scan is finished.
- When done, apply all the recommendations.
Fix 3. Perform Disk Cleanup
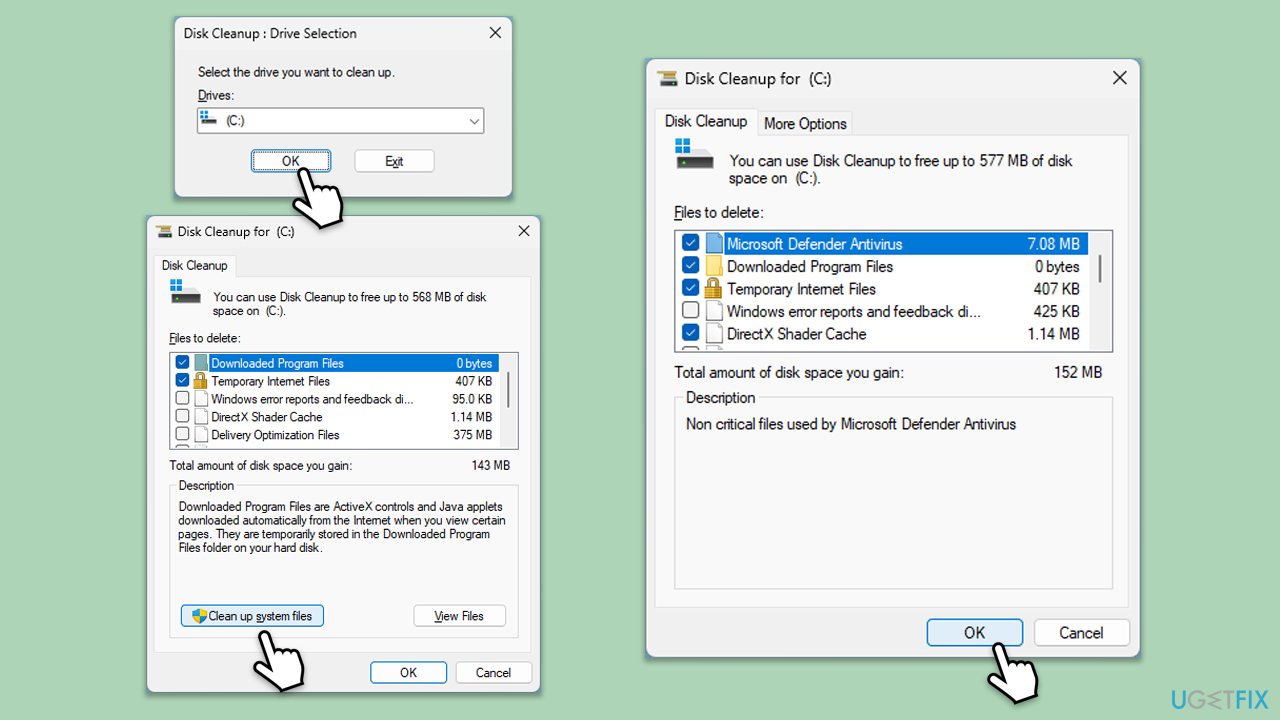
- Type Disk Cleanup in Windows search and hit Enter.
- If your Windows is installed on drive C, pick it from the list (it should be by default) and press OK.
- Click Clean up system files.
- Select your main disk again and click OK.
- Here, select the largest portions of the data used – these typically include Temporary Internet Files, Windows Update, Temporary Files, Recycle Bin, Delivery Optimization Files, and others.
- Click OK – the process should be finished shortly.
Fix 4. Install the update manually
Manually installing the update can bypass issues with the automatic update process.
- Type Updates in Windows search and hit Enter.
- Click View update history.
- Here, note down the KB number which failed to be installed.
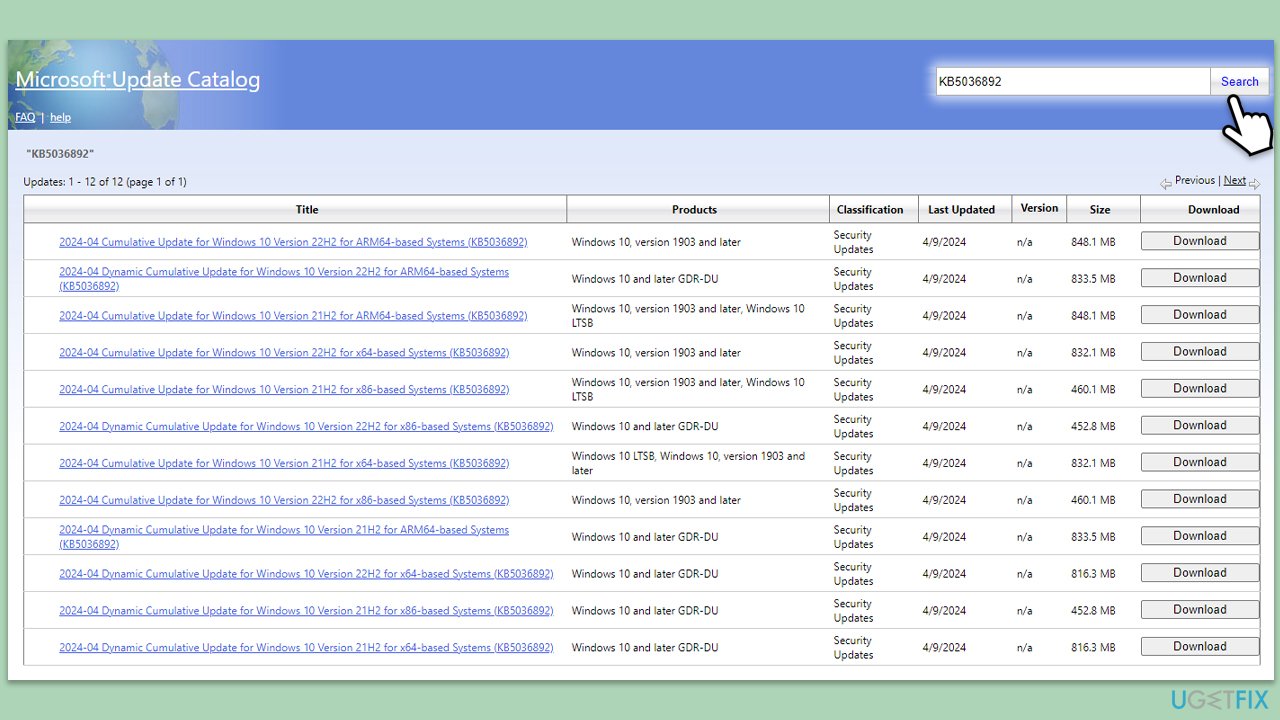
- Go to the official Microsoft Update Catalog website.
- Type the KB number into the search bar, and press Enter or click Search.
- You will find many different versions on the update – you need to find the one that matches your PC specs and Windows version (as a home user, ignore Windows server versions).
- Right-click on Start and pick System.
- Under Device specifications, check the System type section: it should either be 64-bit or 32-bit.
- Scroll down to Windows specifications and check the Version section.
- With all this information, pick the correct version for your device.
- Go back to the Microsoft Update catalog, download the appropriate version, and install it.
Fix 5. Reset Windows update components
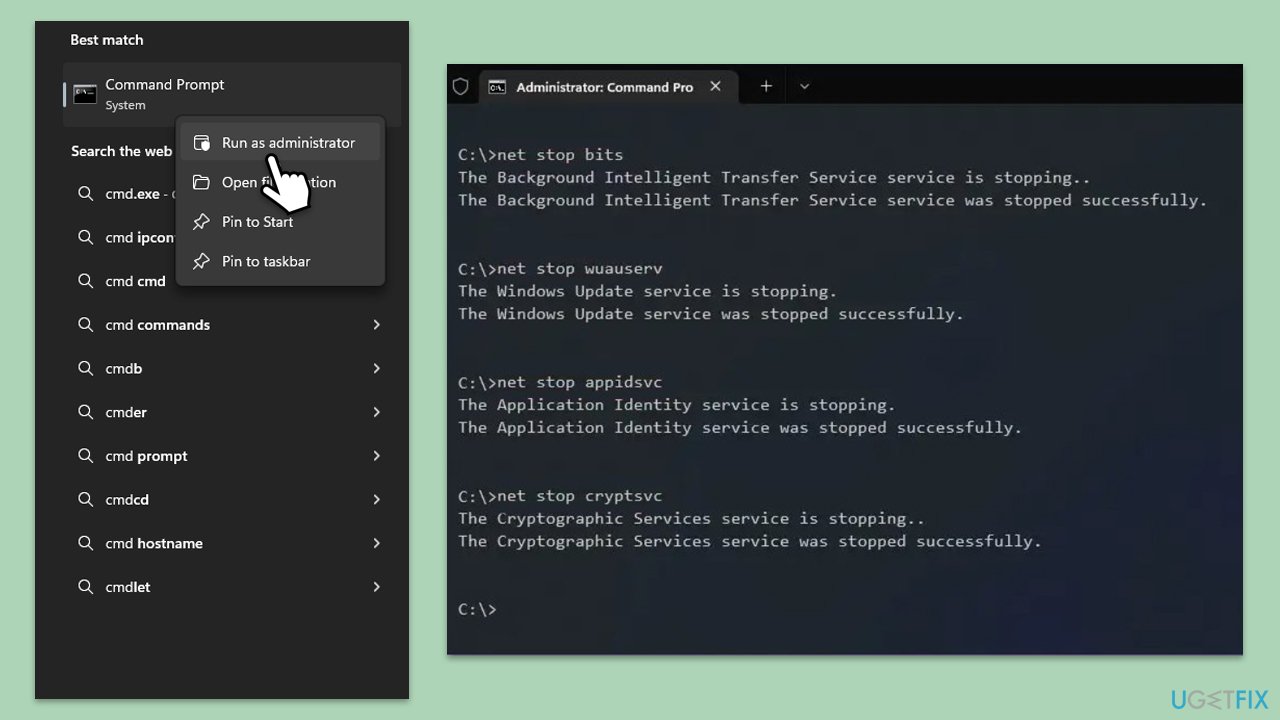
- Type cmd in Windows search.
- Right-click on Command Prompt and pick Run as administrator.
-
User Account Control (UAC) will ask whether you want to allow changes – click Yes.
- Paste in each of these commands, pressing Enter every time:
net stop bits
net stop wuauserv
net stop appidsvc
net stop cryptsvc
Del “%ALLUSERSPROFILE%Application DataMicrosoftNetworkDownloader*.*”
rmdir %systemroot%SoftwareDistribution /S /Q
rmdir %systemroot%system32catroot2 /S /Q
regsvr32.exe /s atl.dll
regsvr32.exe /s urlmon.dll
regsvr32.exe /s mshtml.dll
netsh winsock reset
netsh winsock reset proxy
net start bits
net start wuauserv
net start appidsvc
net start cryptsvc
-
Reboot your computer.
Fix 6. Repair corrupted files
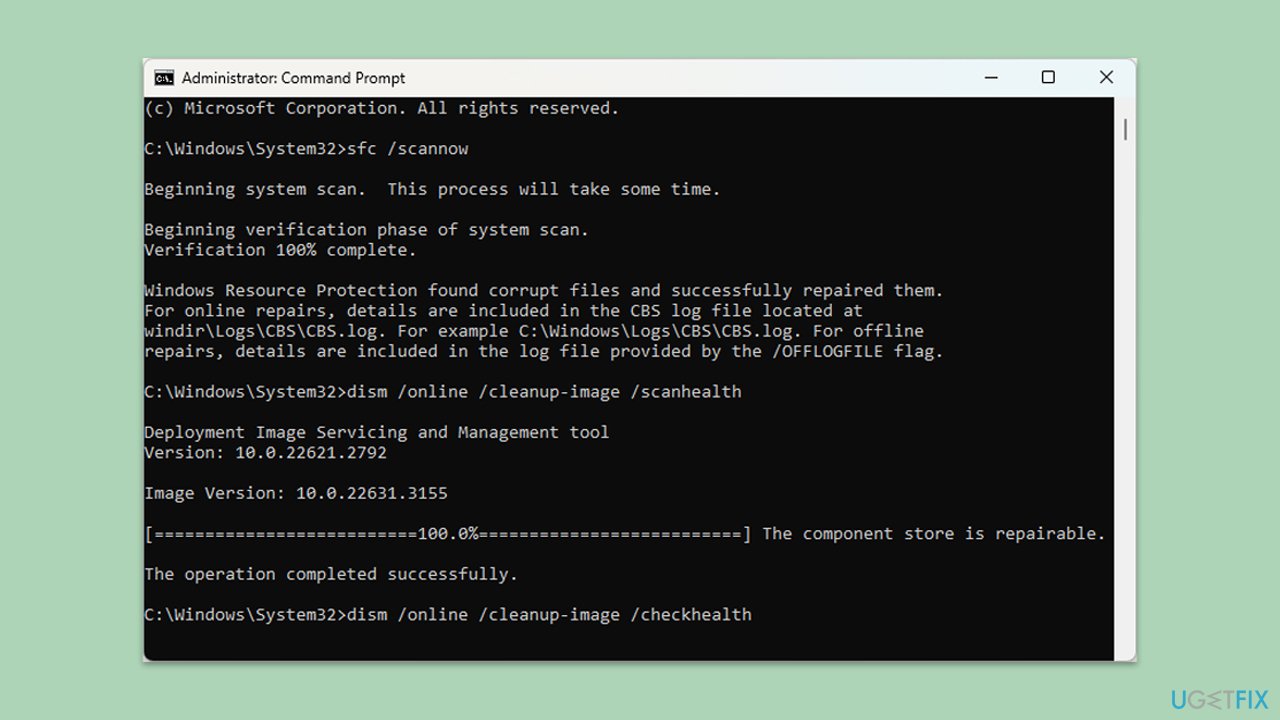
- Open Command Prompt as administrator.
- In the Command Prompt window, paste the following command and hit Enter:
sfc /scannow
- Once the scan is complete, use the following commands and press Enter after each:
Dism /Online /Cleanup-Image /CheckHealth
Dism /Online /Cleanup-Image /ScanHealth
Dism /Online /Cleanup-Image /RestoreHealth
- (Note: if you get an error executing this last command, add /Source:C:RepairSourceWindows /LimitAccess to it and try again).
-
Restart your device.
Fix 7. Use Media Creation Tool
- Visit the official Microsoft website and download Windows 10 installation media (Windows 11 version).
- Double-click the installer, select Yes when UAC shows up, and agree to the terms.
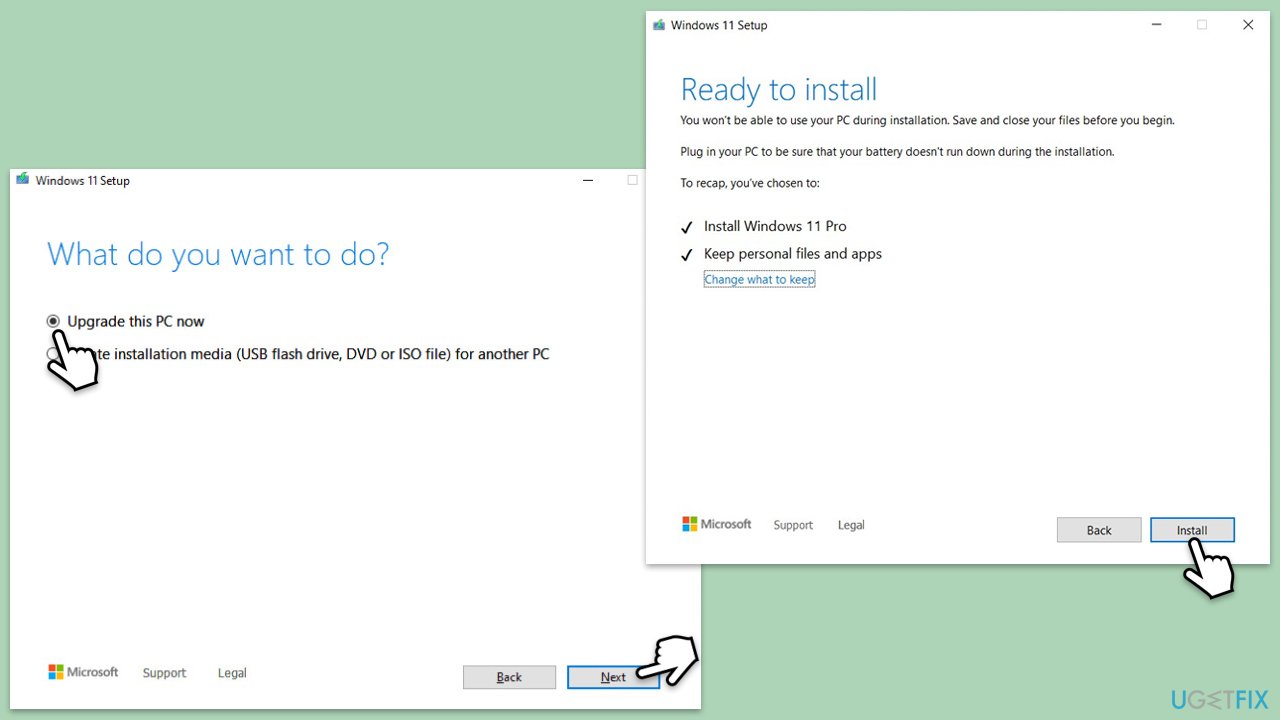
- Launch the installer.
- Agree to the terms and click Next.
- Select Upgrade this PC now and click Next.
- Windows will start downloading the needed files.
- Agree to terms once again and click Next.
- Before installing, make sure that you are happy with your choices (otherwise, you can click Change what to keep option).
- Finally, click Install to begin the upgrade process.
The above is the detailed content of How to fix Windows update error 0x80246018?. For more information, please follow other related articles on the PHP Chinese website!


 What is the format of caj
 How to install linux system
 What are the differences between weblogic and tomcat
 vscode runs c language
 How to solve tomcat Chinese garbled characters
 The difference between lightweight application servers and cloud servers
 What software is Xiaohongshu?
 How to close secure boot


![[Web front-end] Node.js quick start](https://img.php.cn/upload/course/000/000/067/662b5d34ba7c0227.png)


