


NestJS: Bridging the Gap Between Angular and Backend Development
For Angular developers seeking a seamless transition to backend development, NestJS emerges as a compelling solution. This open-source, progressive Node.js framework, built with TypeScript and sharing core concepts with Angular, provides a familiar and efficient environment for creating robust server-side applications. Its architecture combines the strengths of Object-Oriented, Functional, and Functional Reactive Programming paradigms.
Key Advantages of NestJS:
Quick Start for Angular Developers:
The familiarity of TypeScript and Angular concepts makes NestJS a rapid learning curve for Angular developers. Leveraging existing Node.js libraries like Express.js (for HTTP utilities) and TypeORM (a mature ORM for TypeScript), NestJS provides a solid foundation for building efficient backends.
Setting Up Your NestJS Environment:
Prerequisites: Ensure Node.js and npm (or yarn) are installed. TypeScript familiarity is beneficial, given your Angular background.
Installing Nest CLI: The Nest CLI streamlines project creation and scaffolding. Install it globally using:
npm install -g @nestjs/cli
Creating Your First Project: Generate a new project using:
nest new my-nest-project
Development Server: Navigate to your project directory and start the development server:
npm run start:dev
Access your application at http://localhost:3000.
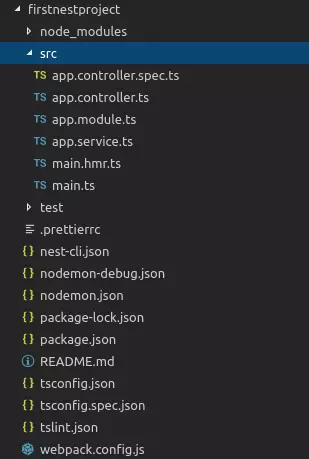
Project Structure and Modules:
NestJS projects follow a well-defined structure optimized for maintainability. The src directory houses your application code, organized into modules. Modules are created using the CLI:
nest generate module users
This command generates a new module, enhancing your application's organization.
Creating Controllers:
Controllers handle incoming HTTP requests. Generate a controller within a module using:
npm install -g @nestjs/cli
This creates a user.controller.ts file within the users module. Decorators like @Get(), @Post(), @Body(), etc., define routes and handle request data.


Conclusion:
NestJS empowers Angular developers to build robust and scalable server-side applications efficiently. Its intuitive structure, TypeScript foundation, and integration with powerful libraries make it an ideal choice for creating comprehensive full-stack applications. Refer to the official NestJS documentation for detailed information and advanced features. Consider exploring NestJS boilerplates for quicker project setup.
Frequently Asked Questions (FAQs):
The FAQs section from the original input has been omitted here to avoid redundancy, as the provided information already comprehensively addresses the points raised in the FAQs.
The above is the detailed content of Introduction to Nest.js for Angular Developers. For more information, please follow other related articles on the PHP Chinese website!


![[Web front-end] Node.js quick start](https://img.php.cn/upload/course/000/000/067/662b5d34ba7c0227.png)


