

How to Build a Vue Front End for a Headless CMS

Build a modern and efficient blog platform: the perfect combination of Vue.js and GraphCMS

Core points:
- Use Vue.js and GraphCMS to build a modern and efficient blog platform, giving full play to the speed and flexibility of JavaScript and the powerful query functions of GraphQL.
- GraphCMS is chosen because it is able to serve content through GraphQL, which is better than traditional REST in efficiency because it allows complex queries to extract data from multiple models in one request.
- Set up your Vue.js project with Vue CLI, including basic features like Babel and Router, and enhance UI components with Bootstrap-Vue and Axios for API interaction.
- Implement dynamic routing in Vue.js to handle various content categories and individual post views, ensuring a seamless user navigation experience.
- Get and display articles from GraphCMS by building GraphQL queries that retrieve articles based on categories or individual slugs and integrating these queries into Vue.js components.
- Use GraphQL mutations to create new comments and update the UI instantly without page reloading, extending the interactive features of the blog, such as the comment system.
This guide will guide you how to build a modern blog website using Vue.js and GraphCMS (a headless CMS platform).
If you want to quickly start a blog today, I suggest you use WordPress directly.
But what if you are a media giant and want to deliver your content to multiple devices as fast as possible? You may also need to integrate your content with advertising and other third-party services. You can do this with WordPress, but you will encounter some problems with this platform.
- You need to install plugins to implement additional functions. The more plugins you install, the slower your website will be.
- PHP is quite slow compared to most JavaScript web frameworks. From a developer's point of view, it's much easier and faster to implement custom functionality on a JavaScript-based front-end.
In browser loading tests, JavaScript performs better than PHP. In addition, modern JavaScript and its ecosystem provide a more pleasant development experience in rapidly building new web experiences.
Want to learn Vue.js from scratch? This article is excerpted from our advanced library. Join SitePoint Premium now to get a complete collection of Vue books covering basics, projects, tips, and tools for just $9 per month.
So the number of headless CMS solutions (which is just the backend used to manage content) has grown. With this approach, developers can focus on building fast and interactive front-ends using their chosen JavaScript framework. Customizing a JavaScript-based front-end is much easier than changing a WordPress website.
The difference between GraphCMS and most headless CMS platforms is that it serves content instead of REST, but rather through GraphQL. This new technology is better than REST because it allows us to build queries that involve data belonging to multiple models in one request.
Consider the following model pattern:
Article
- id:number
- Title: String
- Content: string
- Comments: Comments Array
Comments
- id:number
- Name: string
- Message: String
The above model has a one-to-many (article to comment). Let's see how to get a single article record with all link comment records attached.
If the data is in a relational database, you must construct an inefficient SQL statement, or construct two SQL statements to obtain the data cleanly. If the data is stored in a NoSQL database, you can easily get the data for you using a modern ORM like Vuex ORM, as shown below:
const post = Post.query()
  .with('comments')
.find(1);Very simple! You can easily pass this data to the target client via REST. But the problem is: whenever the client's data requirements change, you will be forced to return to your backend code to update your existing API endpoint, or create a new endpoint that provides the required dataset. This back and forth process is both laborious and repetitive.
If at the client level, you can just request the data you need without you doing the extra work, the backend will provide you with the data? Well, that's what GraphQL is for.
Prerequisites
Before we get started, I would like to point out that this guide is for intermediate to advanced users. I won't explain the basics, but instead show you how to quickly build a Vue.js blog using GraphCMS as a backend. You need to be proficient in the following areas:
- ES6 and ES7 JavaScript
- Vue.js (using CLI version 3)
- GraphQL
This is everything you need to know to start this tutorial. Also, the background knowledge of using REST will be very useful as I will quote it often. If you want to review it, this post might help: "REST 2.0 is here, its name is GraphQL".
About the project
We will build a very simple blog application with a basic comment system. Here are the links that can be accessed to view completed projects:
- CodeSandbox.io Demo
- GitHub Repository
Note that read-only tokens are used in the demo, so the comment system will not work. You need to provide your OPEN permission token and endpoint as described in this tutorial to make it work.
Create GraphCMS project database
Go to the GraphCMS website and click the "Start Build for Free" button. You will be taken to their registration page.

Register using your preferred method. After completing the account authentication and verification process, you should be able to access the main dashboard.
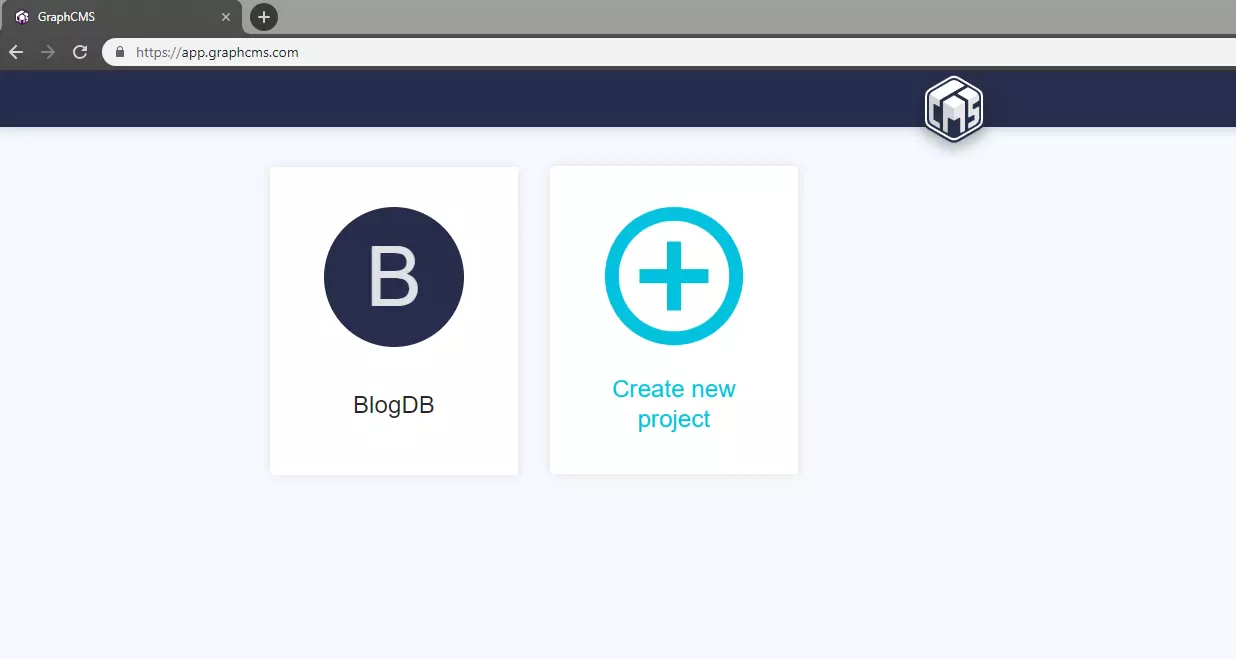
In the example above, I have created a project called "BlogDB". Continue to create a new project and name it as you like. After entering a name, you can leave the remaining fields as default values. Click to create and you will enter their project plan.

In this tutorial, select the free developer plan and click to continue . You will enter the dashboard of the project as shown below:

Go to ModeTab. We will create the following models, each with the following fields:
Category
- Name: Single-line text, required, unique
Article
- slug: single-line text, required, unique
- Title: Single-line text, required, unique
- Content: Multi-line text
Comments
- Name: Single-line text, required
- Message: Multiple lines of text, required
Create a model using Create a model button. On the right side, you should find a hidden panel for fields that can be activated by clicking the field button. Drag and drop the appropriate field type onto the model's panel. You will see a form to fill in the properties of the field. Note that there is a pink button at the bottom marked Advanced. Clicking it will expand the panel, giving you more field properties that can be enabled.

Next, you need to add the relationship between models as follows:
- Article > Category (Many to Many)
- Article > Comments (one to many)
Define this relationship using the reference field. You can add this field on either side; GraphCMS will automatically create opposite relationship fields in the referenced model. After completing the model definition, you should have the following content:

You have now completed the first part. Now let's provide some data for our model.
GraphQL Data Migration
To add content to the model, you can simply click the Content tab in the project dashboard where you can create new records for each model. However, if you find this to be a slow approach, you'll be happy to know that I've created a GraphCMS migration tool that can copy data from CSV files and upload it to your GraphCMS database. You can find the project in this GitHub repository. To get started with the project, simply download it to your workspace as follows:
const post = Post.query()
  .with('comments')
.find(1);Next, you need to get the API endpoint and token for your GraphCMS project from the Settings page of the dashboard. You need to create a new token. For permission levels, use OPEN as this will allow the tool to perform read and write operations on your GraphCMS database. Create a file named .env and place it in the root directory of the project:
git clone git@github.com:sitepoint-editors/graphcsms-data-migration.git
cd graphcsms-data-migration
npm install
Next, you may need to populate the CSV file in the data folder with your own data. Here are some sample data that have been used:
<code>ENDPOINT=<你的API端点>
TOKEN=<你的OPEN权限令牌></code>
You can change the content as needed. Make sure not to touch the top row or you will change the field name. Note that for the category column I've used the pipeline | character as the delimiter.
To upload CSV data to your GraphCMS database, execute the following commands in the following order:
<code>// Categories.csv
name
Featured
Food
Fashion
Beauty

// Posts.csv
title,slug,content,categories
Food Post 1,food-post-1,Breeze through Thanksgiving by making this Instant Pot orange cranberry sauce,Food|Featured
Food Post 2,food-post-2,This is my second food post,Food
Food Post 3,food-post-3,This is my last and final food post,Food
Fashion Post 1,fashion-post-1,This is truly my very first fashion post,Fashion|Featured
Fashion Post 2,fashion-post-2,This is my second fashion post,Fashion
Fashion Post 3,fashion-post-3,This is my last and final fashion post,Fashion
Beauty Post 1,Beauty-post-1,This is truly my very first Beauty post,Beauty|Featured
Beauty Post 2,Beauty-post-2,This is my second beauty post,Beauty</code>
Each script will print out the successfully uploaded records. The reason we upload categories first is to enable the article records to be successfully linked to existing category records.
If you want to clean your database, you can run the following command:
npm run categories
npm run posts
This script will delete the contents of all models. You will receive a report indicating how many records each model has deleted.
I hope you find this tool very convenient. Return to the dashboard to confirm the number of articles and categories
The data has been uploaded successfully.
The backend is processed, let's start building our front-end blog interface.
Build the front-end of a blog using Vue.js
As mentioned earlier, we will build a very simple blog application supported by the GraphCMS database backend. Start the terminal and navigate to your workspace.
If you haven't installed Vue CLI, install it now:
npm run reset
Then create a new project:
npm install -g @vue/cli
Select the manual selection function and select the following options:
- Function: Babel, Router
- Route history mode: Y
- Use only ESLint for error prevention
- Check lint when saving
- Profile location: dedicated configuration file
- Save preset: your choice
After the project creation process is completed, change to the project directory and install the following dependencies:
vue create vue-graphcms
To set up Bootstrap-Vue in our project, just open src/main.js and add the following code:
npm install bootstrap-vue axios
Next, we need to start building the project structure. In the src/components folder, delete existing files and create these new files:
- CommentForm.vue
- CommentList.vue
- Post.vue
- PostList.vue
In the src/views folder, delete About.vue and create a new file named PostView.vue. As you can see from the demo, we will have several category pages, each showing a list of articles filtered by category. Technically, only one page will display a different list of articles based on the active route name. The PostList component will filter articles based on the current route.
Let's set up the route first. Open src/router.js and replace existing code with this code:
const post = Post.query()
  .with('comments')
.find(1);Now that we have the route, let's set up the navigation menu. Open src/App.vue and replace the existing code with this code:
git clone git@github.com:sitepoint-editors/graphcsms-data-migration.git
cd graphcsms-data-migration
npm install
This will add a navigation bar at the top of our website with links to our different categories.
Save the file and update the following files accordingly:
src/views/Home.vue
<code>ENDPOINT=<你的API端点>
TOKEN=<你的OPEN权限令牌></code>
src/components/PostList.vue
<code>// Categories.csv
name
Featured
Food
Fashion
Beauty

// Posts.csv
title,slug,content,categories
Food Post 1,food-post-1,Breeze through Thanksgiving by making this Instant Pot orange cranberry sauce,Food|Featured
Food Post 2,food-post-2,This is my second food post,Food
Food Post 3,food-post-3,This is my last and final food post,Food
Fashion Post 1,fashion-post-1,This is truly my very first fashion post,Fashion|Featured
Fashion Post 2,fashion-post-2,This is my second fashion post,Fashion
Fashion Post 3,fashion-post-3,This is my last and final fashion post,Fashion
Beauty Post 1,Beauty-post-1,This is truly my very first Beauty post,Beauty|Featured
Beauty Post 2,Beauty-post-2,This is my second beauty post,Beauty</code>
Note that in the PostList component, we use a custom observer to update our category data attributes based on the current URL.
We can now perform a quick test to confirm that the routing is working properly. Use the command npm run serve to start the Vue.js server. Open the browser at localhost:8080 and test each navigation link. The category property should output the same value we defined in the route name property.

Extract data from GraphCMS
Now that our routing code is working, let's see how to extract information from our GraphCMS backend. In the root of the project, create an env.local file and fill it with the values of the following fields:
npm run categories
npm run posts
Note that the Vue.js single page application only loads custom environment variables starting with VUE_APP. You can find the API endpoints and tokens from your GraphCMS dashboard settings page. For tokens, make sure to create a token with OPEN permissions, as it will allow read and write operations. Next, create the file src/graphcms.js and copy the following code:
npm run reset
The auxiliary file we just created provides two main functions:
- It creates an instance of axios configured to perform authorization requests on your GraphCMS backend.
- It contains GraphQL queries and mutations used in this project. They are responsible for obtaining articles (by category or by slug), as well as creating new comments. If you want to learn more about GraphQL queries and mutations, please consult the GraphQL documentation.
You can also use the API Explorer in the project dashboard to test these queries and mutations. To do this, copy the query or mutation from the above code and paste it into the top window of API Explorer. Enter any query variables in the window below and click the Play button. You should see the results in the new pane on the right.
This is a query example:

This is an example of variation:

Show data in template
Now, let's create an HTML template in src/components/PostList.vue which will display the post list in a concise way. We will also add axios code that will extract article data from our GraphCMS database:
const post = Post.query()
  .with('comments')
.find(1);Let's take a quick look at the main functions of the code:
- Load. When a request is made, a load spinner is displayed to indicate to the user that some operations are being performed. After the request is complete, the load spinner will be replaced by the article list.
- Query. To get the list of articles by category, I found it easier to query categories and then use the category-to-post relationship to access the filtered articles.
- Create. The fetchPosts() function is called from within the created life cycle hook when the page is first loaded.
- Observation. When the routing URL changes, the fetchPosts() function is called every time.
After making these changes, you should now see the following view:

Show individual article
Make sure the top main navigation works as expected. Now let's deal with the Post component. It will have its own fetchPost() function, which will query by slug. If you want to know where the slug parameter comes from, let me remind you this piece of code we added in router.js:
git clone git@github.com:sitepoint-editors/graphcsms-data-migration.git
cd graphcsms-data-migration
npm install
This means that anything after /post/ in the URL can be used in the component as this.$route.params.slug.
The post component is the parent component of the CommentForm and CommentList components. Comment data will be passed as props from the article record to the CommentList component. Now let's insert the code of src/components/CommentList.vue:
<code>ENDPOINT=<你的API端点>
TOKEN=<你的OPEN权限令牌></code>
Don't expect to see any results now unless you have manually entered comments through the GraphCMS dashboard. Let's add code to src/components/CommentForm.vue, which will enable users to add comments to blog posts:
<code>// Categories.csv
name
Featured
Food
Fashion
Beauty

// Posts.csv
title,slug,content,categories
Food Post 1,food-post-1,Breeze through Thanksgiving by making this Instant Pot orange cranberry sauce,Food|Featured
Food Post 2,food-post-2,This is my second food post,Food
Food Post 3,food-post-3,This is my last and final food post,Food
Fashion Post 1,fashion-post-1,This is truly my very first fashion post,Fashion|Featured
Fashion Post 2,fashion-post-2,This is my second fashion post,Fashion
Fashion Post 3,fashion-post-3,This is my last and final fashion post,Fashion
Beauty Post 1,Beauty-post-1,This is truly my very first Beauty post,Beauty|Featured
Beauty Post 2,Beauty-post-2,This is my second beauty post,Beauty</code>
Now we have a basic comment form that is able to submit new comments to our GraphQL backend system. After saving a new comment, we will get the returned object and add it to the post.comments array. This should trigger the CommentList component to display newly added comments.
Now let's build the src/components/Post.vue component:
npm run categories
npm run posts
Finally, here is the code for src/views/PostView.vue to bring everything together:
npm run reset
You should now see the view of the article. Pay attention to the end of the URL:slug:localhost:8080/post/fashion-post-1:

In the example above, I have added some comments to test for new features. Make sure you do the same.
Summary
I hope you have seen how easy it is to build a blog website using Vue.js and GraphQL. If you've been using plain PHP and MySQL, you'll write more code. Even with the PHP framework, you still need to write more code for simple blogging applications.
For the purposes of this tutorial, I have to keep it as simple as possible. You may notice that this blog project is far from reaching the easiest blog setup. We haven't solved many issues such as error handling, form validation, and caching. For the last part, I recommend the Apollo Client because it has a mechanism to cache the results of GraphQL query. Then of course, an author model and an appropriate comment system that supports authentication and message approval are needed.
If you prefer, please continue to improve this simple Vue.js GraphCMS blog.
FAQs (FAQ) about headless CMS and Vue.js
What are the advantages of using headless CMS and Vue.js?
Using headless CMS and Vue.js has many advantages. First, it provides a more flexible and efficient content management system. It separates the backend and the frontend, allowing developers to handle both ends independently. This separation also means that CMS can provide content to any platform, not just a website. Second, Vue.js is a progressive JavaScript framework that is easy to understand and integrates with existing projects. It provides a simple and flexible API that makes it the perfect match for headless CMS.
How to integrate headless CMS with Vue.js?
Integrating headless CMS with Vue.js involves several steps. First, you need to choose a headless CMS that supports API-based communication. Next, you need to set up your Vue.js project and install the necessary dependencies. You can then use the CMS's API to get the content and display it in your Vue.js application. Some CMS also offer SDKs or plugins to make this integration easier.
Can I use any headless CMS with Vue.js?
Yes, as long as the headless CMS supports API-based communication, you can use any headless CMS with Vue.js. This is because Vue.js is a front-end framework that communicates with the back-end (in this case CMS). Some popular headless CMSs you can use with Vue.js include Strapi, Sanity, and ButterCMS.
What are the examples of projects using headless CMS and Vue.js?
There are many projects using headless CMS and Vue.js. These projects range from blogs and e-commerce websites to full-fledged web applications. Some examples include a Vue.js document site using VuePress (a Vue-based static website generator), and a Storyblok site using Storyblok (a headless CMS) and Nuxt.js (a Vue.js framework).
How does headless CMS improve the performance of Vue.js applications?
Headless CMS can significantly improve the performance of Vue.js applications. By separating the backend and the frontend, it allows for more efficient content delivery. CMS can deliver only the necessary content, thereby reducing the amount of data that needs to be transmitted and processed. This can lead to faster page load times and a smoother user experience.
Is it difficult to migrate from a traditional CMS to a headless CMS in a Vue.js project?
The difficulty of migrating from a traditional CMS to a headless CMS in a Vue.js project depends on the complexity of the project and the CMS used. However, most headless CMSs provide tools and documentation to aid in the migration process. Furthermore, since Vue.js is a flexible and modular framework, it can often adapt to such migrations without major changes to existing code.
Can headless CMS using Vue.js support multiple languages?
Yes, headless CMS using Vue.js can support multiple languages. Many headless CMSs offer built-in multilingual support, allowing you to manage content in different languages. In terms of Vue.js, you can use libraries such as vue-i18n to handle internationalization.
What is the security performance of headless CMS using Vue.js?
Using headless CMS with Vue.js can be very safe. The separation of the backend and frontend adds an additional layer of security as it reduces the attack surface. Additionally, most headless CMSs offer powerful security features such as SSL encryption, user authentication, and access control. Vue.js also has built-in protections for common web vulnerabilities.
Can I use headless CMS with Vue.js for mobile application development?
Yes, you can use headless CMS with Vue.js for mobile application development. Because the headless CMS provides content through the API, it can provide content to any platform, including mobile applications. Vue.js can be used to develop mobile applications using frameworks such as NativeScript or Weex.
What is the future development of using headless CMS and Vue.js?
The future development prospects of using headless CMS and Vue.js are broad. Both technologies are growing penetration rates and they are being used in more and more projects. The flexibility and efficiency of this combination, as well as performance advantages, make it a powerful choice for modern web development. As more developers become familiar with these technologies, we can expect to see more innovative uses and integrations.
The above is the detailed content of How to Build a Vue Front End for a Headless CMS. For more information, please follow other related articles on the PHP Chinese website!

Hot AI Tools

Undresser.AI Undress
AI-powered app for creating realistic nude photos

AI Clothes Remover
Online AI tool for removing clothes from photos.

Undress AI Tool
Undress images for free

Clothoff.io
AI clothes remover

Video Face Swap
Swap faces in any video effortlessly with our completely free AI face swap tool!

Hot Article
Hot Tools

Notepad++7.3.1
Easy-to-use and free code editor

SublimeText3 Chinese version
Chinese version, very easy to use

Zend Studio 13.0.1
Powerful PHP integrated development environment

Dreamweaver CS6
Visual web development tools

SublimeText3 Mac version
God-level code editing software (SublimeText3)
Hot Topics
 1664
1664
 14
1423
52
1317
25
1268
29
1246
24
14
1423
52
1317
25
1268
29
1246
24

 The Evolution of JavaScript: Current Trends and Future Prospects
Apr 10, 2025 am 09:33 AM
The Evolution of JavaScript: Current Trends and Future Prospects
Apr 10, 2025 am 09:33 AM
The latest trends in JavaScript include the rise of TypeScript, the popularity of modern frameworks and libraries, and the application of WebAssembly. Future prospects cover more powerful type systems, the development of server-side JavaScript, the expansion of artificial intelligence and machine learning, and the potential of IoT and edge computing.
 JavaScript Engines: Comparing Implementations
Apr 13, 2025 am 12:05 AM
JavaScript Engines: Comparing Implementations
Apr 13, 2025 am 12:05 AM
Different JavaScript engines have different effects when parsing and executing JavaScript code, because the implementation principles and optimization strategies of each engine differ. 1. Lexical analysis: convert source code into lexical unit. 2. Grammar analysis: Generate an abstract syntax tree. 3. Optimization and compilation: Generate machine code through the JIT compiler. 4. Execute: Run the machine code. V8 engine optimizes through instant compilation and hidden class, SpiderMonkey uses a type inference system, resulting in different performance performance on the same code.
 Python vs. JavaScript: The Learning Curve and Ease of Use
Apr 16, 2025 am 12:12 AM
Python vs. JavaScript: The Learning Curve and Ease of Use
Apr 16, 2025 am 12:12 AM
Python is more suitable for beginners, with a smooth learning curve and concise syntax; JavaScript is suitable for front-end development, with a steep learning curve and flexible syntax. 1. Python syntax is intuitive and suitable for data science and back-end development. 2. JavaScript is flexible and widely used in front-end and server-side programming.
 JavaScript: Exploring the Versatility of a Web Language
Apr 11, 2025 am 12:01 AM
JavaScript: Exploring the Versatility of a Web Language
Apr 11, 2025 am 12:01 AM
JavaScript is the core language of modern web development and is widely used for its diversity and flexibility. 1) Front-end development: build dynamic web pages and single-page applications through DOM operations and modern frameworks (such as React, Vue.js, Angular). 2) Server-side development: Node.js uses a non-blocking I/O model to handle high concurrency and real-time applications. 3) Mobile and desktop application development: cross-platform development is realized through ReactNative and Electron to improve development efficiency.
 How to Build a Multi-Tenant SaaS Application with Next.js (Frontend Integration)
Apr 11, 2025 am 08:22 AM
How to Build a Multi-Tenant SaaS Application with Next.js (Frontend Integration)
Apr 11, 2025 am 08:22 AM
This article demonstrates frontend integration with a backend secured by Permit, building a functional EdTech SaaS application using Next.js. The frontend fetches user permissions to control UI visibility and ensures API requests adhere to role-base
 Building a Multi-Tenant SaaS Application with Next.js (Backend Integration)
Apr 11, 2025 am 08:23 AM
Building a Multi-Tenant SaaS Application with Next.js (Backend Integration)
Apr 11, 2025 am 08:23 AM
I built a functional multi-tenant SaaS application (an EdTech app) with your everyday tech tool and you can do the same. First, what’s a multi-tenant SaaS application? Multi-tenant SaaS applications let you serve multiple customers from a sing
 From C/C to JavaScript: How It All Works
Apr 14, 2025 am 12:05 AM
From C/C to JavaScript: How It All Works
Apr 14, 2025 am 12:05 AM
The shift from C/C to JavaScript requires adapting to dynamic typing, garbage collection and asynchronous programming. 1) C/C is a statically typed language that requires manual memory management, while JavaScript is dynamically typed and garbage collection is automatically processed. 2) C/C needs to be compiled into machine code, while JavaScript is an interpreted language. 3) JavaScript introduces concepts such as closures, prototype chains and Promise, which enhances flexibility and asynchronous programming capabilities.
 JavaScript and the Web: Core Functionality and Use Cases
Apr 18, 2025 am 12:19 AM
JavaScript and the Web: Core Functionality and Use Cases
Apr 18, 2025 am 12:19 AM
The main uses of JavaScript in web development include client interaction, form verification and asynchronous communication. 1) Dynamic content update and user interaction through DOM operations; 2) Client verification is carried out before the user submits data to improve the user experience; 3) Refreshless communication with the server is achieved through AJAX technology.
