


Key Points
lambda-local that can simulate AWS Lambda environments locally. This article was originally published in mongoDB. Thank you for supporting the partners who made SitePoint possible.
In recent years, the developer environment has undergone tremendous changes. In the past, we developers would usually run all the tools (databases, web servers, development IDEs…) on their own machines, but cloud services such as GitHub, MongoDB Atlas, and AWS Lambda are revolutionizing this. They make it increasingly easier for developers to write and run code anywhere, on any device, without (or with very few) dependencies.
A few years ago, if you crashed, lost your machine, or just lost your power, it might take several days for you to get your new machine back on and set up and configure everything correctly to get it back to the previous one state.
With the cloud developer tools, you can now switch from one laptop to another without causing too much disruption. However, that doesn't mean everything goes well. Writing and debugging code in the cloud is still challenging; as developers, we know that having a local development environment that is still valuable despite being lighter.
This is exactly what I'm going to try to show you in this blog post: How to easily integrate AWS Lambda Node.js functions with MongoDB database hosted in MongoDB Atlas (DBaaS for MongoDB (Database as a Service)) . More specifically, we will write a simple Lambda function that creates a single document in a collection stored in a MongoDB Atlas database. I'll walk you through this tutorial step by step and you should finish it in an hour.
Let's start with the necessary requirements and get you started:
Now that you understand the requirements, let's discuss the specific steps we will take to write, test, and deploy our Lambda functions:
I didn't go into the details of setting up VPC peering between our MongoDB Atlas cluster and AWS Lambda for two reasons: 1) We already have a detailed documentation page on setting up VPC peering and a I highly recommend this post on VPC peering in Atlas; 2) The M0 cluster (the cluster I used to build this demonstration) does not support VPC peering.
If you do not set up VPC peering, the following will happen:
If you're just trying to get this demo code for writing, these two warnings may be fine, but if you plan to deploy a Lambda-Atlas integration that can be used in a production environment, setting up VPC peering is a highly recommended one we highly recommend safety best practices. M0 is our current free product; check out our MongoDB Atlas pricing page for the full range of all available instance sizes.
Remind that for development environments and low traffic websites, the M0, M10 and M20 instance sizes should be fine. However, for production environments that support high-traffic applications or large datasets, it is recommended to use an M30 or larger instance size.
Ensure that your application complies with the minimum permission access policy is critical to protecting your data from malicious threats. That's why we will set up a specific database user that will only have read/write access to our travel database. Let's see how to implement this in MongoDB Atlas:
On the Cluster page, select the Security tab and press the Add New User button

 In the User Permissions section, select the
 You can then choose to assign a finer granular access control permission:
 In the Select Role drop-down list, select readWrite and fill in the Database field with the name of the database you will use to store the document. I chose to name it travel.
 In the Password section, use the Automatically Generate Security Password button (and note down the generated password) or set your favorite password. Then press the "Add User" button to confirm that this user is created.
Let's get the cluster connection string by the way, because we will need it in the Lambda code to connect to our MongoDB Atlas database:
Suppose you have created a MongoDB Atlas cluster, press the "Connect" button next to the cluster:
 Copy the URI Connection String value and store it safely in the text document. We will need it in the code later, as well as the password you just set.
 In addition, if you are not using VPC peering, navigate to the IP Whitelist tab and add the 0.0.0.0/0 CIDR block or press the Allow access from anywhere button. As a reminder, this setting is highly recommended not to be used in production environments and may make your MongoDB Atlas cluster vulnerable to malicious attacks.
 Create a local Node.js project
While the Lambda function supports multiple languages, I chose to use Node.js, thanks to the increasing popularity of JavaScript as a multifunctional programming language and the great success of MEAN and MERN stacks (MongoDB, Express.js, Angular /React, Node.js acronyms – Check out Andrew Morgan’s wonderful developer blog series on this topic). Also, to be honest, I like that it is an interpreted lightweight language that doesn't require heavy development tools and compilers.
Now it's time to write some code, so let's continue to use Node.js as our preferred language for our Lambda functions.
First create a folder, such as lambda-atlas-create-doc
<code>mkdir lambda-atlas-create-doc
&& cd lambda-atlas-create-doc</code>
Next, run the following command from the terminal console and initialize our project with the package.json file
<code>npm init</code>
The system will prompt you to configure some fields. I've left them to your creativity, but note that I chose to set the entry point to app.js (rather than the default index.js), so you might want to do that, too.
We need to use the MongoDB Node.js driver so that we can connect to our MongoDB database from the Lambda function (on Atlas), so let's go ahead and run the following command to install it from our project root:
<code>npm install mongodb --save</code>
We also want to write and test our Lambda functions locally to speed up development and simplify debugging, because instantiating the lambda function in Amazon Web Services is not particularly fast every time (and debugging doesn't actually exist unless you are console .log() function fans). I chose to use the lambda-local package because it provides support for environment variables (we will use it later):
<code>(sudo) npm install lambda-local -g</code>
Create an app.js file. This will be the file containing our lambda function:
<code>touch app.js</code>
Now that you have imported all the required dependencies and created the Lambda code file, please open the app.js file in the code editor of your choice (Atom, Sublime Text, Visual Studio Code...) and use the following Initialize it by code segment:
<code>'use strict'

var MongoClient = require('mongodb').MongoClient;

let atlas_connection_uri;
let cachedDb = null;

exports.handler = (event, context, callback) => {
  var uri = process.env['MONGODB_ATLAS_CLUSTER_URI'];

  if (atlas_connection_uri != null) {
    processEvent(event, context, callback);
  }
  else {
    atlas_connection_uri = uri;
    console.log('the Atlas connection string is ' + atlas_connection_uri);
    processEvent(event, context, callback);
  }
};

function processEvent(event, context, callback) {
  console.log('Calling MongoDB Atlas from AWS Lambda with event: ' + JSON.stringify(event));
}</code>Let's pause and comment the above code, as you may have noticed some weird structure:
Now that we have finished the code comment, let's create an event.json file (in the project root directory) and populate it with the following data:
<code>mkdir lambda-atlas-create-doc
&& cd lambda-atlas-create-doc</code>
(If you want to know, the JSON file is what we will send to MongoDB Atlas to create our BSON document)
Next, make sure you have set it up correctly by running the following command in the terminal console:
<code>npm init</code>
If you want to test with your own cluster URI connection string (I believe you will), don't forget to escape the double quotes, commas, and & characters in the E parameter, or lambda-local will throw an error (You should also replace the $PASSWORD and $DATABASE keywords with your own values).
After you run it locally, you should see the following console output:
 If you encounter an error, check your connection string and double quotes/comma/& escapes (as mentioned above).
Now, let's handle the core content of the function code by customizing the processEvent() function and adding the createDoc() function:
<code>mkdir lambda-atlas-create-doc
&& cd lambda-atlas-create-doc</code>
Note how easy it is to connect to the MongoDB Atlas database and insert documents, and the small piece of code I added to convert JSON dates (formatted as ISO-compliant strings) to real JavaScript that can be stored as BSON dates date.
You may also notice my performance optimization annotation and the call to context.callbackWaitsForEmptyEventLoop = false . If you are interested in understanding what they mean (I think you should!), see my subsequent blog post on how to optimize Lambda performance with MongoDB Atlas.
You are now ready to test your Lambda function completely locally. Using the same lambda-local command as before, hopefully you will receive a nice "Kudos" success message:
 If everything goes well on your local machine, let's release our local Node.js project as a new Lambda function!
The first step we are going to take is to compress our Node.js project, because we won't write Lambda code functions in the Lambda code editor. Instead, we will choose the zip upload method to push our code to AWS Lambda.
I used the zip command line tool in the terminal console, but any method would work (as long as you compress the files into the top-level folder, not the top-level folder itself!):
<code>npm init</code>
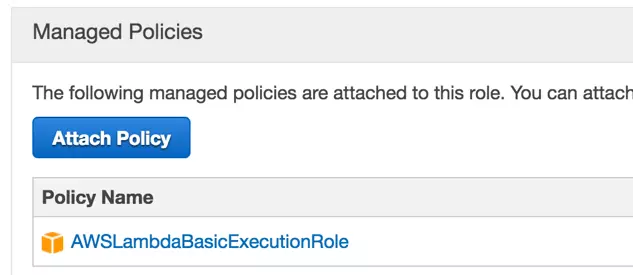
Next, log in to the AWS console, navigate to the IAM role page and create a role (for example, LambdaBasicExecRole) with AWSLambdaBasicExecutionRole permission policy:
 Let's now navigate to the AWS Lambda page. Click the Start Now (if you have never created a Lambda function) or the Create Lambda function button. We will not use any blueprints and we will not configure any triggers, so please select "Configure Function" directly in the left navigation bar:
 In the Configure Functions page, enter the name of the function (for example, MongoDB_Atlas_CreateDoc). The runtime is automatically set to Node.js 4.3, which is perfect for us because this is the language we will use. In the Code Input Type list, select Upload .ZIP File, as shown in the screenshot below:
 Click the "Upload" button and select the compressed Node.js project file you created earlier.
In the "Lambda Function Handlers and Roles" section, modify the "Handler" field value to app.handler (Why? Here is a tip: I used the app.js file for my Lambda Function Code, instead of index.js file...) and select the existing LambdaBasicExecRole role we just created:
 In the Advanced Settings section, you may want to increase the Timeout value to 5 or 10 seconds, but this is always something you can adjust later. Leave the VPC and KMS key fields as their default values (unless you want to use the VPC and/or KMS keys), and press Next.
Lastly, look at your Lambda function and press "Create Function" at the bottom. Congratulations, your Lambda function is online, and you should see a page similar to the following screenshot:
 But do you remember we used environment variables? Now is the time to configure them and use the AWS Key Management Service to protect them!
Scroll down to the Code tab of the Lambda function and create an environment variable with the following properties:
Name
Value
MONGODB_ATLAS_CLUSTER_URI YOUR_ATLAS_CLUSTER_URI_VALUE  At this point, you can press the "Save and Test" button at the top of the page, but for the sake of security ( We will encrypt the connection string.
Select the "Enable Encryption Assistant" check box and select it if you have already created the encryption key (otherwise, you may need to create one - which is easy):
 Next, select the "Encrypt" button for the MONGODB_ATLAS_CLUSTER_URI variable:
 Back to the inline code editor, add the following line at the top:
<code>mkdir lambda-atlas-create-doc
&& cd lambda-atlas-create-doc</code>
and replace the content of the "else" statement in the "exports.handler" method with the following code:
<code>npm init</code>
(Hopefully the complex code we wrote initially makes sense now!)
If you want to check the entire function code I'm using, check out the following Gist. For Git fans, the full Node.js project source code is also available on GitHub.
Now press the "Save and Test" button and paste the contents of our event.json file in the "Input Test Event" text editor:
 Scroll and press the "Save and Test" button.
If you configure everything correctly, you should receive the following success message in the Lambda log output:
 Great! You can enjoy a few minutes of success before continuing to read.
I hope this AWS Lambda-MongoDB Atlas integration tutorial will provide you with the right steps to get started with your first Lambda project. You should now be able to write and test Lambda functions locally and store sensitive data, such as your MongoDB Atlas connection string, securely in AWS KMS.
So what can you do next?
Of course, feel free to ask any questions or leave your feedback in the comments below. Happy coding!
Like this article? Replay our webinar where we provide interactive tutorials on serverless architectures using AWS Lambda.
AWS Lambda is a very useful tool in serverless development. It allows developers to run code without managing servers. This means you can focus on writing code and let AWS Lambda handle infrastructure. It automatically scales your application based on incoming traffic and you only pay for the calculation time you consume. This makes it a cost-effective solution for businesses of all sizes. In addition, AWS Lambda supports a variety of programming languages, including Node.js, making it a versatile option for developers.
MongoDB Atlas seamlessly integrates with AWS Lambda. It provides a fully managed database service that automates time-consuming administrative tasks such as hardware configuration, database setup, patching, and backups. With MongoDB Atlas, you can easily trigger AWS Lambda functions based on database events such as insertion, update, or delete. This allows you to create powerful, real-time, and serverless applications.
Setting up a serverless application with Node.js, AWS Lambda, and MongoDB Atlas involves several steps. First, you need to set up your AWS Lambda function. This includes writing code using Node.js and uploading it to AWS Lambda. Next, you need to configure your MongoDB Atlas cluster. This includes creating a new cluster, configuring your IP whitelist, and creating a database user. Finally, you need to connect your AWS Lambda function to your MongoDB Atlas cluster. This includes configuring your Lambda function to connect strings using MongoDB Atlas.
A variety of tools and technologies can be used to troubleshoot problems with serverless applications. AWS Lambda provides detailed logs of function execution, which can help you identify any errors or problems. MongoDB Atlas also offers comprehensive monitoring and alerting capabilities, allowing you to track the performance of your database and receive alerts for any potential issues. Additionally, using good coding practices and thoroughly testing your application can help prevent problems.
Security is a key aspect of any application, and serverless applications are no exception. AWS Lambda offers a variety of security features including AWS Identity and Access Management (IAM) for access control, encryption at transport and at rest, and VPC support for network isolation. MongoDB Atlas also offers powerful security features including IP whitelisting, database auditing, and encryption at rest and in-transit. Be sure to properly configure these security features to protect your applications and data.
Optimizing the performance of serverless applications involves a variety of strategies. This includes correctly configuring AWS Lambda functions for optimal performance, using efficient code, and optimizing MongoDB Atlas databases. AWS Lambda allows you to allocate memory for functions, which also allocates CPU capabilities, network bandwidth, and disk I/O proportionally. MongoDB Atlas provides performance optimization features such as automatic indexing and performance consultant advice.
Yes, AWS Lambda supports a variety of programming languages, including Node.js, Python, Java, Go, and .NET. MongoDB Atlas can be used with any programming language with MongoDB drivers. This makes it a versatile solution for serverless development.
Serverless architecture can significantly reduce the cost of applications. With AWS Lambda, you only pay for the calculation time you consume and you don't charge when the code is not running. MongoDB Atlas offers a variety of pricing options, including a free tier, allowing you to choose the option that best suits your needs.
Migrating an existing application to a serverless architecture involves multiple steps. First, you need to refactor the application to make it compatible with AWS Lambda and MongoDB Atlas. This may include rewriting the code and modifying the database schema using a supported programming language. Next, you need to set up the AWS Lambda function and MongoDB Atlas cluster. Finally, you need to thoroughly test your application to make sure it works properly in the new architecture.
While AWS Lambda and MongoDB Atlas offer many benefits for serverless development, there are some limitations to be paid attention to. AWS Lambda has limitations on the amount of compute and storage resources available, and the function has a maximum execution time. MongoDB Atlas also limits the size of the database and the number of connections. However, these limitations are usually high enough to accommodate most applications.
The above is the detailed content of Serverless development with Node.js, AWS Lambda and MongoDB Atlas. For more information, please follow other related articles on the PHP Chinese website!


![[Web front-end] Node.js quick start](https://img.php.cn/upload/course/000/000/067/662b5d34ba7c0227.png)


