

Connecting to the Jawbone UP API with Node.js

As a developer, I cannot help but want to access the huge amount of step count and sleeping habit data my Jawbone UP has on me. There is so much data! So I began looking into how to pull in this data using the Jawbone UP API and Node.
I found examples of how to work with the Jawbone UP API and Node across the web but they were all quite involved and had a lot of moving parts, along with some outdated modules (like older versions of Express). In this article I want to focus on the absolute basics—no worrying about saving user data into a database, creating accounts or connecting up social logins. We’ll focus on the core things you need to know to get a Node server to authenticate with the Jawbone API and return user data.
All of the code for this demo is available on our GitHub repo.
Key Takeaways
- Utilize the Jawbone UP API to access extensive user data like step counts and sleep habits using Node.js, without the complexities of handling user data storage or account management.
- Begin by setting up a Jawbone app on the Jawbone developer site to obtain necessary credentials like Client ID and App Secret, which are crucial for API integration.
- Implement the Passport module with OAuth 2.0 in Node.js to handle user authentication and data retrieval securely.
- Ensure all communications with the Jawbone UP API are conducted over HTTPS to meet security protocols and avoid data interception.
- Use EJS templates in Node.js to dynamically display retrieved sleep data from the Jawbone UP API on your web application.
- Explore the potential for expanding the application by integrating more data types from the Jawbone UP API and possibly combining with other APIs for enhanced functionalities.
Setting up a Jawbone App
The first thing we’ll need is a new Jawbone app set up under our Jawbone account. This is the app which users will be authorizing to access their data.
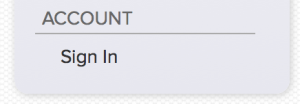
Start by logging into the developer section of the Jawbone site by going to https://jawbone.com/up/developer and clicking the “Sign In” link on the bottom left. You won’t need a specific Jawbone developer account as they will allow you to log in using an existing Jawbone account.
Once logged in, head to https://jawbone.com/up/developer/account, or click the “Manage Account” link in the left hand menu under “Account”.

On this page, you’ll reach your developer account page. From here, click “Create App”.

On the page that loads you will be prompted to enter the details of your app:
- Name – The name of your application, I entered “Jawbone UP Node Demo”.
- Description – This is a short description that will come up on the user’s UP App Gallery.
- Long Description – This comes up on the detail page of the app in the app gallery.
- Logo – Upload a logo for your application. If you receive an error about “Select” (strange I know, but it’ll make sense to the few people who follow along and get that message), chances are your logo image is too big.
- URL – Your app’s homepage
- Authorization URL – The URL that your login page will be found at. For our test purposes, enter in https://localhost:5000/login/jawbone.
- OAuth Redirect URIs – URLs that your application is allowed to redirect to once the user has been authenticated. In our demo, we’ll enter in https://localhost:5000.
Once you click to create the application, you’ll be directed to the page with a list of your apps. Your newly created app should look similar to mine:
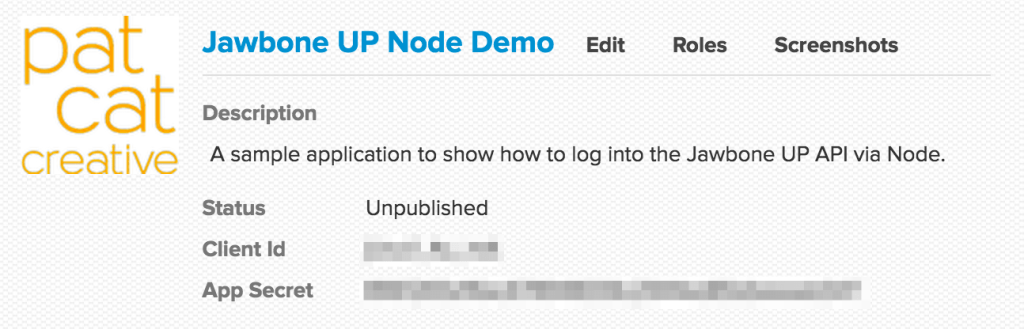
Take note of the “Client Id” and “App Secret” – these are what you’ll need to connect up to the Jawbone API.
Starting our Node App
I’ll be including all our Node server code in one file called server.js. We start by requiring the necessary npm modules for our server.
First, we set up a basic Express app.
<span>var express = require(‘express’),
</span>    app <span>= express(),</span>
We then require ejs (Embedded JavaScript), which allows us to insert JavaScript into our HTML templates. We’ll use this to display JavaScript variables within our returned HTML.
ejs <span>= require('ejs'),</span>In order to be able to authenticate with the Jawbone API and redirect back to our application, Jawbone requires that we redirect to a page over https. To do this, we’ve got to include https.
https <span>= require('https'),</span>Next, we include fs, which allows us to read the file system. We’ll need this to read in server certificate files to enable https.
fs <span>= require('fs'),</span>We’ll also need body-parser to enable us to handle JSON requests:
bodyParser <span>= require('body-parser'),</span>The Jawbone UP API uses the OAuth 2.0 protocol for authentication. Basically, this means in order to have a user sign in with their Jawbone account and give us permission to access their data, we need to go through this protocol. Luckily, npm’s passport module contains a module called passport-oauth which supports this. We set up passport in our app along with OAuth 2.0 like so:
passport <span>= require('passport'),
</span><span>JawboneStrategy = require('passport-oauth').<span>OAuth2Strategy</span>,</span>We’ve then got a self explanatory variable that stores the port we’ll be running on.
port <span>= 5000,</span>
Next up, we will be storing all the values needed for authentication in Passport and OAuth 2.0 inside jawboneAuth. This is the moment you’ll be using the “Client Id” and “App Secret” values we took note of earlier when we registered our app.
<span>var express = require(‘express’),
</span>    app <span>= express(),</span>
Here is an overview of what these values mean and/or where they’ve come from:
- clientID – this is the “Client Id” listed for your Jawbone app.
- clientSecret – this is the “App Secret” value below it.
- authorizationURL – this is the location of the UP OAuth 2.0 authentication page that the user will be redirected to.
- tokenURL – this is the URL in the Jawbone UP API that we must make a HTTPS call to, in order to request an access token. This token is what we need to include in our calls to the Jawbone UP API to prove we are authorized to make those requests for data. In the Jawbone UP API, this token lasts for a year, so you can store it in a database and have a user connected to their Jawbone account for a year before needing to reauthenticate them. We won’t be looking at storing users and such in this tutorial, but it is good to keep in mind if you’re looking to push this further.
- callbackURL – the URL on our site which Jawbone will direct the user back to once they’ve successfully given us access to their data. For us it is a page to display the sleep data.
The last variable we’ve got to define is our sslOptions which contains all the details we need to provide to our server to allow us to run this server using HTTPS. I’ll go over each of these in detail later in this article when explaining how we set up HTTPS.
We then include a few lines defining some basic Node app functionality which will be familiar to Node developers out there:
ejs <span>= require('ejs'),</span>- bodyParser – allows us to parse JSON objects.
- Static folder – defines where our static files like images will be on the server (in our case, /public folder).
- EJS – assigns the ejs module as our template engine.
- Views folder – defines where our ejs view files will be on the server (in our case, the /views folder).
In order to initialize Passport within Express, we run the following line:
https <span>= require('https'),</span>As a note, there is more to set up in Passport if we wanted to have persistent login sessions. In this case, we would need to set up sessions. However, for this tutorial, we’ll just focus on the initial stage of getting the data down from the Jawbone UP API and won’t worry about login sessions.
Setting up Our GET Requests
In order to direct the user to a login screen for the Jawbone UP API, we need to assign a URL on our server that will redirect to the Jawbone login screen. The code below assigns the URL of /login/jawbone for this purpose. On a GET request to this URL, we call passport.authorize() to bring up our Jawbone UP authorization page:
<span>var express = require(‘express’),
</span>    app <span>= express(),</span>
As you can see above, we’ve got an array of specific permissions that we’re asking for — ['basic_read','sleep_read']. In our case, we’re asking for basic user data and sleep data. If you wanted to request access to the step count, meals eaten and so forth, you can add additional permission requests to that array. You can see a list of what is available and what they provide access to at the Jawbone UP Developer Authentication documentation page.
Also note, if there is a failure in authenticating in the Jawbone UP Authentication screen, it’ll redirect us back to the homepage. It is possible in the passport module to set successRedirect too, however I’ve found with the Jawbone UP API, it is not needed as we will define our callback URL in the JawboneStrategy further down in this code.
We then set up the GET request that our sleep data will appear on. This is the location which we’ll be telling the API to redirect us to when we’ve got access to the user data. In this example, it is /sleepdata:
ejs <span>= require('ejs'),</span>We have the same passport.authorize() function here, just to check that the user is logged in by the time they reach this page. If so, we run res.render('userdata', req.account); which passes in the data that the Jawbone UP API returned to the userdata.ejs template (which we will set up soon). If they are not logged in, they’ll be directed back to the Jawbone UP authentication screen.
We then set a URL to allow the user to logout at /logout, which redirects the user back to the homepage once logged out:
https <span>= require('https'),</span>Finally for our routing, we set it to load our index.ejs template if someone tries to access the homepage:
fs <span>= require('fs'),</span>Using Passport to Connect to the Jawbone UP API
The biggest chunk of code is also the most important — setting up a Passport “strategy” to tell Passport how to handle requests to authorize using 'jawbone'. It looks like this:
bodyParser <span>= require('body-parser'),</span>Let’s go over what all of this code is doing.
First, we set up our clientID, clientSecret, authorizationURL, tokenURL and callbackURL from our jawboneAuth object we defined at the start of the file. This is done using new JawboneStrategy().
Next we have our callback function which handles this data. We use the token and done values in this callback function. token is the Jawbone UP API access token that we’ll need to include with any calls to the API to prove we’re authenticated. done is the callback function that returns our data to the app.
We pass in the access token, along with the client ID and secret defined earlier, into the jawbone-up module within the options object:
<span>var express = require(‘express’),
</span>    app <span>= express(),</span>
The jawbone-up module is the Node module that gives us access to the Jawbone UP API endpoints. These are the calls we make to the API to return user data (e.g. GET https://jawbone.com/nudge/api/v.1.1/users/@me/sleeps), however the jawbone-up module allows us to access these in functions such as up.moves.get() and up.sleeps.get(). In our example, we’ll be using up.sleeps.get() to get sleep data.
Within up.sleeps.get() we’ve got two variables, err and body. If there’s an error in receiving the data from the API, it’ll be returned in the err variable so we test for that at the start of our callback.
Otherwise, we’ve got our data returned in a JSON string in the body variable. The body variable will contain a JSON string of values that’ll look like so:
ejs <span>= require('ejs'),</span>Everything we’ll want is within data. We parse the values above into a JavaScript object using JSON.parse(body) and assign the values in the data key to a variable called jawboneData:
https <span>= require('https'),</span>Then, we have a for loop that goes through each item in the array within data and formats our date and sleep times before returning them to our template to display.
fs <span>= require('fs'),</span>Here, we read in the date, convert it to a string and then slice out the day, month and year ourselves. It is returned as a value of 20150408, so we slice out the first four digits as the year, the two after that as the month and the last two as the day. We then arrange it so that it will be DD/MM/YYYY, if you’d prefer to format it in the US date format, you can switch the month and day:
bodyParser <span>= require('body-parser'),</span>The Jawbone API returns a relatively nicely formatted sleep duration value as the title which looks like this: "for 9h 43m". We can use this but remove the "for " part like so:
passport <span>= require('passport'),
</span><span>JawboneStrategy = require('passport-oauth').<span>OAuth2Strategy</span>,</span>We then return that data to our Passport’s callback function that’ll render our userdata.ejs. To do so, we return our jawboneData variable to the done function. There’s also a console.log just so we can see in the log when the Jawbone UP data has been sent to be displayed:
port <span>= 5000,</span>
Using HTTPS
As I mentioned earlier, in order to use the Jawbone UP API, we need to be running our server with HTTPS, as Jawbone’s service requires both sides to be running HTTPS. If the callbackURL is not set to https you’ll receive “Invalid redirect” errors when you try to log in.
In order to get our example to work, we’ll be using a self signed certificate. If you are doing this on a live site, you’ll want to get proper certificates from a valid certificate authority.
In server.js, we have defined two SSL options:
jawboneAuth <span>= {
</span>  <span>clientID: 'jUvu1_4u_mA',
</span>  <span>clientSecret: '8961265d16ac678948006c2944ed85dbeeaab547',
</span>  <span>authorizationURL: 'https://jawbone.com/auth/oauth2/auth',
</span>  <span>tokenURL: 'https://jawbone.com/auth/oauth2/token',
</span>  <span>callbackURL: 'https://localhost:5000/sleepdata'
</span><span>},</span>These are the file locations on our server of our two authentication related files:
- key – This is the private key for our server
- cert – This is our self signed certificate
Generate a Private Key for Our Server
To generate a private key we’ll need to use the OpenSSL Toolkit. Mac OSX and Linux users should have this pre-installed. For Windows users, you can install Cygwin, search for “openssl” at the “Select Packages” screen and choose the package that appears.
We can generate that private key by opening our terminal, navigating to the folder for our server and running the following command:
<span>var express = require(‘express’),
</span>    app <span>= express(),</span>
This generates a private server key ready for use called server.key.
Generate a Certificate Signing Request (CSR)
We then need to generate a CSR. This would usually be sent off to a certificate authority but in our case we’ll be signing it ourselves for testing purposes.
To generate a CSR using our private key we created above, run the following command:
ejs <span>= require('ejs'),</span>You will be given a list of questions to answer, answer these and you’ll receive your CSR as a file called server.csr.
Generate a Signed Certificate Using Our Server Private Key
Finally, to generate a self-signed certificate without a certificate authority, we run the following command to generate a certificate that’ll be valid for one year:
https <span>= require('https'),</span>That command should have generated a server.crt file — this is your certificate.
Remove Our Certificate Request
For those who like to keep things tidy and are self-signing their certificate, we can remove server.csr as our certificate is now signed.
We’re HTTPS Ready
With our private key and certificate ready and defined in our Node file, our server is ready to run as HTTPS. The following code starts the server using HTTPS and our sslOptions:
fs <span>= require('fs'),</span>Our EJS files
Our HTML for this app is all in .ejs files so that we can include JavaScript variables inside them when needed. These files are all within /views. index.ejs is very simple and just contains a title, instructions and a log in button that’ll go to /login/jawbone:
bodyParser <span>= require('body-parser'),</span>userdata.ejs is where the action is. The main bit we can focus on is our table:
passport <span>= require('passport'),
</span><span>JawboneStrategy = require('passport-oauth').<span>OAuth2Strategy</span>,</span>Our App in Action
To get the app running, head to your terminal and run:
port <span>= 5000,</span>
With it running, go to http://localhost:5000 and you’ll see our initial page:

If we click the login button, we’ll be taken to http://localhost:5000/login/jawbone, which will direct us to the Jawbone UP authentication page. The page will prompt us for our Jawbone login details. Once you enter those details or if you’re already logged into the Jawbone site, you’ll be directed to an Auth page requesting access to your user data. Click “Agree”:

When we click agree, we should be directed back to the http://localhost:5000/sleepdata page with a table of our sleep data returned:

And if we click the “Log out” button, it should log us out and redirect us back to the home page.
Conclusion
That completes our overview of the basics of connecting to the Jawbone UP API and returning data to a Node server.
The next steps from here could include setting up a database to store the data for future use, creating user accounts for your app, expanding the amount of data you pull in from the UP API, changing how it displays (maybe adding some pretty graphs!) and more. Combine this data with any number of other APIs out there and the potential for some really neat applications is huge!
Other useful resources
- Documentation for the node-jawbone-up module
- The Jawbone developer documentation
- Documentation for Passport
- An UP and Node demo with user accounts and MongoDB
Frequently Asked Questions about Connecting Jawbone UP API with Node.js
What is the Jawbone UP API and how does it work?
The Jawbone UP API is a set of programming interfaces provided by Jawbone that allows developers to interact with Jawbone UP data. It enables the extraction of data from the Jawbone UP platform, which includes user’s activity, sleep, meal, and other health-related data. The API uses RESTful calls and responses are formatted in JSON.
How can I connect the Jawbone UP API with Node.js?
To connect the Jawbone UP API with Node.js, you need to first register your application on Jawbone’s developer site to get your client ID and client secret. Then, you can use the ‘jawbone-up’ npm package in your Node.js application. This package provides a simple way to authenticate and make requests to the Jawbone UP API.
What are the alternatives to Jawbone UP API?
Since Jawbone has stopped its services, you might want to consider alternatives like Fitbit API, Google Fit API, or Apple HealthKit. These APIs also provide access to user’s health and fitness data and have extensive documentation to help developers.
What happened to Jawbone and its services?
Jawbone, once a popular fitness tracker company, has stopped its services and is no longer in business. The company has transitioned to a medical subscription service called Jawbone Health Hub. However, the Jawbone UP app and API are no longer supported.
Can I still use the Jawbone UP API?
Unfortunately, since Jawbone has ceased its operations, the Jawbone UP API is no longer available. Any applications using this API will no longer function as expected. It’s recommended to switch to alternative APIs for accessing health and fitness data.
How can I migrate from Jawbone UP API to Fitbit API?
Migrating from Jawbone UP API to Fitbit API involves a few steps. First, you need to register your application on Fitbit’s developer site. Then, you can use the Fitbit API to access user’s health and fitness data. The Fitbit API provides similar functionality to the Jawbone UP API, including access to activity, sleep, and meal data.
What is Node.js and why is it used for connecting with APIs?
Node.js is a JavaScript runtime built on Chrome’s V8 JavaScript engine. It’s used for building scalable network applications. Node.js is non-blocking, which makes it efficient and lightweight, perfect for data-intensive real-time applications. It’s commonly used for connecting with APIs due to its efficiency and ease of use.
How can I handle errors when connecting to an API with Node.js?
When connecting to an API with Node.js, you can handle errors using the ‘error’ event. This event is emitted whenever an error occurs during the request. You can listen for this event and handle the error appropriately, such as by logging the error or retrying the request.
What data can I access with fitness tracker APIs?
Fitness tracker APIs typically provide access to a range of health and fitness data. This includes activity data (like steps, distance, and calories burned), sleep data (like sleep duration and sleep quality), and meal data (like food intake and nutritional information). The exact data available depends on the specific API and the permissions granted by the user.
How can I ensure the privacy and security of user data when using fitness tracker APIs?
When using fitness tracker APIs, it’s important to follow best practices for data privacy and security. This includes obtaining user consent before accessing their data, using secure connections (HTTPS) for all requests, storing user data securely, and only requesting the minimum amount of data necessary for your application.
The above is the detailed content of Connecting to the Jawbone UP API with Node.js. For more information, please follow other related articles on the PHP Chinese website!

Hot AI Tools

Undresser.AI Undress
AI-powered app for creating realistic nude photos

AI Clothes Remover
Online AI tool for removing clothes from photos.

Undress AI Tool
Undress images for free

Clothoff.io
AI clothes remover

AI Hentai Generator
Generate AI Hentai for free.

Hot Article
Hot Tools

Notepad++7.3.1
Easy-to-use and free code editor

SublimeText3 Chinese version
Chinese version, very easy to use

Zend Studio 13.0.1
Powerful PHP integrated development environment

Dreamweaver CS6
Visual web development tools

SublimeText3 Mac version
God-level code editing software (SublimeText3)
Hot Topics
 1382
1382
 52
52

 How do I create and publish my own JavaScript libraries?
Mar 18, 2025 pm 03:12 PM
How do I create and publish my own JavaScript libraries?
Mar 18, 2025 pm 03:12 PM
Article discusses creating, publishing, and maintaining JavaScript libraries, focusing on planning, development, testing, documentation, and promotion strategies.
 How do I optimize JavaScript code for performance in the browser?
Mar 18, 2025 pm 03:14 PM
How do I optimize JavaScript code for performance in the browser?
Mar 18, 2025 pm 03:14 PM
The article discusses strategies for optimizing JavaScript performance in browsers, focusing on reducing execution time and minimizing impact on page load speed.
 What should I do if I encounter garbled code printing for front-end thermal paper receipts?
Apr 04, 2025 pm 02:42 PM
What should I do if I encounter garbled code printing for front-end thermal paper receipts?
Apr 04, 2025 pm 02:42 PM
Frequently Asked Questions and Solutions for Front-end Thermal Paper Ticket Printing In Front-end Development, Ticket Printing is a common requirement. However, many developers are implementing...
 Who gets paid more Python or JavaScript?
Apr 04, 2025 am 12:09 AM
Who gets paid more Python or JavaScript?
Apr 04, 2025 am 12:09 AM
There is no absolute salary for Python and JavaScript developers, depending on skills and industry needs. 1. Python may be paid more in data science and machine learning. 2. JavaScript has great demand in front-end and full-stack development, and its salary is also considerable. 3. Influencing factors include experience, geographical location, company size and specific skills.
 How do I debug JavaScript code effectively using browser developer tools?
Mar 18, 2025 pm 03:16 PM
How do I debug JavaScript code effectively using browser developer tools?
Mar 18, 2025 pm 03:16 PM
The article discusses effective JavaScript debugging using browser developer tools, focusing on setting breakpoints, using the console, and analyzing performance.
 How do I use source maps to debug minified JavaScript code?
Mar 18, 2025 pm 03:17 PM
How do I use source maps to debug minified JavaScript code?
Mar 18, 2025 pm 03:17 PM
The article explains how to use source maps to debug minified JavaScript by mapping it back to the original code. It discusses enabling source maps, setting breakpoints, and using tools like Chrome DevTools and Webpack.
 How to merge array elements with the same ID into one object using JavaScript?
Apr 04, 2025 pm 05:09 PM
How to merge array elements with the same ID into one object using JavaScript?
Apr 04, 2025 pm 05:09 PM
How to merge array elements with the same ID into one object in JavaScript? When processing data, we often encounter the need to have the same ID...
 Demystifying JavaScript: What It Does and Why It Matters
Apr 09, 2025 am 12:07 AM
Demystifying JavaScript: What It Does and Why It Matters
Apr 09, 2025 am 12:07 AM
JavaScript is the cornerstone of modern web development, and its main functions include event-driven programming, dynamic content generation and asynchronous programming. 1) Event-driven programming allows web pages to change dynamically according to user operations. 2) Dynamic content generation allows page content to be adjusted according to conditions. 3) Asynchronous programming ensures that the user interface is not blocked. JavaScript is widely used in web interaction, single-page application and server-side development, greatly improving the flexibility of user experience and cross-platform development.
