

iPhone Photo Editing Guide: Easily master photo editing skills
iPhone photo editing is powerful and easy to get started, and you can easily improve your photo quality whether you are a newbie or a veteran. Enhance pictures with preset effects or manually adjusting settings without expensive software.
The iPhone's photo editor also offers advanced features such as selective editing, allowing you to make precise adjustments to specific areas of your image. Additionally, you can easily share edited photos directly from the app, post them to social media platforms or send them to friends and family.
Most of the time, we take photos casually, and we don’t consider composition or lighting when shooting. We just capture the moments as fast as possible. Fortunately, this is where post-editors come in. Just like frosting a cake, editing images makes them look more perfect. And, editing photos on your iPhone may be easier than dealing with buttercream frosting.
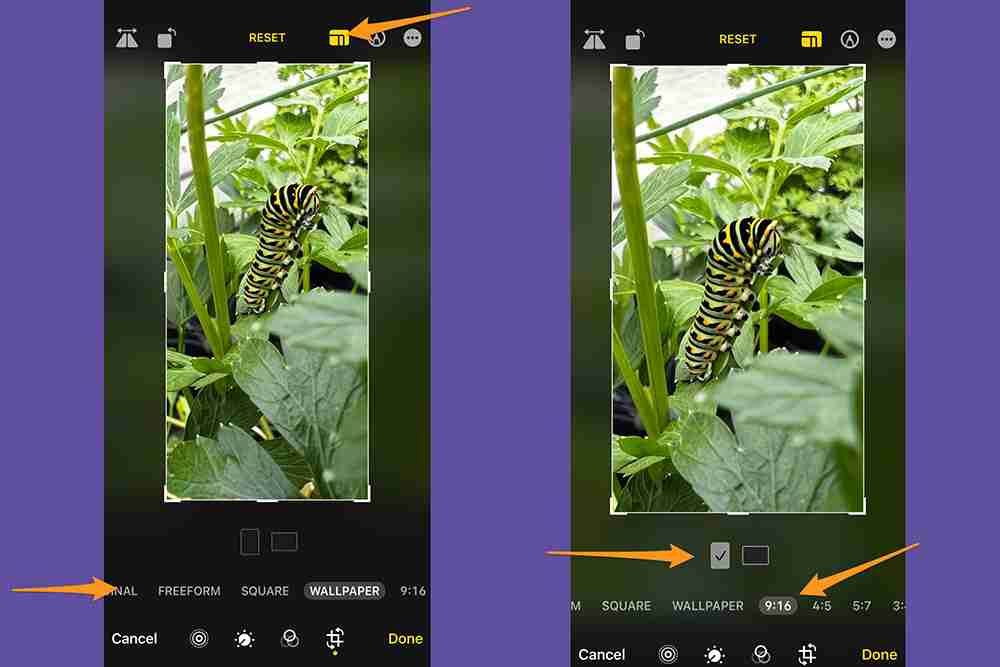
After taking a selfie, passers-by accidentally came into the camera? Don't worry, the cropping tool can help you solve this problem. Cropping is one of the easiest and quickest ways to remove unwanted elements or distractors from your photos. Trimming edges can also improve the composition of photos by adjusting the position and balance of elements within the picture. In the Photos app, click on any thumbnail to view it in full screen. To start making changes, click Edit and then click Crop Icon to select one of three ways to crop your photos.

1. Crop manually: After selecting the Crop Icon, drag the corners of the rectangle to contain the area you want to keep in the photo. Click "Done" to crop.

2. Zoom Crop: Alternatively, you can scale iPhone images by activating the cropping tool and pinching it. When the photo is displayed as the desired cropping effect, click "Done" to save.
Click on the "Rotation Icon" (a square with arrows curved around a corner) to rotate the photo 90 degrees at a time. Continue to rotate until you get the desired orientation. Click "Done" to confirm the changes.

Touch the "Flip Icon" (mirror triangle with the arrow above) to invert the image horizontally. Click "Done" to save the edit.

Note that if you don't like your crop, rotate, and/or flip at any time during the editing process, you can click Cancel in the lower left corner of the screen and then click Discard Changes.
Sometimes, you won't notice tilted or skewed lines in the photo until after shooting. Fortunately, using iPhone's editing software, you can easily change the perspective. Open a photo on your iPhone, click Edit, and then click Crop Icon.
Below the photo, you will see three options for correcting horizontal lines in the photo and adjusting vertical and horizontal viewing angles. When you select the option you want to use, drag the slider below to make precise changes. There is also an "Auto" option at the top of the screen, which will automatically adjust the photos according to the selected adjustments.
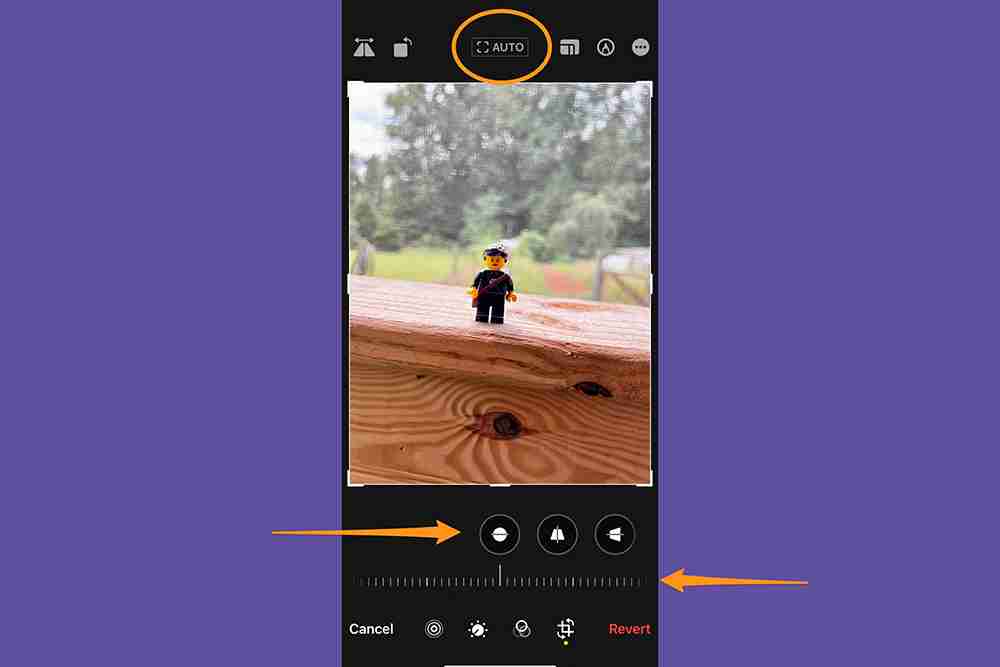
1. Calibration: This adjustment corrects the horizontal line in the photo.

2. Vertical viewing angle: Correct or modify the perceived height or angle of an object in the photo to correct vertical lines that may appear tilted or distorted.

3. Horizontal Perspective: Change the horizontal lines and angles in the photo to ensure the parallel lines are aligned with the way you want.

After adjusting the perspective, select "Done" to save the changes; if you are not satisfied, click "Cancel", and then click "Discard Changes".
Light and color are important factors when editing photos (and anywhere) with your iPhone, as they affect the overall atmosphere and visual appeal of the image. The right light highlights the subject, adds depth, and makes important details stand out. Similarly, changing the color of a photo can make the viewer develop a certain mood, create a specific atmosphere, and even convey information. Your phone's Photos app has tools that allow you to adjust the light and color of your picture.
[Related: How to take a better selfie]
First, open the photo you want to change. Click Edit and swipe left under the image to see what you can edit. The quickest and simplest way to make adjustments is to click “Auto”, and the slider under the “Auto” tab will allow you to adjust the editing intensity recommended by your iPhone.
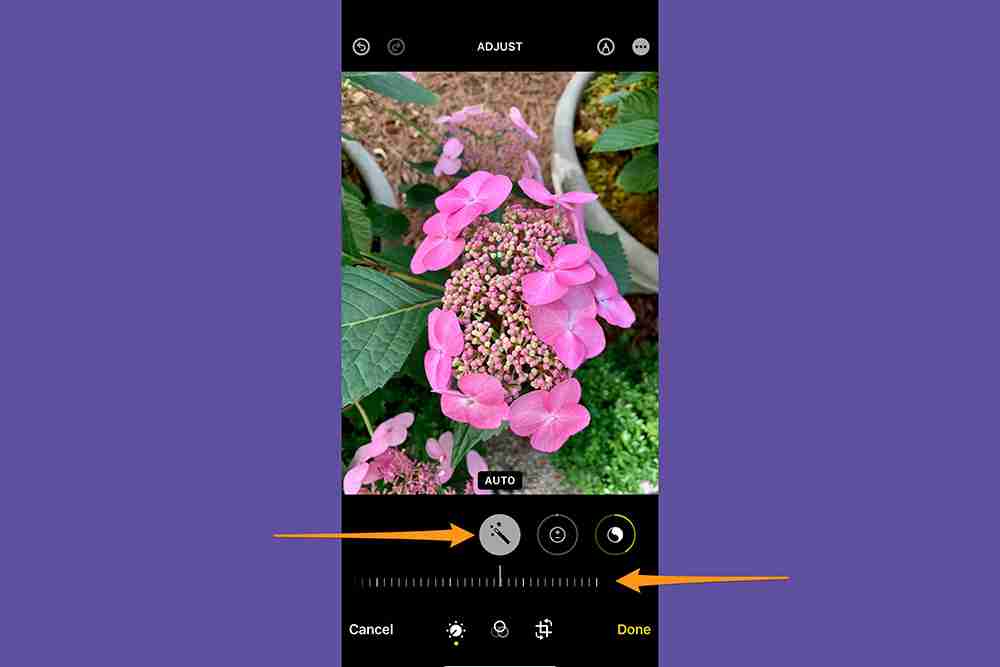
However, if you prefer full control of editing, the iPhone Photo Editor allows you to adjust each effect individually for custom editing. The effects you can change include:

Filter effect allows you to easily add creative and artistic elements to your photos, making the image more visually appealing and charming. To apply a filter, open the photo, click Edit, and then click the Filter Button (three overlapping circles) to bring up the filter effect options. There are nine filters to choose from. Use the slider below the selected effect to adjust its strength, and if you need to delete the filter, click "Original". Click "Done" to confirm the editing.

If you like to use Portrait Mode, you need to be familiar with the iPhone's Portrait Mode-specific enhancements. These allow you to adjust the depth of field (also known as bokeh), which is the distance range in the photo that looks sharp in focus and makes the subject stand out. The editing tool for portrait mode also includes studio lighting effects for enhanced flexibility and creativity.

Adjustment f Stop will increase or decrease background blur. The smaller the stop, the more blur you see. A larger f stop means less blur. Click the "f stop icon" and a slider will appear at the bottom of the screen, allowing you to adjust the effect.

To adjust the light, click one of the effects. You can choose from natural light, studio light, contour light, stage light, stage monochrome light and high-profile monochrome light. Move the slider to the left or right to increase or decrease the effect.

Writing or painting on pictures can be fun, and the iPhone makes this easy. Select a photo, then go to Edit and click the Pen button. Draw on pictures using various drawing tools and colors.

You can click the "plus button" to enlarge or add titles, text, shapes, and even your signature. Click "Done" to save the changes, or if you don't like the changes, click "Cancel".
If you make editing mistakes, don't worry - iPhone's Photos app offers you many opportunities to undo editing.
Undo and redo editing: Click the Left and right arrows at the top of the screen to undo and redo multiple editing steps.

Restore edited photos: If you saved your changes and decide you don't like the edit, you can open the photo, select Edit, and then click Restore to restore the original version.

iPhone allows you to copy and paste edits from one photo to one or more other photos, which is especially useful when you try to edit a series of similar photos. First open the photo containing the edits you want to copy. Then click the "More Options" button (three dots) and click "Copy Edit". Click Cancel, and then click the Back button to return to the photo library.

Then, click "Select" and then touch the thumbnail of the photo you want to edit. Finally, select Paste Edit from the More Options menu.

While you can't edit the background of your photo using the Photos app on your iPhone (you need to install a separate app for this), you can cut and paste a part of the picture - the theme.
For this purpose, the subject and background of the photo should be clear and clear, and the background should not be too busy or similar to the subject. First open the image, then hold the theme. You should see a white glow around the subject and a window will pop up asking you to "copy or share". If that doesn't work, move your finger and try again – sometimes, selecting a topic requires more than one attempt.
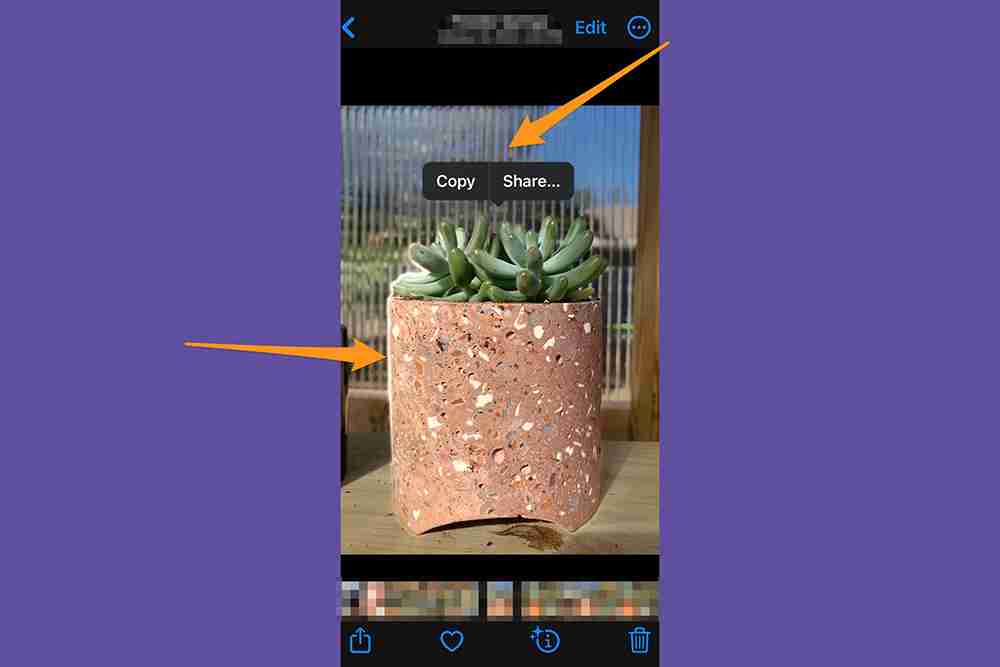
If successful, your iPhone will automatically detach the theme from the background, which you can copy and paste into another app, or share with the standard sharing option.

Your iPhone stores date, time, and location in the metadata of your photo. If you need to change this information, you can do so. Open the photo you want to change and click the "More Options Button" (three dots) in the upper right corner. Touch "Adjust Date and Time" or "Adjust Position", enter new information, and then click "Adjust".

To change the date, time, or location of multiple photos at once, click Select, touch the thumbnail of the image you want to change, and follow the steps above. If you change your mind, don't worry - you can undo the metadata edit by clicking on the "More Options Button" and then clicking on "Adjust Date and Time" or "Adjust Position" and then clicking on "Restore".
The above is the detailed content of How to edit photos on an iPhone—a detailed guide. For more information, please follow other related articles on the PHP Chinese website!


![[Web front-end] Node.js quick start](https://img.php.cn/upload/course/000/000/067/662b5d34ba7c0227.png)


