

How to Create a 'Switch User' Shortcut on Windows 10 Desktop

Quickly switch between user accounts on your Windows 10 system with a custom desktop shortcut! This guide provides a simple, step-by-step process to create a "Switch User" shortcut for faster account access.
Creating a "Switch User" Shortcut in Windows 10
Follow these easy steps:
Step 1: Right-click an empty area on your Windows 10 desktop. From the menu that appears, select New > Shortcut.

Step 2: In the "Create Shortcut" window, enter either "C:WindowsSystem32tsdiscon.exe" or "%windir%system32tsdiscon.exe" in the location field. Click "Next".

Step 3: Name the shortcut "Switch User" and click Finish.

Step 4: A "Switch User" shortcut will now appear on your desktop.

Double-clicking this shortcut instantly takes you to the Windows 10 sign-in screen, allowing you to seamlessly switch to another user account.

The above is the detailed content of How to Create a 'Switch User' Shortcut on Windows 10 Desktop. For more information, please follow other related articles on the PHP Chinese website!

Hot AI Tools

Undresser.AI Undress
AI-powered app for creating realistic nude photos

AI Clothes Remover
Online AI tool for removing clothes from photos.

Undress AI Tool
Undress images for free

Clothoff.io
AI clothes remover

Video Face Swap
Swap faces in any video effortlessly with our completely free AI face swap tool!

Hot Article
Hot Tools

Notepad++7.3.1
Easy-to-use and free code editor

SublimeText3 Chinese version
Chinese version, very easy to use

Zend Studio 13.0.1
Powerful PHP integrated development environment

Dreamweaver CS6
Visual web development tools

SublimeText3 Mac version
God-level code editing software (SublimeText3)
Hot Topics


 Microsoft's New PowerToys Search Is the Missing Feature Windows 11 Needs
Apr 03, 2025 am 03:53 AM
Microsoft's New PowerToys Search Is the Missing Feature Windows 11 Needs
Apr 03, 2025 am 03:53 AM
Microsoft's latest PowerToys update introduces a game-changing search feature reminiscent of macOS' Spotlight. This improved "Command Palette" (formerly PowerToys Run) surpasses the functionality of the Windows R Run command and the task
 Windows kb5054979 update information Update content list
Apr 15, 2025 pm 05:36 PM
Windows kb5054979 update information Update content list
Apr 15, 2025 pm 05:36 PM
KB5054979 is a cumulative security update released on March 27, 2025, for Windows 11 version 24H2. It targets .NET Framework versions 3.5 and 4.8.1, enhancing security and overall stability. Notably, the update addresses an issue with file and directory operations on UNC shares using System.IO APIs. Two installation methods are provided: one through Windows Settings by checking for updates under Windows Update, and the other via a manual download from the Microsoft Update Catalog.
 Why Do Some Keyboards Have Coiled Cables?
Mar 27, 2025 pm 09:01 PM
Why Do Some Keyboards Have Coiled Cables?
Mar 27, 2025 pm 09:01 PM
For mechanical keyboard enthusiasts, those intriguing coiled cables are a common sight. But why the coil? Let's delve into the reasons. Coiled Cables: Primarily Aesthetics The main draw of coiled cables is their visual appeal. They enhance the look
 These Are My Go-To Free Alternatives for Paid Windows Apps
Apr 04, 2025 am 03:42 AM
These Are My Go-To Free Alternatives for Paid Windows Apps
Apr 04, 2025 am 03:42 AM
Many free apps rival their paid counterparts in functionality. This list showcases excellent free Windows alternatives to popular paid software. I firmly believe in using free software unless a paid option offers a crucial, missing feature. These
 How to Disable Windows 11 Round Corners: 4 Easy Methods!
Mar 27, 2025 pm 03:27 PM
How to Disable Windows 11 Round Corners: 4 Easy Methods!
Mar 27, 2025 pm 03:27 PM
This guide provides four methods to remove the rounded corners in Windows 11, restoring the classic square-edged look. While the rounded corners offer a modern aesthetic, some users prefer the sharper look for reasons including improved screenshot a
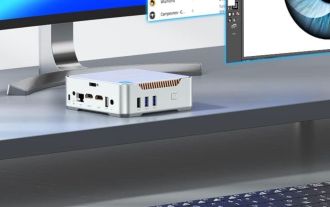 You Can Get This Powerful Mini PC for Under $150 Today
Apr 02, 2025 am 03:55 AM
You Can Get This Powerful Mini PC for Under $150 Today
Apr 02, 2025 am 03:55 AM
Kamrui GK3Plus Mini PC: Small and powerful, affordable! During Amazon's spring sale, the Kamrui GK3Plus Mini PC is priced as low as $150! This mini computer has powerful performance, easy upgrade and small size, making it an ideal choice for users who pursue cost-effectiveness. Whether it’s a mini computer enthusiast or a first-time user who’s trying out a small computer, the Kamrui GK3Plus Mini PC is an excellent starter choice. Originally priced at $199, Amazon currently enjoys a 15% discount (and a $20 coupon) and can be purchased for less than $149. Such a affordable price, but with a good configuration: equipped with a slightly old but competent In
 Microsoft Might Finally Fix Windows 11's Start Menu
Apr 10, 2025 pm 12:07 PM
Microsoft Might Finally Fix Windows 11's Start Menu
Apr 10, 2025 pm 12:07 PM
Windows 11's Start Menu Gets a Much-Needed Overhaul Microsoft's Windows 11 Start menu, initially criticized for its less-than-intuitive app access, is undergoing a significant redesign. Early testing reveals a vastly improved user experience. The up
 Nanoleaf Wants to Change How You Charge Your Tech
Apr 17, 2025 am 01:03 AM
Nanoleaf Wants to Change How You Charge Your Tech
Apr 17, 2025 am 01:03 AM
Nanoleaf's Pegboard Desk Dock: A Stylish and Functional Desk Organizer Tired of the same old charging setup? Nanoleaf's new Pegboard Desk Dock offers a stylish and functional alternative. This multifunctional desk accessory boasts 32 full-color RGB
