

How to downgrade macOS Sequoia without losing data and time

macOS Sequoia downgrade guide: Easily return to the Sonoma system
Difficulty: 5/10
Required Equipment: Hard drive for backup (usually at least 500GB). If you choose to downgrade using the bootable macOS installer, you need a flash drive (32GB).
Time: up to 3 hours
Tools: Time Machine. Optional: Get Backup Pro, CleanMyMac.
Every fall, my colleagues from IT security will give the same advice: “After a new operating system is released, wait a few days before upgrading. Early versions often have bugs or compatibility issues that can disrupt your work.”
I usually do this, but this year my curiosity beats everything. Not only did I skip the waiting period, I also installed the Sequoia beta. Sure enough, after a few days of testing, I had to downgrade.
If you upgraded too, and now want to roll back due to errors or other issues, you can also downgrade from macOS Sequoia to Sonoma. This guide shares my experience and tips – I hope you find it useful!
Before downgrading macOS Sequoia
The most important thing to do before you start downgrading is backing up and cleaning up your Mac.
Step 1. Prepare a backup
When you downgrade, you need to wipe the hard drive of your MacBook completely. This means a complete backup of your system (or at least the files that matter most to you).
To create a backup, you need a storage device. Ideally, it should be twice the size of a Mac hard drive.
Here is how to prepare a backup drive:
- Connect the drive to your Mac.
- Open Disk Utility and select Erashes.
- In the Format drop-down menu, select APFS or Mac OS extension (logged), and then click Eraser.
- Close Disk Utility.

Next, use Time Machine to create a backup:
- Open Time Machine by going to System Settings > General > Time Machine.
- Click Add Backup Disk, select the desired disk, and then click Set Disk.
- If needed, set a password (you will need it later to restore the backup) and click Finish.
- Click Options to configure the files you want to back up and the backup frequency, and then click Finish.
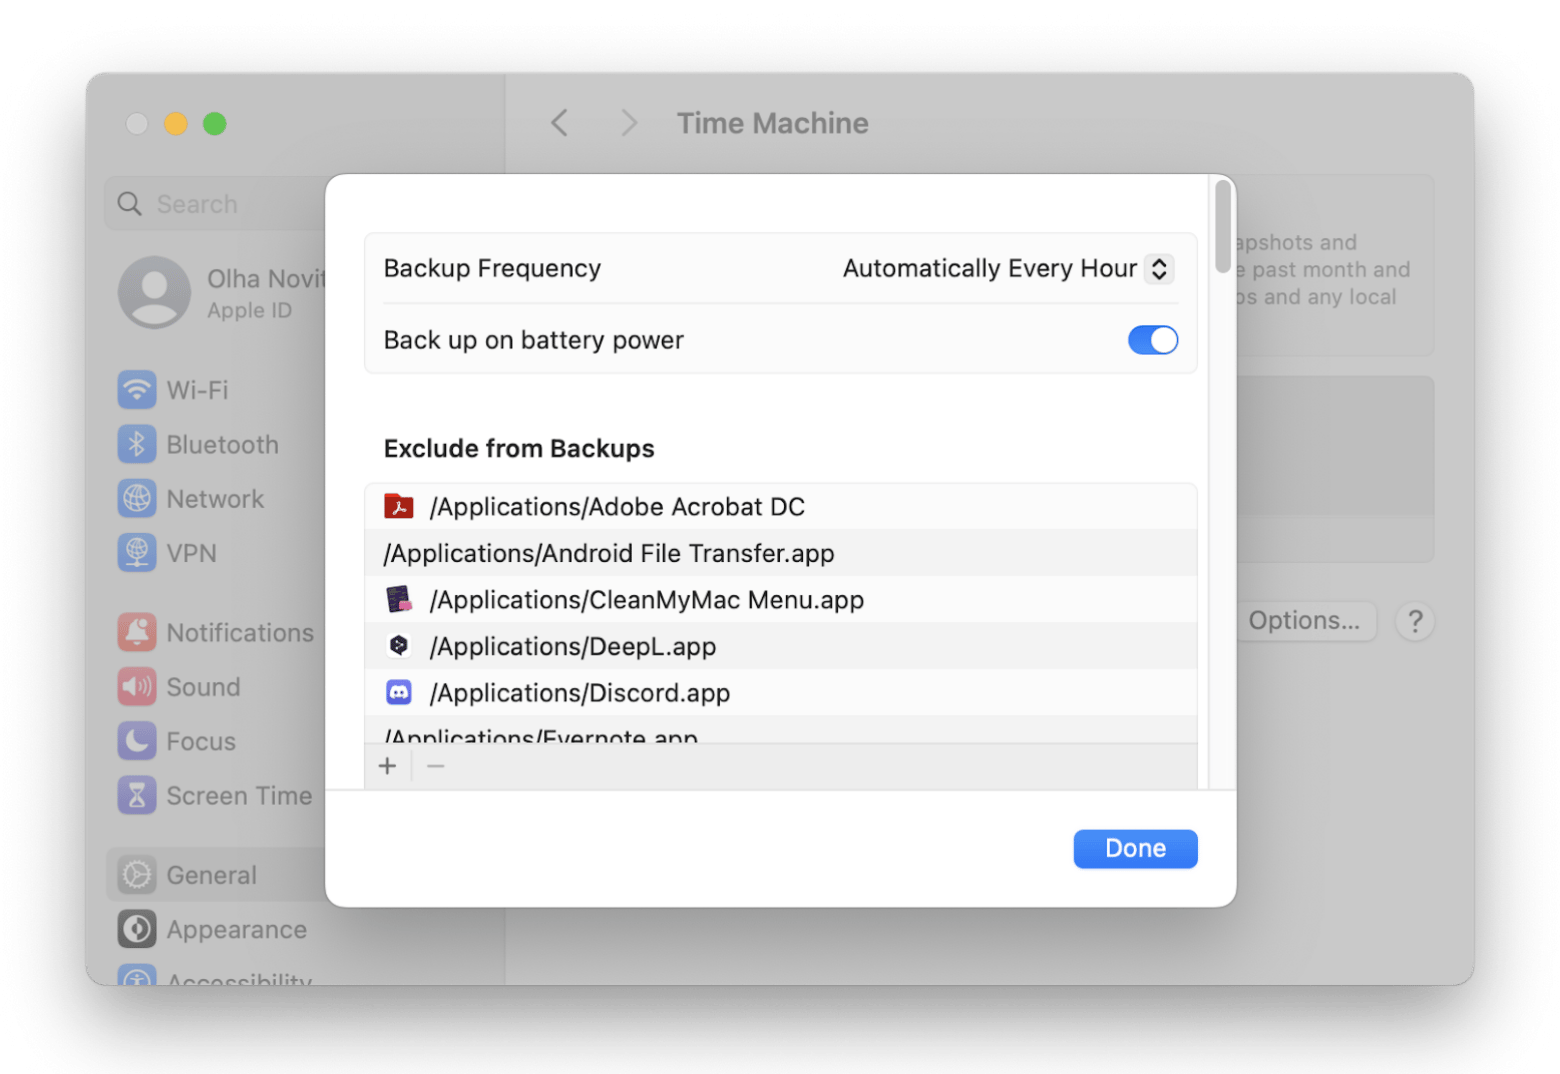
The backup should start automatically. If not, click the clock icon in the menu bar and select Backup Now. Wait for the backup to complete.
Step 2. Clean up the junk files of your Mac
I like to think of this step as cleaning up the construction site before starting a new build.
Over time, your Mac accumulates system junk files that may interfere with the smooth operation of the new operating system. Since it's nearly impossible to manually delete these junk files, I recommend using CleanMyMac. It is a Mac care app that removes system junk, removes viruses and speeds up the system.
To clean up your Mac:
- Install and open CleanMyMac.
- Click Scan.
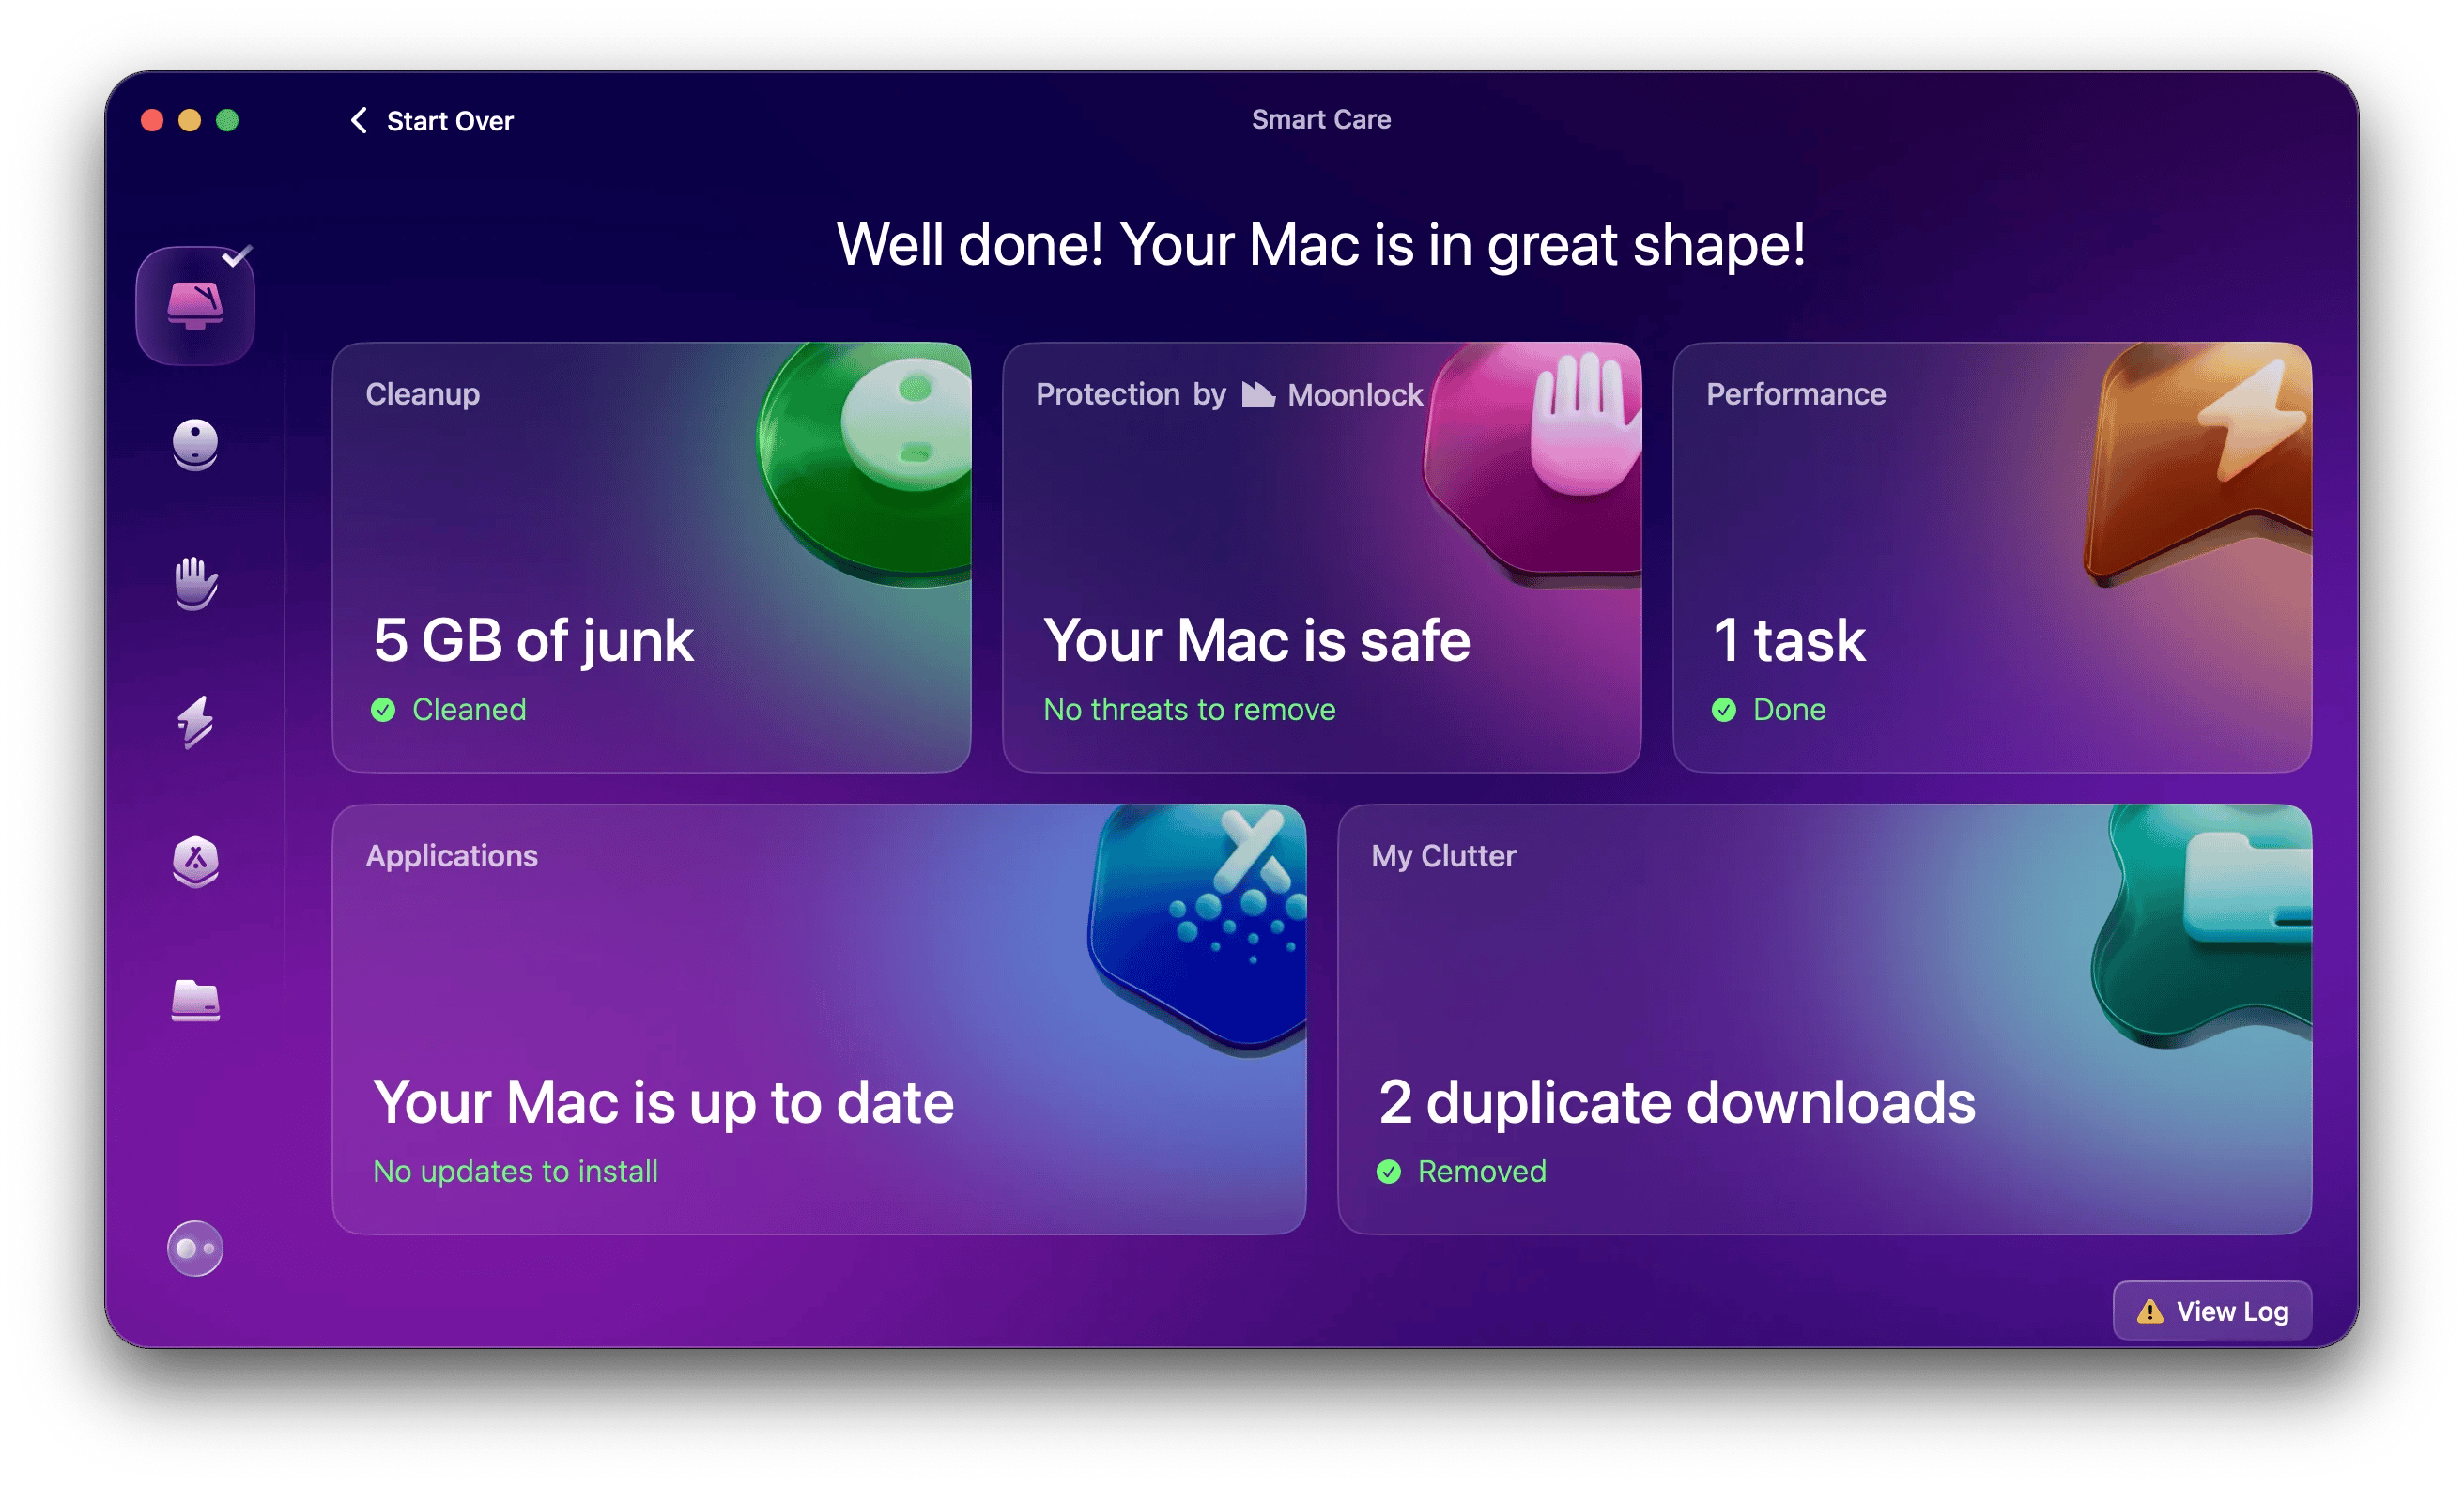
- View the junk file found and click Run to delete it.
This process takes up to 10 minutes and can free up several GB of space. Please check my results:
How to downgrade macOS Sequoia
There are three ways to restore macOS Sequoia updates: use Time Machine, Internet Recovery, or start the macOS USB installer. Which method to choose?
| Method comparison | Time Machine | Internet recovery | Can boot the USB installer |
|---|---|---|---|
| Best choice | Have a Mac backed up on your Sonoma system and want to restore data and settings. | Need a brand new installation. | A specific version of macOS needs to be installed (not necessarily Sonoma). |
| time | 30 minutes to several hours, depending on the data size. | 1 to 3 hours or more, depending on the speed of the internet. | 30 minutes to 2 hours (extra time to create a USB). |
| Control of macOS version | No, restore from backup. | No, install the original/latest version. | Yes, you can choose a version. |
| Hardware requirements | Backup drive | none | USB drive (32GB) |
Downgrade with Time Machine
If you backed up your Mac before upgrading to Sequoia, the downgrade should be fast. You can restore your Mac to its exact state before the upgrade.

Note: If you create any important files or projects while using Sequoia, make sure you back up them as well before downgrading.
In my case, I only have some GB of files and programs, so I only backed up these. I found Time Machine inconvenient for selective backups, so I used GetBackup Pro. It's simple: you just select the file you want and the application will create a backup. In my experience, it also saves more space than the backup of Time Machine.
Here is how to downgrade from Sequoia using Time Machine:
- Connect the drive with Time Machine backup to your Mac.
- Restart your Mac in recovery mode.
- For Intel-based Macs: Hold down Command R until you see the Apple logo.
- For Apple Chip Mac: Press and hold the power button until you see the boot option.
- For Intel-based Macs: Hold down Command R until you see the Apple logo.
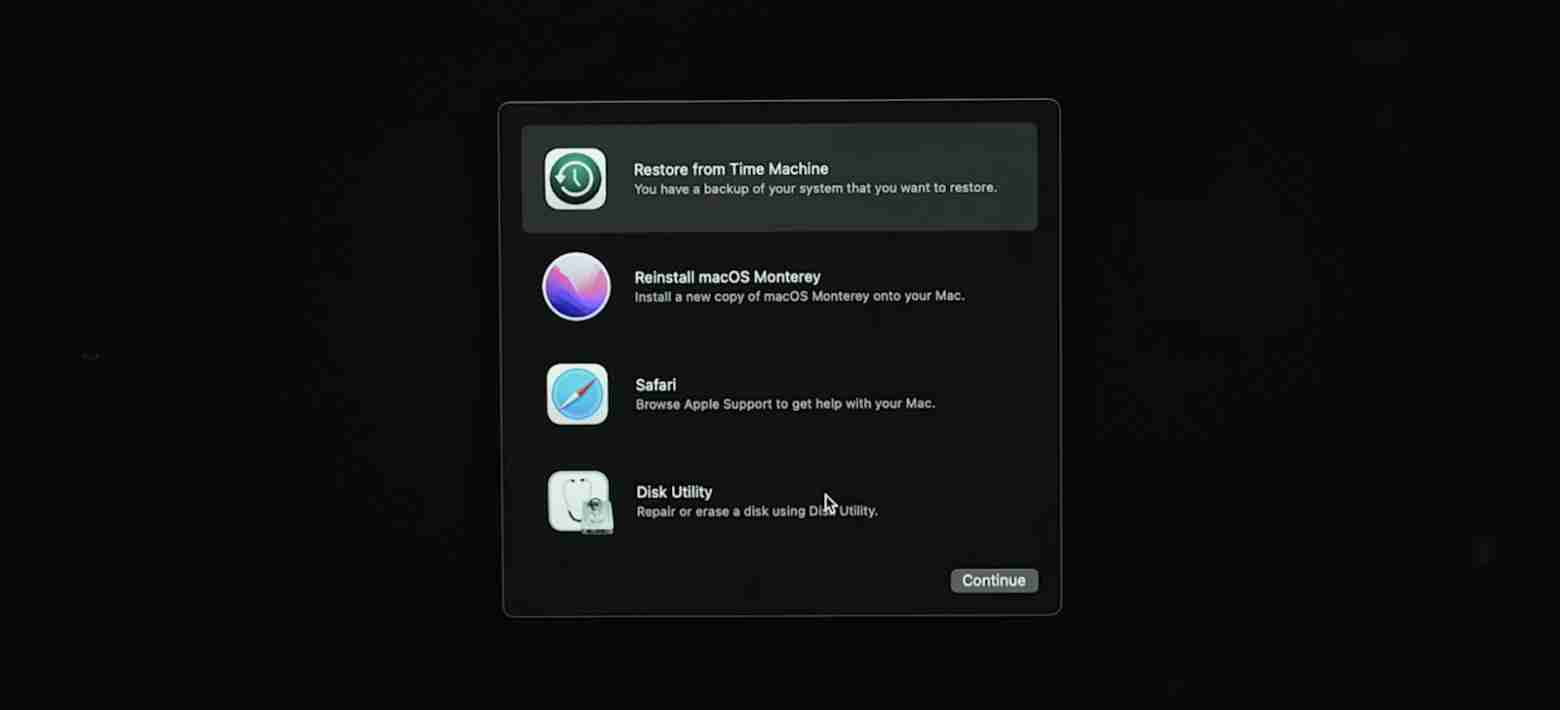
- Click Options > Continue > Recover from Time Machine > Continue.

- Select the Time Machine drive and in the backup list, select the backup you created before upgrading to Sequoia.
- Click Recover.
Follow the on-screen instructions and wait for the system to recover.
Use the Internet to restore downgrade
Internet Recovery will restore your Mac to the operating system it originally came with, not your previous one. Why the "Internet"? Because in this approach, your Mac downloads the operating system from Apple's servers. After that, you can upgrade to your favorite operating system.
As a reminder: You need to erase the entire Mac, so make sure you have a backup of your important files or a whole system.
Here is how to reinstall older versions of macOS using Internet Recovery:
- Turn off your Mac.
- Enter recovery mode. First, turn off your Mac. Then:
- For Intel Mac: Press and hold Shift Option Command R and press the Power button.
- For Apple chip Mac: Press and hold the power button until the Options button appears.
- Select Disk Utility.
- In the left pane, click your drive (usually called Macintosh HD).

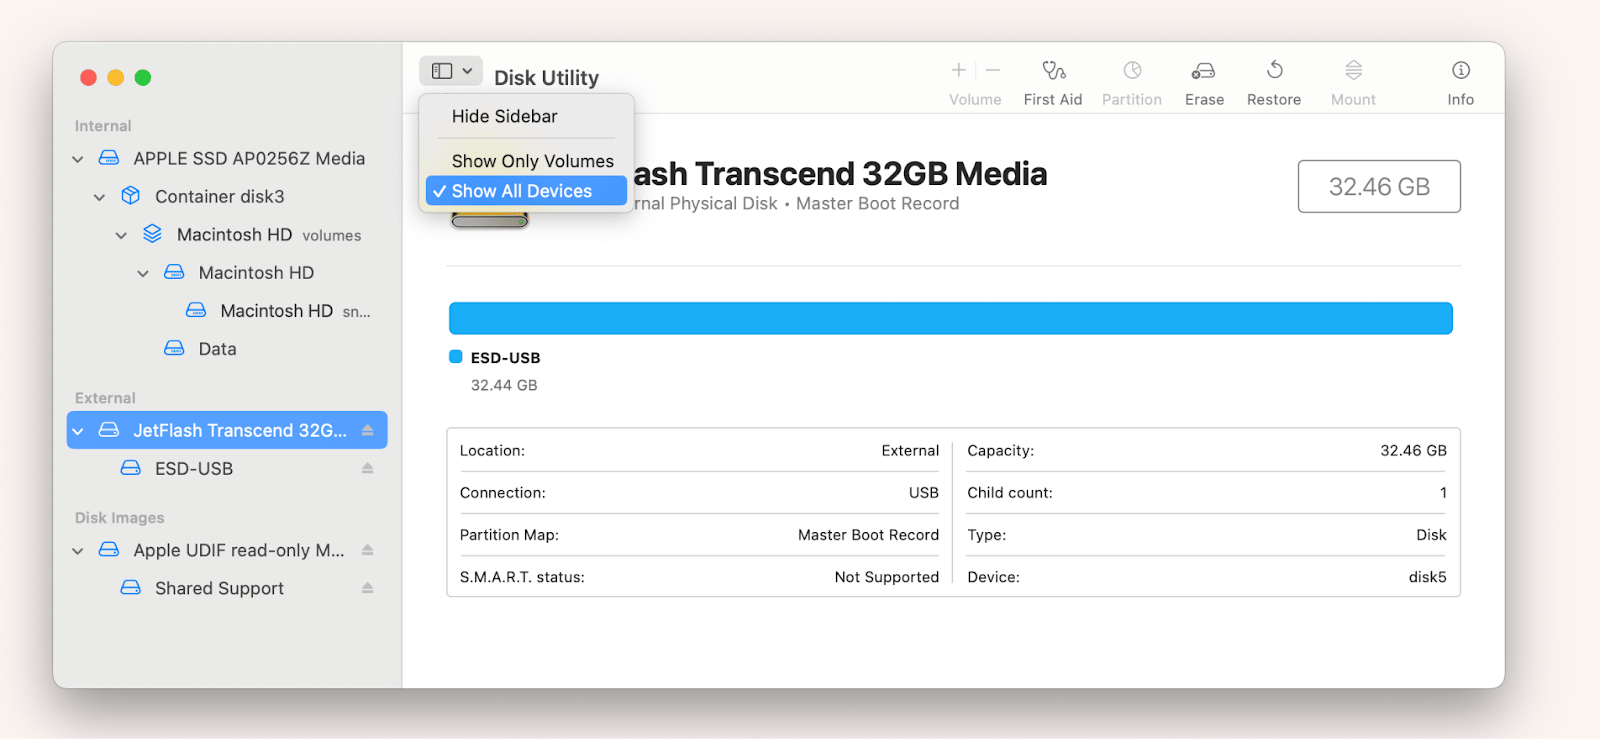
Note: Make sure to select the entire disk, not just the volume. If you are not sure, click the View button on the left side of the Disk Utility and make sure Show All Devices is selected.
- Press "Erase" and confirm your action. Wait for the erase process to be completed.
- Connect to Wi-Fi.
- Click Exit Recovery.
- Click Reinstall macOS [Name] > Continue. Then, follow the on-screen instructions: Agree with the license terms, select the disk (usually Macintosh HD) to install the operating system, and wait for the installation to complete.
Downgrade using bootable macOS USB installer
For this method you need:
- A flash drive that turns it into a bootable installer. I was using a 16GB drive initially, but when I tried to burn Sonoma to it, I was missing…83MB. So I switched to 32GB USB.
- macOS Sonoma: Download it from the Apple Store. Downloading may take 1 hour or more depending on your internet speed.
Now, let's continue with the macOS Sequoia downgrade guide using the USB installer.
Step 1: Format USB
- Plug the USB drive into your Mac.
- Open Disk Utility, select your USB and click Erashes.
- In the Format drop-down menu, select Mac OS extension (log-style), and then click Eraser.
Common Errors
If you don't see Mac OS extensions (logs) in the Format drop-down menu, it may be because you're trying to format the volume instead of the physical disk. To resolve this issue, go to the upper left corner, click View > Show All Devices, and select the physical disk in the left pane.
Step 2: Make USB bootable
- Open the terminal and type
sudo /Applications/Install\ macOS\ Sonoma.app/Contents/Resources/createinstallmedia --volume /Volumes/[您的USB名称](please replace[您的USB名称]with the actual name of your USB drive). - Open Finder > Go to > Go to Folder, type
/Volumes, and press Return. - Select your USB drive and drag it into the terminal.
- Press Return, enter your password, and wait for the process to complete – this may take 30 minutes.
You should get the following results:

Step 3: Downgrade to macOS Sonoma
- Turn off your Mac.
- Press and hold the power button until the Startup option appears.
- Select Install macOS Sonoma > Continue.
- Select Disk Utility > Continue.
- Select your hard drive (usually called Macintosh HD) and click "Erase" in the upper right corner.

- In the Format drop-down menu, select APFS, and then click Erashes.
- Wait for the process to complete, and then close the Disk Utility window.
- Select Install macOS Sonoma > Continue.
- Agree to the license agreement and follow the on-screen instructions.
The operating system installation will begin and will take about 30 minutes.
Prepare correctly to restore macOS Sequoia updates
The rules for downgrading from macOS Sequoia to Sonoma can be summarized as follows:
- Make a backup. Back up any important files that you create on your current system or when using macOS Sequoia. If you plan to use Time Machine recovery, use this tool. Personally, I prefer Get Backup Pro because it is convenient and backups are more compressed.
- Clean up your Mac. Don't bring unnecessary junk files to the new system. Use CleanMyMac to clean up system junk files.
- Set aside time for this. This process can take 3 hours or more, so be prepared to avoid using your Mac during this period.
The apps I mentioned that help you prepare your backup are available on Setapp, a platform with over 250 macOS and iOS applications. You can try out all the features of all apps for free for 7 days.
The above is the detailed content of How to downgrade macOS Sequoia without losing data and time. For more information, please follow other related articles on the PHP Chinese website!

Hot AI Tools

Undresser.AI Undress
AI-powered app for creating realistic nude photos

AI Clothes Remover
Online AI tool for removing clothes from photos.

Undress AI Tool
Undress images for free

Clothoff.io
AI clothes remover

Video Face Swap
Swap faces in any video effortlessly with our completely free AI face swap tool!

Hot Article
Hot Tools

Notepad++7.3.1
Easy-to-use and free code editor

SublimeText3 Chinese version
Chinese version, very easy to use

Zend Studio 13.0.1
Powerful PHP integrated development environment

Dreamweaver CS6
Visual web development tools

SublimeText3 Mac version
God-level code editing software (SublimeText3)
Hot Topics


 Spotify on Apple Watch: How to use it in 2025
Apr 04, 2025 am 09:55 AM
Spotify on Apple Watch: How to use it in 2025
Apr 04, 2025 am 09:55 AM
With the support of Apple devices' interconnected ecosystem, managing and synchronizing your Apple devices has become a breeze. Unlock Mac with Apple Watch? Simple! (If you haven't set this unlocking method yet, you should really try it, it's very time-saving). Can you pay with Apple Watch without using iPhone? Apple can handle it easily! Today we will focus on how to download the Spotify playlist to an Apple Watch and play without an iPhone. Spoiler: This is possible. How to use Spotify on Apple Watch: A quick overview Let's dive into the key issues and their solutions directly. If this form helps you, that would be great! If you
 Floating screen recording: how to capture a specific app window on a Mac
Mar 28, 2025 am 09:16 AM
Floating screen recording: how to capture a specific app window on a Mac
Mar 28, 2025 am 09:16 AM
Mac Screen Recording: Easily capture windows, areas and drop-down menus The screenshot tool (Command Shift 5) that comes with Mac systems can record full screen or selected areas, but cannot record specific application windows separately. At this time, more powerful tools are needed to complete the task. This article will introduce several ways to help you record your Mac windows as easily as a professional. Record the application window separately Record a single window to avoid cluttered desktop backgrounds and create more professional and prominent images and videos. Here are some excellent screen recording applications: Function comparison Gifox CleanShot X Dropshare Record a specific window ✓ ✓ ✓


 How to get rid of 'Your screen is being observed' error
Apr 05, 2025 am 10:19 AM
How to get rid of 'Your screen is being observed' error
Apr 05, 2025 am 10:19 AM
When you see the message "Your screen is being monitored", the first thing you think of is someone hacking into your computer. But that's not always the case. Let's try to find out if there are any issues that need you to worry about. Protect your Mac With Setapp, you don't need to worry about choosing a tool to protect your computer. You can quickly form your own suite of privacy and security software on Setapp. Free Trial Security Test What does "Your screen is being monitored" mean? There are many reasons why there is a Mac lock screen message that appears with “Your screen is being monitored”. You are sharing the screen with others You are recording the screen You are using AirPlay You are using some apps that try to access your screen Your computer is infected with evil
 Email is not syncing? How to refresh the Mail app on Mac
Apr 04, 2025 am 09:45 AM
Email is not syncing? How to refresh the Mail app on Mac
Apr 04, 2025 am 09:45 AM
Mac mail synchronization failed? Quick solution! Many Mac users rely on the included Mail app because it is simple and convenient. But even reliable software can have problems. One of the most common problems is that Mail cannot be synced, resulting in recent emails not being displayed. This article will guide you through email synchronization issues and provide some practical tips to prevent such issues. How to refresh the Mail app on your Mac Operation steps Click the envelope icon Open the Mail app > View > Show Tab Bar > Click the Envelope icon to refresh. Use shortcut keys or menu options Press Shift Command N. Or open the Mail app

 How to show only active apps in Dock on Mac
Apr 09, 2025 am 11:44 AM
How to show only active apps in Dock on Mac
Apr 09, 2025 am 11:44 AM
Mac Dockbar Optimization Guide: Show only running applications The dock bar of your Mac is the core of the system, from which you can launch Finder, Trash, recently used apps, active apps, and bookmark apps, and even add folders such as Document and Downloads. By default, the Mac dock bar will display more than a dozen Apple-owned applications. Most users will add more applications, but rarely delete any applications, resulting in the dock bar being cluttered and difficult to use effectively. This article will introduce several ways to help you organize and clean up your Mac dock bar in just a few minutes. Method 1: Manually organize the dock bar You can manually remove unused applications and keep only commonly used applications. Remove the application: Right-click on the application
