
 System Tutorial
Windows Series
Step-by-Step Instructions for Setting Up Windows 11 LTSC on Your Device
System Tutorial
Windows Series
Step-by-Step Instructions for Setting Up Windows 11 LTSC on Your Device
Step-by-Step Instructions for Setting Up Windows 11 LTSC on Your Device

This article provides a step-by-step guide to installing Windows 11 LTSC, detailing system requirements, bootable USB drive creation (using Rufus or MCT), and post-installation steps. Key differences between LTSC and standard Windows 11, focusing o
Step-by-Step Instructions for Setting Up Windows 11 LTSC on Your Device
Setting up Windows 11 LTSC involves several steps, from preparing your system to the final configuration. This process assumes you already have a legitimate Windows 11 LTSC ISO file. If not, you'll need to obtain one from a legitimate source. Remember to back up all your important data before proceeding, as installing a new operating system can potentially erase existing files.
1. Preparation: Ensure your computer meets the minimum system requirements (detailed in the next section). Back up all your data. Disconnect any unnecessary peripherals.
2. Creating the Bootable USB Drive: Use a tool like Rufus or the Media Creation Tool (MCT) to create a bootable USB drive (at least 8GB). The process typically involves selecting the ISO file, choosing the USB drive, and then initiating the creation process. Follow the instructions provided by the chosen tool carefully. Be absolutely certain you select the correct USB drive; selecting the wrong one will erase its contents.
3. Booting from the USB Drive: Restart your computer and enter the BIOS/UEFI settings (usually by pressing Del, F2, F10, F12, or Esc during startup – the key varies depending on your motherboard manufacturer). Change the boot order to prioritize the USB drive. Save the changes and exit the BIOS/UEFI. Your computer should now boot from the USB drive.
4. Installation Process: Follow the on-screen instructions. You'll be guided through the language selection, keyboard layout, product key entry (if required), and license agreement. Choose a custom installation to wipe the existing drive and install Windows 11 LTSC cleanly. This is generally recommended for a fresh install.
5. Post-Installation: After the installation is complete, your computer will restart. You will then need to configure your user account, network settings, and other preferences. Install any necessary drivers for your hardware. Consider installing updates to ensure your system is up-to-date and secure.
What are the minimum system requirements for installing Windows 11 LTSC?
While the exact requirements might vary slightly depending on the specific LTSC build, the minimum system requirements for Windows 11 LTSC are generally similar to the standard Windows 11. However, it's crucial to check the specific system requirements listed on the official Microsoft documentation or the source from which you obtained the ISO file, as these specifications can change. Generally, expect to need:
- Processor: A 64-bit processor with 2 or more cores at 1 GHz or faster.
- RAM: 4 GB of RAM (though 8 GB is recommended for a smoother experience).
- Storage: 64 GB or larger storage device (SSD recommended).
- System Firmware: UEFI, Secure Boot capable.
- TPM: Trusted Platform Module (TPM) version 2.0.
- Graphics Card: Compatible DirectX 12 graphics card or better.
- Display: A display that supports 8 bits per color channel. Minimum resolution of 1366 x 768 pixels.
It's important to note that while these are minimum requirements, a more powerful system will provide a significantly better user experience. An SSD is highly recommended for faster boot times and overall system performance.
How do I create a bootable USB drive for Windows 11 LTSC installation?
Creating a bootable USB drive for Windows 11 LTSC is straightforward using tools like Rufus or the Windows Media Creation Tool (MCT). Here's a breakdown of both methods:
Method 1: Using Rufus
- Download Rufus: Download the latest version of Rufus from the official website. Be cautious and only download from the official source to avoid malware.
- Download Windows 11 LTSC ISO: Ensure you have a legitimate ISO file downloaded.
- Open Rufus: Run Rufus as administrator.
- Select USB Drive and ISO: Select your USB drive (ensure it's the correct one!) and browse to your downloaded Windows 11 LTSC ISO file.
- Select Partition Scheme and Target System: Choose the correct partition scheme (GPT is generally recommended for newer systems) and target system (UEFI is generally recommended).
- Click Start: Click the "Start" button. Rufus will format your USB drive and create the bootable media. This process may take some time.
Method 2: Using Windows Media Creation Tool (MCT)
- Download MCT: Download the Media Creation Tool from the official Microsoft website.
- Run MCT: Run the MCT as administrator.
- Choose Installation Media: Select "Create installation media (USB flash drive, DVD, or ISO file) for another PC".
- Select Language, Edition, and Architecture: Choose the appropriate language, edition (should be Windows 11 LTSC), and architecture (64-bit is almost always correct).
- Select USB Drive: Select your USB drive and click "Next". The MCT will download the necessary files and create the bootable media.
In both cases, ensure you have a USB drive with sufficient storage space (at least 8GB) and that you've backed up any important data on the USB drive before proceeding, as the process will erase all existing data on the selected drive.
What are the key differences between Windows 11 LTSC and the standard Windows 11 version?
The primary difference between Windows 11 LTSC (Long Term Servicing Channel) and the standard Windows 11 versions lies in their update schedules and included features.
- Update Schedule: LTSC receives major feature updates less frequently, typically every 2-3 years, compared to the standard Windows 11, which receives updates more regularly. This makes LTSC ideal for environments requiring stability and predictability, such as industrial control systems or specialized devices where frequent updates might disrupt operations.
- Feature Set: LTSC intentionally omits certain features found in standard Windows 11 releases, such as Microsoft Store, some built-in apps (like Edge), and some optional features. This streamlined approach reduces the attack surface and simplifies maintenance.
- Target Audience: LTSC is specifically designed for long-term deployments in enterprise and industrial settings where stability and predictability are paramount. Standard Windows 11, on the other hand, is geared towards home and general business users who benefit from more frequent updates and feature additions.
- Support Lifecycle: LTSC versions generally have an extended support lifecycle compared to standard Windows 11 releases. This provides longer-term security updates and support.
In summary, Windows 11 LTSC prioritizes stability and long-term support over frequent feature updates and the inclusion of optional components. Choosing between LTSC and standard Windows 11 depends entirely on your specific needs and priorities. If you need a stable, predictable system with minimal disruptions, LTSC is a good option. If you prefer the latest features and regular updates, the standard Windows 11 is more suitable.
The above is the detailed content of Step-by-Step Instructions for Setting Up Windows 11 LTSC on Your Device. For more information, please follow other related articles on the PHP Chinese website!

Hot AI Tools

Undresser.AI Undress
AI-powered app for creating realistic nude photos

AI Clothes Remover
Online AI tool for removing clothes from photos.

Undress AI Tool
Undress images for free

Clothoff.io
AI clothes remover

AI Hentai Generator
Generate AI Hentai for free.

Hot Article
Hot Tools

Notepad++7.3.1
Easy-to-use and free code editor

SublimeText3 Chinese version
Chinese version, very easy to use

Zend Studio 13.0.1
Powerful PHP integrated development environment

Dreamweaver CS6
Visual web development tools

SublimeText3 Mac version
God-level code editing software (SublimeText3)
Hot Topics
 1382
1382
 52
52

 win11 activation key permanent 2025
Mar 18, 2025 pm 05:57 PM
win11 activation key permanent 2025
Mar 18, 2025 pm 05:57 PM
Article discusses sources for a permanent Windows 11 key valid until 2025, legal issues, and risks of using unofficial keys. Advises caution and legality.
 win11 activation key permanent 2024
Mar 18, 2025 pm 05:56 PM
win11 activation key permanent 2024
Mar 18, 2025 pm 05:56 PM
Article discusses reliable sources for permanent Windows 11 activation keys in 2024, legal implications of third-party keys, and risks of using unofficial keys.
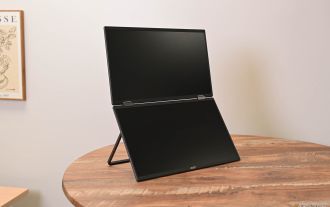 Acer PD163Q Dual Portable Monitor Review: I Really Wanted to Love This
Mar 18, 2025 am 03:04 AM
Acer PD163Q Dual Portable Monitor Review: I Really Wanted to Love This
Mar 18, 2025 am 03:04 AM
The Acer PD163Q Dual Portable Monitor: A Connectivity Nightmare I had high hopes for the Acer PD163Q. The concept of dual portable displays, conveniently connecting via a single cable, was incredibly appealing. Unfortunately, this alluring idea quic
 ReactOS, the Open-Source Windows, Just Got an Update
Mar 25, 2025 am 03:02 AM
ReactOS, the Open-Source Windows, Just Got an Update
Mar 25, 2025 am 03:02 AM
ReactOS 0.4.15 includes new storage drivers, which should help with overall stability and UDB drive compatibility, as well as new drivers for networking. There are also many updates to fonts support, the desktop shell, Windows APIs, themes, and file
 How to Create a Dynamic Table of Contents in Excel
Mar 24, 2025 am 08:01 AM
How to Create a Dynamic Table of Contents in Excel
Mar 24, 2025 am 08:01 AM
A table of contents is a total game-changer when working with large files – it keeps everything organized and easy to navigate. Unfortunately, unlike Word, Microsoft Excel doesn’t have a simple “Table of Contents” button that adds t
 How to Use Voice Access in Windows 11
Mar 18, 2025 pm 08:01 PM
How to Use Voice Access in Windows 11
Mar 18, 2025 pm 08:01 PM
Detailed explanation of the voice access function of Windows 11: Free your hands and control your computer with voice! Windows 11 provides numerous auxiliary functions to help users with various needs to use the device easily. One of them is the voice access function, which allows you to control your computer completely through voice. From opening applications and files to entering text with voice, everything is at your fingertips, but first you need to set up and learn key commands. This guide will provide details on how to use voice access in Windows 11. Windows 11 Voice Access Function Settings First, let's take a look at how to enable this feature and configure Windows 11 voice access for the best results. Step 1: Open the Settings menu
 Shopping for a New Monitor? 8 Mistakes to Avoid
Mar 18, 2025 am 03:01 AM
Shopping for a New Monitor? 8 Mistakes to Avoid
Mar 18, 2025 am 03:01 AM
Buying a new monitor isn't a frequent occurrence. It's a long-term investment that often moves between computers. However, upgrading is inevitable, and the latest screen technology is tempting. But making the wrong choices can leave you with regret
 New to Multi-Monitors? Don't Make These Mistakes
Mar 25, 2025 am 03:12 AM
New to Multi-Monitors? Don't Make These Mistakes
Mar 25, 2025 am 03:12 AM
Multi-monitor setups boost your productivity and deliver a more immersive experience. However, it's easy for a novice to stumble while assembling the setup and make mistakes. Here are some of the most common ones and how to avoid them.
