
 System Tutorial
Windows Series
Installing Windows 11 Made Easy: A Complete Walkthrough for a Successful Installation
System Tutorial
Windows Series
Installing Windows 11 Made Easy: A Complete Walkthrough for a Successful Installation
Installing Windows 11 Made Easy: A Complete Walkthrough for a Successful Installation

Installing Windows 11 Made Easy: A Complete Walkthrough for a Successful Installation
This walkthrough will guide you through a successful Windows 11 installation. The process can seem daunting, but by following these steps and taking precautions, you can smoothly upgrade or install a fresh copy of Windows 11. First, ensure you meet the minimum system requirements (discussed in the next section). Then, create a bootable Windows 11 installation media (USB drive or DVD) using the Media Creation Tool from Microsoft's website. This tool will download the appropriate ISO file and create the bootable media for you.
Once your bootable media is ready, restart your computer and enter the BIOS/UEFI settings (usually by pressing Delete, F2, F10, F12, or Esc during startup – the key varies depending on your motherboard manufacturer). Change the boot order to prioritize your USB drive or DVD. Save the changes and exit the BIOS/UEFI. Your computer will now boot from the installation media.
Follow the on-screen instructions. You'll be prompted to select your language, region, and keyboard layout. Then, you'll have the option to either upgrade your existing installation or perform a clean installation. An upgrade keeps your files and settings, while a clean installation wipes your drive and starts fresh. Choose carefully! For a clean install, you'll be asked to partition your hard drive; ensure you select the correct partition to avoid data loss. The installation process will take some time, and your computer will restart several times. Once completed, you'll be prompted to create a user account and personalize your settings.
Remember to install all necessary drivers after the installation is complete, especially for your graphics card, network adapter, and other peripherals. These drivers ensure your hardware functions correctly. Finally, update Windows 11 to the latest version to benefit from security patches and performance improvements.
What are the minimum system requirements for a successful Windows 11 installation?
To successfully install Windows 11, your system must meet the following minimum requirements:
- Processor: 1 gigahertz (GHz) or faster with 2 or more cores on a compatible 64-bit processor or System on a Chip (SoC).
- Memory (RAM): 4 GB
- Storage: 64 GB or larger storage device
- System firmware: UEFI, Secure Boot capable
- TPM: Trusted Platform Module (TPM) version 2.0
- Graphics card: Compatible with DirectX 12 or later with WDDM 2.x driver
- Display: High definition (720p) display, 9 inches or greater diagonally
- Internet connection: Required for updates and some features
It's crucial to understand that while these are the minimum requirements, a more powerful system will provide a significantly better experience. Meeting only the minimum requirements might lead to performance issues and slowdowns. Check your system specifications through the System Information tool (search for "System Information" in the Windows search bar) to ensure compatibility before attempting an installation. Some older systems might require BIOS updates to enable TPM 2.0 and Secure Boot. Check your motherboard manufacturer's website for BIOS updates.
What common problems might I encounter during a Windows 11 installation, and how can I troubleshoot them?
Several issues can arise during a Windows 11 installation. Here are some common problems and their troubleshooting steps:
- Error codes: Windows 11 installation often displays error codes. Search online for the specific error code you encounter; Microsoft's support website and numerous community forums offer solutions.
- Boot problems: If your computer fails to boot after installation, try booting from the installation media again and repairing your boot configuration.
- Driver issues: After installation, you might experience problems with specific hardware components. Download and install the latest drivers from the manufacturer's website.
- Incompatibility with hardware: Some older hardware might be incompatible with Windows 11. If you encounter significant issues, consider upgrading your hardware or sticking with a compatible operating system.
- TPM or Secure Boot issues: If your system doesn't meet the TPM 2.0 or Secure Boot requirements, you won't be able to install Windows 11. You'll need to update your BIOS/UEFI settings to enable these features (if possible). Check your motherboard manufacturer's website for instructions.
- Installation media errors: Ensure your installation media (USB drive or DVD) is not corrupted. Create a new installation media if necessary.
If you encounter persistent problems, consider seeking help from Microsoft support or online communities dedicated to Windows 11 troubleshooting. Providing details about the error messages and your system specifications will significantly help in finding a solution.
How can I ensure I back up my important data before starting a Windows 11 installation?
Backing up your important data before installing Windows 11 is crucial, especially if you're performing a clean installation. Data loss can be devastating, and a backup safeguards your valuable files and settings. Here are several ways to back up your data:
- External hard drive: The simplest method is to copy your important files to an external hard drive. Connect the external drive, and manually copy folders containing your documents, photos, videos, and other essential data.
- Cloud storage: Services like OneDrive, Google Drive, Dropbox, and iCloud offer cloud storage solutions. These services automatically sync your files, making them accessible from multiple devices. Ensure you have enough storage space before starting the backup.
- USB flash drive: For smaller amounts of data, a USB flash drive can be sufficient. However, this method might require multiple drives for large amounts of data.
- System image backup: Windows provides a built-in tool to create a system image backup. This backup includes your entire operating system, applications, and data. This is particularly useful if you want to restore your system to its previous state after a clean installation. You can find this tool in the Control Panel under "Backup and Restore (Windows 7)".
Regardless of your chosen method, always verify your backup by attempting to restore a few files from the backup to ensure its integrity. Having multiple backups (e.g., a cloud backup and an external hard drive) is recommended for added security and redundancy. Remember to back up your data before you start the Windows 11 installation process to avoid data loss.
The above is the detailed content of Installing Windows 11 Made Easy: A Complete Walkthrough for a Successful Installation. For more information, please follow other related articles on the PHP Chinese website!

Hot AI Tools

Undresser.AI Undress
AI-powered app for creating realistic nude photos

AI Clothes Remover
Online AI tool for removing clothes from photos.

Undress AI Tool
Undress images for free

Clothoff.io
AI clothes remover

Video Face Swap
Swap faces in any video effortlessly with our completely free AI face swap tool!

Hot Article
Hot Tools

Notepad++7.3.1
Easy-to-use and free code editor

SublimeText3 Chinese version
Chinese version, very easy to use

Zend Studio 13.0.1
Powerful PHP integrated development environment

Dreamweaver CS6
Visual web development tools

SublimeText3 Mac version
God-level code editing software (SublimeText3)
Hot Topics
 1392
1392
 52
36
110
52
36
110

 ReactOS, the Open-Source Windows, Just Got an Update
Mar 25, 2025 am 03:02 AM
ReactOS, the Open-Source Windows, Just Got an Update
Mar 25, 2025 am 03:02 AM
ReactOS 0.4.15 includes new storage drivers, which should help with overall stability and UDB drive compatibility, as well as new drivers for networking. There are also many updates to fonts support, the desktop shell, Windows APIs, themes, and file
 How to Create a Dynamic Table of Contents in Excel
Mar 24, 2025 am 08:01 AM
How to Create a Dynamic Table of Contents in Excel
Mar 24, 2025 am 08:01 AM
A table of contents is a total game-changer when working with large files – it keeps everything organized and easy to navigate. Unfortunately, unlike Word, Microsoft Excel doesn’t have a simple “Table of Contents” button that adds t
 Microsoft's New PowerToys Search Is the Missing Feature Windows 11 Needs
Apr 03, 2025 am 03:53 AM
Microsoft's New PowerToys Search Is the Missing Feature Windows 11 Needs
Apr 03, 2025 am 03:53 AM
Microsoft's latest PowerToys update introduces a game-changing search feature reminiscent of macOS' Spotlight. This improved "Command Palette" (formerly PowerToys Run) surpasses the functionality of the Windows R Run command and the task
 This ASUS ROG Zephyrus with an RTX 3070 Is 31% Off Right Now
Mar 22, 2025 am 06:02 AM
This ASUS ROG Zephyrus with an RTX 3070 Is 31% Off Right Now
Mar 22, 2025 am 06:02 AM
Great value for discount! Asus ROG Zephyrus G16 (2024) E-sports book has dropped significantly! Original price is $1999.99, current price is only $1379.99, saving $620! This Asus ROG Zephyrus G16 gaming laptop equipped with RTX 4070 graphics card brings excellent gaming performance at a lower price. It comes with a stunning 16-inch QHD OLED screen with a smooth 240Hz refresh rate. While the CPU isn't top-notch, its cool appearance, oversized storage space and powerful graphics card make it an ideal choice for users who pursue portable high-performance laptops. Best Buy exclusive offer! Currently, Best Buy is selling this product at a significant discount
 New to Multi-Monitors? Don't Make These Mistakes
Mar 25, 2025 am 03:12 AM
New to Multi-Monitors? Don't Make These Mistakes
Mar 25, 2025 am 03:12 AM
Multi-monitor setups boost your productivity and deliver a more immersive experience. However, it's easy for a novice to stumble while assembling the setup and make mistakes. Here are some of the most common ones and how to avoid them.
 Lenovo Yoga Slim 9i 14 Gen 10 Laptop Review: Speedy Processing, Lacking Elsewhere
Mar 22, 2025 am 03:07 AM
Lenovo Yoga Slim 9i 14 Gen 10 Laptop Review: Speedy Processing, Lacking Elsewhere
Mar 22, 2025 am 03:07 AM
The Lenovo Yoga Slim 9i (14-inch, 10th Gen Intel) offers a compelling blend of features: Microsoft Copilot AI integration, a stunning 4K OLED display, and robust Intel processing power. While it comes close to perfection, some shortcomings hold it b
 You Don't Need to Wait for These Amazon Big Spring Sale Deals
Mar 23, 2025 am 03:04 AM
You Don't Need to Wait for These Amazon Big Spring Sale Deals
Mar 23, 2025 am 03:04 AM
If there are two things you can bet on when it comes to an Amazon sales event, it's for Amazon brand products to be on sale, and it's for them to be on sale early. The latest model of the Amazon Fire HD 10 is one such product, and you can pick it up
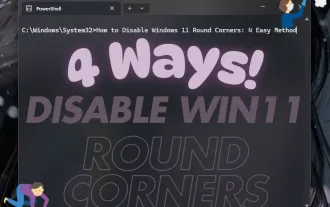 How to Disable Windows 11 Round Corners: 4 Easy Methods!
Mar 27, 2025 pm 03:27 PM
How to Disable Windows 11 Round Corners: 4 Easy Methods!
Mar 27, 2025 pm 03:27 PM
This guide provides four methods to remove the rounded corners in Windows 11, restoring the classic square-edged look. While the rounded corners offer a modern aesthetic, some users prefer the sharper look for reasons including improved screenshot a
