

How To Manage Image Metadata Using ExifTool In Linux

This detailed guide explains what ExifTool is, how to install ExifTool on Linux, and how to use it to manage image metadata information with practical examples.
At the end, we will briefly learn the difference between two types of metadata standards, Exif and XMP. There's even a ExifTool cheat sheet included to help you remember the commands!
Table of Contents
What is ExifTool?
ExifTool, developed by Phil Harvey, is a robust command-line application and Perl library designed for managing metadata in a variety of file formats.
Using ExifTool, we can manage the hidden details (i.e. metadata) embedded within various digital files. These details can include things like:
- Date and time a photo was taken,
- Camera settings used,
- Location information (GPS coordinates),
- Author information,
- Edits made to the file,
- And many.
ExifTool works across different platforms (Linux, macOS, and Windows and comes in two flavors:
- Perl library: This allows programmers to integrate ExifTool functionalities within their applications.
- Command-line application: This is a text-based tool for users to directly interact with ExifTool.
If you're dealing with images, videos, audio files, or PDFs everyday, I can assure that ExifTool could be a best companion for you!
NOTE: EXIF stands for Exchangeable Image File Format.
Key Features of ExifTool
ExifTool is renowned for its extensive range of features that cater to diverse metadata management needs:
- Supports Multiple Metadata Formats: ExifTool can handle numerous metadata formats such as EXIF, GPS, IPTC, XMP, JFIF, GeoTIFF, ICC Profile, Photoshop IRB, FlashPix, AFCP, ID3, and more.
- Wide File Format Compatibility: It works with many file types, including JPEG, PNG, TIFF, RAW, MP4, MOV, and AVI.
- Platform-Independent: ExifTool is available for Windows, macOS, and Unix-based systems.
- Customizable Output: It offers multiple output formatting options, including tab-delimited, HTML, XML, and JSON.
- Multi-Lingual Support: ExifTool provides output in various languages, including English, French, German, Japanese, and more.
Install ExifTool in Linux
ExifTool can be installed on Linux in a few ways.
Install ExifTool in Debian/Ubuntu
ExifTool is available in the default repositories of popular Linux operating systems.
For Debian, Ubuntu, and other Debian-based distributions, you can install ExifTool using the apt package manager:
sudo apt update
sudo apt install exiftool
This will install ExifTool and its dependencies.
Install ExifTool in in Fedora
For Fedora, you can use the dnf package manager:
sudo dnf install perl-Image-ExifTool
Install ExifTool from Source
If you prefer to install ExifTool from the source, follow these steps:
1. Download the latest version:
As of writing this guide, the latest version of ExifTool was 12.89. Let us download it using command:
wget https://exiftool.org/Image-ExifTool-12.89.tar.gz
2. Extract the downloaded file:
tar xvf Image-ExifTool-12.89.tar.gz
3. Navigate to the extracted directory:
cd Image-ExifTool-12.89
4. Install ExifTool:
Make sure you've installed the Development tools. And then run the following commands one by one:
perl Makefile.PL
make
make test
sudo make install
Install ExifTool using Git
You can also clone the ExifTool repository and install it:
1. Clone the repository:
git clone https://github.com/exiftool/exiftool.git
2. Navigate to the cloned directory:
cd exiftool
3. Run ExifTool:
./exiftool /path/to/image
These methods should help you get ExifTool up and running on your Linux system.
How to Use ExifTool to Manage Image Metadata in Linux
Here are a few basic commands to demonstrate how ExifTool can be used:
Reading Metadata
To read metadata from an image file:
exiftool image.jpg
This command displays all metadata associated with image.jpg.
Example:
I am going to display the metadata of an image file named Ostechnix.png.
exiftool Ostechnix.png
Sample Output:
ExifTool Version Number         : 12.16
File Name                       : Ostechnix.png
Directory                       : .
File Size                       : 6.4 KiB
File Modification Date/Time     : 2020:08:22 15:21:00 05:30
File Access Date/Time           : 2024:07:22 17:52:28 05:30
File Inode Change Date/Time     : 2024:07:11 13:44:03 05:30
File Permissions                : rwxrwxrwx
File Type                       : PNG
File Type Extension             : png
MIME Type                       : image/png
Image Width                     : 267
Image Height                    : 267
Bit Depth                       : 8
Color Type                      : RGB with Alpha
Compression                     : Deflate/Inflate
Filter                          : Adaptive
Interlace                       : Noninterlaced
Pixels Per Unit X               : 11811
Pixels Per Unit Y               : 11811
Pixel Units                     : meters
Image Size                      : 267x267
Megapixels                      : 0.071

Writing Metadata
To add or modify metadata in an image file:
exiftool -Artist="Your Name" image.jpg
This command sets the Artist tag to "Your Name" in image.jpg.
Example:
To set/change the Artist tag to "Senthil Kumar" in Ostechnix.png:

Let us verify if the author's name has been really updated by reading the metadata of the file:

As you can see in the output above, the artist name is added.
NOTE:When writing information, ExifTool preserves the original file by adding "_original" to the file name. You must keep a copy of the original, or thoroughly validate the new file before erasing the original.
Copying Metadata
To copy metadata from one file to another:
exiftool -TagsFromFile source.jpg target.jpg
This command copies all metadata tags from source.jpg to target.jpg.
Remove a Specific Metadata Tag
To delete a specific tag:
exiftool -TagName= filename
For example, to remove the Artist tag from image.jpg:
exiftool -Artist= image.jpg
Removing All Metadata
To remove all metadata from a file:
exiftool -all= image.jpg
This command deletes all metadata from image.jpg.
Batch Processing
Batch processing allows you to apply metadata changes to multiple files simultaneously.
To edit metadata for multiple files at once:
exiftool -Artist="John Doe" *.jpg
This command sets the Artist tag for all JPEG files in a directory.
Recursive Batch Processing
To process files in subdirectories as well, use the -r option:
exiftool -r -Artist="John Doe" /path/to/directory
This command sets the Artist tag for all JPEG files in /path/to/directory and its subdirectories.
View Available Tags
To see a list of all tags that can be edited:
exiftool -list
This command lists all the tags that ExifTool can read and write.
Extract Specific Metadata Tags
exiftool -T -createdate -aperture -shutterspeed -iso image.jpg
This command extracts the CreateDate, Aperture, ShutterSpeed, and ISO tags from image.jpg.
Example:

Rename Files Based on Metadata
You can use ExifTool to rename files based on their "Date Taken" metadata with a simple command:
exiftool -d "%Y-%m-%d_%H-%M-%S%%-c.%%e" "-filename<datetimeoriginal image.jpg><p>This command renames image.jpg based on its DateTimeOriginal metadata, using the format YYYY-MM-DD_HH-MM-SS.</p>
<h3 id="Recursive-Renaming">Recursive Renaming</h3>
<p>If you want to recursively rename all files in a specific directory based on a metadata, you can use -r flag like below:</p>
<pre class="brush:php;toolbar:false">exiftool -r -d "%Y-%m-%d_%H-%M-%S%%-c.%%e" "-filename<datetimeoriginal><p>This command will recursively rename all files in the specified directory and its subdirectories.</p>
<h3 id="Handling-Duplicate-Filenames">Handling Duplicate Filenames</h3>
<p>The %%-c part of the format ensures that if there are duplicate filenames, a copy number is appended to avoid overwriting files. For example, if two files have the same date and time, they will be named 2024-07-13_12-23-21-1.jpg and 2024-07-13_12-23-21-2.jpg.</p>
<h3 id="Renaming-Specific-File-Types">Renaming Specific File Types</h3>
<p>To rename only specific file types, such as JPEG files, you can use the -ext option:</p>
<pre class="brush:php;toolbar:false">exiftool -r -ext jpg -d "%Y-%m-%d_%H-%M-%S%%-c.%%e" "-filename<datetimeoriginal><p>This command will rename only JPEG files in the specified directory and its sub-directories.</p>
<h3 id="Extract-Thumbnail-Image">Extract Thumbnail Image</h3>
<div class="code" style="position:relative; padding:0px; margin:0px;"><pre class="brush:php;toolbar:false">exiftool -b -ThumbnailImage image.jpg > thumbnail.jpg
This command extracts the thumbnail image from image.jpg and saves it as thumbnail.jpg.
Geotagging Images
exiftool -geotag track.log image.jpg
This command geotags image.jpg using GPS data from track.log.
Batch Geotagging
If you have a CSV file with GPS data, you can batch geotag images:
exiftool -geotag gps_data.csv /path/to/images
This command geotags all images in /path/to/images using the GPS data from gps_data.csv.
Validate Metadata
exiftool -validate -warning -error image.jpg
This command validates the metadata of image.jpg and shows any warnings or errors.

Extract All Metadata to a Text File
exiftool -a -G1 -s image.jpg > metadata.txt
This command extracts all metadata from image.jpg and saves it to metadata.txt.
Extract Metadata from All Files in a Directory
exiftool -r -w .txt -common pictures
This command recursively extracts common metadata from all files in the pictures directory and writes the output to text files with the same names but with a .txt extension.
Extracting GPS Coordinates Using ExifTool
Here’s how you can extract GPS coordinates from an image using ExifTool.
Basic Extraction
exiftool -gpslatitude -gpslongitude image.jpg
This command will display the GPS latitude and longitude of image.jpg.

Extracting All GPS Data
exiftool -gps* image.jpg
This command extracts all GPS-related metadata from image.jpg.
Sample Output:
GPS Latitude Ref : NorthGPS Longitude Ref : EastGPS Altitude Ref : Above Sea LevelGPS Time Stamp : 13:37:16GPS Date Stamp : 2023:05:18GPS Altitude : 93.9 m Above Sea LevelGPS Date/Time : 2023:05:18 13:37:16ZGPS Latitude : 52 deg 40' 11.85" NGPS Longitude : 13 deg 16' 51.10" EGPS Position : 52 deg 40' 11.85" N, 13 deg 16' 51.10" E
Output to a Text File
To save the GPS coordinates to a text file:
exiftool -gpslatitude -gpslongitude -T image.jpg > gps_coordinates.txt
This command writes the GPS latitude and longitude of image.jpg to gps_coordinates.txt.
Batch Extraction
To extract GPS coordinates from all images in a directory and save them to a text file:
exiftool -filename -gpslatitude -gpslongitude -T /path/to/directory > gps_coordinates.txt
This command creates a tab-delimited file gps_coordinates.txt with the filenames and GPS coordinates of all images in the specified directory.
Output in Decimal Degrees
If you prefer the coordinates in decimal degrees, add the -n option:
exiftool -gpslatitude -gpslongitude -n image.jpg
Sample Output:
GPS Latitude : 52.6699589722222GPS Longitude : 13.280862
This command outputs the GPS coordinates in decimal degrees.
ExifTool Command Cheatsheet
1. Reading Metadata
Basic Reading:
exiftool image.jpg
Extract Specific Metadata Tags:
exiftool -T -createdate -aperture -shutterspeed -iso image.jpg
Extract All Metadata to a Text File:
exiftool -a -G1 -s image.jpg > metadata.txt
Extract Metadata from All Files in a Directory:
exiftool -r -w .txt -common pictures
2. Writing Metadata
Add or Modify a Metadata Tag:
exiftool -TagName="New Value" filename
Batch Processing (Modify Metadata for All Files in a Directory):
exiftool -Artist="John Doe" *.jpg
Recursive Batch Processing:
exiftool -r -Artist="John Doe" /path/to/directory
3. Copying Metadata
Copy Metadata from One File to Another:
exiftool -TagsFromFile source.jpg target.jpg
Copy Metadata from One File to Multiple Files:
exiftool -TagsFromFile source.jpg -ext jpg /path/to/directory
4. Removing Metadata
Remove All Metadata:
exiftool -all= image.jpg
Remove a Specific Metadata Tag:
exiftool -TagName= filename
5. Renaming Files
Rename Files Based on Date Taken:
exiftool -d "%Y-%m-%d_%H-%M-%S%%-c.%%e" "-filename<datetimeoriginal><p><strong>Recursive Renaming:</strong></p>
<pre class="brush:php;toolbar:false">exiftool -r -d "%Y-%m-%d_%H-%M-%S%%-c.%%e" "-filename<datetimeoriginal><p><strong>Renaming Specific File Types:</strong></p>
<pre class="brush:php;toolbar:false">exiftool -r -ext jpg -d "%Y-%m-%d_%H-%M-%S%%-c.%%e" "-filename<datetimeoriginal><h3 id="Geotagging-Images">6. Geotagging Images</h3>
<p><strong>Basic Geotagging:</strong></p>
<div class="code" style="position:relative; padding:0px; margin:0px;"><pre class="brush:php;toolbar:false">exiftool -geotag track.log image.jpg
Batch Geotagging:
exiftool -geotag gps_data.csv /path/to/images
7. Extracting GPS Coordinates
Basic Extraction:
exiftool -gpslatitude -gpslongitude image.jpg
Extracting All GPS Data:
exiftool -gps* image.jpg
Output to a Text File:
exiftool -gpslatitude -gpslongitude -T image.jpg > gps_coordinates.txt
Batch Extraction:
exiftool -filename -gpslatitude -gpslongitude -T /path/to/directory > gps_coordinates.txt
Output in Decimal Degrees:
exiftool -gpslatitude -gpslongitude -n image.jpg
8. Listing Available Tags
View Available Tags:
exiftool -list
9. Validating Metadata
Validate Metadata:
exiftool -validate -warning -error image.jpg
10. Extract Thumbnail Image
Extract Thumbnail:
exiftool -b -ThumbnailImage image.jpg > thumbnail.jpg
Difference Between Exif and XMP Metadata
Exif and XMP are both metadata standards used in digital imaging, but they serve different purposes and have distinct characteristics.
Exif Metadata
- Origin: Developed by the Japan Electronic Industries Development Association (JEIDA) for use in digital cameras.
- Content: Primarily contains technical information about the image, such as camera settings (aperture, shutter speed, ISO), date and time the photo was taken, and sometimes GPS coordinates.
- Format: Binary format embedded directly within the image file (JPEG, TIFF, etc.).
- Usage: Widely supported by digital cameras and image viewing/editing software. It is mainly used for storing camera-related information.
XMP Metadata
- Origin: Developed by Adobe Systems as an open standard for metadata.
- Content: Can store a wide range of information, including technical, descriptive, and administrative metadata. This includes editing history, keywords, author information, and more.
- Format: XML-based, making it more flexible and extensible. XMP metadata can be embedded within the file or stored in a separate sidecar file.
- Usage: Used extensively in professional photo editing software (like Adobe Photoshop and Lightroom) for managing and preserving metadata across different file formats and workflows.
Key Differences
- Purpose: Exif is mainly for camera-specific information, while XMP is more versatile and can store a broader range of metadata.
- Format: Exif is binary and embedded within the image file, whereas XMP is XML-based and can be embedded or stored separately.
- Flexibility: XMP is more flexible and can be easily extended to include custom metadata fields, while Exif is more rigid and standardized.
Both Exif and XMP metadata are important for different aspects of digital imaging. Exif is useful for understanding the technical details of how an image was captured, while XMP provides a more comprehensive and flexible way to manage and preserve metadata throughout the editing and publishing process.
Conclusion
Now you know all about ExifTool! ExifTool is a powerful tool for anyone who wants to understand and manage the metadata within their digital files. It can be especially useful for photographers, videographers, and anyone who wants to keep their digital files well-organized.
Resource:
- ExifTool Website
Related Read:
- How To View Image Metadata On Linux
The above is the detailed content of How To Manage Image Metadata Using ExifTool In Linux. For more information, please follow other related articles on the PHP Chinese website!

Hot AI Tools

Undresser.AI Undress
AI-powered app for creating realistic nude photos

AI Clothes Remover
Online AI tool for removing clothes from photos.

Undress AI Tool
Undress images for free

Clothoff.io
AI clothes remover

AI Hentai Generator
Generate AI Hentai for free.

Hot Article
Hot Tools

Notepad++7.3.1
Easy-to-use and free code editor

SublimeText3 Chinese version
Chinese version, very easy to use

Zend Studio 13.0.1
Powerful PHP integrated development environment

Dreamweaver CS6
Visual web development tools

SublimeText3 Mac version
God-level code editing software (SublimeText3)
Hot Topics
 1379
1379
 52
52

 How To Count Files And Directories In Linux: A Beginner's Guide
Mar 19, 2025 am 10:48 AM
How To Count Files And Directories In Linux: A Beginner's Guide
Mar 19, 2025 am 10:48 AM
Efficiently Counting Files and Folders in Linux: A Comprehensive Guide Knowing how to quickly count files and directories in Linux is crucial for system administrators and anyone managing large datasets. This guide demonstrates using simple command-l
 How To Add A User To Multiple Groups In Linux
Mar 18, 2025 am 11:44 AM
How To Add A User To Multiple Groups In Linux
Mar 18, 2025 am 11:44 AM
Efficiently managing user accounts and group memberships is crucial for Linux/Unix system administration. This ensures proper resource and data access control. This tutorial details how to add a user to multiple groups in Linux and Unix systems. We
 How To List Or Check All Installed Linux Kernels From Commandline
Mar 23, 2025 am 10:43 AM
How To List Or Check All Installed Linux Kernels From Commandline
Mar 23, 2025 am 10:43 AM
Linux Kernel is the core component of a GNU/Linux operating system. Developed by Linus Torvalds in 1991, it is a free, open-source, monolithic, modular, and multitasking Unix-like kernel. In Linux, it is possible to install multiple kernels on a sing
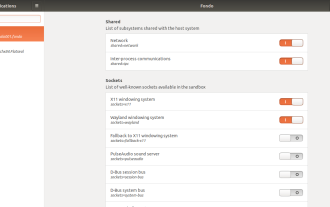 How To Easily Configure Flatpak Apps Permissions With Flatseal
Mar 22, 2025 am 09:21 AM
How To Easily Configure Flatpak Apps Permissions With Flatseal
Mar 22, 2025 am 09:21 AM
Flatpak application permission management tool: Flatseal User Guide Flatpak is a tool designed to simplify Linux software distribution and use. It safely encapsulates applications in a virtual sandbox, allowing users to run applications without root permissions without affecting system security. Because Flatpak applications are located in this sandbox environment, they must request permissions to access other parts of the operating system, hardware devices (such as Bluetooth, network, etc.) and sockets (such as pulseaudio, ssh-auth, cups, etc.). This guide will guide you on how to easily configure Flatpak with Flatseal on Linux
 How To Type Indian Rupee Symbol In Ubuntu Linux
Mar 22, 2025 am 10:39 AM
How To Type Indian Rupee Symbol In Ubuntu Linux
Mar 22, 2025 am 10:39 AM
This brief guide explains how to type Indian Rupee symbol in Linux operating systems. The other day, I wanted to type "Indian Rupee Symbol (₹)" in a word document. My keyboard has a rupee symbol on it, but I don't know how to type it. After
 What is the Linux best used for?
Apr 03, 2025 am 12:11 AM
What is the Linux best used for?
Apr 03, 2025 am 12:11 AM
Linux is best used as server management, embedded systems and desktop environments. 1) In server management, Linux is used to host websites, databases, and applications, providing stability and reliability. 2) In embedded systems, Linux is widely used in smart home and automotive electronic systems because of its flexibility and stability. 3) In the desktop environment, Linux provides rich applications and efficient performance.
 Linux Kernel 6.14 RC6 Released
Mar 24, 2025 am 10:21 AM
Linux Kernel 6.14 RC6 Released
Mar 24, 2025 am 10:21 AM
Linus Torvalds has released Linux Kernel 6.14 Release Candidate 6 (RC6), reporting no significant issues and keeping the release on track. The most notable change in this update addresses an AMD microcode signing issue, while the rest of the updates
 LocalSend - The Open-Source Airdrop Alternative For Secure File Sharing
Mar 24, 2025 am 09:20 AM
LocalSend - The Open-Source Airdrop Alternative For Secure File Sharing
Mar 24, 2025 am 09:20 AM
If you're familiar with AirDrop, you know it's a popular feature developed by Apple Inc. that enables seamless file transfer between supported Macintosh computers and iOS devices using Wi-Fi and Bluetooth. However, if you're using Linux and missing o
