
This comprehensive guide explains how to add, manage, and remove shared mailboxes in Outlook 365, covering the classic desktop app, the new Outlook app, and the web version. Learn to send emails from shared mailboxes, set them as default senders, and manage user access.
Understanding Shared Mailboxes:
A shared mailbox in Outlook allows multiple users to access and manage emails from a single address, ideal for teams needing a centralized communication point. It includes a shared calendar for scheduling and event management. Unlike personal mailboxes, it doesn't require individual login credentials. Key benefits include centralized communication, sending emails on behalf of the shared address, and the shared calendar feature. Remember, it's distinct from a shared Outlook folder; shared mailboxes manage emails, while shared folders manage files.
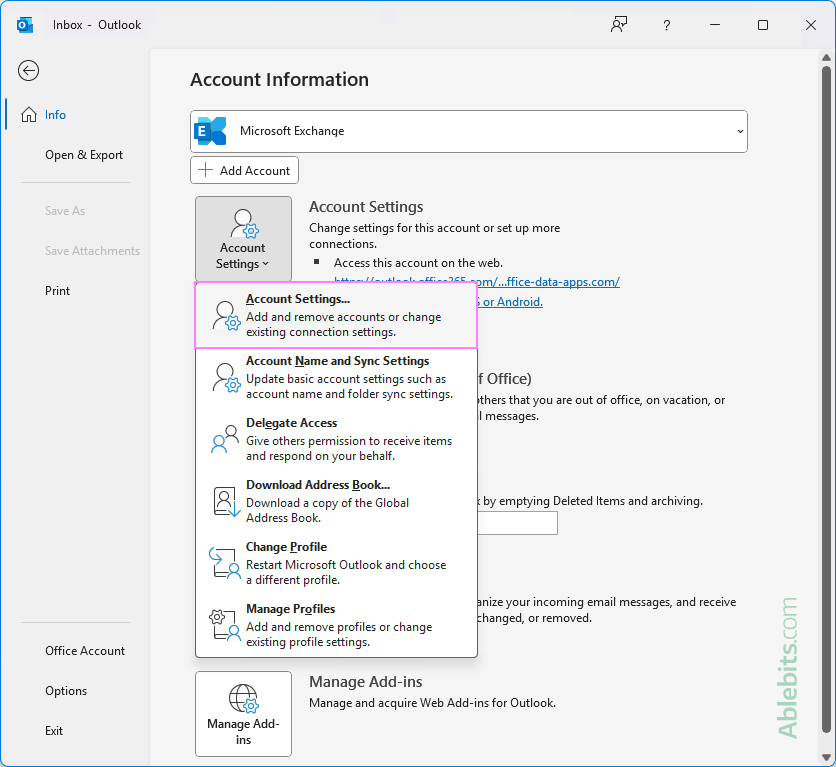
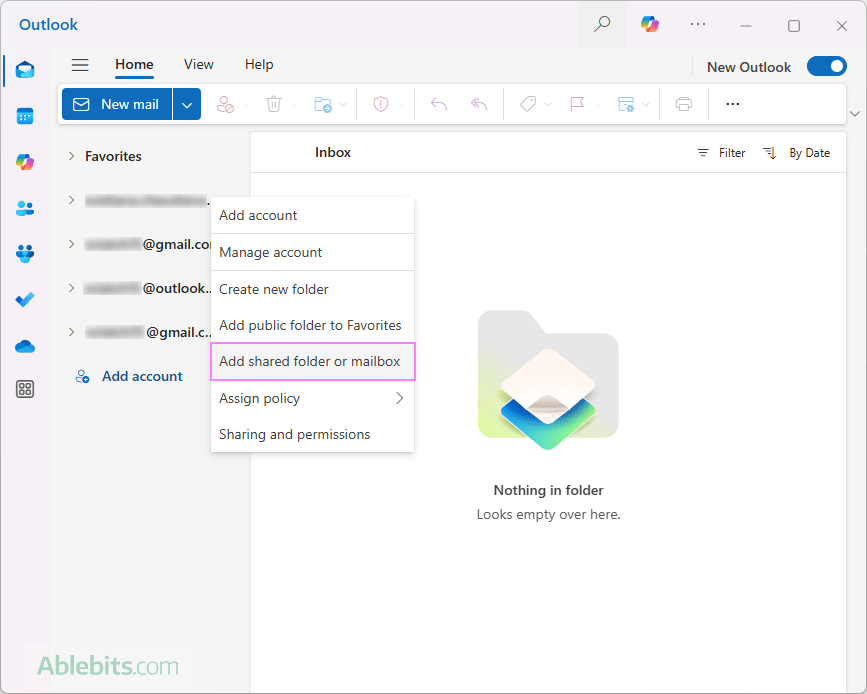
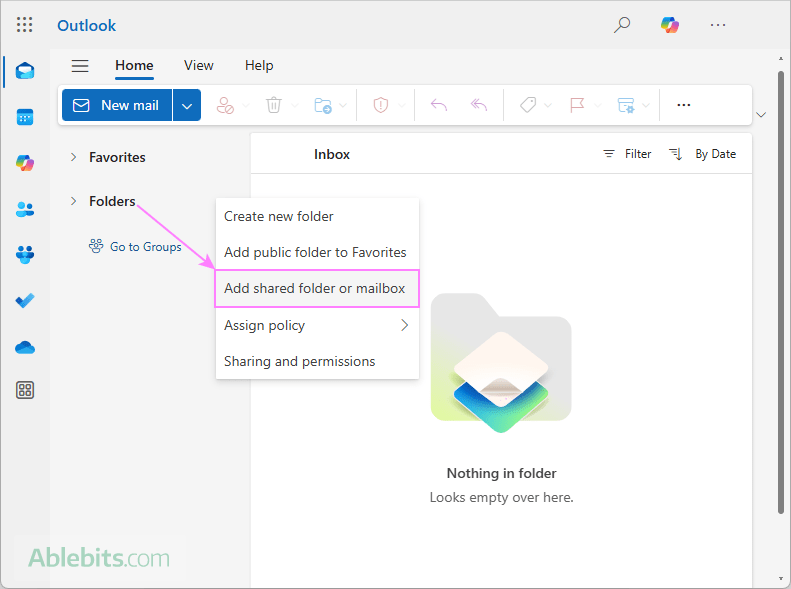
Adding Shared Mailboxes:
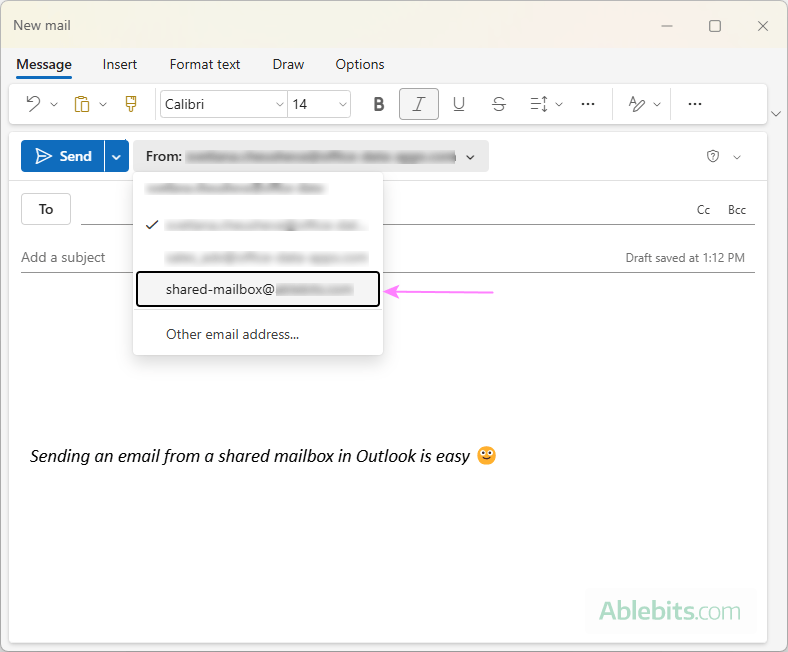
Sending Emails from Shared Mailboxes:
When composing a new email or replying, select the shared mailbox address from the "From" dropdown. If it's not listed, choose "Other email address" and enter it manually.
Favoriting Shared Mailboxes:
In the classic Outlook app, you can favorite a shared mailbox by dragging and dropping it to the Favorites section or using the right-click menu. This feature isn't currently available in the new Outlook or web app.

Managing Users:
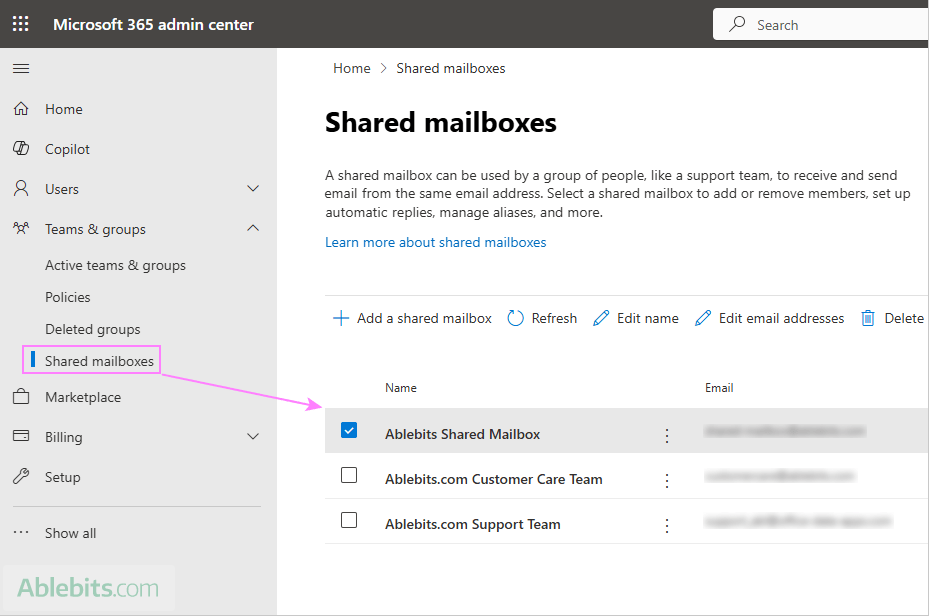
Adding or removing users is an admin-only task performed in the Microsoft 365 Admin Center. There's no way to view members directly within Outlook.
Setting as Default Sender:
In classic Outlook, add the shared mailbox as a separate account, then set it as the default account for sending. This isn't supported in the new Outlook app.

Removing Shared Mailboxes:
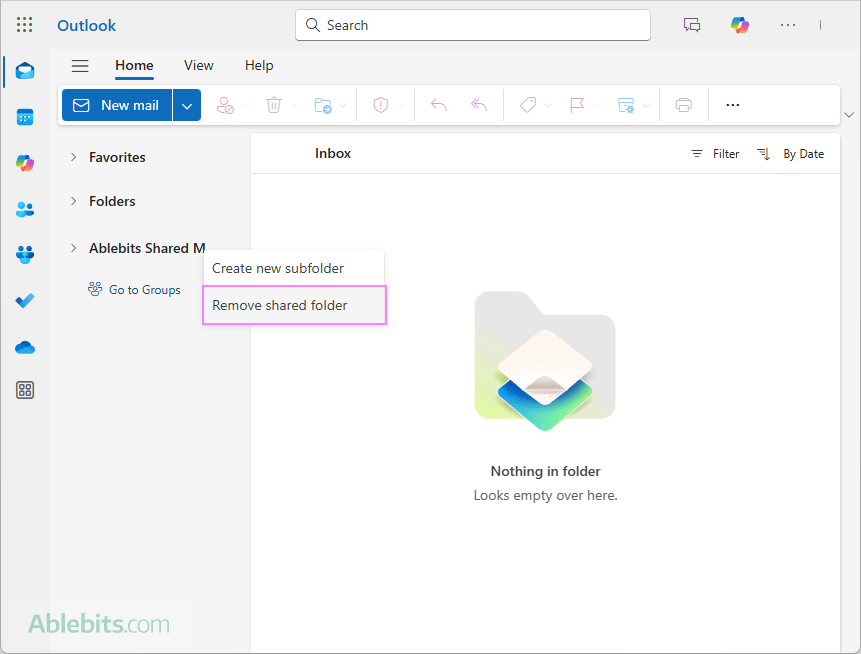
The removal method depends on how the mailbox was added. Manually added mailboxes can be removed from the Advanced tab in classic Outlook's account settings. Automatically added mailboxes require admin assistance. In Outlook on the web, right-click the shared mailbox and select "Remove shared folder." If removal is problematic, contact your admin to disable auto-mapping.

This guide provides a comprehensive overview of managing shared mailboxes in various Outlook environments. Remember to consult your Microsoft 365 administrator for assistance with tasks requiring administrative privileges.
The above is the detailed content of How to add shared mailbox in Outlook (classic, new, and web app). For more information, please follow other related articles on the PHP Chinese website!
 Bitcoin exchange
 c language const usage
 The most promising coin in 2024
 High-level language programming
 java basic data types
 what is adobe flash player
 The latest prices of the top ten virtual currencies
 How to recover files emptied from Recycle Bin
 What's going on when the ip address is unavailable?


![[Web front-end] Node.js quick start](https://img.php.cn/upload/course/000/000/067/662b5d34ba7c0227.png)


