

How do I use Snap Layouts in Windows 11?

How do I use Snap Layouts in Windows 11?
Using Snap Layouts in Windows 11 is a straightforward process designed to enhance multitasking by allowing you to organize multiple windows on your screen efficiently. Here’s how to use Snap Layouts:
- Hover over the Maximize button: When you hover your cursor over the maximize button (the square icon in the upper right corner of any window), a menu will appear showing different layout options.
- Choose a layout: Select one of the available layouts based on your needs. The layouts vary from two windows side by side to more complex arrangements with up to four windows.
- Select a zone: After choosing a layout, you will see zones marked within it. Click on the zone where you want the current window to go.
- Add more windows: To fill the remaining zones, simply hover over the maximize button on another window and click the zone you want it to occupy. You can continue this process until all zones in your chosen layout are filled.
- Adjust windows: Once in the Snap Layout, you can easily adjust the size of each window by dragging the border between them.
Snap Layouts also come with additional features like Snap Groups, which allow you to minimize and restore multiple snapped windows at once.
What are the benefits of using Snap Layouts in Windows 11?
Snap Layouts in Windows 11 offer several advantages that can significantly enhance your productivity and multitasking capabilities. Here are some key benefits:
- Improved Multitasking: Snap Layouts make it easier to view and work with multiple applications simultaneously. This is particularly useful for tasks that require cross-referencing information or monitoring different applications at the same time.
- Efficient Workspace Management: With Snap Layouts, you can quickly organize your desktop to fit your current workflow without manually resizing and positioning windows. This saves time and reduces the clutter on your screen.
- Increased Productivity: By streamlining the process of managing multiple windows, Snap Layouts help reduce the cognitive load, allowing you to focus more on your work rather than on managing your desktop environment.
- Customizable Layouts: While the default layouts cater to common use cases, you can customize them to fit specific needs, enhancing your productivity further.
- Snap Groups Feature: Snap Groups allow you to group multiple snapped windows together, so you can minimize and restore them as a single unit, maintaining your workspace exactly as you left it.
Can I customize Snap Layouts in Windows 11 to fit my workflow?
Yes, you can customize Snap Layouts in Windows 11 to a certain extent to better fit your workflow. While the feature does not offer direct customization of the layouts themselves, you can make several adjustments to enhance your experience:
- Adjusting Snap Layout Sizes: Once you have selected a layout and positioned your windows, you can adjust the size of each window by dragging the border between them. This allows you to allocate more screen space to the applications you use most frequently.
- Enabling or Disabling Snap Layouts: You can turn Snap Layouts on or off in the Windows Settings. Go to Settings > System > Multitasking, and toggle the switch under Snap windows to your preference.
- Snap Assist: You can also customize how Snap Assist behaves. In the same Multitasking settings, you can choose whether to show suggestions for snapping windows to other zones when you drag a window to the edge of the screen.
-
Keyboard Shortcuts: While not directly a customization of the Snap Layouts, using keyboard shortcuts like
Win Left/Right arrowto snap windows to the left or right, orWin Up/Down arrowto snap to quadrants, can speed up your workflow and make it more tailored to your needs.
These adjustments can help you better utilize Snap Layouts to fit your specific workflow, even if the layouts themselves are not directly customizable.
How do I revert changes made by Snap Layouts in Windows 11?
Reverting changes made by Snap Layouts in Windows 11 is simple and can be done in several ways:
- Dragging the Window: The simplest way to revert a window from a snapped position is to click and drag it away from its current position. Once you start dragging, the window will detach from the Snap Layout, and you can place it anywhere on your screen.
- Maximize Button: You can also revert a snapped window by clicking the maximize button (the square icon) in the upper right corner of the window. This action will restore the window to full screen.
-
Keyboard Shortcuts: If you prefer using keyboard shortcuts, you can use
Win Left/Right arrowfollowed byWin Up arrowto restore a window to full screen from a snapped position. - Snap Groups: If you have used Snap Groups and want to revert the entire group, you can click on the group in the Taskbar and select Restore all windows from the preview that appears. This will restore all the windows in the group to their original sizes and positions before they were snapped.
- Settings: If you want to completely disable Snap Layouts, go to Settings > System > Multitasking, and toggle off the Snap windows option. This will prevent future use of Snap Layouts, but it won’t affect windows that are currently snapped; you will need to manually adjust them.
These methods give you flexibility in managing your windows and undoing any changes made by Snap Layouts, ensuring that you always have control over your desktop environment.
The above is the detailed content of How do I use Snap Layouts in Windows 11?. For more information, please follow other related articles on the PHP Chinese website!

Hot AI Tools

Undresser.AI Undress
AI-powered app for creating realistic nude photos

AI Clothes Remover
Online AI tool for removing clothes from photos.

Undress AI Tool
Undress images for free

Clothoff.io
AI clothes remover

AI Hentai Generator
Generate AI Hentai for free.

Hot Article
Hot Tools

Notepad++7.3.1
Easy-to-use and free code editor

SublimeText3 Chinese version
Chinese version, very easy to use

Zend Studio 13.0.1
Powerful PHP integrated development environment

Dreamweaver CS6
Visual web development tools

SublimeText3 Mac version
God-level code editing software (SublimeText3)
Hot Topics
 1383
1383
 52
52

 win11 activation key permanent 2025
Mar 18, 2025 pm 05:57 PM
win11 activation key permanent 2025
Mar 18, 2025 pm 05:57 PM
Article discusses sources for a permanent Windows 11 key valid until 2025, legal issues, and risks of using unofficial keys. Advises caution and legality.
 win11 activation key permanent 2024
Mar 18, 2025 pm 05:56 PM
win11 activation key permanent 2024
Mar 18, 2025 pm 05:56 PM
Article discusses reliable sources for permanent Windows 11 activation keys in 2024, legal implications of third-party keys, and risks of using unofficial keys.
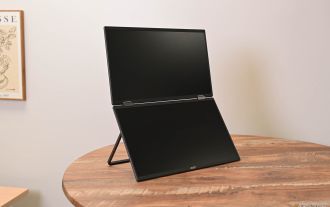 Acer PD163Q Dual Portable Monitor Review: I Really Wanted to Love This
Mar 18, 2025 am 03:04 AM
Acer PD163Q Dual Portable Monitor Review: I Really Wanted to Love This
Mar 18, 2025 am 03:04 AM
The Acer PD163Q Dual Portable Monitor: A Connectivity Nightmare I had high hopes for the Acer PD163Q. The concept of dual portable displays, conveniently connecting via a single cable, was incredibly appealing. Unfortunately, this alluring idea quic
 ReactOS, the Open-Source Windows, Just Got an Update
Mar 25, 2025 am 03:02 AM
ReactOS, the Open-Source Windows, Just Got an Update
Mar 25, 2025 am 03:02 AM
ReactOS 0.4.15 includes new storage drivers, which should help with overall stability and UDB drive compatibility, as well as new drivers for networking. There are also many updates to fonts support, the desktop shell, Windows APIs, themes, and file
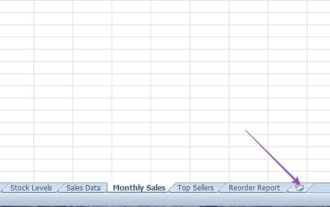 How to Create a Dynamic Table of Contents in Excel
Mar 24, 2025 am 08:01 AM
How to Create a Dynamic Table of Contents in Excel
Mar 24, 2025 am 08:01 AM
A table of contents is a total game-changer when working with large files – it keeps everything organized and easy to navigate. Unfortunately, unlike Word, Microsoft Excel doesn’t have a simple “Table of Contents” button that adds t
 How to Use Voice Access in Windows 11
Mar 18, 2025 pm 08:01 PM
How to Use Voice Access in Windows 11
Mar 18, 2025 pm 08:01 PM
Detailed explanation of the voice access function of Windows 11: Free your hands and control your computer with voice! Windows 11 provides numerous auxiliary functions to help users with various needs to use the device easily. One of them is the voice access function, which allows you to control your computer completely through voice. From opening applications and files to entering text with voice, everything is at your fingertips, but first you need to set up and learn key commands. This guide will provide details on how to use voice access in Windows 11. Windows 11 Voice Access Function Settings First, let's take a look at how to enable this feature and configure Windows 11 voice access for the best results. Step 1: Open the Settings menu
 Shopping for a New Monitor? 8 Mistakes to Avoid
Mar 18, 2025 am 03:01 AM
Shopping for a New Monitor? 8 Mistakes to Avoid
Mar 18, 2025 am 03:01 AM
Buying a new monitor isn't a frequent occurrence. It's a long-term investment that often moves between computers. However, upgrading is inevitable, and the latest screen technology is tempting. But making the wrong choices can leave you with regret
 New to Multi-Monitors? Don't Make These Mistakes
Mar 25, 2025 am 03:12 AM
New to Multi-Monitors? Don't Make These Mistakes
Mar 25, 2025 am 03:12 AM
Multi-monitor setups boost your productivity and deliver a more immersive experience. However, it's easy for a novice to stumble while assembling the setup and make mistakes. Here are some of the most common ones and how to avoid them.
