

How to remove read-only disk drive permissions on Mac: Trusted solutions


External hard drives, solid-state drives and USB drives are common tools for storing and backing up valuable files or transferring data. But sometimes, we may find that the target disk appears as "read-only". what does that mean?
"Read Only" permissions mean you can open and view files on disk, or even copy them to your Mac. However, you cannot add or delete files to the storage drive. To do this, you need "read and write" permissions.
Depending on the root cause of the problem, there are multiple ways to solve the disk read-only problem and unlock the hard drive. Continue reading to see if you need to set access, format read-only drives, or fix drive errors.
| Several ways to solve the problem of read-only disks | Operation steps |
| Change the read-only permissions of the hard disk | Connect the external hard drive to your Mac > Click the drive and press Command I > Click the arrow next to "Share and Permissions". |
| Fix disk read-only problem without reformatting | Install and open iBoysoft NTFS for Mac > Connect an external NTFS drive to Mac > Manage your files. |
| Check if the internal hard drive of Mac is read-only | Click File > Press Command I > "Share and Permissions" |
| Repair external drives using third-party tools | Use Disk Drill. |
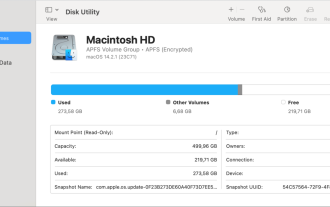
| Fix internal hard drive permissions issues | Utilities > Disk Utility > Select the hard disk you want to repair > Select First Aid > Run. |
| Write to lock drive using terminal command | Open Terminal > Enter nano /etc/fstab > Replace DRIVENAME in LABEL=DRIVENAME none ntfs rw,auto,nobrowse with your drive name > according to Control O Save> Press Control X quit. After that, Finder > Go to Folder Enter/Volumes > Go to > Find your drive in the list. |
How to bypass data access restrictions on Mac
Learn how to diagnose and remove read-only limits on external hard drives and optimize Mac performance with more than 240 applications on Setapp.
Free trial security beta version How to change hard drive read-only permissions on Mac
When an external hard disk appears read-only, you can retrieve and use the files in it, but since nothing can be modified, you cannot effectively continue using the disk as a storage and data transfer device.
To understand what it takes to unlock a hard drive, let's first understand the most common reasons why external disks become read-only:
- Permission settings . The Share & Permissions setting on the drive may prevent your Mac or your user account from accessing files on disk. This happens if you use a device on another computer with a different operating system, or if you intentionally add access restrictions to protect your data.
- NTFS format . NTFS is a proprietary file system developed for Windows and is incompatible with Mac. It allows you to read files on your hard drive, but can't make any changes to it.
- Format error . If you see a warning about read-only mode when connecting an external drive to your Mac, it means there is a formatting error in the storage device itself preventing you from writing files to it.
As you can see, the read-only problem may stem from different reasons and requires different strategies to solve. The good news is that there are solutions for each of the above situations. Let's start with the drive's access settings.
How to check and change external hard drive permissions
Permissions are a security feature that can be set up for files, folders, or entire hard drives to configure access to certain users or user groups. You can easily check the current permissions on disk. Follow these steps to learn what they are:
- Connect an external hard drive to your Mac
- Click the drive icon and press Command I to display the information window
- Click the arrow next to "Share and Permissions" at the bottom of the window to view the current permission settings

If you want to change your read-only hard drive to read-write, make sure you have a Mac administrator password to authorize the change. Otherwise, setting up access is very easy. Please follow these steps to delete read-only:
- Click the gold lock icon in the lower right corner of the information window to unlock it➙Enter password➙OK
- Click the "Permissions" drop-down menu next to your username ➙Select "Read and Write"
- Close the information window

While the fix for this read-only issue is simple, it works only if the cause of the issue is indeed the hard drive permission settings. So, if this method doesn't unlock the hard drive for you, check the disk format to make sure it's not NTFS. To do this, simply click the arrow next to General to expand this section of the Disk Information window.

Since macOS is incompatible with the way NTFS writes data, it only allows you to read files from NTFS drives by default. The most obvious way is to change the drive format to a file system supported by macOS. The problem with this solution is that reformatting the disk will erase all its data. Therefore, formatting read-only drives are only selected if:
- You are willing to spend time creating a backup copy of files on your drive
- You are sure that you will only use this hard drive for Mac in the future
Fortunately, there are some applications that allow you to write data to NTFS volumes on your Mac. Therefore, if you want to fix disk read-only issues without reformatting, you must consider using iBoysoft NTFS.
iBoysoft NTFS provides full read/write support for NTFS drives. This way, you don't need to erase and reformat them every time you want to use NTFS storage drives on your Mac. It also helps you interact with Windows users to read, write, copy, delete and transfer files across devices.
Once you connect an external NTFS drive to your Mac, you can manage files, check for disk errors, view details, and format the drive to NTFS or vice versa.

How to check if the internal hard drive of Mac is read-only
Permissions can be applied to hard drives as well as separate files and folders. This way, you can determine who can view and change files on your Mac. If for some reason you find yourself having files and folders that appear as read-only, be sure to check their permissions. Otherwise, you will not be able to make any changes to its content.
It's easy to check permission settings on your Mac:
- Click the file or folder you want to check and press Command I to display the information window
- Click the arrow next to "Share & Permissions" at the bottom of the window to check and set access permissions

As long as you have administrator rights and a password for your Mac, you should be all in place.
Now, it's a little different for internal hard drive permissions on your Mac. Starting with macOS Catalina or later, your Mac's internal drive contains a read-only system volume, which is separate from other files for security reasons. There is also a second "writable" volume called Macintosh HD-Data, which contains data you can access.
The two volumes appear as a single Macintosh HD icon on the desktop, so the information window will show a seemingly conflicting permission status: you appear to have read and write permissions from the system administrator, but you see "You can only read" under Share & Permissions.

To avoid having trouble accessing files and hard drives again, consider using Disk Drill.
Disk Drill is a powerful data recovery application that quickly fixes external drive issues and always backs up and protects your data with additional tools. Disk Drill is perfect for:
- No matter what causes data loss (accidental deletion, disk utility error, or other type of data corruption), any data can be recovered
- Work seamlessly with various devices – Mac, iPhone, iPad, Android, and USB and SD cards
- Speed up your Mac by identifying which programs and files take up all disk space and deleting cluttered files
- Regular data backup and send alerts about risks to prevent data loss

How to fix internal hard drive permissions issues on Mac
Since each file and folder on your Mac comes with a set of permissions, these permissions can be corrupted over time (due to installing and uninstalling applications, using shared folders, copying files from external volumes, etc.), and problems may occur throughout the system.
Therefore, it is no surprise that repair permissions are considered a standard troubleshooting method that can solve many system problems on your Mac. You can try using Mac's own disk utility to fix read-only issues with disks, folders, or files. To try this method:
- Open Utility from Application Folder ➙Disk Tool
- Select the hard drive to repair from the left panel
- Click the "First Aid" icon from the top menu ➙Run

If you understand that permissions are critical to system performance, you can also try using the more powerful dedicated CleanMyMac X to verify and repair corrupted permissions.
Get into the habit of starting CleanMyMac when you encounter application or file problems and perform regular system scans. To start fixing:
- Install and open CleanMyMac.
- In the left panel, select Performance > Run.
- Click "View All Tasks" > "Maintenance Tasks".
- Select "Repair Disk Permissions" and click "Run".

How to write to a locked drive using terminal commands
If you try to unlock the hard drive using another method without success, you can choose to try using a terminal. It allows you to write data to a hard drive in NTFS format on your Mac. Note, however, that this should be considered a one-time solution, as NTFS support in macOS is experimental and therefore less reliable.
Be sure to follow the steps below accurately to avoid any unexpected errors:
- Start the terminal from the utility in Finder
- Enter nano /etc/fstab
- Replace DRIVENAME in LABEL=DRIVENAME none ntfs rw,auto,nobrowse with the actual name of your external hard drive, and enter the generated command in the terminal window
- Press Control O to save the file
- Press Control X to exit
- Disconnect and reconnect your external hard drive
After that, your drive will be in /Volumes. To get there:
- Select "Go to" ➙ "Go to folder" in the finder
- Enter/Volumes ➙ Go
- Find your drive in the list
After deleting read-only using the NTFS terminal command, you can copy the file to a locked external hard drive.
How to prevent read-only errors from hard disk
As you can see, there are a variety of ways you can try to fix disk read-only issues on your Mac. But, as ever, it is best to avoid problems rather than investing a lot of energy trying to get rid of it. Here are some steps you can take to prevent read-only errors on your Mac:
- External hard drives using macOS-supported formats
- Check regularly to diagnose and repair damaged disk permissions
- If you are using someone else's hard drive, be sure to let them set read and write permissions for you
Don't let read-only prevent you from doing the required edits
Changing a read-only hard drive to read-write may take some time, but once you know how to fix the problem, it is worth the effort. You can try to fix disk read-only issues by changing permission settings, overwriting NTFS restrictions with iBoysoft NTFS, or fixing drive errors with the features of CleanMyMac X. If you decide to reformat it, don't forget to prepare Disk Drill to help you back up files and data recovery (if needed).
Don't miss the opportunity to try the seven-day trial version of iBoysoft NTFS, Disk Drill and CleanMyMac X on Setapp, a high-performance, top-notch iOS and macOS application platform for free. Enjoy the perfect mission-critical tasks with just a few clicks, and you can also view over 230 other options to improve your productivity.
FAQ
How to change read-only permissions on your Mac?
Select a file or folder and press Command I to open the information window. Click the lock icon at the bottom and enter your password. In the Share & Permissions section, select Read and Write from the drop-down menu next to your user account.
How to turn off read-only on Mac hard drive?
To turn off read-only on your Mac hard drive, turn on Finder and select your hard drive. Then, press Command I to open the information window. Click the lock icon and enter your password. In the Share & Permissions section, set your user account to read and write , and finally close the information window.
How to fix removable disk read-only?
To fix a read-only removable disk, connect it to your Mac, select the disk in the finder, and press Command I to open the information window. Click the lock icon, enter your password, and then set your user account to read and write in the Share & Permissions section. If the option is grayed out, check the physical write protection switch on the disk.
How to delete read-only USB on Mac?
To delete read-only USB on your Mac, connect the USB drive, select it in the Finder, and press Command I to open the information window. Click the lock icon, enter your password, and then set your user account to read and write in the Share & Permissions section. If the option is grayed out, check the physical write protection switch on the USB drive.
The above is the detailed content of How to remove read-only disk drive permissions on Mac: Trusted solutions. For more information, please follow other related articles on the PHP Chinese website!

Hot AI Tools

Undresser.AI Undress
AI-powered app for creating realistic nude photos

AI Clothes Remover
Online AI tool for removing clothes from photos.

Undress AI Tool
Undress images for free

Clothoff.io
AI clothes remover

Video Face Swap
Swap faces in any video effortlessly with our completely free AI face swap tool!

Hot Article
Hot Tools

Notepad++7.3.1
Easy-to-use and free code editor

SublimeText3 Chinese version
Chinese version, very easy to use

Zend Studio 13.0.1
Powerful PHP integrated development environment

Dreamweaver CS6
Visual web development tools

SublimeText3 Mac version
God-level code editing software (SublimeText3)
Hot Topics
 1664
1664
 14
1423
52
1317
25
1268
29
1242
24
14
1423
52
1317
25
1268
29
1242
24

 Fix your Mac running slow after update to Sequoia
Apr 14, 2025 am 09:30 AM
Fix your Mac running slow after update to Sequoia
Apr 14, 2025 am 09:30 AM
After upgrading to the latest macOS, does the Mac run slower? Don't worry, you are not alone! This article will share my experience in solving slow Mac running problems after upgrading to macOS Sequoia. After the upgrade, I can’t wait to experience new features such as recording and transcription of voice notes and improved trail map planning capabilities. But after installation, my Mac started running slowly. Causes and solutions for slow Mac running after macOS update Here is my summary of my experience, I hope it can help you solve the problem of slow Mac running after macOS Sequoia update: Cause of the problem Solution Performance issues Using Novabe
 How to make a video into a live photo on Mac and iPhone: Detailed steps
Apr 11, 2025 am 10:59 AM
How to make a video into a live photo on Mac and iPhone: Detailed steps
Apr 11, 2025 am 10:59 AM
This guide explains how to convert between Live Photos, videos, and GIFs on iPhones and Macs. Modern iPhones excel at image processing, but managing different media formats can be tricky. This tutorial provides solutions for various conversions, al
 How to reduce WindowServer Mac CPU usage
Apr 16, 2025 pm 12:07 PM
How to reduce WindowServer Mac CPU usage
Apr 16, 2025 pm 12:07 PM
macOS WindowServer: Understanding High CPU Usage and Solutions Have you noticed WindowServer consuming significant CPU resources on your Mac? This process is crucial for your Mac's graphical interface, rendering everything you see on screen. High C
 How to type hashtag on Mac
Apr 13, 2025 am 09:43 AM
How to type hashtag on Mac
Apr 13, 2025 am 09:43 AM
You can’t really use the internet nowadays without encountering the hashtag symbol that looks like this — #. Popularized on a global scale by Twitter as a way to define common tweet themes and later adopted by Instagram and other apps to c
 Is Google Chrome Not Working on Mac? Why Are Websites Not Loading?
Apr 12, 2025 am 11:36 AM
Is Google Chrome Not Working on Mac? Why Are Websites Not Loading?
Apr 12, 2025 am 11:36 AM
With a market share of over 65.7%, Google Chrome is the biggest web browser in the world. You can use it if you use other operating systems like Windows and Android, but many Mac users also prefer Chrome over Safari. Mo
 Mac Disk Utility: How to Repair Disk with First Aid? How to Recover It?
Apr 13, 2025 am 11:49 AM
Mac Disk Utility: How to Repair Disk with First Aid? How to Recover It?
Apr 13, 2025 am 11:49 AM
You might need to repair your Mac disk if your computer won’t start up, apps keep freezing, you can’t open certain documents, or the performance has slowed to a halt. Luckily, Apple includes a handy tool you can use to
 How to delete files on Mac
Apr 15, 2025 am 10:22 AM
How to delete files on Mac
Apr 15, 2025 am 10:22 AM
Managing Mac storage: A comprehensive guide to deleting files Daily Mac usage involves installing apps, creating files, and downloading data. However, even high-end Macs have limited storage. This guide provides various methods for deleting unneces
 How to connect bluetooth headphones to Mac?
Apr 12, 2025 pm 12:38 PM
How to connect bluetooth headphones to Mac?
Apr 12, 2025 pm 12:38 PM
From the dawn of time to just about a few years ago, all of us sported a pair of wired headphones and were convinced that this is simply how it will be done forever. After all, they are the easiest technology around: just plug them in, put them
