

How to archive in Outlook automatically or manually

This comprehensive guide explains how to effectively manage your Outlook email storage by archiving emails, tasks, and other items across various Outlook versions (365, 2021, 2019, 2016, 2013, and earlier). Learn to configure automatic archiving, perform manual archiving, and troubleshoot common issues.
Maintaining a streamlined Outlook inbox is crucial for efficiency. Archiving older items reduces mailbox size and improves performance. This tutorial covers both automated and manual archiving methods.
- Automating Email Archiving
- Manual Archiving (Individual or All Folders)
- Locating Archived Files
- Advanced Archiving Techniques
- Relocating Archived Files
- Auto-Deleting from Deleted Items and Junk
- Archiving by Received Date
- Troubleshooting Archiving Problems
What is Outlook Archiving?
Outlook archiving (and AutoArchive) transfers older emails, tasks, and calendar entries to a separate archive folder on your hard drive. This process moves items from your primary .pst file to a dedicated archive.pst file, accessible within Outlook. This frees up space on your C:\ drive (unless you specify a different location).
Archiving offers two key functions:
- Moving items: Transfers items to the archive folder.
- Permanent deletion: Deletes items after a specified time.
Key Facts About Outlook Archiving
To avoid common archiving questions, remember these points:
- Outlook primarily uses .pst files (Outlook Data Files) to store emails, contacts, appointments, tasks, and notes. Only .pst files can be archived. Archived items reside in the Outlook Archive folder and are no longer in their original location.
- Archiving differs from exporting. Exporting creates a copy; archiving moves or deletes the original.
- Archived files are not backups. Create separate backups of your archive.pst file for data security.
- Contacts are not auto-archived. Manual archiving is required for contacts.
- Exchange accounts with online archives disable Outlook's built-in archiving.
Tip: Merge duplicate contacts before archiving.
Automating Email Archiving in Outlook
Outlook's AutoArchive feature automatically moves or deletes old items at set intervals. The steps vary slightly depending on your Outlook version.
Auto-Archiving in Outlook 365 - 2010
AutoArchive isn't enabled by default in Outlook 2010 and later. You might receive prompts to enable it. Click "Yes" to proceed immediately, or "AutoArchive Settings…" to customize options. Alternatively, manually configure it:
- Open Outlook, then navigate to File > Options > Advanced > AutoArchive Settings…
- Check "Run AutoArchive every N days" to activate. Configure other settings and click OK.
The following image shows default settings; detailed explanations for each option are available elsewhere. The archive progress displays in the status bar. The "Archives" folder appears automatically if "Show archive folder in the folder list" is selected. See instructions on displaying the archive folder if needed.

Auto-Archiving in Outlook 2007
Outlook 2007 auto-archives Calendar, Tasks, and Journal items (older than 6 months), along with Sent Items and Deleted Items (older than 2 months) by default. Enable it for other folders:
- Open Outlook and click Tools > Options.
- Go to the Other tab and click AutoArchive….
Configure the settings as described below.
Understanding Outlook AutoArchive Settings
(Outlook 2010 and later: File > Options > Advanced > AutoArchive Settings…)
- Run AutoArchive every N days: Sets the frequency. Frequent archiving of large volumes of data may impact performance.
- Prompt before AutoArchive runs: Provides a confirmation prompt before archiving.
- Delete expired items (e-mail folders only): Deletes messages with individual expiration dates (set in Options > Tracking > Expires after). This is often checked by default, so uncheck if necessary.
- Archive or delete old items: Allows custom AutoArchive settings (unchecked uses defaults).
- Show archive folder in folder list: Displays the "Archives" folder in the Navigation Pane.
- Clean out items older than: Sets the age threshold for archiving.
- Move old items to: Moves items to the archive.pst file. Click Browse to change the location.
- Permanently delete items: Deletes items without archiving.
- Apply these settings to all folders now: Applies settings to all folders.
Default Aging Periods
Default aging periods (changeable per folder):
- Inbox, Drafts, Calendar, Tasks, Notes, Journal: 6 months
- Outbox: 3 months
- Sent Items, Deleted Items: 2 months
- Contacts: Not auto-archived
Excluding Folders or Applying Different Settings
To exclude a folder or customize its settings:
- Right-click the folder and select Properties….
- Choose either "Do not archive items in this folder" or "Archive this folder using these settings" and configure accordingly.
Creating the Archive Folder
If "Show archive folder in folder list" is selected, the "Archives" folder appears automatically. Otherwise:
- Click File > Open & Export > Open Outlook Data File.
- Select the archive.pst file and click OK.
Manual Archiving in Outlook
For more control, manually archive items:
- In Outlook 2016, go to the File tab, and click Tools > Clean up old items. In Outlook 2010 and 2013, click File > Cleanup Tool > Archive…
- Select the folder(s) to archive and set the age threshold. Click Browse to change the archive file location. Check "Include items with 'Do not AutoArchive' checked" to include excluded items.
Location of Outlook Archive Files
The archive.pst file is created automatically during the first auto-archive or manual archive. The location depends on your operating system (unless changed during setup).
Outlook 365 - 2010
-
Vista, Windows 7, 8, 10: C:\Users\
\Documents\Outlook Files\archive.pst -
Windows XP: C:\Documents and Settings\
\Local Settings\Application Data\Microsoft\Outlook\archive.pst
Outlook 2007 and earlier
-
Vista and Windows 7: C:\Users\
\AppData\Local\Microsoft\Outlook\archive.pst -
Windows XP: C:\Documents and Settings\
\Local Settings\Application Data\Microsoft\Outlook\archive.pst
(Note: Application Data and AppData are hidden folders.)
Advanced Archiving Techniques
Changing the Archive File Location
To move an existing archive:
- Close the Archive folder in Outlook.
- Move the archive.pst file to the new location.
- Reconnect the moved file in Outlook (File > Open > Outlook Data File…).
- Update your AutoArchive settings to point to the new location.
Auto-Deleting from Deleted Items and Junk Email
Configure AutoArchive to delete old items from Deleted Items and Junk Email folders by setting the "Permanently delete items" option for these folders.
Archiving by Received Date
To archive based on received date (instead of modified date), modify the registry (use caution!). This requires specific hotfixes for Outlook 2007 and 2010. Create the registry value ArchiveIgnoreLastModifiedTime with a value of 1 under HKEY_CURRENT_USER\Software\Microsoft\Office\<office version>\Outlook\Preferences</office>. Restart Outlook.
Troubleshooting Archiving Problems
Archiving Options Unavailable
This usually indicates an Exchange Server mailbox or organizational mail retention policies. Check with your administrator.
AutoArchive Not Running
Ensure "Run AutoArchive every N days" is checked in AutoArchive settings.
Specific Item Not Archived
Check if the item's modified date is recent or if "Do Not AutoArchive this item" is selected.
Missing Archive Folder
Verify that "Show archive folder in folder list" is selected. Open the Outlook Data File manually if necessary.
Damaged Archive.pst File
Use the Inbox Repair Tool (scanpst.exe) to repair the archive.pst file. If unsuccessful, create a new archive.
Maximum Size Reached
Clean up the archive.pst or main .pst file if it's full. The default limit is 20GB (Outlook 2007) or 50GB (later versions).
This guide provides a thorough understanding of Outlook archiving, empowering you to optimize your email management.
The above is the detailed content of How to archive in Outlook automatically or manually. For more information, please follow other related articles on the PHP Chinese website!

Hot AI Tools

Undresser.AI Undress
AI-powered app for creating realistic nude photos

AI Clothes Remover
Online AI tool for removing clothes from photos.

Undress AI Tool
Undress images for free

Clothoff.io
AI clothes remover

Video Face Swap
Swap faces in any video effortlessly with our completely free AI face swap tool!

Hot Article
Hot Tools

Notepad++7.3.1
Easy-to-use and free code editor

SublimeText3 Chinese version
Chinese version, very easy to use

Zend Studio 13.0.1
Powerful PHP integrated development environment

Dreamweaver CS6
Visual web development tools

SublimeText3 Mac version
God-level code editing software (SublimeText3)
Hot Topics


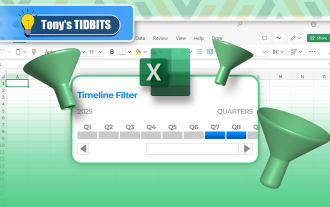 How to Create a Timeline Filter in Excel
Apr 03, 2025 am 03:51 AM
How to Create a Timeline Filter in Excel
Apr 03, 2025 am 03:51 AM
In Excel, using the timeline filter can display data by time period more efficiently, which is more convenient than using the filter button. The Timeline is a dynamic filtering option that allows you to quickly display data for a single date, month, quarter, or year. Step 1: Convert data to pivot table First, convert the original Excel data into a pivot table. Select any cell in the data table (formatted or not) and click PivotTable on the Insert tab of the ribbon. Related: How to Create Pivot Tables in Microsoft Excel Don't be intimidated by the pivot table! We will teach you basic skills that you can master in minutes. Related Articles In the dialog box, make sure the entire data range is selected (
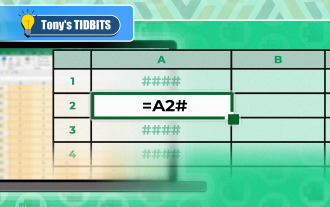 You Need to Know What the Hash Sign Does in Excel Formulas
Apr 08, 2025 am 12:55 AM
You Need to Know What the Hash Sign Does in Excel Formulas
Apr 08, 2025 am 12:55 AM
Excel Overflow Range Operator (#) enables formulas to be automatically adjusted to accommodate changes in overflow range size. This feature is only available for Microsoft 365 Excel for Windows or Mac. Common functions such as UNIQUE, COUNTIF, and SORTBY can be used in conjunction with overflow range operators to generate dynamic sortable lists. The pound sign (#) in the Excel formula is also called the overflow range operator, which instructs the program to consider all results in the overflow range. Therefore, even if the overflow range increases or decreases, the formula containing # will automatically reflect this change. How to list and sort unique values in Microsoft Excel
 Use the PERCENTOF Function to Simplify Percentage Calculations in Excel
Mar 27, 2025 am 03:03 AM
Use the PERCENTOF Function to Simplify Percentage Calculations in Excel
Mar 27, 2025 am 03:03 AM
Excel's PERCENTOF function: Easily calculate the proportion of data subsets Excel's PERCENTOF function can quickly calculate the proportion of data subsets in the entire data set, avoiding the hassle of creating complex formulas. PERCENTOF function syntax The PERCENTOF function has two parameters: =PERCENTOF(a,b) in: a (required) is a subset of data that forms part of the entire data set; b (required) is the entire dataset. In other words, the PERCENTOF function calculates the percentage of the subset a to the total dataset b. Calculate the proportion of individual values using PERCENTOF The easiest way to use the PERCENTOF function is to calculate the single
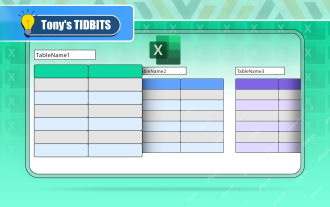 If You Don't Rename Tables in Excel, Today's the Day to Start
Apr 15, 2025 am 12:58 AM
If You Don't Rename Tables in Excel, Today's the Day to Start
Apr 15, 2025 am 12:58 AM
Quick link Why should tables be named in Excel How to name a table in Excel Excel table naming rules and techniques By default, tables in Excel are named Table1, Table2, Table3, and so on. However, you don't have to stick to these tags. In fact, it would be better if you don't! In this quick guide, I will explain why you should always rename tables in Excel and show you how to do this. Why should tables be named in Excel While it may take some time to develop the habit of naming tables in Excel (if you don't usually do this), the following reasons illustrate today
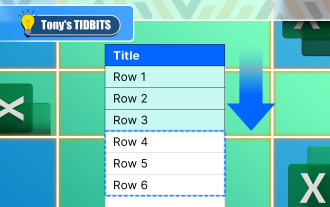 How to Format a Spilled Array in Excel
Apr 10, 2025 pm 12:01 PM
How to Format a Spilled Array in Excel
Apr 10, 2025 pm 12:01 PM
Use formula conditional formatting to handle overflow arrays in Excel Direct formatting of overflow arrays in Excel can cause problems, especially when the data shape or size changes. Formula-based conditional formatting rules allow automatic formatting to be adjusted when data parameters change. Adding a dollar sign ($) before a column reference applies a rule to all rows in the data. In Excel, you can apply direct formatting to the values or background of a cell to make the spreadsheet easier to read. However, when an Excel formula returns a set of values (called overflow arrays), applying direct formatting will cause problems if the size or shape of the data changes. Suppose you have this spreadsheet with overflow results from the PIVOTBY formula,

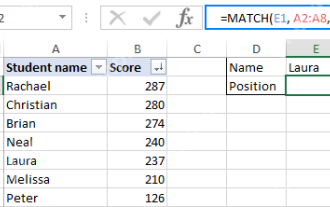 Excel MATCH function with formula examples
Apr 15, 2025 am 11:21 AM
Excel MATCH function with formula examples
Apr 15, 2025 am 11:21 AM
This tutorial explains how to use MATCH function in Excel with formula examples. It also shows how to improve your lookup formulas by a making dynamic formula with VLOOKUP and MATCH. In Microsoft Excel, there are many different lookup/ref
 How to Use Excel's AGGREGATE Function to Refine Calculations
Apr 12, 2025 am 12:54 AM
How to Use Excel's AGGREGATE Function to Refine Calculations
Apr 12, 2025 am 12:54 AM
Quick Links The AGGREGATE Syntax
