How to Create a Custom Post Type Archive Page in WordPress
Do you want to create a custom post type archive page in WordPress?
Typically, custom post types in WordPress will use the theme's archive template. You can also create your own custom archive page for your post type.
In this article, we will show you how to easily create custom post type archive pages in WordPress.

What is a custom post type archive page in WordPress?
The Custom Post Type Archive page is where users can view all items archived under a specific custom post type.
When you create a custom post type, WordPress automatically generates an archive page for that post type. An archive page is a list of all posts associated with that custom post type. This allows visitors to easily browse and access content in that particular post type.
By default, WordPress comes with two commonly used post types, called Posts and Pages. The WordPress plugin can also create its own post types.
For example, WooCommerce adds a new post type called "Product" to your WordPress site.
Similarly, you can create custom post types and use them to manage different types of content.
After you create a custom post type, you can use it within the WordPress admin area. However, your WordPress theme is responsible for displaying all your content.
If your theme does not have a template for a specific post type, WordPress will use the default archive template to display any post type archive page.

To learn more, see a guide on WordPress template hierarchy and how to use them in WordPress themes.
Now, if you want to change how the custom post type archive page appears, you can do it by creating a custom template.
That being said, let's see how to easily create custom post type archive pages in WordPress.
Enable archive for your custom post type in WordPress
Before creating and using a custom post type archive page, first make sure that your custom post type has archive enabled.
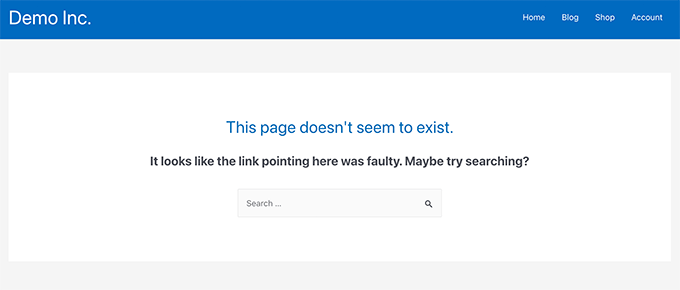
For example, if your custom post type is called a movie and you have SEO-friendly permalink enabled, your post type archive will be marked as:
Now, if you use a plugin to generate a custom post type, you can simply edit it there and enable the archive feature.
For example, in the CPT UI plug-in, you can edit custom post types and turn on the "Available" feature under Post Type settings.
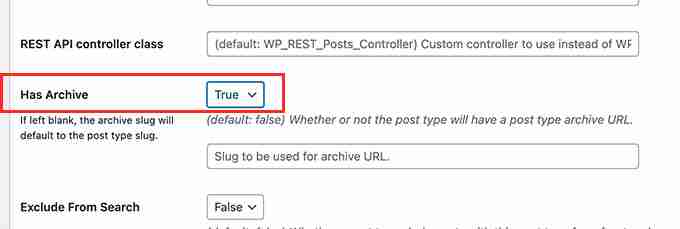
On the other hand, if you use code to generate a custom post type, you need to edit that code to enable archives.
Here is a short example of the code that generates the post type. You can see that the last line has an additional property to enable the archive page:

From here, you need to download the archive.php file to your computer.
After downloading, you need to rename the file to archive-{posttype}.php, where {posttype} is the name of your custom post type.
For example, if your custom post type is called a movie, then you need to rename it to archive-movie.php.
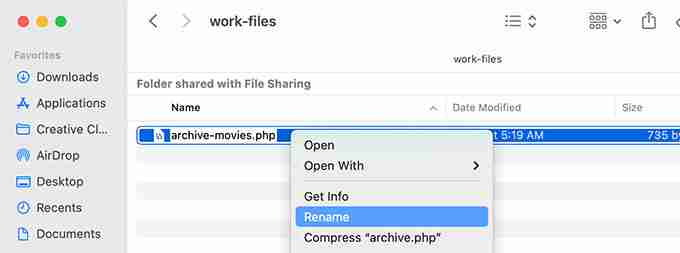
You can now open this file with any plain text editor (such as Notepad) for any changes.
This file already contains all the code needed to display the content of a custom post type. You can add any code you want to add or change the layout of an existing template.
Tip: If you need help, see our WordPress theme development cheat sheet for beginners.
Once you are satisfied with the changes, don't forget to save the file.
After that, you need to upload this file to your WordPress theme folder using the FTP or File Manager application.
You can now access the Custom Post Type Archive page to see the actual changes.

Use SeedProd to create custom post type archive pages
For this method, we will use SeedProd. It is the best WordPress page builder plugin on the market, making it easy for you to create custom pages for your website.
It comes with a drag and drop interface, allowing you to easily design custom post type pages without writing any code. You can also use SeedProd to design other pages on your website and even create custom themes from scratch.
First, you need to install and activate the SeedProd plugin. For more details, see our step-by-step guide on how to install WordPress plug-ins.
After activation, you need to enter the SeedProd license key. You can find this information in your account on the SeedProd website.
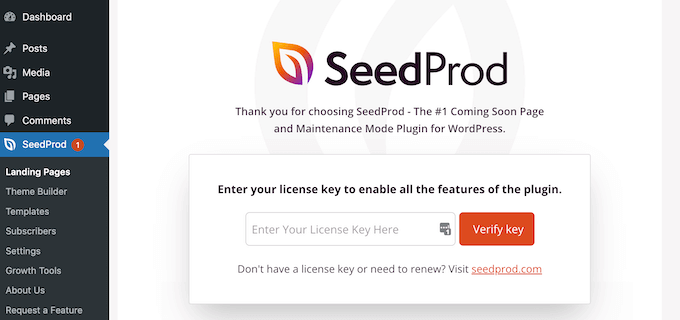
Next, you need to go to SeedProd » Landing Pages .
From here, click the "Add New Landing Page" button to start.

Next, you need to select a template for your page.
If there is a template similar to your website design, then you can use that template or start with a blank template.
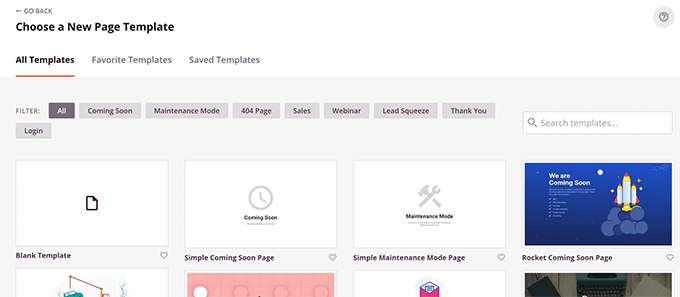
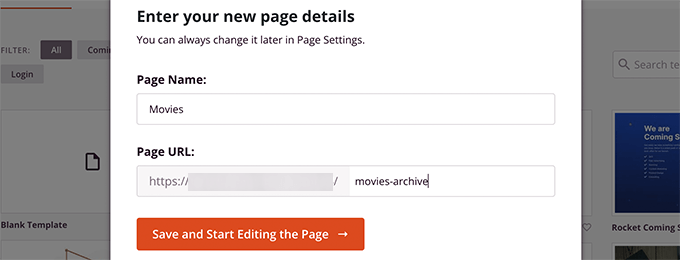
Next, you need to provide the page name and select the URL.
Make sure you use content that represents your custom post type.
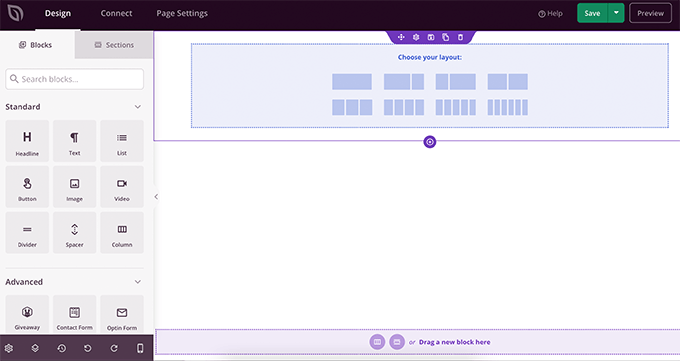
This will take you to the page builder interface.
You can select a layout to start and start adding blocks from the left column.
We first add post blocks to display items in the custom post type.
Simply drag and drop the Posts block in the Advanced section onto your page.
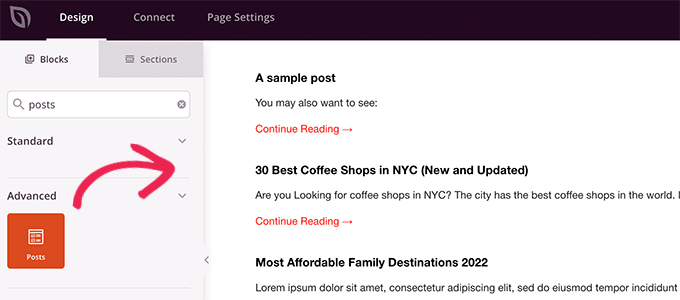
By default, the post block will display your blog post.
Click Block Settings and select your post type from the Query by Post Type section.
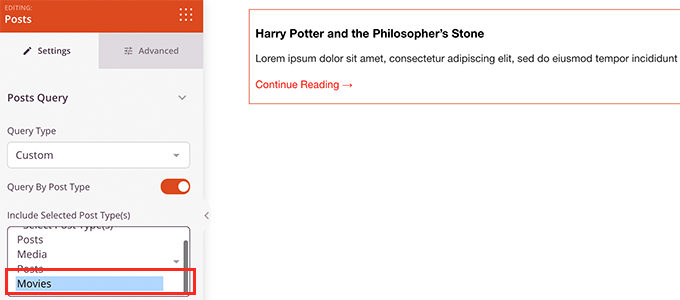
After that, you can view additional options to open featured images, change excerpt size, and more.
Once you have finished setting up your post block, you can switch to the Sections tab and add a header or footer to the page layout.

After you have finished editing, you can continue publishing the page.
Just click the drop-down arrow next to the Save button and select Publish.

You can now access the custom page by clicking the Preview tab to see how it works.
Here is what our custom post type archive page looks like on our test site.

You can also add this page to the navigation menu or continue editing to optimize it further.
Example of custom post type archive page
Custom templates for archive pages using post type allow you to customize them to suit your needs.
For example, you can delete the sidebar, change the page layout, and provide more context to make the archived page more attractive.
Here are some examples of custom post type archive pages with their own custom templates.
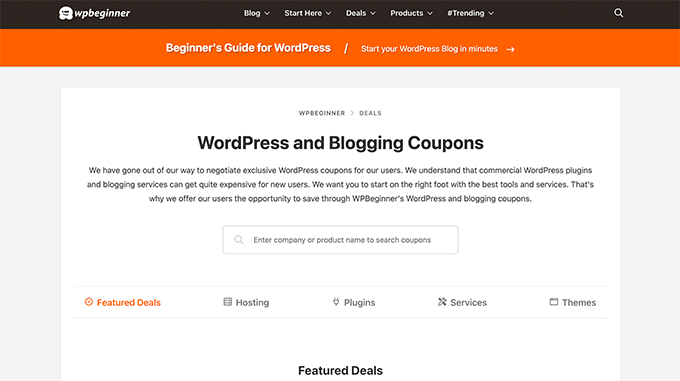
The WPBeginner transaction page is a custom post type that uses its own archive template.
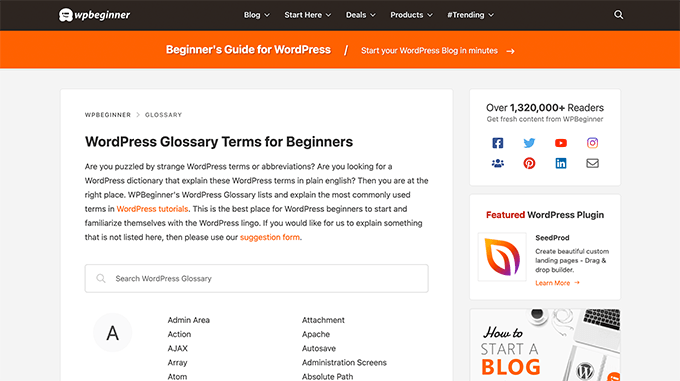
We also use custom templates for the WordPress glossary section.
This is also a custom post type.
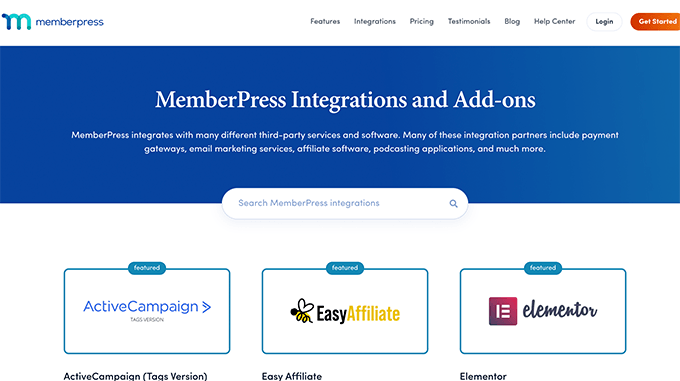
Our friends at MemberPress use custom post type archive templates in their plugin section.
You can see the example in the screenshot below.
We hope this article helps you understand how to easily create custom post type archive pages. You may also want to check out our list of essential WordPress plugins and tools for our business website, or our expert comparison of the best commercial VoIP providers.
The above is the detailed content of How to Create a Custom Post Type Archive Page in WordPress. For more information, please follow other related articles on the PHP Chinese website!

Hot AI Tools

Undresser.AI Undress
AI-powered app for creating realistic nude photos

AI Clothes Remover
Online AI tool for removing clothes from photos.

Undress AI Tool
Undress images for free

Clothoff.io
AI clothes remover

Video Face Swap
Swap faces in any video effortlessly with our completely free AI face swap tool!

Hot Article

Hot Tools

Notepad++7.3.1
Easy-to-use and free code editor

SublimeText3 Chinese version
Chinese version, very easy to use

Zend Studio 13.0.1
Powerful PHP integrated development environment

Dreamweaver CS6
Visual web development tools

SublimeText3 Mac version
God-level code editing software (SublimeText3)

Hot Topics
 1392
1392
 52
52
 36
36
 110
110
 How to adjust the wordpress article list
Apr 20, 2025 am 10:48 AM
There are four ways to adjust the WordPress article list: use theme options, use plugins (such as Post Types Order, WP Post List, Boxy Stuff), use code (add settings in the functions.php file), or modify the WordPress database directly.
 WordPress website account login
Apr 20, 2025 am 09:06 AM
To log in to a WordPress website account: Visit the login page: Enter the website URL plus "/wp-login.php". Enter your username and password. Click "Login". Verification Two-step Verification (optional). After successfully logging in, you will see the website dashboard.
 What to do if there is an error in wordpress
Apr 20, 2025 am 11:57 AM
WordPress Error Resolution Guide: 500 Internal Server Error: Disable the plug-in or check the server error log. 404 Page not found: Check permalink and make sure the page link is correct. White Screen of Death: Increase the server PHP memory limit. Database connection error: Check the database server status and WordPress configuration. Other tips: enable debug mode, check error logs, and seek support. Prevent errors: regularly update WordPress, install only necessary plugins, regularly back up your website, and optimize website performance.
 How to display wordpress comments
Apr 20, 2025 pm 12:06 PM
Enable comments in WordPress website: 1. Log in to the admin panel, go to "Settings" - "Discussions", and check "Allow comments"; 2. Select a location to display comments; 3. Customize comments; 4. Manage comments, approve, reject or delete; 5. Use <?php comments_template(); ?> tags to display comments; 6. Enable nested comments; 7. Adjust comment shape; 8. Use plugins and verification codes to prevent spam comments; 9. Encourage users to use Gravatar avatar; 10. Create comments to refer to
 How to write a header of a wordpress
Apr 20, 2025 pm 12:09 PM
The steps to create a custom header in WordPress are as follows: Edit the theme file "header.php". Add your website name and description. Create a navigation menu. Add a search bar. Save changes and view your custom header.
 Recommended product registration plug-in for easy-to-use wordpress
Apr 20, 2025 am 08:15 AM
There is no perfect WordPress product registration plugin, the choice should be based on actual needs and website size. Recommended plug-ins include: MemberPress: powerful but high-priced, complex configuration Restrict Content Pro: Focus on content restrictions and member management, cost-effective Easy Digital Downloads: Sell digital products, and users register as additional functions
 WordPress website building and avoid pits
Apr 20, 2025 am 08:06 AM
Be cautious when building a WordPress website. The guide to breaking through pits helps you avoid risks: choose paid themes and avoid the quality and safety risks of free themes. "Less is more" when installing plugins to avoid website speed and compatibility issues. Regularly optimize the database to ensure the smooth operation of the website. Pay attention to security measures and regularly update and install security plug-ins. Modify the code carefully to avoid website crashes and do it in a test environment if necessary. Pay attention to performance optimization, improve website speed, and improve user experience.
 What are the plugins for wordpress blocking ip
Apr 20, 2025 am 08:27 AM
WordPress IP blocking plugin selection is crucial. The following types can be considered: based on .htaccess: efficient, but complex operation; database operation: flexible, but low efficiency; firewall: high security performance, but complex configuration; self-written: highest control, but requires more technical level.


