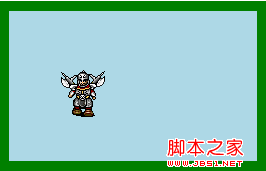
First of all, to make a game playable, it must combine movement and movement. (Haha, everyone thought I was going to talk about composition... But in fact, what I want to talk about today is Javascript) Who doesn't know how to do static things? Because things are static when they are born (unless you use gif animation), no processing is required to achieve static status. Then I will tell you how to use Javascript to turn static pictures into dynamic pictures.
1. Picture preparation


 fight01.pngfight02.pngfight03.pngfight04.png03.png02.png01.png First of all, I found some games from the classic game "Three Kingdoms" Materials from "The Biography of Cao Cao" (these are pictures of Wei general Pound). Below I'm going to use these still images to demonstrate how to turn stillness into movement. If you want to demonstrate the code, please download the above picture. The picture name corresponds to the column below.
2. Code explanation
First look at the following javascript code:
var picSub = 0;
var time = 150; //Time interval (milliseconds)
var pic1 = "./01.png";
var pic2 = "./02.png";
var pic3 = "./03.png";
var pic4 = "./01.png";
var picArr = [pic1 , pic2, pic3, pic4]; //Define the array and put the variable corresponding to the position of the picture into it
setInterval(changeImg, time); //Make the picture switch according to a certain time
function changeImg()
{
var xElem = document.getElementById("ID_IMG_ROLE");
if(picSub == picArr.length-1){
picSub = 0;
}else{
picSub = 1;
} //Determine whether the array length is exceeded. If so, reset the array subscript to 0 so that it does not exceed
xElem.src = picArr[picSub]; //Switch picture
}
function changeFight()
{
pic1 = "./fight01.png";
pic2 = "./fight02. png";
pic3 = "./fight03.png";
pic4 = "./fight04.png";
picArr = [pic1, pic2, pic3, pic4];
setTimeout(reduction, 600);
}
function reduction()
{
pic1 = "./01.png";
pic2 = "./02 .png";
pic3 = "./03.png";
pic4 = "./01.png";
picArr = [pic1, pic2, pic3, pic4];
}
These codes use my favorite array. Of course, the array here is also the core of the entire program. The following is my explanation word for word:
var pic1 = "./01.png";
var pic2 = "./02.png";
var pic3 = "./03.png";
var pic4 = "./01. png";
var picArr = [pic1, pic2, pic3, pic4]; //Define the array and put the variable corresponding to the position of the picture into it
First of all, In the array, I put several variables corresponding to the positions of the pictures. for the following operations.
Look at the code again:
var xElem = document.getElementById("ID_IMG_ROLE");
if(picSub == picArr.length-1){
picSub = 0;
}else{
picSub = 1;
} //Determine whether the array length is exceeded. If so, return the array subscript to 0 so that it does not exceed
xElem.src = picArr[picSub]; // Switch pictures
Here, use the if...else statement to determine whether the array subscript exceeds the array length. If it exceeds, the subscript will be returned to 0. Then take out the image position corresponding to the subscript in the array and assign it to the src attribute in the img tag with the id attribute ID_IMG_ROLE. This will allow the picture to keep changing. So at this point just give him a place to call the function and you're done! In order to make the picture display not instantaneous, we need to give it a waiting number of seconds, and then display the next picture after waiting. So I used the following code to make function calls:
var time = 150; //Time interval (milliseconds)
setInterval(changeImg, time); //Make the picture switch at a certain time
This will make the picture move . I have also added a function here: when you press the left mouse button in the green border, the characters inside will attack. The principle is also very simple. Let's study it slowly!
For everyone’s convenience in testing, I put all the code including html below for everyone to download:
I provide the download code:
3. Demonstration effect
The first is:

Then:

Demo location:
4. Postscript
After reading this article, you must have a preliminary understanding of dynamic characters using Javascript.
In the future, everyone can use their imagination to their fullest and use this method to create beautiful dynamic games.
Of course, these are not the only mysteries of the program, and it is not easy to figure it out! I will tell you about other Javascript game development technologies in the future. Hope you all like it.


 fight01.pngfight02.pngfight03.pngfight04.png03.png02.png01.png First of all, I found some games from the classic game "Three Kingdoms" Materials from "The Biography of Cao Cao" (these are pictures of Wei general Pound). Below I'm going to use these still images to demonstrate how to turn stillness into movement. If you want to demonstrate the code, please download the above picture. The picture name corresponds to the column below.


