

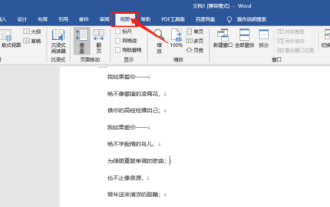
PHP校验码生成-备忘

PHP校验码生成--备忘
<?php session_start();//保存生成值,以与用户输入比较//-------------------------------------$img_w = 80;// 设置图片宽$img_h = 20;// 设置图片高$pixel_num = 200;//点越多干扰越大$is_set_line = true;// 启用干扰线$pixel_mode = 2;// 干扰点模式,1,同色;2,杂色//-------------------------------------// 随机数产生器function make_seed(){ list($usec, $sec) = explode(' ', microtime()); return (float) $sec + ((float) $usec * 100000);}mt_srand(make_seed());//4.2.0以下版本适用$authnum = mt_rand(100, 99999);// 加入session$_SESSION['verifycode']=$authnum;//echo $authnum;//生成验证码图片Header("Content-type: image/PNG");$im = imagecreatetruecolor($img_w, $img_h);$bg_color = ImageColorAllocate($im, mt_rand(250,255),mt_rand(250,255),mt_rand(250,255));// 绘制背景imagefill($im,0,0,$bg_color);$total_width = 0;$word_info = array();// 循环,获取文字信息$word_length = strlen($authnum);for($ii=0; $ii<$word_length; $ii++){ $word_space = mt_rand(1,5); $font = rand(3,5); mt_rand(1,9)%2 == 0?$top = 1:$top = 3; $word_info[$ii]['char'] = substr($authnum,$ii,1); $word_info[$ii]['font'] = $font; $word_info[$ii]['offset'] = $top; if($ii == 0) { $word_info[$ii]['width'] = 0; } $word_info[$ii]['width'] = imageFontWidth($font)+$word_space; $word_info[$ii]['height'] = imageFontHeight($font); $word_info[$ii]['color'] = imageColorAllocate($im, mt_rand(0,50),mt_rand(0,150),mt_rand(0,200)); // 文字总宽度 $total_width += $word_info[$ii]['width']; // 取第一个字体的高度 if($ii == 0) { $total_height = imagefontHeight($font); }}// 计算偏移$offset_x = floor(($img_w - $total_width)/2);$offset_y = floor(($img_h - $total_height)/2);// 填充验证码$wid = 0;$i = 0;foreach($word_info as $key=>$val){ if($i>0) { $wid += $val['width']; } imagestring($im, $val['font'], $offset_x + $wid, $val['offset'] + $offset_y, $val['char'], $val['color']); $i++;}switch($pixel_mode){ case 1: $pixel_color = ImageColorAllocate($im, mt_rand(50,255), mt_rand(50,255), mt_rand(50,255)); // 干扰象素 for($i=0;$i 
Hot AI Tools

Undresser.AI Undress
AI-powered app for creating realistic nude photos

AI Clothes Remover
Online AI tool for removing clothes from photos.

Undress AI Tool
Undress images for free

Clothoff.io
AI clothes remover

AI Hentai Generator
Generate AI Hentai for free.

Hot Article
Hot Tools

Notepad++7.3.1
Easy-to-use and free code editor

SublimeText3 Chinese version
Chinese version, very easy to use

Zend Studio 13.0.1
Powerful PHP integrated development environment

Dreamweaver CS6
Visual web development tools

SublimeText3 Mac version
God-level code editing software (SublimeText3)
Hot Topics
 1378
1378
 52
52

 Detailed explanation of how to display the ruler in Word and how to operate the ruler!
Mar 20, 2024 am 10:46 AM
Detailed explanation of how to display the ruler in Word and how to operate the ruler!
Mar 20, 2024 am 10:46 AM
When we use Word, in order to edit the content more beautifully, we often use rulers. You should know that the rulers in Word include horizontal rulers and vertical rulers, which are used to display and adjust the document's page margins, paragraph indents, tabs, etc. So, how do you display the ruler in Word? Next, I will teach you how to set the ruler display. Students in need should quickly collect it! The steps are as follows: 1. First, we need to bring up the word ruler. The default word document does not display the word ruler. We only need to click the [View] button in word. 2. Then, we find the option of [Ruler] and check it. In this way, we can adjust the word ruler! Yes or no
 How to add handwritten signature to word document
Mar 20, 2024 pm 08:56 PM
How to add handwritten signature to word document
Mar 20, 2024 pm 08:56 PM
Word documents are widely used due to their powerful functions. Not only can various formats be inserted into Word, such as pictures and tables, etc., but now for the integrity and authenticity of the files, many files require a manual signature at the end of the document. It sounds like this How to solve complex problems? Today I will teach you how to add a handwritten signature to a word document. Use a scanner, camera or mobile phone to scan or photograph the handwritten signature, and then use PS or other image editing software to perform necessary cropping on the image. 2. Select "Insert - Picture - From File" in the Word document where you want to insert the handwritten signature, and select the cropped handwritten signature. 3. Double-click the handwritten signature picture (or right-click the picture and select "Set Picture Format"), and the "Set Picture Format" pops up.
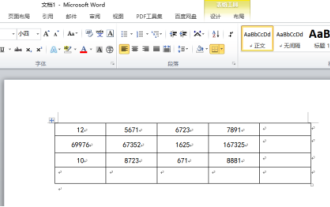 Do you know how to sum a Word table?
Mar 21, 2024 pm 01:10 PM
Do you know how to sum a Word table?
Mar 21, 2024 pm 01:10 PM
Sometimes, we often encounter counting problems in Word tables. Generally, when encountering such problems, most students will copy the Word table to Excel for calculation; some students will silently pick up the calculator. Calculate. Is there a quick way to calculate it? Of course there is, in fact the sum can also be calculated in Word. So, do you know how to do it? Today, let’s take a look together! Without further ado, friends in need should quickly collect it! Step details: 1. First, we open the Word software on the computer and open the document that needs to be processed. (As shown in the picture) 2. Next, we position the cursor on the cell where the summed value is located (as shown in the picture); then, we click [Menu Bar
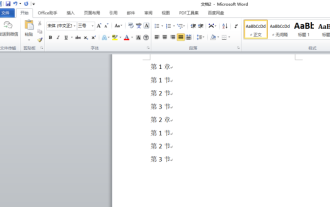 How to automatically sort word serial numbers
Mar 20, 2024 pm 09:20 PM
How to automatically sort word serial numbers
Mar 20, 2024 pm 09:20 PM
When there is a lot of content in word, there will be many chapters. It is impossible for us to write each chapter one by one. In fact, we can use the word serial number to automatically sort. The operation is simple and convenient. Friends who don’t know how to operate, come and learn it. Bar! 1. First, we open the document to be processed on the computer, as shown in the figure below: 2. After opening the document, select the text that needs to be automatically sorted. In this example, select [Chapter 1] and [Chapter 2] and hold down the Ctrl key. To select multiple areas, use the mouse to click the [Start] menu of Word after selection, as shown in the red circle in the figure below: 3. Click the small triangle symbol to the right of the number on the [Paragraph] toolbar, and click in the pop-up menu The serial number type that needs to be selected is as shown below with the red arrow pointing to it.
 How to underline in Word
Mar 20, 2024 pm 03:16 PM
How to underline in Word
Mar 20, 2024 pm 03:16 PM
As a very commonly used word processing software, Word is used in our life, study and work all the time. Of course, if you want to make good use of Word to edit text, you must lay a good foundation. So today I will take you to learn how to underline in Word. You can do it together with the editor. It is very simple. 1. First, we open the file we need to edit. Here we take the following figure as an example. 2. Use the mouse to select the text we need to edit. In the pop-up tab, we select the [U] icon. The operation is as shown in the figure: 3. Let’s take a look at the effect: 4. In fact, we can use a more convenient and faster The method is to use the key combination [ctrl] + [U] on the keyboard to add and follow your text.
 How to remove watermark in Word There are two ways to solve it
Mar 20, 2024 am 09:19 AM
How to remove watermark in Word There are two ways to solve it
Mar 20, 2024 am 09:19 AM
Word software has been used in everyone’s daily work and life. When using Word, everyone will want to add a watermark to the Word document. However, after adding the watermark, many people want to remove the watermark from the Word document. Many people do not know how to remove it, which is a bit confusing. What should friends who are too familiar with operating Word do? Today I will explain to you how to remove watermarks in Word. First open a document with a watermark in a Word document. Then find the "Insert" menu in the toolbar and click the [Watermark] option. Finally, select the [Delete Watermark] option in the pop-up drop-down option. After the operation is completed, when we return to the document, we will find that the watermark in the previous document has been removed. I don’t know if you have noticed that, in fact, “watermark
 How to insert automatic numbering or serial numbers into Word tables
Mar 20, 2024 am 09:30 AM
How to insert automatic numbering or serial numbers into Word tables
Mar 20, 2024 am 09:30 AM
When we make tables, the first thing we think of is to use Excel software to make tables. But did you know that Word software is actually very convenient to make tables. Sometimes when we make tables in Word software, we need to enter serial numbers or numbers. , if you enter them one by one manually, it will be very troublesome. In fact, there is an operation in the word software that can automatically insert numbers or serial numbers. So let’s learn with the editor how to insert automatic numbering or serial numbers into Word tables. . 1. First create a Word document and insert a table. 2. Select the column or cell where you want to insert automatic serial numbers or numbers. 3. Click "Start" - "Number". 4. Select one of the style numbers. 5.
 How to switch tables horizontally and vertically in word
Mar 20, 2024 am 09:31 AM
How to switch tables horizontally and vertically in word
Mar 20, 2024 am 09:31 AM
Word software is indispensable to us and needs to be used frequently. I have learned how to edit tables using Word software before. However, if I accidentally edit the table in the horizontal and vertical directions, and I don’t want to waste time re-creating it, is it possible to change the horizontal and vertical directions of the table? Woolen cloth? The answer is of course yes. Next, the editor will introduce to you in detail how to swap tables horizontally and vertically in Word. Let us learn together. First, we need to swap the rows and columns of the Word table below. To do this, we need to first select the table entirely, then right-click and select the copy function. Step 2: After selecting copy, we minimize word, then open an Excel table, right-click, select paste, and paste it into Exc
