Home > Web Front-end > JS Tutorial > body text

JavaScript Basics 1 What is js? Creating the first js program_Basic knowledge

WBOY
Release: 2016-05-16 17:55:15
Original
1049 people have browsed it

JavaScript is a scripting language that is object- and event-driven and has security features. It is widely used, not just on web pages. Don’t be trapped by JSP.

Based on objects, there is no need to specify the type of the variable. If you give it a 3, it knows it is an integer. If you assign a value of '3', it knows it is a char.
Event-driven, it is driven by events such as clicks and the like.

Advantages of JavaScript: The web page is highly interactive and easy to use. js is mainly run on the client, which greatly reduces the load on the server.
Javascript is a script programming language: it is implemented in program segments and combined with HTML. The Java compiler is actually the browser itself.
Security: The local hard drive cannot be accessed in the HTML page, network documents can only be deleted and modified, and information browsing or dynamic interaction can only be achieved through the browser.

Cross-platform: As long as there is a browser that supports js, it can run.
Javascript is an implementation of the ECMAScript specification.

JS programming is usually done in the eclipse environment. Here we recommend a plug-in spket , which can intelligently prompt code and is very easy to use. Download address spket IDE 1.6.22 Just choose according to your needs. We usually choose Spket IDE. If you are using myeclipse, you can choose not to install it, because it itself comes with similar components.

For plug-in installation, if you download a compressed package (that is, there are two folders plugin and feature in it, then just merge the contents of these two folders with the same folder in the eclipse installation directory.)

If you choose an executable jar package, remember to select the plugin option when installing. Directory selects the installation directory of eclipse.

Next, open eclipse~

(I’m not saying that, the eclipse icon is really ugly, so as a member of the appearance association, I generally use myeclipse~)←See this sentence clearly, I am talking about icons, icons! Please don't come here to complain about the UI!

After opening it, you can see that there is spket in the preference option under the window menu, which is the plug-in we just mentioned. As for how to use it, we will mention it in the future.
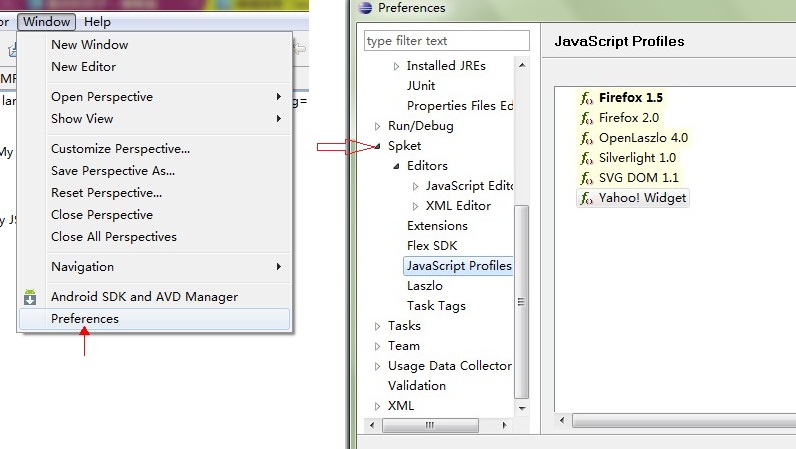
Next, let’s create a js-related project. file ->new -> java project I named it testJs.

View the workspace directory of the project. I believe everyone knows how to view it, right? In myeclipse, right-click the project and myeclipse will appear. Follow the mouse and a menu will appear on the right, select open in explorer.

In eclipse, right-click the project, select properties, and view the properties. There is a project directory in it. Just copy it and open it in the window.

The next step is to create some standard paths.

(The more I think about it, the more miserable I feel. If it is myeclipse, you can choose web project, and you will have everything you want...囧rz, but in order to meet the needs of most people, you still have to use it eclipse to learn ).

Because we are going to build a jsp project, there must be some standard paths under the project. Refer to the picture below to create it (I copied the folder automatically generated after the web project created under myeclipse):
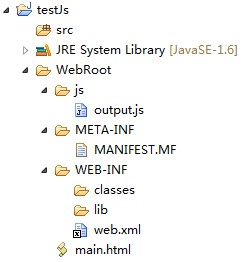
The code content of MANIFEST.MF is as follows:

Copy the codeThe code is as follows:

Manifest-Version: 1.0
Class-Path:

The content of web.xml is as follows:
Copy code The code is as follows:


xmlns="http://java.sun.com/xml/ns/javaee"
xmlns:xsi="http://www.w3.org/2001/XMLSchema-instance"
xsi:schemaLocation="http://java.sun.com/xml/ns/javaee
http://java.sun.com/xml/ns/javaee/web-app_2_5.xsd">

main.html


Create a new file (New->File main.html suffix is ​​essential), the main.html code is as follows:
Copy Code The code is as follows:


(* ̄▽ ̄)</title> ; <BR></head> <br><br><body> <br>This is my page. <br> <br></body> <br></html> <br> </div> <br>Next we have to rely on editing this thing to enjoy the pleasure that js brings to us~! <br><br>First of all, for the sake of code standardization, I recommend that you store all js content in a newly created .js file, so that code sharing can be achieved and it is easy to edit. <br><br>As a type A person with micro-obsessive-compulsive disorder, I will never be able to write if I see the code in a mess. <br><br>So, here we first right-click on the WebRoot directory and select New->Folder (didn’t you say create a js file?)=.=Don’t worry, don’t worry, let’s put the js files together. It looks better this way~ <br><br>Create a new folder named js. Then right-click on this folder, new->file, write a name casually, remember to add the suffix, I named it output.js. <br><br>Before editing the js file, let’s demonstrate the use of spket. It can help us create code templates. The process is as follows: <br><img alt="" src="http://files.jb51.net/upload/201203/20120314152254241.jpg"><br> <p>In this way, we created a template named func. Open the js file, enter func, press ALT / to find the template in the prompt, press Enter, and the code we defined in the pattern will appear: </p> <p><img alt="" src="http://files.jb51.net/upload/201203/20120314152256964.jpg"></p> <p>In this way, we have a function in our js file~! </p> <p>So everyone will understand~ spket can be used to customize prompts, and it already comes with js templates. You can click on the preferences and everything in spket will be almost familiar. </p> <p>However, we usually import an extjs package, which will definitely be useful in the future. Download address <a href="http://www.sencha.com/products/extjs/download?page=a" target="_blank">senta</a></p> <p>The loading method in spket is: </p> <p><img alt="" src="http://files.jb51.net/upload/201203/20120314152256460.jpg"></p> <p>The last step is to add file, and then just load the things you just downloaded into it. </p> <p>Finally, come on, let’s quote the js file in the html, and we will be a big success todayヘ( ̄▽ ̄ヘ): </p> <p>In main.html, write the code as follows: <br></p> <div class="codetitle"> <span><a style="CURSOR: pointer" data="4160" class="copybut" id="copybut4160" onclick="doCopy('code4160')"><u>Copy the code</u></a></span> The code is as follows:</div> <div class="codebody" id="code4160"> <br><html> <br><head> <br><title>O.O


This is my JSP page.


Reference files using src="xxxxx.jsp"
Next, find the project directory, double-click the html file to see the effect~
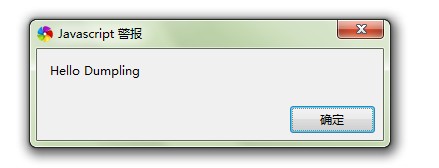
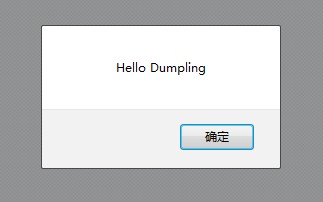
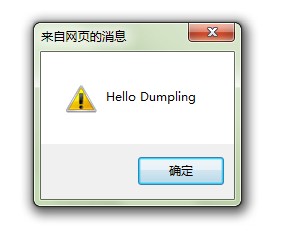
The above is the test information under different browsers, it is very compatible~

Related labels:
source:php.cn
Statement of this Website
The content of this article is voluntarily contributed by netizens, and the copyright belongs to the original author. This site does not assume corresponding legal responsibility. If you find any content suspected of plagiarism or infringement, please contact admin@php.cn
Popular Tutorials
More>
Latest Downloads
More>
Web Effects
Website Source Code
Website Materials
Front End Template