Node.js practice building a simple web server_javascript skills
In the previous chapter, we introduced Node.js, a JavaScript server platform for Internet services. At the same time, the running environment of Node.js has been set up, and the basic functions of Node.js have been verified through two HelloWorld programs. In this chapter, we also use Node.js to build a simple web server through practical exercises.

If you are familiar with web development on .NET or other similar platforms, you may be like, what is the point of setting up a web server? Just create a web project in Visual Studio and click to run. This is indeed the case, but please don’t forget that the cost is that, for example, if you use .NET to develop a Web application, you use a complete IIS as the basis of your Web server, so that when your application is released, it will I can only use IIS. And if you use a stand-alone server (built by yourself using System.Web.Hosting), you have to deal with various HttpListeners and corresponding threads, which will be more troublesome. After all, .NET is not focused on the Web. Node.js provides a convenient and customizable approach in this regard, on which you can build a sophisticated service platform that is fully oriented to your application.
1. Building a simple web server involves some basic knowledge points of Node.js:
1. Request module
in Node.js , the system provides many useful modules (of course you can also write your own modules in JavaScript, which we will explain in detail in subsequent chapters), such as http, url, etc. Modules encapsulate specific functions and provide corresponding methods or properties. To use these modules, you need to first request the module to obtain its operation object.
For example, to use the system http module, you can write like this:
var libHttp = require('http'); //Request the HTTP protocol module
In this way, future programs will be able to access the functions of the http module through the variable libHttp. The following system modules are used in the routines in this chapter:
http: encapsulates the server and client implementation of the http protocol;
url: encapsulates the parsing and processing of urls;
fs: encapsulates the function of file system operations ;
path: Encapsulates the path parsing function.
With these modules, we can stand on the shoulders of giants to build our own applications.
2. Console
In order to better observe the operation of the program and to easily check errors when exceptions occur, you can use the function of the console through the variable console.
console.log('This is a log message') ;
Time and output timing information on the console:
//Start timing
console.timeEnd('Timer 1'); //Start the timer named "Timer 1"
...
...
...
//End the timing and output it to the console
console.timeEnd('Timer 1'); //The end is called "timing" 1" timer and output
3. Define function
The method of defining a function in Node.js is exactly the same as in ordinary JavaScript, but our recommended writing method is as follows, that is, use a The variable is named for the function, so that it is more convenient and clear to pass the function as a parameter to other functions:
//Define a function named showErr
var showErr=function(msg){
var inf="Error!" msg;
console.log(inf msg) ;
return msg;
}
4. Create a Web server and listen for access requests
The most important thing about creating a Web server is to provide a response function for Web requests. It has two Parameters, the first represents the information requested by the client, and the other represents the information to be returned to the client. In the response function, the request information should be parsed, and the returned content should be assembled according to the request.
//Request module
var libHttp = require( 'http'); //HTTP protocol module
//Web server main function, parses requests, returns Web content
var funWebSvr = function (req, res){
res.writeHead(200, {' Content-Type': 'text/html'});
res.write('');
res.write('
*** Node.js ***
');res.write('
Hello!
');res.end('}
//Create an http server
var webSvr=libHttp.createServer(funWebSvr);
//Start listening to port 8124
webSvr.listen(8124);
5. Parse Web requests
For simple Web page access requests, important information is contained in the URL of the request information parameters. We can use the URL parsing module to parse the access path in the URL, and use the path module to The access path is assembled into the actual file path to be accessed for return.
var reqUrl=req.url; //Get the requested url
//Output the requested path to the console
console.log(reqUrl);
//Use the url parsing module to obtain the path name in the url
var pathName = libUrl.parse(reqUrl) .pathname;
//Use the path module to get the extension in the path name
if (libPath.extname(pathName)=="") {
//If the path has no extension
pathName = "/"; //Specify access directory
}
if (pathName.charAt(pathName.length-1)=="/"){
//If access directory
pathName ="index .html"; //Specify as the default web page
}
//Use the path parsing module to assemble the actual file path
var filePath = libPath.join("./WebRoot",pathName);
6. Set the return header
Since it is a web request, the http return header needs to be included in the return content. The focus here is to set the content type of the http return header according to the file extension of the file path to be accessed. .
var contentType="";
//Use The path parsing module obtains the file extension
var ext=libPath.extname(filePath);
switch(ext){
case ".html":
contentType= "text/html";
break;
case ".js":
contentType="text/javascript";
break;
...
...
default:
contentType= "application/octet-stream";
}
//Write the content type in the return header
res.writeHead(200, {"Content-Type": contentType });
7. Write the accessed file content into the returned object
With the actual path of the file that needs to be accessed and the content type corresponding to the file, you can use the fs file system module to read the file stream and return it to client.
//Determine whether the file exists
libPath.exists (filePath, function(exists){
if(exists){//The file exists
//Write the content type in the return header
res.writeHead(200, {"Content-Type": funGetContentType (filePath) });
//Create a read-only stream for returning
var stream = libFs.createReadStream(filePath, {flags: "r", encoding: null});
//Specify if stream Read error, return 404 error
stream.on("error", function() {
res.writeHead(404);
res.end("
404 Read Error});
//Pipeline connecting file stream and http return stream, used to return actual web content
stream.pipe(res);
}
else { //File does not exist
//Returns 404 error
res.writeHead(404, {"Content-Type": "text/html"});
res.end("404 Not Found
");
}
});
2. Testing and running
1. Complete source code
The following 100 lines of JavaScript are All the source code to build such a simple web server:
//------------------------------------------------ ------
//WebSvr.js
// A demo web server
//--------------------- --------------------------
//Start service startup timer
console.time('[WebSvr][Start] ');
//Request module
var libHttp = require('http'); //HTTP protocol module
var libUrl=require('url'); //URL parsing module
var libFs = require("fs"); //File system module
var libPath = require("path"); //Path analysis module
//Get the return content type string based on the path, used for http return Header
var funGetContentType=function(filePath){
var contentType="";
//Use the path parsing module to get the file extension
var ext=libPath.extname(filePath);
switch(ext){
case ".html":
contentType="text/html";
break;
case ".js":
contentType="text/javascript";
break;
case ".css":
contentType="text/css";
break;
case ".gif":
contentType="image/gif";
break;
case ".jpg":
contentType="image/jpeg";
break;
case ".png":
contentType="image/png";
break;
case ".ico":
contentType="image/icon";
break;
default:
contentType="application/octet-stream";
}
return contentType; //Return content type string
}
//Web server main function, parse the request, return Web content
var funWebSvr = function (req, res){
var reqUrl=req.url; //Get the requested url
//Output the requested path to the console
console.log(reqUrl);
//Use the url parsing module to get the path in the url Name
var pathName = libUrl.parse(reqUrl).pathname;
if (libPath.extname(pathName)=="") {
//If the path has no extension
pathName ="/ "; //Specify access directory
}
if (pathName.charAt(pathName.length-1)=="/"){
//If access directory
pathName ="index.html "; //Specify as the default web page
}
//Use the path parsing module to assemble the actual file path
var filePath = libPath.join("./WebRoot",pathName);
// Determine whether the file exists
libPath.exists(filePath,function(exists){
if(exists){//The file exists
//Write the content type in the return header
res.writeHead( 200, {"Content-Type": funGetContentType(filePath) });
//Create a read-only stream for return
var stream = libFs.createReadStream(filePath, {flags: "r", encoding: null} );
//Specify that if there is an error in reading the stream, a 404 error will be returned
stream.on("error", function() {
res.writeHead(404);
res.end("
404 Read Error
");});
//Pipeline connecting the file stream and http return stream, used to return actual web content
stream.pipe(res) ;
}
else { //File does not exist
//Returns 404 error
res.writeHead(404, {"Content-Type": "text/html"});
res.end("
404 Not Found
");}
});
}
//Create an http server
var webSvr=libHttp. createServer(funWebSvr);
//Specify server error event response
webSvr.on("error", function(error) {
console.log(error); //Output error information in the console
});
//Start listening to port 8124
webSvr.listen(8124, function(){
//Output service startup information to the console
console.log('[ WebSvr][Start] running at http://127.0.0.1:8124/');
//End the service start timer and output
console.timeEnd('[WebSvr][Start]');
});
2. Resource Directory
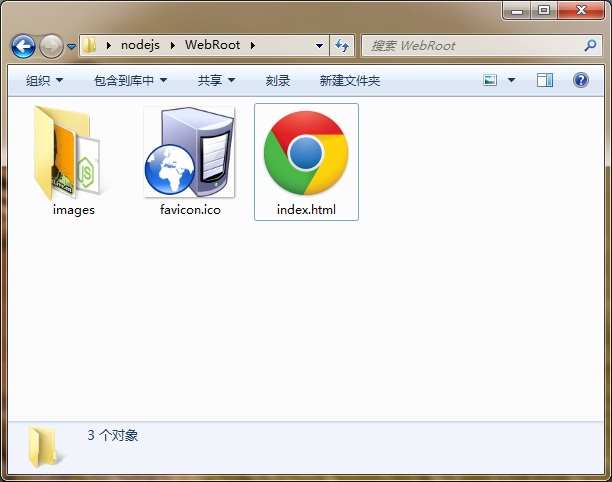
Since we want to establish a Web server, we need to create a WebRoot directory to store actual web pages and image resources. The directory name of "WebRoot" is used in the above source code to assemble the actual file path.

3. Run and test
Enter in the command line:
node.exe WebSvr.js
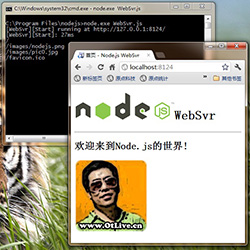
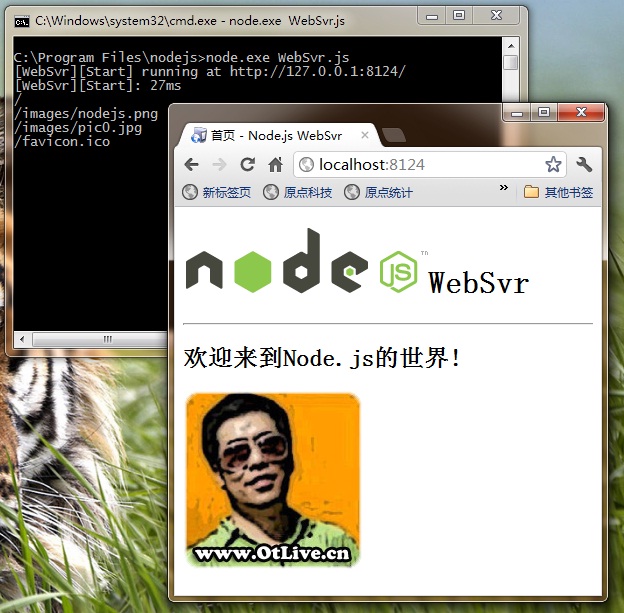
Our web server is running. At this time, it can be accessed through the browser. The operation effect is as follows:

Postscript
Using Node.js we can easily build a relatively independent web server. Its event-driven features avoid cumbersome thread protection, and its basic modules reduce the difficulty of development. The web server established in this chapter is just a simple sample, without too much consideration of modularity, security and other issues, but it can help you master some basic knowledge of Node.js development.
Author: Wang Feng www.otlive.cn

Hot AI Tools

Undresser.AI Undress
AI-powered app for creating realistic nude photos

AI Clothes Remover
Online AI tool for removing clothes from photos.

Undress AI Tool
Undress images for free

Clothoff.io
AI clothes remover

AI Hentai Generator
Generate AI Hentai for free.

Hot Article

Hot Tools

Notepad++7.3.1
Easy-to-use and free code editor

SublimeText3 Chinese version
Chinese version, very easy to use

Zend Studio 13.0.1
Powerful PHP integrated development environment

Dreamweaver CS6
Visual web development tools

SublimeText3 Mac version
God-level code editing software (SublimeText3)

Hot Topics
 An article about memory control in Node
Apr 26, 2023 pm 05:37 PM
The Node service built based on non-blocking and event-driven has the advantage of low memory consumption and is very suitable for handling massive network requests. Under the premise of massive requests, issues related to "memory control" need to be considered. 1. V8’s garbage collection mechanism and memory limitations Js is controlled by the garbage collection machine
 Security auditing and event log management of web servers built on CentOS
Aug 05, 2023 pm 02:33 PM
Overview of security auditing and event log management of web servers built on CentOS. With the development of the Internet, security auditing and event log management of web servers have become more and more important. After setting up a web server on the CentOS operating system, we need to pay attention to the security of the server and protect the server from malicious attacks. This article will introduce how to perform security auditing and event log management, and provide relevant code examples. Security audit Security audit refers to comprehensive monitoring and inspection of the security status of the server to promptly discover potential
 Detailed graphic explanation of the memory and GC of the Node V8 engine
Mar 29, 2023 pm 06:02 PM
This article will give you an in-depth understanding of the memory and garbage collector (GC) of the NodeJS V8 engine. I hope it will be helpful to you!
 Let's talk in depth about the File module in Node
Apr 24, 2023 pm 05:49 PM
The file module is an encapsulation of underlying file operations, such as file reading/writing/opening/closing/delete adding, etc. The biggest feature of the file module is that all methods provide two versions of **synchronous** and **asynchronous**, with Methods with the sync suffix are all synchronization methods, and those without are all heterogeneous methods.
 Best Practices: Performance Tuning Guide for Building a Web Server on CentOS
Aug 04, 2023 pm 12:17 PM
Best Practices: Performance Tuning Guide for Building Web Servers on CentOS Summary: This article aims to provide some performance tuning best practices for users building web servers on CentOS, aiming to improve the performance and response speed of the server. Some key tuning parameters and commonly used optimization methods will be introduced, and some sample codes will be provided to help readers better understand and apply these methods. 1. Turn off unnecessary services. When building a web server on CentOS, some unnecessary services will be started by default, which will occupy system resources.
 Permissions and access control strategies that you need to pay attention to before building a web server on CentOS
Aug 05, 2023 am 11:13 AM
Permissions and access control strategies that you need to pay attention to before building a web server on CentOS. In the process of building a web server, permissions and access control strategies are very important. Correctly setting permissions and access control policies can protect the security of the server and prevent unauthorized users from accessing sensitive data or improperly operating the server. This article will introduce the permissions and access control strategies that need to be paid attention to when building a web server under the CentOS system, and provide corresponding code examples. User and group management First, we need to create a dedicated
 Let's talk about the event loop in Node
Apr 11, 2023 pm 07:08 PM
The event loop is a fundamental part of Node.js and enables asynchronous programming by ensuring that the main thread is not blocked. Understanding the event loop is crucial to building efficient applications. The following article will give you an in-depth understanding of the event loop in Node. I hope it will be helpful to you!
 Learn more about Buffers in Node
Apr 25, 2023 pm 07:49 PM
At the beginning, JS only ran on the browser side. It was easy to process Unicode-encoded strings, but it was difficult to process binary and non-Unicode-encoded strings. And binary is the lowest level data format of the computer, video/audio/program/network package


