

Image cutting plug-in based on jQuery_jquery

Step 1: Establish a workspace
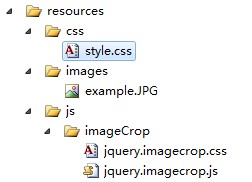
First, we need to create a workspace for our tutorial, establish the file hierarchy as shown in the figure, and create a corresponding empty file.
< ;title>
< ;/head>
[/code]
style.css
* {
margin : 0;
outline : 0;
padding : 0;
}
/*Initialize web page style*/
body {
background-color : #ededed;
color : #646464;
font-family : 'Verdana', 'Geneva', sans-serif;
font-size : 12px;
text-shadow : 0 1px 0 #ffffff;
}
h1 {
font-size : 24px;
font-weight : normal;
margin : 0 0 10px 0;
}
div#wrapper {
margin : 25px 25px 25px 25px;
}
/*Select the div with the id of wrapper*/
div.image-decorator {
-moz-border-radius : 5px 5px 5px 5px;/*Sharpening of boxes for Firefox browsers* /
-moz-box-shadow : 0 0 6px #c8c8c8;/*Border shadow processing of the box for Firefox browser*/
-webkit-border-radius : 5px 5px 5px 5px;/*WebKit Is an open source browser engine*/
-webkit-box-shadow : 0 0 6px #c8c8c8;
background-color : #ffffff;
border : 1px solid #c8c8c8;
border- radius : 5px 5px 5px 5px;
box-shadow : 0 0 6px #c8c8c8;
display : inline-block; /* Render the object as an inline object, but render the object's content as a block object. Adjacent inline objects will be rendered on the same line, allowing spaces. Supported browsers are: Opera, Safari*/
height : 360px;
padding : 5px 5px 5px 5px;
width : 480px;
}
The above we By changing the background color and setting some basic styles, we can make our page more readable.
Step 3: Write a basic jQuery plug-in
Let’s start writing a basic jQuery plug-in. Before writing, if you, the reader, have never had the experience of writing a jQuery plug-in, it is recommended to read the official instructions first. Plug-in tutorial (http://docs.jquery.com/Plugins/Authoring), this is the English version, the Chinese version is not found, the author plans to translate it, so stay tuned.
Open /resources/js/imageCrop/jquery.imagecrop.js and add the js code as shown below
//Generally, please include the plug-in code you write in '(function($) { // Plug-in code here}) (jQuery);'
(function($) {
$.imageCrop = function(object, customOptions) {};
$.fn.imageCrop = function (customOptions) {
//Iterate over each object
/ /Iterate over each object
this.each(function () {
var currentObject = this,
image = new Image();
//When the object is loaded, append ImageCrop cutting function
image.onload = function () {
$.imageCrop(currentObject, customOptions);
};
//Reset the address of the image because sometimes the image is cached Cannot be loaded quickly
image.src = currentObject.src;
});
//Unless your plug-in returns a certain value, the function is usually required to return the 'this' keyword
//This is used to keep programming chained
return this;
};
}) (jQuery);
We have just extended jQuery by adding a new method attribute on the jQuery.fn object. Now we have a basic plugin that iterates over each object and attaches the imageCrop function to it when it's loaded. Noticed that the cached image might not be downloaded quickly, so reset its image address.
Step 4: Add customizable options
With customizable options, users will have more choices and the plug-in will be more flexible. (Note: The following codes are in order)
/ / Encapsulating the plugin's options in a constant object is far better than passing a long list of parameters to pass.
//This allows expansion by default in the plug-in
var defaultOptions = {
allowMove: true,
allowResize: true,
allowSelect: true,
minSelect: [ 0, 0],
outlineOpacity: 0.5,
overlayOpacity: 0.5,
selectionPosition: [0, 0],
selectionWidth: 0,
selectionHeight: 0
};
// Set the options as default options
var options = defaultOptions;
// Then merge it with the customer-customized options
setOptions(customOptions);
Above we define an array containing default options, and then use the setOption function to merge the default options and customized options. Now let us write the merge function body
// Will Default options and customer-customized options are merged
function setOptions(customOptions) {
options = $.extend(options, customOptions);
};
$.extend() The function implements the function of merging two or more objects into the first object.
Options
The following list explains each option in the plugin
allowMove – Specifies whether the selection can be moved (the default value is true.)
allowResize – Specifies whether the selection area can be resized (the default value is true)
allowSelect – Specifies whether the user can resize the selection area (the default value is true)
minSelect – The minimum size of a new selection area (The default size is [0, 0])
outlineOpacity – the transparency of the outline (the default value is 0.5)
overlayOpacity – the transparency of the overlay (the default value is 0.5)
selectionPosition – the selection area Position (default is [0, 0])
selectionWidth – the width of the selection area (the default value is 0)
selectionHeight – the length of the selection area (the default value is 0)
Step 5: Create an image layer
In this step we will change the structure of the document to prepare for the next step: the surface of the plug-in

// Initialize the image layer
var $image = $(object);
// Initialize an image support layer
var $holder = $(' ')
.css({
position: 'relative'
})
.width($image.width())
.height($image. height());
// imag is included in the holder layer. wrap() function
$image.wrap($holder)
.css({
position: 'absolute'
});
As you can see, the containing layer and the image have the same size and are positioned relative to each other. Then we use the .wrap function to make the image contained within it
On top of the image is the overlay:
//Initialize an overlay and place it on top of the image
var $overlay = $('')
.css({
opacity: options.overlayOpacity,
position: 'absolute'
})
.width($image.width())
.height($image.height())
.insertAfter($image);
This layer is also the same size as the image, but is absolutely positioned. We get transparency from options.outlineOpacity. This element has an Id, so we can change its style by changing the css via the plugin. At the end we use the .insertAfter($image) method to place the overlay just below the image layer.
The lower layer is the trigger layer
//Initialize a trigger layer and place it on top of the overlay
var $trigger = $('')
.css({
backgroundColor: '#000000',
opacity: 0,
position: 'absolute'
})
.width($image.width())
.height($image. height())
.insertAfter($overlay);
This time it will not be visible to the user, but it will handle some events.
Next is the border layer and selection layer
//Initialize a border layer and place it on top of the trigger layer
var $outline = $('')
.css ({
opacity: options.outlineOpacity,
position: 'absolute'
})
.insertAfter($trigger);
// Initialize a selection layer and set it Above the border layer
var $selection = $('')
.css({
background: 'url(' $image.attr('src') ') no-repeat',
position: 'absolute'
})
.insertAfter($outline);
.attr() method is used to return a specific The value of the attribute, we use it to get the address of the image and use it as the background of the selection layer
Absolute positioning inside relative positioning
A relatively positioned element can control an absolutely positioned element , so that the absolutely positioned element is inside the relatively positioned element. This is also why the containing layer is relatively positioned, and all its child elements are absolutely positioned
Step 6: Update the interface
First we need to initialize some global variables
//Initialize global variables
var selectionExists,
selectionOffset = [0, 0],
selectionOrigin = [0, 0];
selectionExists will tell us whether there is a selection area, selectionOffset will contain the offset relative to the starting point, selectionOrigin Will contain the starting point of the selection area
The following condition is used for the selection area to exist when the plugin is loaded
//Indicates whether the size of the selection area is larger than the smallest, and then sets whether the selection area exists based on it
if (options.selectionWidth > options. minSelect[0] &&
options.selectionHeight > options.minSelect[1])
selectionExists = true;
else
selectionExists = false;
Now we will call updateInterface to initialize the plug-in. Interface
//Call the 'uploadInterface' function for the first time to initialize the plug-in interface
updateInterface();

Hot AI Tools

Undresser.AI Undress
AI-powered app for creating realistic nude photos

AI Clothes Remover
Online AI tool for removing clothes from photos.

Undress AI Tool
Undress images for free

Clothoff.io
AI clothes remover

AI Hentai Generator
Generate AI Hentai for free.

Hot Article
Hot Tools

Notepad++7.3.1
Easy-to-use and free code editor

SublimeText3 Chinese version
Chinese version, very easy to use

Zend Studio 13.0.1
Powerful PHP integrated development environment

Dreamweaver CS6
Visual web development tools

SublimeText3 Mac version
God-level code editing software (SublimeText3)
Hot Topics
 1374
1374
 52
52

 Replace String Characters in JavaScript
Mar 11, 2025 am 12:07 AM
Replace String Characters in JavaScript
Mar 11, 2025 am 12:07 AM
Detailed explanation of JavaScript string replacement method and FAQ This article will explore two ways to replace string characters in JavaScript: internal JavaScript code and internal HTML for web pages. Replace string inside JavaScript code The most direct way is to use the replace() method: str = str.replace("find","replace"); This method replaces only the first match. To replace all matches, use a regular expression and add the global flag g: str = str.replace(/fi
 How do I create and publish my own JavaScript libraries?
Mar 18, 2025 pm 03:12 PM
How do I create and publish my own JavaScript libraries?
Mar 18, 2025 pm 03:12 PM
Article discusses creating, publishing, and maintaining JavaScript libraries, focusing on planning, development, testing, documentation, and promotion strategies.
 How do I optimize JavaScript code for performance in the browser?
Mar 18, 2025 pm 03:14 PM
How do I optimize JavaScript code for performance in the browser?
Mar 18, 2025 pm 03:14 PM
The article discusses strategies for optimizing JavaScript performance in browsers, focusing on reducing execution time and minimizing impact on page load speed.
 How do I debug JavaScript code effectively using browser developer tools?
Mar 18, 2025 pm 03:16 PM
How do I debug JavaScript code effectively using browser developer tools?
Mar 18, 2025 pm 03:16 PM
The article discusses effective JavaScript debugging using browser developer tools, focusing on setting breakpoints, using the console, and analyzing performance.
 jQuery Matrix Effects
Mar 10, 2025 am 12:52 AM
jQuery Matrix Effects
Mar 10, 2025 am 12:52 AM
Bring matrix movie effects to your page! This is a cool jQuery plugin based on the famous movie "The Matrix". The plugin simulates the classic green character effects in the movie, and just select a picture and the plugin will convert it into a matrix-style picture filled with numeric characters. Come and try it, it's very interesting! How it works The plugin loads the image onto the canvas and reads the pixel and color values: data = ctx.getImageData(x, y, settings.grainSize, settings.grainSize).data The plugin cleverly reads the rectangular area of the picture and uses jQuery to calculate the average color of each area. Then, use
 10 Ways to Instantly Increase Your jQuery Performance
Mar 11, 2025 am 12:15 AM
10 Ways to Instantly Increase Your jQuery Performance
Mar 11, 2025 am 12:15 AM
This article outlines ten simple steps to significantly boost your script's performance. These techniques are straightforward and applicable to all skill levels. Stay Updated: Utilize a package manager like NPM with a bundler such as Vite to ensure
 How to Build a Simple jQuery Slider
Mar 11, 2025 am 12:19 AM
How to Build a Simple jQuery Slider
Mar 11, 2025 am 12:19 AM
This article will guide you to create a simple picture carousel using the jQuery library. We will use the bxSlider library, which is built on jQuery and provides many configuration options to set up the carousel. Nowadays, picture carousel has become a must-have feature on the website - one picture is better than a thousand words! After deciding to use the picture carousel, the next question is how to create it. First, you need to collect high-quality, high-resolution pictures. Next, you need to create a picture carousel using HTML and some JavaScript code. There are many libraries on the web that can help you create carousels in different ways. We will use the open source bxSlider library. The bxSlider library supports responsive design, so the carousel built with this library can be adapted to any
 Enhancing Structural Markup with JavaScript
Mar 10, 2025 am 12:18 AM
Enhancing Structural Markup with JavaScript
Mar 10, 2025 am 12:18 AM
Key Points Enhanced structured tagging with JavaScript can significantly improve the accessibility and maintainability of web page content while reducing file size. JavaScript can be effectively used to dynamically add functionality to HTML elements, such as using the cite attribute to automatically insert reference links into block references. Integrating JavaScript with structured tags allows you to create dynamic user interfaces, such as tab panels that do not require page refresh. It is crucial to ensure that JavaScript enhancements do not hinder the basic functionality of web pages; even if JavaScript is disabled, the page should remain functional. Advanced JavaScript technology can be used (
