
 Web Front-end
JS Tutorial
Node.js: Node.js service built under Windows 7 (let's play with server-side javascript, this is not a front-end js plug-in)_javascript skills
Web Front-end
JS Tutorial
Node.js: Node.js service built under Windows 7 (let's play with server-side javascript, this is not a front-end js plug-in)_javascript skills
Node.js: Node.js service built under Windows 7 (let's play with server-side javascript, this is not a front-end js plug-in)_javascript skills

这里只是纯粹的搭建,连环境都没有,还玩什么服务器端js,一切都成了浮云,让我们先搭建一个环境,输入一个“hello world”的页面。
对的,windows7下的搭建,你只需一步一步跟着我做,就ok了,不用去了解过多的细节,那不是我们现在要关心的,我们现在首要目的是把环境搭建好,要不然就没有下一步了。
Step 1. 下载node.js在windows下是要安装在Cygwin下的,去Cygwin网站下载Cygwin安装程序。
Cygwin网站:http://cygwin.com/
直接下载地址:http://cygwin.com/setup.exe
Step 2. 安装
安装你下下来的Cygwin程序,基本上只需下一步就可以。
在Choose A Download Source界面选择-》install from internet
在Select Your Internet Connection界面选择-》Direct Connect
在Choose A Download Site界面选择-》这个自己选择了,就是选择下载的镜像,推荐使用.jp结尾的日本网站,速度比较快
注意:如果你是首次安装,可能会弹出警告提示,不管管他,点击ok就可以。
Step 3. 选择安装组件
注意:由于组件较多,建议使用搜索的方式来查找。点击名字即可选中,选中后后面会有一个小方块,里面有X(叉)表示选中。
Devel 分类
gcc-g++: C++ compiler
gcc-mingw-g++: Mingw32 support headers and libraries for GCC C++
gcc4-g++: G++ subpackage
git: Fast Version Control System – core files
make: The GNU version of the 'make' utility
openssl-devel: The OpenSSL development environment
pkg-config: A utility used to retrieve information about installed libraries
zlib-devel: The zlib compression/decompression library (development)
Editor 分类
vim: Vi IMproved - enhanced vi editor
Python 分类
全部
注意:全部安裝,你只要点选 Python 右边的图标切换至 Install 即可。
Web 分类
wget: Utility to retrieve files from the WWW via HTTP and FTP
curl: Multi-protocol file transfer command-line tool
下一步之后会提示你有许多相依的组件需要安装,基本上直接按下一步即可。
注意:由于组件都是在线下载,可能有点漫长,等待即可。
Step 4. 运行ash.exe
安装完后会在桌面生成图标(如果你选了在桌面生成图标项的话),注意不是运行这个图标!
打开文件夹,进入C:cygwinbin 目录中,这个是默认的安装目录,如果你修改过安装目录,自己进入到cygwin的安装目录下的bin目录中。
运行ash.exe
在弹出的命令窗口中执行 ./rebaseall -v 命令
等命令执行完成执行 exit 退出 ash
Step 5. 下载并安装Node.js
运行桌面上的Cygwin程序。
在命令窗口中输入 wget http://nodejs.org/dist/node-v0.4.7.tar.gz 回车。
注意:我在写这篇文章是node.js的最新版本是node-v0.4.7, http://nodejs.org/dist/node-v0.4.7.tar.gz 是node.js的下载地址,你在看这篇文章时可以自己去node.js的网站获取最新的下载路径替换就可以了
Node.js网站:http://nodejs.org/
在命令窗口中输入 tar xf node-v0.4.7.tar.gz 回车,node-v0.4.7.tar.gz为你自己下载的版本。
在命令窗口中输入 cd node-v0.4.7 回车。
在命令窗口中输入 ./configure 回车。
在命令窗口中输入 make 回车。
在命令窗口中输入 make install 回车。
ok,到这里你已经安装完成node.js了
在命令窗口中输入 node --version 回车,看看你的node.js版本。
Step 6. 设置DNS
打开文件夹,进入到C:cygwinetc 文件夹下。
手动建立 resolv.conf 文件。
用记事本打开刚建立的resolv.conf文件,添加如下
nameserver 8.8.8.8
nameserver 8.8.4.4
保存并关闭。
Step End. 测试Node.js是否可以运行
到此你就已经搭建完成了,但是不知道是否可以正确运行,那么,下面让我们来写个示例文件来测试下。
在C:cygwin 目录下建立 example.js
输入
var http = require('http');
http.createServer(function (request, response) {
response.writeHead(200, {'Content-Type': 'text/html'});
response.end('Hello World');
}).listen(8888);
console.log('Server running at http://127.0.0.1:8888/');
Save (note: save in UTF-8 format, otherwise a syntax error will be reported).
Run cygwin, enter node /example.js in the command window and press Enter
Have you seen Server running at http://127.0.0.1:8888/
Don’t close cygwin, open the browser, visit http://127.0.0.1:8888/ and see if the hello world page appears.

Hot AI Tools

Undresser.AI Undress
AI-powered app for creating realistic nude photos

AI Clothes Remover
Online AI tool for removing clothes from photos.

Undress AI Tool
Undress images for free

Clothoff.io
AI clothes remover

AI Hentai Generator
Generate AI Hentai for free.

Hot Article
Hot Tools

Notepad++7.3.1
Easy-to-use and free code editor

SublimeText3 Chinese version
Chinese version, very easy to use

Zend Studio 13.0.1
Powerful PHP integrated development environment

Dreamweaver CS6
Visual web development tools

SublimeText3 Mac version
God-level code editing software (SublimeText3)
Hot Topics
 1386
1386
 52
52

 An article about memory control in Node
Apr 26, 2023 pm 05:37 PM
An article about memory control in Node
Apr 26, 2023 pm 05:37 PM
The Node service built based on non-blocking and event-driven has the advantage of low memory consumption and is very suitable for handling massive network requests. Under the premise of massive requests, issues related to "memory control" need to be considered. 1. V8’s garbage collection mechanism and memory limitations Js is controlled by the garbage collection machine
 Detailed graphic explanation of the memory and GC of the Node V8 engine
Mar 29, 2023 pm 06:02 PM
Detailed graphic explanation of the memory and GC of the Node V8 engine
Mar 29, 2023 pm 06:02 PM
This article will give you an in-depth understanding of the memory and garbage collector (GC) of the NodeJS V8 engine. I hope it will be helpful to you!
 How to fix 'Service is not responding' error in Windows.
Apr 27, 2023 am 08:16 AM
How to fix 'Service is not responding' error in Windows.
Apr 27, 2023 am 08:16 AM
The NETSTART command is a built-in command in Windows that can be used to start and stop services and other programs. Sometimes, you may encounter NetHelpmsg2186 error while running this command. Most users who encounter this error try to restart the Windows Update service by running the NETSTARTWUAUSERV command. If the Windows Update service is disabled or not running, your system may be at risk as you will not be able to get the latest updates. Let’s explore in detail why this error occurs and how to bypass it. Okay? What is error 2186? Windows Update service installs the latest critical updates and security features
 Solution to Windows 10 Security Center service being disabled
Jul 16, 2023 pm 01:17 PM
Solution to Windows 10 Security Center service being disabled
Jul 16, 2023 pm 01:17 PM
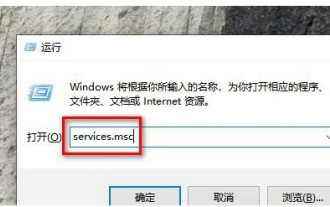
The Security Center service is a built-in computer protection function in the win10 system, which can protect computer security in real time. However, some users encounter a situation where the Security Center service is disabled when booting the computer. What should they do? It's very simple. You can open the service panel, find the SecurityCenter item, then right-click to open its properties window, set the startup type to automatic, and then click Start to start the service again. What to do if the Win10 Security Center service is disabled: 1. Press "Win+R" to open the "Operation" window. 2. Then enter the "services.msc" command and press Enter. 3. Then find the "SecurityCenter" item in the right window and double-click it to open its properties window.
 How to open Remote Desktop Connection Service using command
Dec 31, 2023 am 10:38 AM
How to open Remote Desktop Connection Service using command
Dec 31, 2023 am 10:38 AM
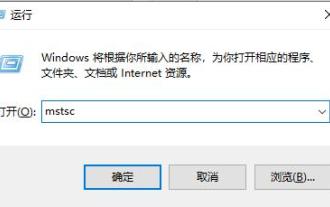
Remote desktop connection has brought convenience to many users' daily lives. Some people want to use commands to connect remotely, which is more convenient to operate. So how to connect? Remote Desktop Connection Service can help you solve this problem by using a command to open it. How to set up the remote desktop connection command: Method 1. Connect remotely by running the command 1. Press "Win+R" to open "Run" and enter mstsc2, then click "Show Options" 3. Enter the IP address and click "Connect". 4. It will show that it is connecting. Method 2: Connect remotely through the command prompt 1. Press "Win+R" to open "Run" and enter cmd2. In the "Command Prompt" enter mstsc/v:192.168.1.250/console
 Let's talk in depth about the File module in Node
Apr 24, 2023 pm 05:49 PM
Let's talk in depth about the File module in Node
Apr 24, 2023 pm 05:49 PM
The file module is an encapsulation of underlying file operations, such as file reading/writing/opening/closing/delete adding, etc. The biggest feature of the file module is that all methods provide two versions of **synchronous** and **asynchronous**, with Methods with the sync suffix are all synchronization methods, and those without are all heterogeneous methods.
 How to enable audio service in win7
Jul 10, 2023 pm 05:13 PM
How to enable audio service in win7
Jul 10, 2023 pm 05:13 PM
Computers have many system services to support the application of various programs. If the computer has no sound and most audio services are not turned on after troubleshooting hardware problems, how do you enable audio services in win7? Many friends are confused, so for the question of how to enable the audio service in win7, the editor below will introduce how to enable the audio service in win7. How to enable audio service in win7. 1. Find the computer on the computer desktop under Windows 7 system, right-click and select the management option. 2. Find and open the service item under Services and Applications in the computer management interface that opens. Find WindowsAudio on the service interface on the right and double-click to open the modification. 4. Switch to the regular project and click Start to enable the function.
 What is the correct way to restart a service in Linux?
Mar 15, 2024 am 09:09 AM
What is the correct way to restart a service in Linux?
Mar 15, 2024 am 09:09 AM
What is the correct way to restart a service in Linux? When using a Linux system, we often encounter situations where we need to restart a certain service, but sometimes we may encounter some problems when restarting the service, such as the service not actually stopping or starting. Therefore, it is very important to master the correct way to restart services. In Linux, you can usually use the systemctl command to manage system services. The systemctl command is part of the systemd system manager
