
 Web Front-end
JS Tutorial
Plug-in for merging the same cells in a table based on jquery (lite version)_jquery
Web Front-end
JS Tutorial
Plug-in for merging the same cells in a table based on jquery (lite version)_jquery
Plug-in for merging the same cells in a table based on jquery (lite version)_jquery

效果如下
原表格:
| col0 | col1 | col2 | col3 |
| SuZhou | 11111 | 22222 | SuZhouCity |
| SuZhou | 33333 | 44444 | SuZhouCity |
| SuZhou | 55555 | 66666 | SuZhouCity |
| ShangHai | 77777 | 88888 | ShangHaiCity |
| ShangHai | uuuuu | hhhhh | ShangHaiCity |
| ShangHai | ggggg | ccccc | ShangHaiCity |
| GuangZhou | ttttt | eeeee | GuangZhouCity |
| GuangZhou | ppppp | qqqqq | GuangZhouCity |
处理之后的样子:
| col0 | col1 | col2 | col3 |
| SuZhou | 11111 | 22222 | SuZhouCity |
| 33333 | 44444 | ||
| 55555 | 66666 | ||
| ShangHai | 77777 | 88888 | ShangHaiCity |
| uuuuu | hhhhh | ||
| ggggg | ccccc | ||
| GuangZhou | ttttt | eeeee | GuangZhouCity |
| ppppp | qqqqq |
效果出来, 看上去比较简单, 下面先看下页面
| col0 | col1 | col2 | col3 |
| SuZhou | 11111 | 22222 | SuZhouCity |
| SuZhou | 33333 | 44444 | SuZhouCity |
| SuZhou | 55555 | 66666 | SuZhouCity |
| ShangHai | 77777 | 88888 | ShangHaiCity |
| ShangHai | uuuuu | hhhhh | ShangHaiCity |
| ShangHai | ggggg | ccccc | ShangHaiCity |
| GuangZhou | ttttt | eeeee | GuangZhouCity |
| GuangZhou | ppppp | qqqqq | GuangZhouCity |
核心代码:
// 这里写成了一个jquery插件的形式
$('#process').mergeCell({
// 目前只有cols这么一个配置项, 用数组表示列的索引,从0开始
// 然后根据指定列来处理(合并)相同内容单元格
cols: [0, 3]
});
下面看看这个小插件的完整代码:
;(function($) {
// After looking at the jquery source code, you can find that $.fn is $.prototype, jQuery is only retained for compatibility with earlier versions of the plug-in
// The form of prototype
$.fn.mergeCell = function(options) {
return this.each(function() {
var cols = options.cols;
for ( var i = cols.length - 1; cols[i] != undefined; i--) {
// fixbug console debugging
// console.debug(cols[i]);
mergeCell($(this), cols [i]);
}
dispose($(this));
});
};
// If you have a clear understanding of the concepts of closure and scope in JavaScript, this is a plug-in Private methods used internally
// For details, please refer to the book introduced in my previous essay
function mergeCell($table, colIndex) {
$table.data('col-content', ''); // Store cell content
$table.data('col-rowspan', 1); // Store calculated rowspan value, which defaults to 1
$table.data('col-td' , $()); // Store the first td found that is different from the previous row (encapsulated by jQuery), defaulting to an "empty" jquery object
$table.data('trNum', $( 'tbody tr', $table).length); //The total number of rows of the table to be processed, used for judgment when the last row is subjected to special processing
//The key is to "scan" each row of data. It is to locate col-td, and its corresponding rowspan
$('tbody tr', $table).each(function(index) {
// colIndex in td:eq is the column index
var $td = $('td:eq(' colIndex ')', this);
// Get the current content of the cell
var currentContent = $td.html();
// First Take this branch the next time
if ($table.data('col-content') == '') {
$table.data('col-content', currentContent);
$table. data('col-td', $td);
} else {
// The previous row has the same content as the current row
if ($table.data('col-content') == currentContent) {
// If the content of the previous row is the same as the current row, col-rowspan is accumulated and the new value is saved
var rowspan = $table.data('col-rowspan') 1;
$table.data(' col-rowspan', rowspan);
// It is worth noting that if $td.remove() is used, it will affect the processing of other columns
$td.hide();
// The situation in the last line is a bit special
// For example, the contents of the td in the last two lines are the same, then the td saved in col-td at this time should be set to rowspan in the last line
if ( index = = $table.data('trNum'))
$table.data('col-td').attr('rowspan', $table.data('col-rowspan'));
} else { // The content of the previous row is different from the current row
// col-rowspan defaults to 1, if the calculated col-rowspan has not changed, it will not be processed
if ($table.data('col-rowspan') != 1) {
$table.data('col-td').attr('rowspan', $table.data('col-rowspan'));
}
// Save the first Once a td with different content appears, and its content, reset col-rowspan
$table.data('col-td', $td);
$table.data('col-content', $ td.html());
$table.data('col-rowspan', 1);
}
}
});
}
// also private Function to clean up memory
function dispose($table) {
$table.removeData();
}
})(jQuery);
Main instructions It should be all in the comments. The code is indeed relatively simple, but some areas still deserve improvement
•The table content to be processed is searched starting from tbody. If there is no tbody, a more general solution should be given
•for ( var i = cols.length - 1; cols[i] != undefined; i--)... If the amount of table data is large and there are many columns processed, failure to optimize here will cause browser problems For the risk of thread blocking, you can consider using setTimeout
• There are many other things worth improving, I think there should be a lot

Hot AI Tools

Undresser.AI Undress
AI-powered app for creating realistic nude photos

AI Clothes Remover
Online AI tool for removing clothes from photos.

Undress AI Tool
Undress images for free

Clothoff.io
AI clothes remover

AI Hentai Generator
Generate AI Hentai for free.

Hot Article
Hot Tools

Notepad++7.3.1
Easy-to-use and free code editor

SublimeText3 Chinese version
Chinese version, very easy to use

Zend Studio 13.0.1
Powerful PHP integrated development environment

Dreamweaver CS6
Visual web development tools

SublimeText3 Mac version
God-level code editing software (SublimeText3)
Hot Topics
 1359
1359
 52
52

 Excel found a problem with one or more formula references: How to fix it
Apr 17, 2023 pm 06:58 PM
Excel found a problem with one or more formula references: How to fix it
Apr 17, 2023 pm 06:58 PM
Use an Error Checking Tool One of the quickest ways to find errors with your Excel spreadsheet is to use an error checking tool. If the tool finds any errors, you can correct them and try saving the file again. However, the tool may not find all types of errors. If the error checking tool doesn't find any errors or fixing them doesn't solve the problem, then you need to try one of the other fixes below. To use the error checking tool in Excel: select the Formulas tab. Click the Error Checking tool. When an error is found, information about the cause of the error will appear in the tool. If it's not needed, fix the error or delete the formula causing the problem. In the Error Checking Tool, click Next to view the next error and repeat the process. When not
 How to set the print area in Google Sheets?
May 08, 2023 pm 01:28 PM
How to set the print area in Google Sheets?
May 08, 2023 pm 01:28 PM
How to Set GoogleSheets Print Area in Print Preview Google Sheets allows you to print spreadsheets with three different print areas. You can choose to print the entire spreadsheet, including each individual worksheet you create. Alternatively, you can choose to print a single worksheet. Finally, you can only print a portion of the cells you select. This is the smallest print area you can create since you could theoretically select individual cells for printing. The easiest way to set it up is to use the built-in Google Sheets print preview menu. You can view this content using Google Sheets in a web browser on your PC, Mac, or Chromebook. To set up Google
 How to embed a PDF document in an Excel worksheet
May 28, 2023 am 09:17 AM
How to embed a PDF document in an Excel worksheet
May 28, 2023 am 09:17 AM
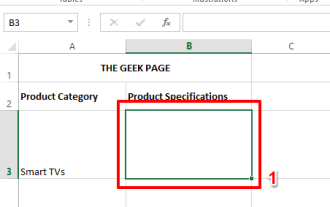
It is usually necessary to insert PDF documents into Excel worksheets. Just like a company's project list, we can instantly append text and character data to Excel cells. But what if you want to attach the solution design for a specific project to its corresponding data row? Well, people often stop and think. Sometimes thinking doesn't work either because the solution isn't simple. Dig deeper into this article to learn how to easily insert multiple PDF documents into an Excel worksheet, along with very specific rows of data. Example Scenario In the example shown in this article, we have a column called ProductCategory that lists a project name in each cell. Another column ProductSpeci
 What should I do if there are too many different cell formats that cannot be copied?
Mar 02, 2023 pm 02:46 PM
What should I do if there are too many different cell formats that cannot be copied?
Mar 02, 2023 pm 02:46 PM
Solution to the problem that there are too many different cell formats that cannot be copied: 1. Open the EXCEL document, and then enter the content of different formats in several cells; 2. Find the "Format Painter" button in the upper left corner of the Excel page, and then click " "Format Painter" option; 3. Click the left mouse button to set the format to be consistent.
 How to find and delete merged cells in Excel
Apr 20, 2023 pm 11:52 PM
How to find and delete merged cells in Excel
Apr 20, 2023 pm 11:52 PM
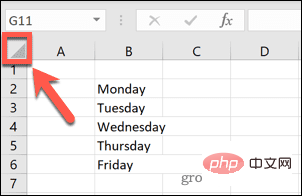
How to Find Merged Cells in Excel on Windows Before you can delete merged cells from your data, you need to find them all. It's easy to do this using Excel's Find and Replace tool. Find merged cells in Excel: Highlight the cells where you want to find merged cells. To select all cells, click in an empty space in the upper left corner of the spreadsheet or press Ctrl+A. Click the Home tab. Click the Find and Select icon. Select Find. Click the Options button. At the end of the FindWhat settings, click Format. Under the Alignment tab, click Merge Cells. It should contain a check mark rather than a line. Click OK to confirm the format
 How to remove commas from numeric and text values in Excel
Apr 17, 2023 pm 09:01 PM
How to remove commas from numeric and text values in Excel
Apr 17, 2023 pm 09:01 PM
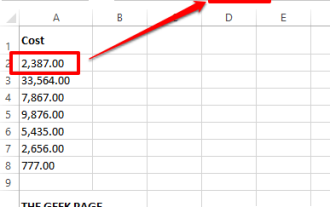
On numeric values, on text strings, using commas in the wrong places can really get annoying, even for the biggest Excel geeks. You may even know how to get rid of commas, but the method you know may be time-consuming for you. Well, no matter what your problem is, if it is related to a comma in the wrong place in your Excel worksheet, we can tell you one thing, all your problems will be solved today, right here! Dig deeper into this article to learn how to easily remove commas from numbers and text values in the simplest steps possible. Hope you enjoy reading. Oh, and don’t forget to tell us which method catches your eye the most! Section 1: How to Remove Commas from Numerical Values When a numerical value contains a comma, there are two possible situations:
 How to prevent Excel from removing leading zeros
Feb 29, 2024 am 10:00 AM
How to prevent Excel from removing leading zeros
Feb 29, 2024 am 10:00 AM
Is it frustrating to automatically remove leading zeros from Excel workbooks? When you enter a number into a cell, Excel often removes the leading zeros in front of the number. By default, it treats cell entries that lack explicit formatting as numeric values. Leading zeros are generally considered irrelevant in number formats and are therefore omitted. Additionally, leading zeros can cause problems in certain numerical operations. Therefore, zeros are automatically removed. This article will teach you how to retain leading zeros in Excel to ensure that the entered numeric data such as account numbers, zip codes, phone numbers, etc. are in the correct format. In Excel, how to allow numbers to have zeros in front of them? You can preserve leading zeros of numbers in an Excel workbook, there are several methods to choose from. You can set the cell by
 How to create a custom power plan on Windows 11
Apr 28, 2023 am 11:34 AM
How to create a custom power plan on Windows 11
Apr 28, 2023 am 11:34 AM
How to Create a Custom Power Plan on Windows 11 Custom power plans allow you to determine how Windows reacts to different situations. For example, if you want your monitor to turn off after a certain amount of time, but don't want it to go to sleep, you can create a custom schedule to do this. Create a custom power plan on Windows 11: Open the Start menu and type control panel. Select Control Panel from the search results. In Control Panel, change the View by option to Large icons. Next, select Power Options. Click the Create power plan option in the Power Options menu. Select the basic power plan you want to use from the options provided. Give it a descriptive name in the Plan Name field at the bottom
