

利用php给图片添加文字水印-面向对象与面临过程俩种方法的实现

利用php给图片添加文字水印--面向对象与面向过程俩种方法的实现
1: 面向过程的编写方法
<span style="color: #008000;">//</span><span style="color: #008000;">指定图片路径</span><span style="color: #800080;">$src</span> = '001.png'<span style="color: #000000;">;</span><span style="color: #008000;">//</span><span style="color: #008000;">获取图片信息</span><span style="color: #800080;">$info</span> = <span style="color: #008080;">getimagesize</span>(<span style="color: #800080;">$src</span><span style="color: #000000;">);</span><span style="color: #008000;">//</span><span style="color: #008000;">获取图片扩展名</span><span style="color: #800080;">$type</span> = image_type_to_extension(<span style="color: #800080;">$info</span>[2],<span style="color: #0000ff;">false</span><span style="color: #000000;">);</span><span style="color: #008000;">//</span><span style="color: #008000;">动态的把图片导入内存中</span><span style="color: #800080;">$fun</span> = "imagecreatefrom{<span style="color: #800080;">$type</span>}"<span style="color: #000000;">;</span><span style="color: #800080;">$image</span> = <span style="color: #800080;">$fun</span>('001.png'<span style="color: #000000;">);</span><span style="color: #008000;">//</span><span style="color: #008000;">指定字体颜色</span><span style="color: #800080;">$col</span> = imagecolorallocatealpha(<span style="color: #800080;">$image</span>,255,255,255,50<span style="color: #000000;">);</span><span style="color: #008000;">//</span><span style="color: #008000;">指定字体内容</span><span style="color: #800080;">$content</span> = 'helloworld'<span style="color: #000000;">;</span><span style="color: #008000;">//</span><span style="color: #008000;">给图片添加文字</span>imagestring(<span style="color: #800080;">$image</span>,5,20,30,<span style="color: #800080;">$content</span>,<span style="color: #800080;">$col</span><span style="color: #000000;">);</span><span style="color: #008000;">//</span><span style="color: #008000;">指定输入类型</span><span style="color: #008080;">header</span>('Content-type:'.<span style="color: #800080;">$info</span>['mime'<span style="color: #000000;">]);</span><span style="color: #008000;">//</span><span style="color: #008000;">动态的输出图片到浏览器中</span><span style="color: #800080;">$func</span> = "image{<span style="color: #800080;">$type</span>}"<span style="color: #000000;">;</span><span style="color: #800080;">$func</span>(<span style="color: #800080;">$image</span><span style="color: #000000;">);</span><span style="color: #008000;">//</span><span style="color: #008000;">销毁图片</span>imagedestroy(<span style="color: #800080;">$image</span>);2:面向对象的实现方法
<span style="color: #0000ff;">class</span><span style="color: #000000;"> Image_class { </span><span style="color: #0000ff;">private</span> <span style="color: #800080;">$image</span><span style="color: #000000;">; </span><span style="color: #0000ff;">private</span> <span style="color: #800080;">$info</span><span style="color: #000000;">; </span><span style="color: #008000;">/*</span><span style="color: #008000;">* * @param $src:图片路径 * 加载图片到内存中 </span><span style="color: #008000;">*/</span> <span style="color: #0000ff;">function</span> __construct(<span style="color: #800080;">$src</span><span style="color: #000000;">){ </span><span style="color: #800080;">$info</span> = <span style="color: #008080;">getimagesize</span>(<span style="color: #800080;">$src</span><span style="color: #000000;">); </span><span style="color: #800080;">$type</span> = image_type_to_extension(<span style="color: #800080;">$info</span>[2],<span style="color: #0000ff;">false</span><span style="color: #000000;">); </span><span style="color: #800080;">$this</span> -> info =<span style="color: #800080;">$info</span><span style="color: #000000;">; </span><span style="color: #800080;">$this</span>->info['type'] = <span style="color: #800080;">$type</span><span style="color: #000000;">; </span><span style="color: #800080;">$fun</span> = "imagecreatefrom" .<span style="color: #800080;">$type</span><span style="color: #000000;">; </span><span style="color: #800080;">$this</span> -> image = <span style="color: #800080;">$fun</span>(<span style="color: #800080;">$src</span><span style="color: #000000;">); } </span><span style="color: #008000;">/*</span><span style="color: #008000;">* * @param $fontsize: 字体大小 * @param $x: 字体在图片中的x位置 * @param $y: 字体在图片中的y位置 * @param $color: 字体的颜色是一个包含rgba的数组 * @param $text: 想要添加的内容 * 操作内存中的图片,给图片添加文字水印 </span><span style="color: #008000;">*/</span> <span style="color: #0000ff;">public</span> <span style="color: #0000ff;">function</span> fontMark(<span style="color: #800080;">$fontsize</span>,<span style="color: #800080;">$x</span>,<span style="color: #800080;">$y</span>,<span style="color: #800080;">$color</span>,<span style="color: #800080;">$text</span><span style="color: #000000;">){ </span><span style="color: #800080;">$col</span> = imagecolorallocatealpha(<span style="color: #800080;">$this</span>->image,<span style="color: #800080;">$color</span>[0],<span style="color: #800080;">$color</span>[1],<span style="color: #800080;">$color</span>[2],<span style="color: #800080;">$color</span>[3<span style="color: #000000;">]); imagestring(</span><span style="color: #800080;">$this</span>->image,<span style="color: #800080;">$fontsize</span>,<span style="color: #800080;">$x</span>,<span style="color: #800080;">$y</span>,<span style="color: #800080;">$text</span>,<span style="color: #800080;">$col</span><span style="color: #000000;">); } </span><span style="color: #008000;">/*</span><span style="color: #008000;"> * 输出图片到浏览器中 </span><span style="color: #008000;">*/</span> <span style="color: #0000ff;">public</span> <span style="color: #0000ff;">function</span><span style="color: #000000;"> show(){ </span><span style="color: #008080;">header</span>('content-type:' . <span style="color: #800080;">$this</span> -> info['mime'<span style="color: #000000;">]); </span><span style="color: #800080;">$fun</span>='image' . <span style="color: #800080;">$this</span>->info['type'<span style="color: #000000;">]; </span><span style="color: #800080;">$fun</span>(<span style="color: #800080;">$this</span>-><span style="color: #000000;">image); } </span><span style="color: #008000;">/*</span><span style="color: #008000;">* * 销毁图片 </span><span style="color: #008000;">*/</span> <span style="color: #0000ff;">function</span><span style="color: #000000;"> __destruct(){ imagedestroy(</span><span style="color: #800080;">$this</span>-><span style="color: #000000;">image); }}</span><span style="color: #008000;">//</span><span style="color: #008000;">对类的调用</span><span style="color: #800080;">$obj</span> = <span style="color: #0000ff;">new</span> Image_class('001.png'<span style="color: #000000;">);</span><span style="color: #800080;">$obj</span>->fontMark(20,20,30,<span style="color: #0000ff;">array</span>(255,255,255,60),'hello'<span style="color: #000000;">);</span><span style="color: #800080;">$obj</span>->show();

Hot AI Tools

Undresser.AI Undress
AI-powered app for creating realistic nude photos

AI Clothes Remover
Online AI tool for removing clothes from photos.

Undress AI Tool
Undress images for free

Clothoff.io
AI clothes remover

Video Face Swap
Swap faces in any video effortlessly with our completely free AI face swap tool!

Hot Article
Hot Tools

Notepad++7.3.1
Easy-to-use and free code editor

SublimeText3 Chinese version
Chinese version, very easy to use

Zend Studio 13.0.1
Powerful PHP integrated development environment

Dreamweaver CS6
Visual web development tools

SublimeText3 Mac version
God-level code editing software (SublimeText3)
Hot Topics


 Solve Ubuntu mounting mobile hard disk error: unknown file system type exfat
Jan 05, 2024 pm 01:18 PM
Solve Ubuntu mounting mobile hard disk error: unknown file system type exfat
Jan 05, 2024 pm 01:18 PM
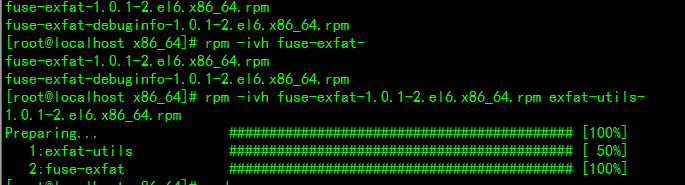
An error occurs when ubuntu mounts a mobile hard disk: mount: unknownfilesystemtype'exfat'. The processing method is as follows: Ubuntu13.10 or install exfat-fuse: sudoapt-getinstallexfat-fuseUbuntu13.04 or below sudoapt-add-repositoryppa:relan/exfatsudoapt-getupdatesudoapt-getinstallfuse- exfatCentOS Linux mount exfat format USB disk error solution to load extfa in CentOS
 What are the uses of the Type keyword in Go?
Sep 06, 2023 am 09:58 AM
What are the uses of the Type keyword in Go?
Sep 06, 2023 am 09:58 AM
The usage of the Type keyword in Go includes defining new type aliases or creating new structure types. Detailed introduction: 1. Type alias. Use the "type" keyword to create an alias for an existing type. This alias does not create a new type, but only provides a new name for the existing type. Type aliases can improve code. The readability of the code makes the code clearer; 2. Structure type. Use the "type" keyword to create a new structure type. The structure is a composite type that can be used to define custom types containing multiple fields. etc.
 How to use Bing Image Creator for free
Feb 27, 2024 am 11:04 AM
How to use Bing Image Creator for free
Feb 27, 2024 am 11:04 AM
This article will introduce seven ways to get high-quality output using the free BingImageCreator. BingImageCreator (now known as ImageCreator for Microsoft Designer) is one of the great online artificial intelligence art generators. It generates highly realistic visual effects based on user prompts. The more specific, clear, and creative your prompts are, the better the results will be. BingImageCreator has made significant progress in creating high-quality images. It now uses Dall-E3 training mode, showing a higher level of detail and realism. However, its ability to consistently produce HD results depends on several factors, including fast
 How to delete images from Xiaomi phones
Mar 02, 2024 pm 05:34 PM
How to delete images from Xiaomi phones
Mar 02, 2024 pm 05:34 PM
How to delete images on Xiaomi mobile phones? You can delete images on Xiaomi mobile phones, but most users don’t know how to delete images. Next is the tutorial on how to delete images on Xiaomi mobile phones brought by the editor. Interested users can come and join us. Let's see! How to delete images on Xiaomi mobile phone 1. First open the [Album] function in Xiaomi mobile phone; 2. Then check the unnecessary pictures and click the [Delete] button in the lower right corner; 3. Then click [Album] at the top to enter the special area , select [Recycle Bin]; 4. Then directly click [Empty Recycle Bin] as shown in the figure below; 5. Finally, directly click [Permanent Delete] to complete.
 Imagemagic installation Centos and Image installation tutorial
Feb 12, 2024 pm 05:27 PM
Imagemagic installation Centos and Image installation tutorial
Feb 12, 2024 pm 05:27 PM
LINUX is an open source operating system. Its flexibility and customizability make it the first choice of many developers and system administrators. In the LINUX system, image processing is a very important task, and Imagemagick and Image are Two very popular image processing tools, this article will introduce you to how to install Imagemagick and Image in Centos system, and provide detailed installation tutorials. Imagemagic installation Centos tutorial Imagemagick is a powerful image processing toolset, which can perform various image operations under the command line. The following are the steps to install Imagemagick on Centos system: 1
 Let's talk about why Vue2 can access properties in various options through this
Dec 08, 2022 pm 08:22 PM
Let's talk about why Vue2 can access properties in various options through this
Dec 08, 2022 pm 08:22 PM
This article will help you interpret the vue source code and introduce why you can use this to access properties in various options in Vue2. I hope it will be helpful to everyone!
 An article that understands this point and catches up with 70% of front-end people
Sep 06, 2022 pm 05:03 PM
An article that understands this point and catches up with 70% of front-end people
Sep 06, 2022 pm 05:03 PM
A colleague got stuck due to a bug pointed by this. Vue2’s this pointing problem caused an arrow function to be used, resulting in the inability to get the corresponding props. He didn't know it when I introduced it to him, and then I deliberately looked at the front-end communication group. So far, at least 70% of front-end programmers still don't understand it. Today I will share with you this link. If everything is wrong If you haven’t learned it yet, please give me a big mouth.
 Linux type command
Mar 20, 2024 pm 05:06 PM
Linux type command
Mar 20, 2024 pm 05:06 PM
In this guide, we will learn more about the "type" command in Linux. Prerequisites: To perform the steps demonstrated in this guide, you need the following components: A properly configured Linux system. See how to create a LinuxVM for testing and learning purposes. Basic understanding of the command line interface The Type command in Linux is different from other Linux-specific commands (for example: ls, chmod, shutdown, vi, grep, pwd, etc.). The "type" command is a built-in Bash function that is displayed as an argument. Information about the command type provided. $type In addition to Bash, other shells (Zsh, Ksh, etc.) also come with
