PHP开发调试环境配备-windows + zend studio + ApmServ + zend debugger
PHP开发调试环境配置-windows + zend studio + ApmServ + zend debugger
PHP开发调试环境配置-windows + zend studio + ApmServ + zend debugger
准备材料:
ZendStudio-9.0.4:http://www.geekso.com/ZendStudio9-key (破解版本)
ApmServ:http://apmserv.s135.com/
zend debugger:http://ishare.iask.sina.com.cn/f/11686597.html
操作步骤:
1、将ZendStudio的工作目录指向ApmServ的web目录。本文以D:\APMServ5.2.6\www\htdocs为例说明。
2,ZendDebugger.dll复制到php.exe同目录下,dummy.php文件复制到web目录,即D:\APMServ5.2.6\www\htdocs目录。
3,配置zend debugger到php.ini文件:
添加如下:
zend_extension_ts=D:/APMServ5.2.6/PHP/ZendDebugger.dll
zend_debugger.allow_hosts=127.0.0.1:6543/PHPTest (这里是因为在D:\APMServ5.2.6\www\htdocs目录中新建了项目文件夹PHPTest)
zend_debugger.expose_remotely=always
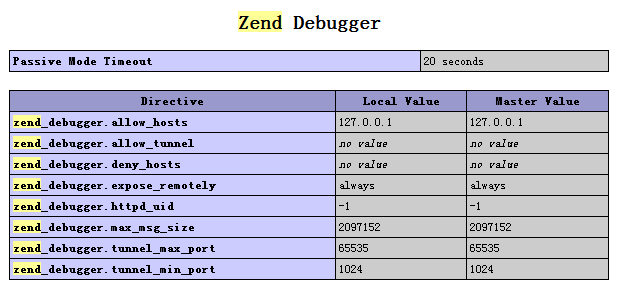
4、重启Apache,新建一个php文件,输入phpinfo()函数,浏览器打开,出现如下的Zend Debugger模块,即为配置成功:

5、关联到zend studio
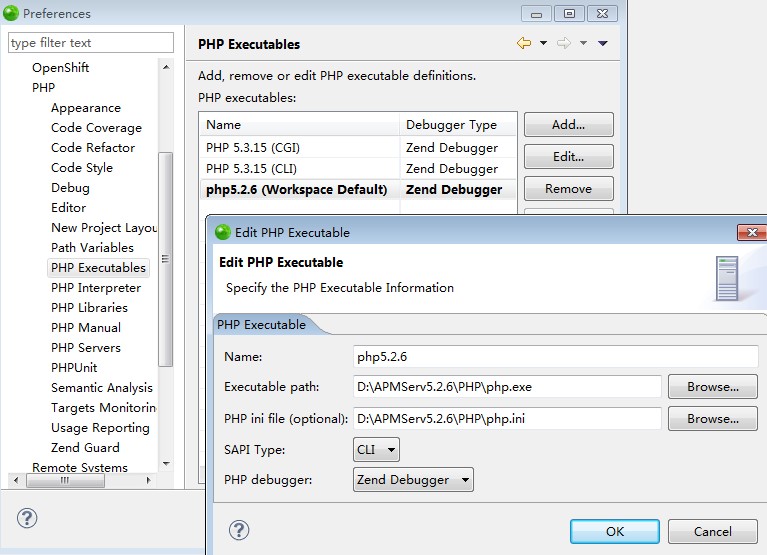
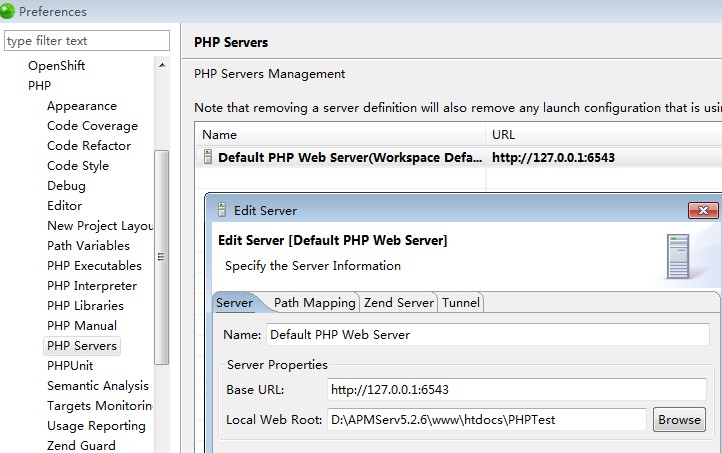
打开preferrence-->php部分,做好php executables和Debug部分的配置。参考如下(注意图中的目录路径):


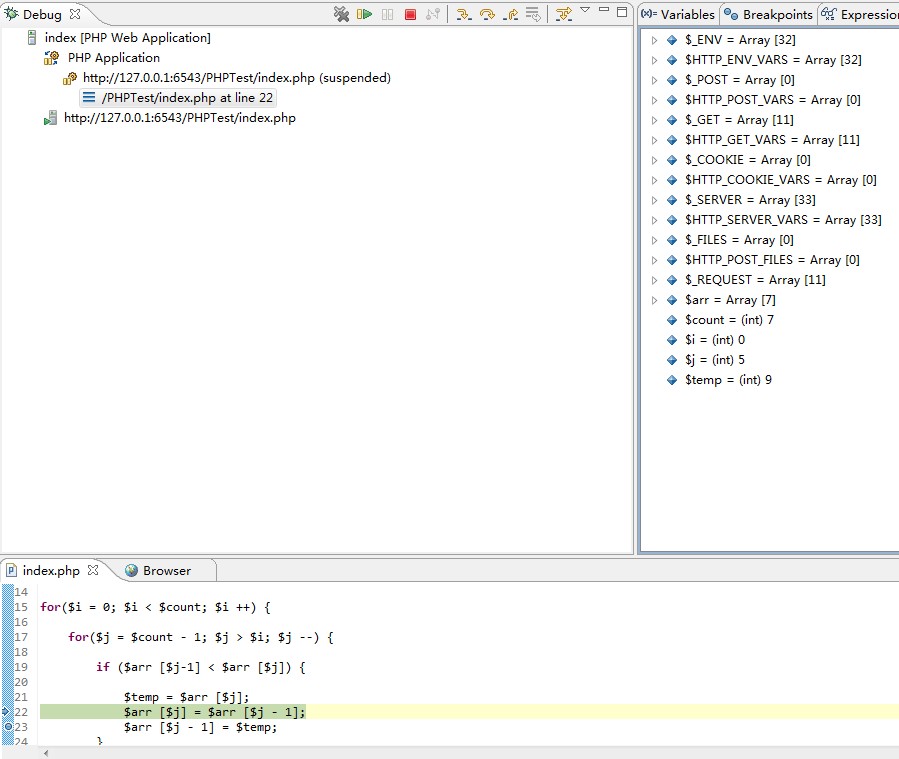
成功调试图:


Hot AI Tools

Undresser.AI Undress
AI-powered app for creating realistic nude photos

AI Clothes Remover
Online AI tool for removing clothes from photos.

Undress AI Tool
Undress images for free

Clothoff.io
AI clothes remover

AI Hentai Generator
Generate AI Hentai for free.

Hot Article

Hot Tools

Notepad++7.3.1
Easy-to-use and free code editor

SublimeText3 Chinese version
Chinese version, very easy to use

Zend Studio 13.0.1
Powerful PHP integrated development environment

Dreamweaver CS6
Visual web development tools

SublimeText3 Mac version
God-level code editing software (SublimeText3)

Hot Topics
 CakePHP Project Configuration
Sep 10, 2024 pm 05:25 PM
In this chapter, we will understand the Environment Variables, General Configuration, Database Configuration and Email Configuration in CakePHP.
 PHP 8.4 Installation and Upgrade guide for Ubuntu and Debian
Dec 24, 2024 pm 04:42 PM
PHP 8.4 brings several new features, security improvements, and performance improvements with healthy amounts of feature deprecations and removals. This guide explains how to install PHP 8.4 or upgrade to PHP 8.4 on Ubuntu, Debian, or their derivati
 CakePHP Date and Time
Sep 10, 2024 pm 05:27 PM
To work with date and time in cakephp4, we are going to make use of the available FrozenTime class.
 CakePHP File upload
Sep 10, 2024 pm 05:27 PM
To work on file upload we are going to use the form helper. Here, is an example for file upload.
 CakePHP Routing
Sep 10, 2024 pm 05:25 PM
In this chapter, we are going to learn the following topics related to routing ?
 Discuss CakePHP
Sep 10, 2024 pm 05:28 PM
CakePHP is an open-source framework for PHP. It is intended to make developing, deploying and maintaining applications much easier. CakePHP is based on a MVC-like architecture that is both powerful and easy to grasp. Models, Views, and Controllers gu
 CakePHP Creating Validators
Sep 10, 2024 pm 05:26 PM
Validator can be created by adding the following two lines in the controller.
 How To Set Up Visual Studio Code (VS Code) for PHP Development
Dec 20, 2024 am 11:31 AM
Visual Studio Code, also known as VS Code, is a free source code editor — or integrated development environment (IDE) — available for all major operating systems. With a large collection of extensions for many programming languages, VS Code can be c


