

Application of js css in interaction_javascript skills

But flexible application of CSS will give people a bright feeling!
The following uses a simple example to illustrate what I want to say.
CSS code:
#nav li ul {
display:none;
}
HTML code:
The effect is as follows:
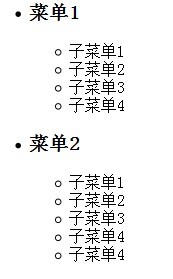
The required effect is:
1. Initially, All submenus are hidden.
2. Click the menu item and the corresponding submenu list will be displayed.
3. Click again to hide the submenu.
What I did half a year ago would be like this: get the h3 element in #nav and add events to it in a loop. The event determines whether its next sibling node is hidden, and modifies the display attribute of the submenu ul element according to the status.
The code is roughly as follows: (All the following codes are only used to express logic, please do not worry about whether it is executable.)
var els = [...]; //The code obtains the h3 element array.
for(var i=0; i < els.length; i ) {
els[i].addEventListener("click",function() {
var target = this.nextSibling;
if(target.style.display == "none")
target.style.display = "block";
else
target.style.display = "none"
}, false) ;
}
A month ago, the approach was probably like this: add an event directly to #nav > ul, and determine whether the target object is an h3 object in the event. If so, get the next sibling node and modify the display attribute according to its display status.
The code is roughly as follows:
var container = document. getElementById("nav");
container.addEventListener("click", function(e) {
var target = e.target, list;
if(target.tagName == "H3") {
list = target.nextSibling;
if(list.style.display === "none")
list.style.display = "block";
else
list.style. display = "none";
}
}, false);
Two methods, please decide for yourself which one is better.
I made a request some time ago and saw another idea in the code - this is what I want to talk about here - using CSS to complete interaction.
Still the code:
CSS code:
#nav li.menu ul {
display:block;
}
The JS code is roughly as follows:
var el = document.getElementById("nav");
el.addEventListener("click", function(e) {
var target = e.target.parentNode;
if(target.tagName == "LI") {
if(target.className == "")
target.className = "menu";
}else {
target.className = "";
}
}
}, false);
코드를 보면 세 번째 방법도 두 번째 방법과 거의 비슷한 것 같습니다.
그럼~~ h3 요소를 클릭하면 다음 ul 요소의 표시 상태가 변경될 뿐만 아니라 h3의 배경 패턴도 변경된다면 어떨까요?
이때 두 번째 방법은 h3의 배경 속성에 따라 값을 수정해야 하고, 세 번째 방법은 스타일만 추가하면 됩니다: #nav li.menu h3{Background:url(...)} .
더 이상 할 말이 없습니다. 모든 사람은 자신의 판단을 가지고 있으며, 어느 것이 더 좋고 어느 것이 더 나쁜지에 대한 판단이 있습니다.
PS:
페이지에 스타일에 영향을 미치는 다른 스타일 시트가 있는 경우 우선순위 문제가 발생합니다. 우리 모두는 ID, 클래스, 태그의 우선순위를 알고 있지만 표현식의 우선순위는 어떻게 계산됩니까?
Google에서 검색하거나 "CSS 우선순위 다시 "를 먼저 살펴보세요.

Hot AI Tools

Undresser.AI Undress
AI-powered app for creating realistic nude photos

AI Clothes Remover
Online AI tool for removing clothes from photos.

Undress AI Tool
Undress images for free

Clothoff.io
AI clothes remover

Video Face Swap
Swap faces in any video effortlessly with our completely free AI face swap tool!

Hot Article
Hot Tools

Notepad++7.3.1
Easy-to-use and free code editor

SublimeText3 Chinese version
Chinese version, very easy to use

Zend Studio 13.0.1
Powerful PHP integrated development environment

Dreamweaver CS6
Visual web development tools

SublimeText3 Mac version
God-level code editing software (SublimeText3)
Hot Topics
 1389
1389
 52
52

 The Roles of HTML, CSS, and JavaScript: Core Responsibilities
Apr 08, 2025 pm 07:05 PM
The Roles of HTML, CSS, and JavaScript: Core Responsibilities
Apr 08, 2025 pm 07:05 PM
HTML defines the web structure, CSS is responsible for style and layout, and JavaScript gives dynamic interaction. The three perform their duties in web development and jointly build a colorful website.
 How to use bootstrap in vue
Apr 07, 2025 pm 11:33 PM
How to use bootstrap in vue
Apr 07, 2025 pm 11:33 PM
Using Bootstrap in Vue.js is divided into five steps: Install Bootstrap. Import Bootstrap in main.js. Use the Bootstrap component directly in the template. Optional: Custom style. Optional: Use plug-ins.
 How to write split lines on bootstrap
Apr 07, 2025 pm 03:12 PM
How to write split lines on bootstrap
Apr 07, 2025 pm 03:12 PM
There are two ways to create a Bootstrap split line: using the tag, which creates a horizontal split line. Use the CSS border property to create custom style split lines.
 Understanding HTML, CSS, and JavaScript: A Beginner's Guide
Apr 12, 2025 am 12:02 AM
Understanding HTML, CSS, and JavaScript: A Beginner's Guide
Apr 12, 2025 am 12:02 AM
WebdevelopmentreliesonHTML,CSS,andJavaScript:1)HTMLstructurescontent,2)CSSstylesit,and3)JavaScriptaddsinteractivity,formingthebasisofmodernwebexperiences.
 How to use bootstrap button
Apr 07, 2025 pm 03:09 PM
How to use bootstrap button
Apr 07, 2025 pm 03:09 PM
How to use the Bootstrap button? Introduce Bootstrap CSS to create button elements and add Bootstrap button class to add button text
 How to resize bootstrap
Apr 07, 2025 pm 03:18 PM
How to resize bootstrap
Apr 07, 2025 pm 03:18 PM
To adjust the size of elements in Bootstrap, you can use the dimension class, which includes: adjusting width: .col-, .w-, .mw-adjust height: .h-, .min-h-, .max-h-
 How to set up the framework for bootstrap
Apr 07, 2025 pm 03:27 PM
How to set up the framework for bootstrap
Apr 07, 2025 pm 03:27 PM
To set up the Bootstrap framework, you need to follow these steps: 1. Reference the Bootstrap file via CDN; 2. Download and host the file on your own server; 3. Include the Bootstrap file in HTML; 4. Compile Sass/Less as needed; 5. Import a custom file (optional). Once setup is complete, you can use Bootstrap's grid systems, components, and styles to create responsive websites and applications.
 How to insert pictures on bootstrap
Apr 07, 2025 pm 03:30 PM
How to insert pictures on bootstrap
Apr 07, 2025 pm 03:30 PM
There are several ways to insert images in Bootstrap: insert images directly, using the HTML img tag. With the Bootstrap image component, you can provide responsive images and more styles. Set the image size, use the img-fluid class to make the image adaptable. Set the border, using the img-bordered class. Set the rounded corners and use the img-rounded class. Set the shadow, use the shadow class. Resize and position the image, using CSS style. Using the background image, use the background-image CSS property.
