

请问php怎么使用自己构造的IP包头

请教php如何使用自己构造的IP包头
- PHP code
<!--

Code highlighting produced by Actipro CodeHighlighter (freeware)
http://www.CodeHighlighter.com/

--><?php //数据
$dns_id = "\x80\xc1";
$dns_flags = "\x01\x00";
$dns_count_queries = "\x00\x01";
$dns_count_answers = "\x00\x00";
$dns_count_auth_rr = "\x00\x00";
$dns_count_add_rr = "\x00\x00";
$dns_qry_name = "\x02\x69\x70\x02\x63\x6e\x00";
$dns_qry_type = "\x00\x01";
$dns_qry_class = "\x00\x01";
$dns = $dns_id . $dns_flags . $dns_count_queries . $dns_count_answers . $dns_count_auth_rr . $dns_count_add_rr . $dns_qry_name . $dns_qry_type . $dns_qry_class;

//IP头
$ip_version = "\x45"; //4位版本
$ip_hdr_len = ""; // 4位首部长度
$ip_dsfield = "\x00"; //8位服务类型
$ip_len = pack('n*',28 + strlen($dns)); //16位总长度
$ip_id = "\x55\xf0"; //16位标识
$ip_flags = "\x00"; //3位标识
$ip_frag_offset = "\x00"; // 13位偏移
$ip_ttl = "\x80"; //8位生存时间
$ip_proto = "\x11"; //8位协议
$ip_src = ipto16("192.168.1.100"); //32位源IP
$ip_dst = ipto16("8.8.4.4"); //32位目的IP
$ip_checksum = ipchecksum($ip_version,$ip_hdr_len,$ip_dsfield,$ip_len,$ip_id,$ip_flags,$ip_frag_offset,$ip_ttl,$ip_proto,$ip_src,$ip_dst); //16位首部效验和
$ip_header = $ip_version . $ip_hdr_len . $ip_dsfield . $ip_len . $ip_id . $ip_flags . $ip_frag_offset . $ip_ttl . $ip_proto . $ip_checksum . $ip_src . $ip_dst;


//UDP头
$udp_srcport = "\xfc\x39"; //16位源端口
$udp_dstport = "\x00\x35"; //16位目的端口
$udp_length = pack('n*',8 + strlen($dns)); //16位UDP长度
$udp_checksum = udpchecksum($ip_src,$ip_dst,$ip_proto,$udp_length,$udp_srcport,$udp_dstport,$dns); //16位UDP效验和
$udp = $udp_srcport . $udp_dstport . $udp_length . $udp_checksum;


//$buf = $ip_header . $udp . $dns;
$buf = $udp . $dns;

function send($host,$port,$buf,$dns_flags)
{
//    $socket = socket_create(AF_INET, SOCK_PACKET, getprotobyname("ip"));
    $socket = socket_create(AF_INET, SOCK_RAM,1);
    $timeout = array('sec'=>1,'usec'=>500000);
//    socket_set_option($socket,IPPROTO_IP,IP_HDRINCL,SO_RCVTIMEO,$timeout);
    socket_set_option($socket,SOL_SOCKET,SO_RCVTIMEO,$timeout);
//    while(1)
        socket_sendto($socket, $buf, strlen($buf), 0, $host, $port);
}

function udpchecksum($ip_src,$ip_dst,$ip_proto,$udp_length,$udp_srcport,$udp_dstport,$dns)
{
    $data = $ip_src . $ip_dst . "\x00" . $ip_proto . $udp_length . $udp_srcport . $udp_dstport . $udp_length . "\x00\x00" . $dns;
    if (strlen($data)%2)
    $data .= "\x00";
    $bit = unpack('n*', $data);
    $sum = array_sum($bit);
    while ($sum >> 16)
        $sum = ($sum >> 16) + ($sum & 0xffff);
    return pack('n*', ~$sum);
}

function ipchecksum($ip_version,$ip_hdr_len,$ip_dsfield,$ip_len,$ip_id,$ip_flags,$ip_frag_offset,$ip_ttl,$ip_proto,$ip_src,$ip_dst)
{
    $data = $ip_version . $ip_hdr_len . $ip_dsfield . $ip_len . $ip_id . $ip_flags . $ip_frag_offset . $ip_ttl . $ip_proto . "\x00\x00" . $ip_src . $ip_dst;
    $bit = unpack('n*', $data);
    $sum = array_sum($bit);
    while ($sum >> 16)
        $sum = ($sum >> 16) + ($sum & 0xffff);
    return pack('n*', ~$sum);
}

function ipto16($ip)
{
    $tmp = explode(".",$ip);
    $ip = "";
    foreach($tmp as $a => $b)
    {
        $tmp = dechex($b);
        if (strlen($tmp)==1)
            $tmp = "0" . $tmp;
        $ip .= $tmp;
    }
    $ip = pack("h*",$ip);
    return $ip;
}

send("8.8.4.4",53,$buf,$dns_flags);
这是个查询向指定dns服务器查询指定域名IP信息的程序,用Wireshark抓包测试可用,但是现在没有用自己的网络层,也就是IP头,我要用自己构造的IP头,
把
$buf = $ip_header . $udp . $dns;
//$buf = $udp . $dns;
改成
$buf = $ip_header . $udp . $dns;
//$buf = $udp . $dns;
结果还是不行,应该是send那函数的问题,请问下应该怎么修改
------解决方案--------------------
不知道你在干什么?利用 sock 包的肯定是在用户层了
封装 ip 应该在下一层

Hot AI Tools

Undresser.AI Undress
AI-powered app for creating realistic nude photos

AI Clothes Remover
Online AI tool for removing clothes from photos.

Undress AI Tool
Undress images for free

Clothoff.io
AI clothes remover

Video Face Swap
Swap faces in any video effortlessly with our completely free AI face swap tool!

Hot Article
Hot Tools

Notepad++7.3.1
Easy-to-use and free code editor

SublimeText3 Chinese version
Chinese version, very easy to use

Zend Studio 13.0.1
Powerful PHP integrated development environment

Dreamweaver CS6
Visual web development tools

SublimeText3 Mac version
God-level code editing software (SublimeText3)
Hot Topics
 1386
1386
 52
52

 How to solve win11 DNS server error
Jan 10, 2024 pm 09:02 PM
How to solve win11 DNS server error
Jan 10, 2024 pm 09:02 PM
We need to use the correct DNS when connecting to the Internet to access the Internet. In the same way, if we use the wrong dns settings, it will prompt a dns server error. At this time, we can try to solve the problem by selecting to automatically obtain dns in the network settings. Let’s take a look at the specific solutions. How to solve win11 network dns server error. Method 1: Reset DNS 1. First, click Start in the taskbar to enter, find and click the "Settings" icon button. 2. Then click the "Network & Internet" option command in the left column. 3. Then find the "Ethernet" option on the right and click to enter. 4. After that, click "Edit" in the DNS server assignment, and finally set DNS to "Automatic (D
 How to assign multiple IP addresses in one LAN card on Windows 10/11
May 30, 2023 am 11:25 AM
How to assign multiple IP addresses in one LAN card on Windows 10/11
May 30, 2023 am 11:25 AM
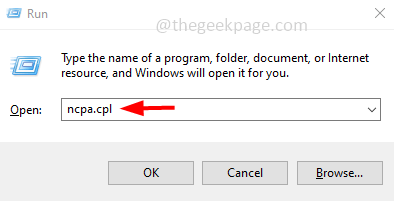
Sometimes it is necessary to assign multiple addresses to a single LAN card. For example, if you need to run multiple websites with unique IP addresses or bind applications to different IP addresses, etc. If you are thinking about how to assign multiple addresses to a single network interface card or LAN card, this article will help you achieve it. Follow the steps below till the end and it will be done. So let’s get started! Assign multiple IP addresses to one LAN card Step 1: Use the Windows+R keys together to open the run prompt and type ncpa.cpl, then press the Enter key to open the Network Connection window. Step 2: Right click on your network adapter Ethernet or WiFi option and click Properties. Step 3: From the Properties Window
 How do websites set black/whitelist IP restrictions and country and city IP access restrictions through nginx?
Jun 01, 2023 pm 05:27 PM
How do websites set black/whitelist IP restrictions and country and city IP access restrictions through nginx?
Jun 01, 2023 pm 05:27 PM
1. Black/white list IP restricted access configuration nginx There are several ways to configure black and white lists. Here are only two commonly used methods. 1. The first method: allow, denydeny and allow instructions belong to ngx_http_access_module. nginx loads this module by default, so it can be used directly. This method is the simplest and most direct. The setting is similar to the firewall iptable. How to use: Add directly to the configuration file: #Whitelist settings, followed by allow is accessible IPlocation/{allow123.13.123.12;allow23.53.32.1/100;denyall;}#Blacklist settings,
 Fix: DNS server not responding issue in Windows 11
Jun 01, 2023 pm 04:52 PM
Fix: DNS server not responding issue in Windows 11
Jun 01, 2023 pm 04:52 PM
When Windows users are unable to browse or load web pages on the browser on their system, they happen to think of all the factors that can cause this issue. Although many Windows users resolve this issue on their systems, it throws an error message stating “DNS server is not responding” and users don’t know how to resolve this issue to use a stable internet connection. We have come up with a solution in this article that will surely solve this problem. However, try these solutions beforehand – try restarting your router and check if this is causing the problem. Change browser applications. That said, if you're using the Microsoft Edge browser, close it and open Google
 Why NameResolutionError(self.host, self, e) from e and how to solve it
Mar 01, 2024 pm 01:20 PM
Why NameResolutionError(self.host, self, e) from e and how to solve it
Mar 01, 2024 pm 01:20 PM
The reason for the error is NameResolutionError(self.host,self,e)frome, which is an exception type in the urllib3 library. The reason for this error is that DNS resolution failed, that is, the host name or IP address attempted to be resolved cannot be found. This may be caused by the entered URL address being incorrect or the DNS server being temporarily unavailable. How to solve this error There may be several ways to solve this error: Check whether the entered URL address is correct and make sure it is accessible Make sure the DNS server is available, you can try using the "ping" command on the command line to test whether the DNS server is available Try accessing the website using the IP address instead of the hostname if behind a proxy
 How to implement asynchronous communication using PHP and UDP protocols
Jul 30, 2023 pm 07:31 PM
How to implement asynchronous communication using PHP and UDP protocols
Jul 30, 2023 pm 07:31 PM
How to use PHP and UDP protocols to implement asynchronous communication In modern Internet applications, asynchronous communication has become a very important method. By using asynchronous communication, user requests can be processed concurrently without blocking the main thread, improving system performance and response speed. As a popular back-end programming language, PHP how to use UDP protocol to achieve asynchronous communication? This article will introduce how to use the UDP protocol in PHP to implement simple asynchronous communication, and attach specific code examples. 1. Introduction to UDP protocolU
 How to check IP address on WeChat
May 31, 2023 am 09:16 AM
How to check IP address on WeChat
May 31, 2023 am 09:16 AM
How to check the IP address on WeChat: 1. Log in to the computer version of WeChat, right-click the taskbar at the bottom of the screen, and click "Task Manager"; 2. When the task manager pops up, click "Details" in the lower left corner; 3. Task management Enter the "Performance" option of the browser and click "Open Resource Monitor"; 4. Select "Network" and check the WeChat process "Wechat.exe"; 5. Click "TCP Connection" below to monitor the WeChat network IP related situation. Sending a message and getting a reply will reveal the other person's IP address.
 How to view and refresh dns cache in Linux
Mar 07, 2024 am 08:43 AM
How to view and refresh dns cache in Linux
Mar 07, 2024 am 08:43 AM
DNS (DomainNameSystem) is a system used on the Internet to convert domain names into corresponding IP addresses. In Linux systems, DNS caching is a mechanism that stores the mapping relationship between domain names and IP addresses locally, which can increase the speed of domain name resolution and reduce the burden on the DNS server. DNS caching allows the system to quickly retrieve the IP address when subsequently accessing the same domain name without having to issue a query request to the DNS server each time, thereby improving network performance and efficiency. This article will discuss with you how to view and refresh the DNS cache on Linux, as well as related details and sample code. Importance of DNS Caching In Linux systems, DNS caching plays a key role. its existence
