

用php怎么生成pdf,word,图片文件

用php如何生成pdf,word,图片文件
希望有个组件,可以生成如上集中格式的文件,
哪位大侠给个demo,我要在以上几种类型的文件中嵌入一个表格
最好这个表格的样式,字体的大小都是可以配置的
万谢
------解决方案--------------------
phpword,=>生成word文件(如果只是生成表格的话直接生成也可以,不需要用此类库)
fpdf或者pdflib。
------解决方案--------------------
gd库能生成picture,别的不知道
------解决方案--------------------
这个可以生成word
ob_start();
echo '';
?>
直接用php创建word文档
作者:axgle
如果你打开word.doc,看到了这里的介绍,则说明word文档创建成功了。
如果你打开word.doc,看到了这里的介绍,则说明word文档创建成功了。
print "";
$data = ob_get_contents();
file_put_contents('d.doc',$data);
ob_end_clean();
?>
------解决方案--------------------
GD处理图片的php扩展。
------解决方案--------------------
- PHP code
define('FPDF_FONTPATH','fpdf152/font/');
require('fpdf152/fpdf.php');
$pdf = new FPDF;
$pdf->AddPage();
$pdf->Output('a.pdf', 'D');
?>
<br><font color="#e78608">------解决方案--------------------</font><br>下面是一个很简单的用FPDF创建一个pdf文件并添加一页的例子<br><br><br>define('FPDF_FONTPATH','fpdf152/font/');<br>require('fpdf152/fpdf.php');<br>$pdf = new FPDF;<br>$pdf->AddPage();<br>$pdf->Output('a.pdf', 'D');<br>?><br><br>当然也可以用$pdf->open();来新建一个pdf文件<br>但是在这里,Addpage()包含了open(),他同时完成了新建一个pdf文件和添加1页两个步骤<br><br>上面例子里的define('FPDF_FONTPATH','fpdf152/font/');定义了存放字体文件的目录<br>具体下载了压缩包后就看到那个font文件夹了,只要指向那个文件夹就行了<br>上面这段程序还不能显示任何东西<br>现在来加两句<br><br><br>define('FPDF_FONTPATH','fpdf152/font/');<br>require('fpdf152/fpdf.php');<br>$pdf = new FPDF;<br>$pdf->AddPage();<br>$pdf->SetFont('arial');<br>$pdf->Text(5,20,'test pdf');<br>$pdf->Output('a.pdf', 'D');<br>?><br><br>SetFont()设定字体,这步在第1次调用FPDF的时候一定要,否则pdf文件打开时将会提示“没有定义字型“而什么都不显示<br>这里最好定义比较常用的字体,并且中文不支持。<br>要支持中文或支持比较偏的字体要用到AddFont(),但是我测试暂时没通过,希望哪位通过的可以指点一下 ^^<br>Text()打印一个字符串,横坐标为5,纵坐标为20,字符串内容为“test pdf”<br>关于最后的Output()里的参数'D'可以参照手册里,写的很清楚了<br>这样导出的pdf文件就会显示'test pdf'了。<br>如果兴趣好,再加上张图片<br><br><br>define('FPDF_FONTPATH','fpdf152/font/');<br>require('fpdf152/fpdf.php');<br>$pdf = new FPDF;<br>$pdf->AddPage();<br>$pdf->SetFont('arial');<br>$pdf->Text(5,20,'test pdf');<br>$pdf->Image('jianxin_mark.jpg', 5, 30, 60, 50);<br>$pdf->Output('a.pdf', 'D');<br>?><br><br>Image()可以在pdf中插入图片,前面是文件名,要包括路径,5是横坐标,30是纵坐标,60是图片宽度,50是高度<br>ok,这样一个又有文字又有图片的pdf文件就建立了 ^^<br>其实还有很多功能,手册中都有写,但不是很详细,需要各位自己去研究发掘了 ^^<br>
<br><font color="#e78608">------解决方案--------------------</font><br>codeplex上有这么一套东西,分别叫PHPExecl,PHPWord,PHPPowerpoint 你搜下,很容易搜到的 <div class="clear">


            </div>
Hot AI Tools

Undresser.AI Undress
AI-powered app for creating realistic nude photos

AI Clothes Remover
Online AI tool for removing clothes from photos.

Undress AI Tool
Undress images for free

Clothoff.io
AI clothes remover

Video Face Swap
Swap faces in any video effortlessly with our completely free AI face swap tool!

Hot Article
Hot Tools

Notepad++7.3.1
Easy-to-use and free code editor

SublimeText3 Chinese version
Chinese version, very easy to use

Zend Studio 13.0.1
Powerful PHP integrated development environment

Dreamweaver CS6
Visual web development tools

SublimeText3 Mac version
God-level code editing software (SublimeText3)
Hot Topics
 1387
1387
 52
52

 How to cancel automatic word wrapping in word
Mar 19, 2024 pm 10:16 PM
How to cancel automatic word wrapping in word
Mar 19, 2024 pm 10:16 PM
When editing content in a word document, lines may automatically wrap. If no adjustment is made at this time, it will have a great impact on our editing and make people very headache. What is going on? In fact, it is a problem with the ruler. Below, I will introduce the solution to how to cancel automatic word wrapping in word. I hope it can help everyone! After opening a Word document and entering text, when you try to copy and paste, the text may jump to a new line. In this case, you need to adjust the settings to solve this problem. 2. To solve this problem, we must first know the cause of this problem. At this time we click View under the toolbar. 3. Then click the "Ruler" option below. 4. At this time we will find that a ruler appears above the document with several conical markers on it.
 Detailed explanation of how to display the ruler in Word and how to operate the ruler!
Mar 20, 2024 am 10:46 AM
Detailed explanation of how to display the ruler in Word and how to operate the ruler!
Mar 20, 2024 am 10:46 AM
When we use Word, in order to edit the content more beautifully, we often use rulers. You should know that the rulers in Word include horizontal rulers and vertical rulers, which are used to display and adjust the document's page margins, paragraph indents, tabs, etc. So, how do you display the ruler in Word? Next, I will teach you how to set the ruler display. Students in need should quickly collect it! The steps are as follows: 1. First, we need to bring up the word ruler. The default word document does not display the word ruler. We only need to click the [View] button in word. 2. Then, we find the option of [Ruler] and check it. In this way, we can adjust the word ruler! Yes or no
 How to add handwritten signature to word document
Mar 20, 2024 pm 08:56 PM
How to add handwritten signature to word document
Mar 20, 2024 pm 08:56 PM
Word documents are widely used due to their powerful functions. Not only can various formats be inserted into Word, such as pictures and tables, etc., but now for the integrity and authenticity of the files, many files require a manual signature at the end of the document. It sounds like this How to solve complex problems? Today I will teach you how to add a handwritten signature to a word document. Use a scanner, camera or mobile phone to scan or photograph the handwritten signature, and then use PS or other image editing software to perform necessary cropping on the image. 2. Select "Insert - Picture - From File" in the Word document where you want to insert the handwritten signature, and select the cropped handwritten signature. 3. Double-click the handwritten signature picture (or right-click the picture and select "Set Picture Format"), and the "Set Picture Format" pops up.
 How to set page margins for Word
Mar 19, 2024 pm 10:00 PM
How to set page margins for Word
Mar 19, 2024 pm 10:00 PM
Among office software, Word is one of our most commonly used software. The text documents we produce are generally operated with Word. Some documents need to be submitted in paper version as required. Before printing, the layout must be set before it can be presented. produce better results. So the question is, how do you set page margins in Word? We have specific course explanations to help you solve your doubts. 1. Open or create a new word document and click the "Page Layout" menu on the menu bar. 2. Click the "Margins" button of the "Page Setup" option. 3. Select a commonly used page margin in the list. 4. If there are no suitable margins in the list, click "Custom Margins". 5. The "Page Setup" dialog box pops up, enter the "Margins" option respectively.
 How to draw a dotted line in word
Mar 19, 2024 pm 10:25 PM
How to draw a dotted line in word
Mar 19, 2024 pm 10:25 PM
Word is a software that we often use in our office. It has many functions that can facilitate our operations. For example, for a large article, we can use the search function inside to find out that a word in the full text is wrong, so we can directly replace it. Make changes one by one; when submitting the document to your superiors, you can beautify the document to make it look better, etc. Below, the editor will share with you the steps on how to draw a dotted line in Word. Let's learn together! 1. First, we open the word document on the computer, as shown in the figure below: 2. Then, enter a string of text in the document, as shown in the red circle in the figure below: 3. Next, press and hold [ctrl+A] Select all the text, as shown in the red circle in the figure below: 4. Click [Start] on the top of the menu bar
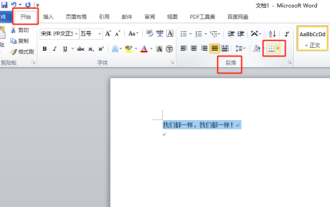 Where is the shading setting in word?
Mar 20, 2024 am 08:16 AM
Where is the shading setting in word?
Mar 20, 2024 am 08:16 AM
We often use word for office work, but do you know where the shading settings are in word? Today I will share with you the specific operation steps. Come and take a look, friends! 1. First, open the word document, select a paragraph of text paragraph information that needs to be added with shading, then click the [Start] button on the toolbar, find the paragraph area, and click the drop-down button on the right (as shown in the red circle in the figure below) ). 2. After clicking the drop-down box button, in the pop-up menu options, click the [Border and Shading] option (as shown in the red circle in the figure below). 3. In the pop-up [Border and Shading] dialog box, click the [Shading] option (as shown in the red circle in the figure below). 4. In the filled column, select a color
 How to export xmind files to pdf files
Mar 20, 2024 am 10:30 AM
How to export xmind files to pdf files
Mar 20, 2024 am 10:30 AM
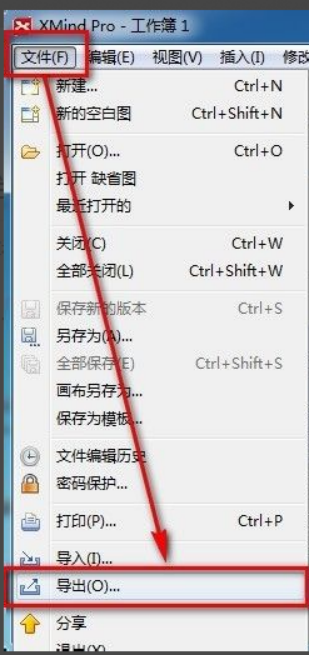
xmind is a very practical mind mapping software. It is a map form made using people's thinking and inspiration. After we create the xmind file, we usually convert it into a pdf file format to facilitate everyone's dissemination and use. Then How to export xmind files to pdf files? Below are the specific steps for your reference. 1. First, let’s demonstrate how to export the mind map to a PDF document. Select the [File]-[Export] function button. 2. Select [PDF document] in the newly appeared interface and click the [Next] button. 3. Select settings in the export interface: paper size, orientation, resolution and document storage location. After completing the settings, click the [Finish] button. 4. If you click the [Finish] button
 Do you know how to sum a Word table?
Mar 21, 2024 pm 01:10 PM
Do you know how to sum a Word table?
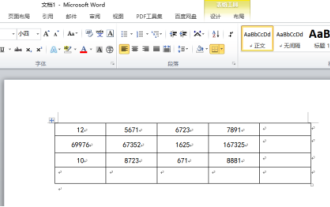
Mar 21, 2024 pm 01:10 PM
Sometimes, we often encounter counting problems in Word tables. Generally, when encountering such problems, most students will copy the Word table to Excel for calculation; some students will silently pick up the calculator. Calculate. Is there a quick way to calculate it? Of course there is, in fact the sum can also be calculated in Word. So, do you know how to do it? Today, let’s take a look together! Without further ado, friends in need should quickly collect it! Step details: 1. First, we open the Word software on the computer and open the document that needs to be processed. (As shown in the picture) 2. Next, we position the cursor on the cell where the summed value is located (as shown in the picture); then, we click [Menu Bar
